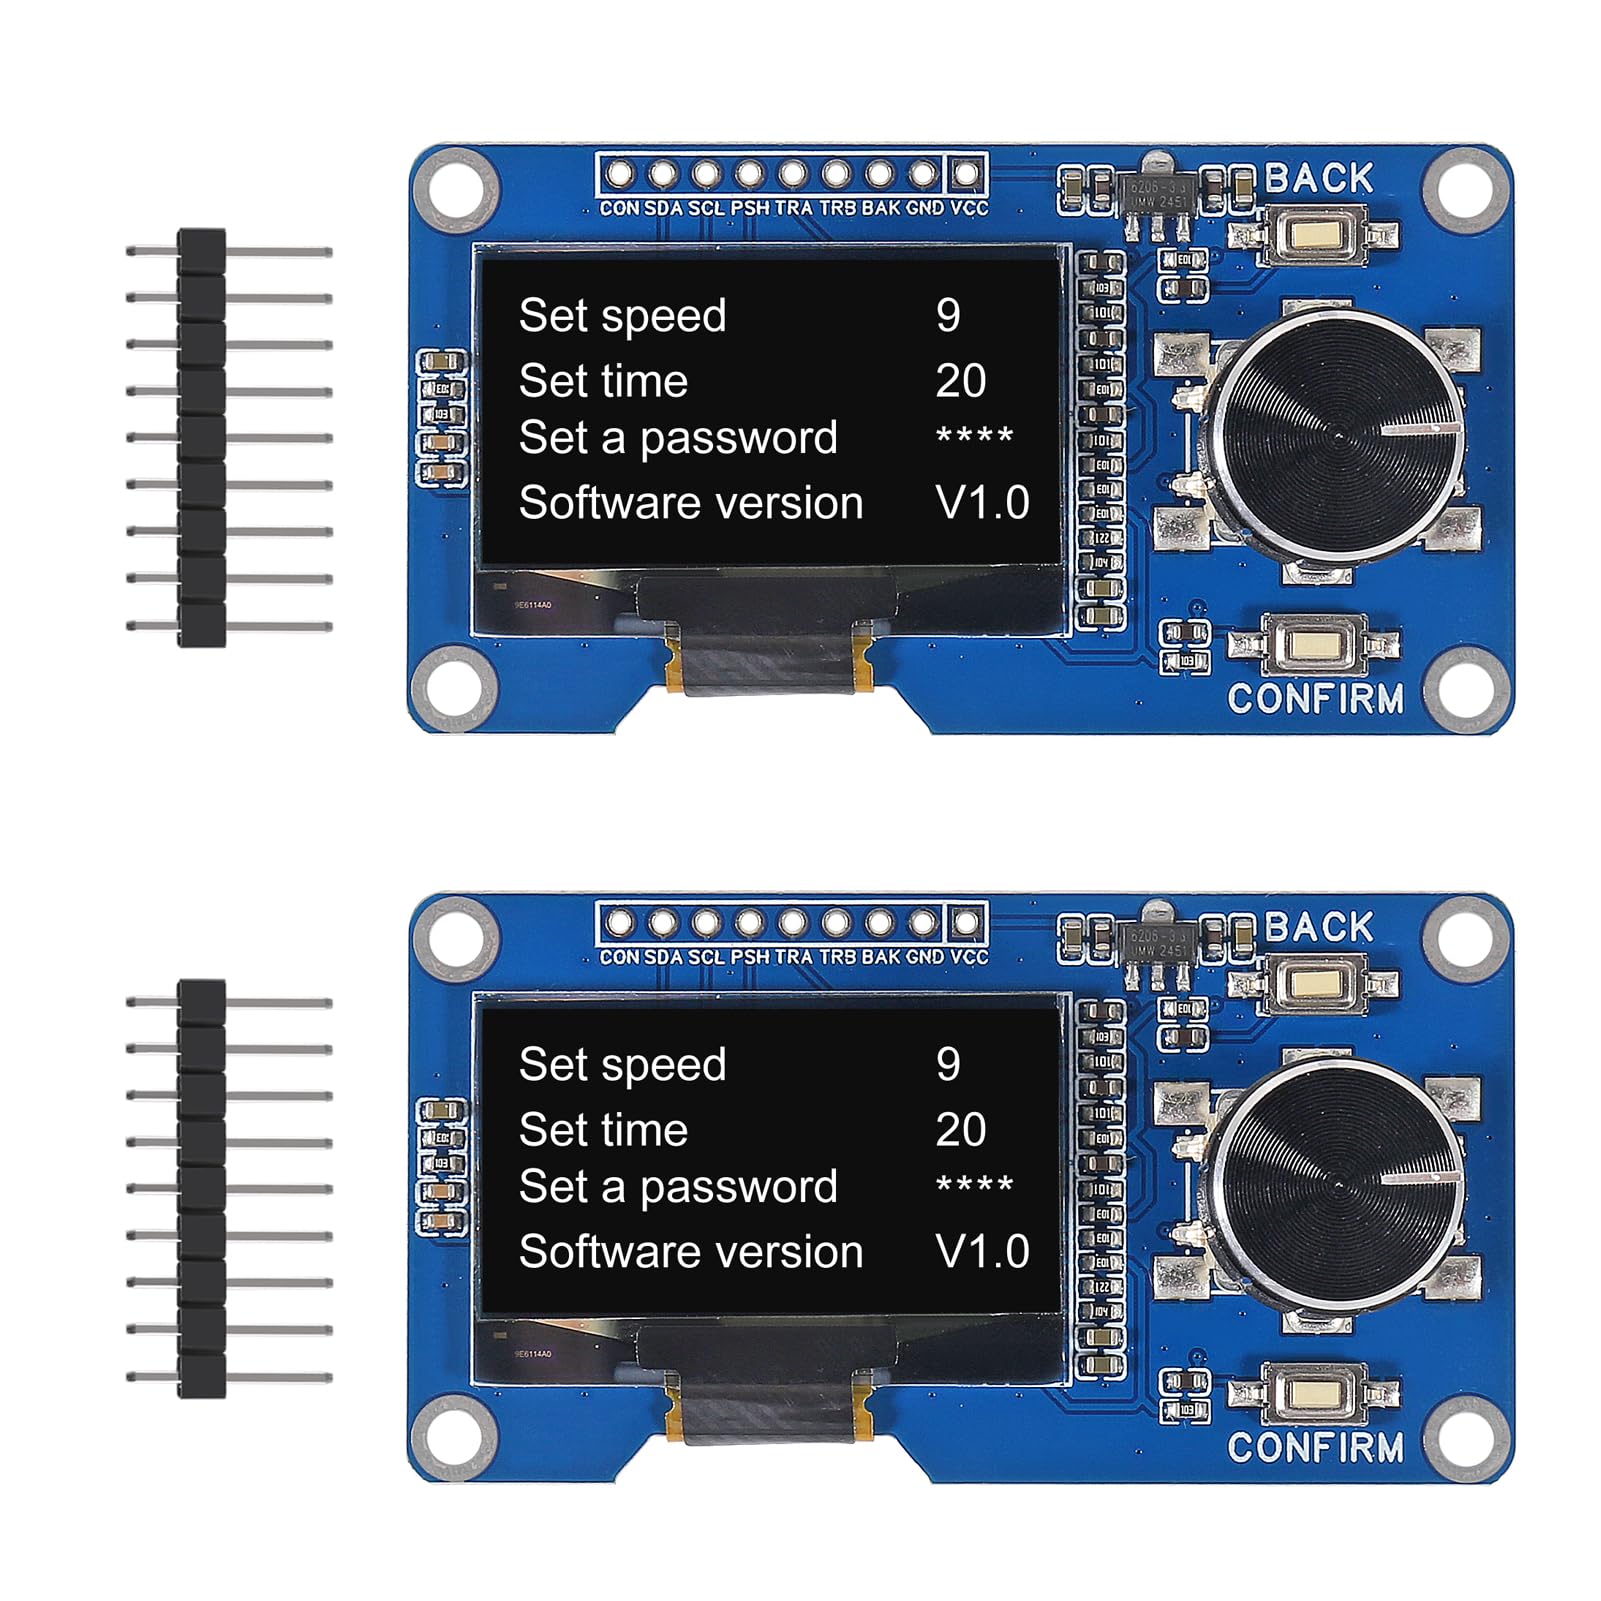
Immagine: Oltreview of the AITRIP 1.3-inch OLED Module with EC11 Rotary Encoder and included pin headers.
Introduzione
This manual provides detailed instructions for the AITRIP 1.3-inch OLED Module with EC11 Rotary Encoder. This integrated module combines a 1.3-inch white OLED display screen with an EC11 rotary encoder, offering a compact and versatile solution for various electronic projects, particularly those involving Arduino. It features an IIC interface for the OLED and includes independent return and confirmation buttons for enhanced user interaction.
Caratteristiche del prodotto
- Progettazione integrata: Combines a 1.3-inch OLED display and an EC11 rotary encoder on a single board.
- Display OLED: 1.3-inch white OLED screen with SH1106 driver chip and IIC communication interface.
- Rotary Encoder (EC11): Features a plum blossom stem (15mm length), 20 pulses, 20 positioning points, and a 5-pin configuration with an integrated switch. Allows 360° rotation for precise control.
- Interfaccia utente: Equipped with dedicated return and confirmation buttons for intuitive navigation and selection.
- Alimentazione elettrica: Operates on 3.3V power.
- Connettività: Rich IIC interface for easy connection to microcontrollers like Arduino.
Contenuto della confezione
Ogni confezione contiene:
- 2 x AITRIP 1.3 Inch OLED Display EC11 Rotary Encoder Module
- (Note: Additional components like CP2012 USB C 38 Pin ESP32 mentioned in some listings are not part of this specific module package but may be used in conjunction with it.)
Specifiche
| Parametro | Valore |
|---|---|
| Tipo di visualizzazione | 1.3-inch White OLED |
| OLED Driver Chip | SH1106 |
| Interfaccia OLED | IIC (I2C) |
| Rotary Encoder Type | EC11 |
| Encoder Stem Length | 15mm |
| Encoder Pulses/Positioning | 20 pulses, 20 positioning points |
| Encoder Pins | 5-pin with switch |
| Volume di eserciziotage | 3.3V (compatible with 3.3V-5V logic levels for IIC) |
| Dimensioni | Approximately 65mm x 35mm (2.55 inches x 1.37 inches) |
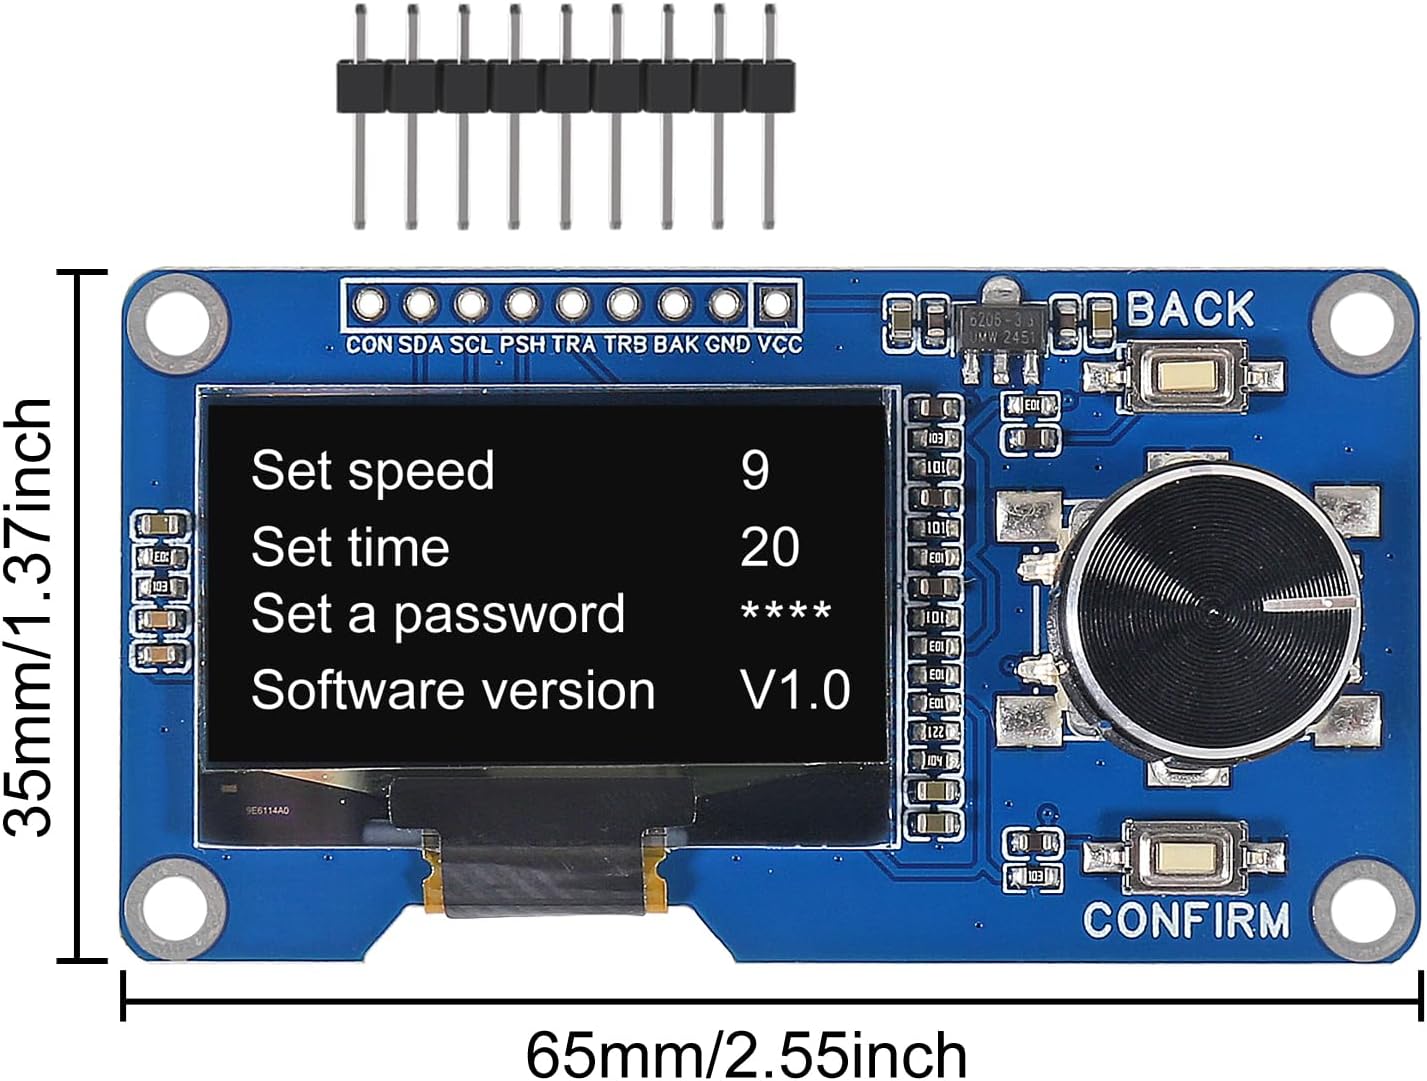
Image: Module dimensions showing approximate length of 65mm and width of 35mm.
Impostazione e connessione
This section details how to connect the AITRIP OLED and Rotary Encoder module to your microcontroller, such as an Arduino or ESP32 board.
Diagramma di piedinatura

Immagine: Posteriore view of the module showing labeled connection pads for OLED and encoder.
The module features a set of pins for power, IIC communication, and encoder signals. Refer to the diagram above for pin identification.
- VCC: Power supply input (3.3V to 5V).
- TERRA: Collegamento a terra.
- SDA: IIC Data Line for OLED.
- SCL: IIC Clock Line for OLED.
- ENCODER_TRA (A): Rotary encoder output A.
- ENCODER_TRB (B): Rotary encoder output B.
- ENCODER_PUSH: Rotary encoder push-button switch output.
- CONFERMARE: Dedicated confirmation button output.
- INDIETRO: Dedicated back/return button output.
Cablaggio Example (Arduino)
Connect the module to your Arduino board as follows:
| Pin del modulo | Perno Arduino |
|---|---|
| VCC | 3.3V o 5V |
| Terra | Terra |
| SDA | A4 (for Arduino Uno/Nano) or SDA pin |
| SCL | A5 (for Arduino Uno/Nano) or SCL pin |
| ENCODER_TRA | Digital Pin (e.g., D2) |
| ENCODER_TRB | Digital Pin (e.g., D3) |
| ENCODER_PUSH | Digital Pin (e.g., D4) |
| CONFERMARE | Digital Pin (e.g., D5) |
| INDIETRO | Digital Pin (e.g., D6) |
Note: Ensure your microcontroller's IIC pins are correctly identified. For Arduino Uno/Nano, A4 is SDA and A5 is SCL. For other boards, consult their pinout diagrams. It is recommended to use interrupt-capable pins for the rotary encoder outputs (TRA, TRB) and push-buttons for responsive operation.

Immagine: dettagliata view of the module with an accompanying pinout diagram and basic schematic for connection reference.
Istruzioni per l'uso
This module is designed for user interaction through its OLED display, rotary encoder, and dedicated buttons. The specific functionality will depend on the firmware loaded onto your microcontroller.
OLED Display Interaction

Image: The 1.3-inch OLED display showing a typical menu interface with options like "Set speed", "Set time", "Set a password", and "Software version".
- The OLED display serves as the primary visual output, showing menus, values, and status information.
- Content displayed is controlled by your microcontroller's program.
- Libraries such as the Adafruit SSD1306 library (modified for SH1106) or U8g2 library can be used to control the OLED display via the IIC interface.
Rotary Encoder and Button Usage
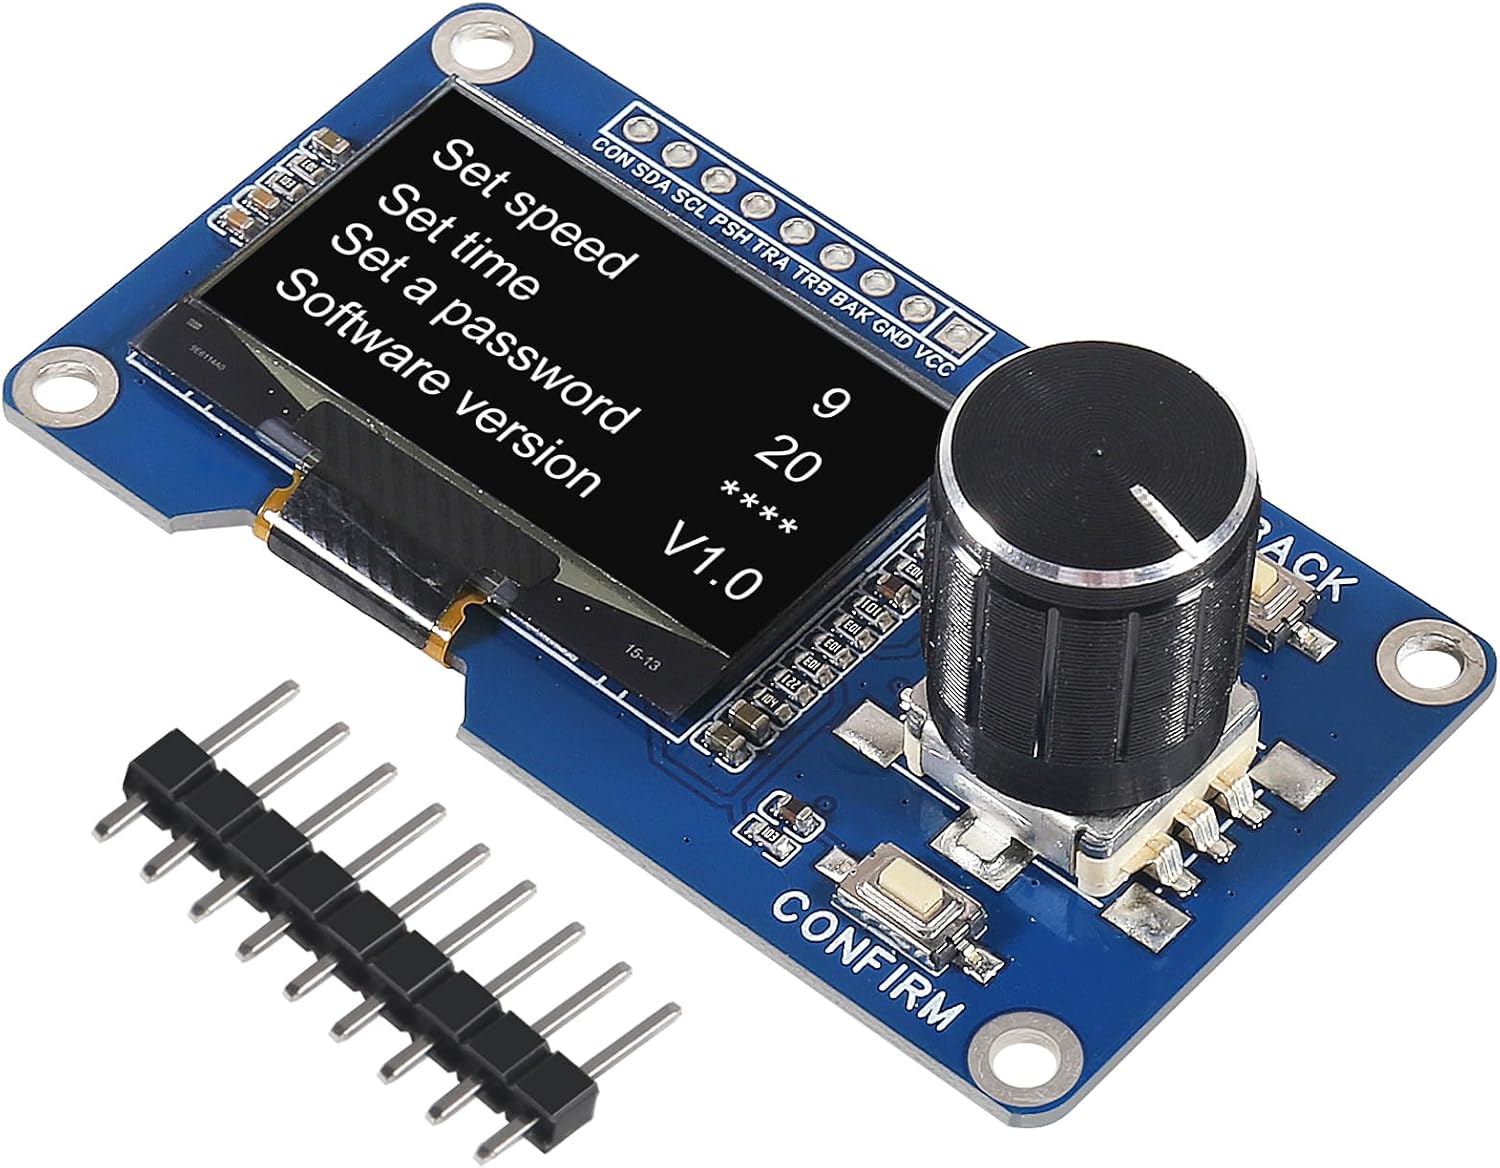
Immagine: Angolata view of the module highlighting the rotary encoder knob, the 'BACK' button, and the 'CONFIRM' button.
- Encoder rotativo:
- Rotate clockwise or counter-clockwise to navigate menus, adjust values, or scroll through options.
- The encoder provides 20 pulses per full rotation, allowing for precise control.
- The integrated switch (push-button) on the encoder can be used for selection or activation.
- CONFIRM Button: Typically used to confirm a selection or enter a submenu.
- Tasto indietro: Typically used to return to the previous menu or cancel an action.
Programming Tip: When writing code for the rotary encoder, it is crucial to debounce the encoder signals (TRA, TRB) and button presses to prevent false readings. Using interrupts for encoder pins can improve responsiveness.
Manutenzione
The AITRIP OLED Rotary Encoder module is a robust electronic component. Follow these guidelines for optimal performance and longevity:
- Gestione: Maneggiare il modulo tenendolo per i bordi per evitare di toccare la superficie del display o i componenti sensibili.
- Pulizia: If necessary, gently clean the OLED display with a soft, dry, lint-free cloth. Avoid using liquid cleaners directly on the module.
- Magazzinaggio: Store the module in an anti-static bag in a dry environment when not in use.
- Energia: Ensure the correct operating voltage (3.3V-5V) is supplied. Over-voltagpuò danneggiare il modulo.
- Saldatura: If soldering pins, use appropriate soldering techniques to prevent damage to the board or components. Avoid prolonged heat application.
Risoluzione dei problemi
If you encounter issues with your AITRIP OLED Rotary Encoder module, consider the following troubleshooting steps:
- Il display non si illumina:
- Check power connections (VCC and GND). Ensure 3.3V-5V is supplied.
- Verify IIC connections (SDA, SCL) to your microcontroller.
- Confirm the IIC address in your code matches the module's address (typically 0x3C or 0x3D for SH1106 OLEDs).
- Ensure the correct OLED library (e.g., U8g2 or Adafruit_SH1106) is installed and configured for the SH1106 driver.
- Rotary Encoder Not Responding:
- Check connections for ENCODER_TRA, ENCODER_TRB, and ENCODER_PUSH.
- Verify your code correctly reads the encoder signals and debounces inputs.
- Ensure the pins used are configured as INPUT_PULLUP in your microcontroller code, or external pull-up resistors are used.
- Pulsanti non funzionanti:
- Check connections for CONFIRM and BACK buttons.
- Verify your code correctly reads button states and includes debouncing logic.
- Ensure the pins are configured as INPUT_PULLUP.
- Problemi intermittenti:
- Poor breadboard connections or loose wires can cause intermittent behavior. Re-check all connections.
- Ensure your power supply is stable and provides sufficient current.
Supporto e garanzia
For technical support or inquiries regarding the AITRIP 1.3-inch OLED Module with EC11 Rotary Encoder, please contact AITRIP customer service through the platform where the product was purchased. While specific warranty details are not provided in this manual, standard consumer rights and return policies typically apply.
Always refer to the seller's return and support policies for the most accurate and up-to-date information.