1. Introduzione
This instruction manual provides detailed guidance for installing and operating your BRIKSMAX 2.0 LED Light Kit, specifically designed for the Lego Star Wars 75415 Kylo Ren Helmet set. This kit enhances your Lego model with innovative lighting effects, bringing it to life with vibrant colors and a realistic visual display. Please read all instructions carefully before beginning installation.
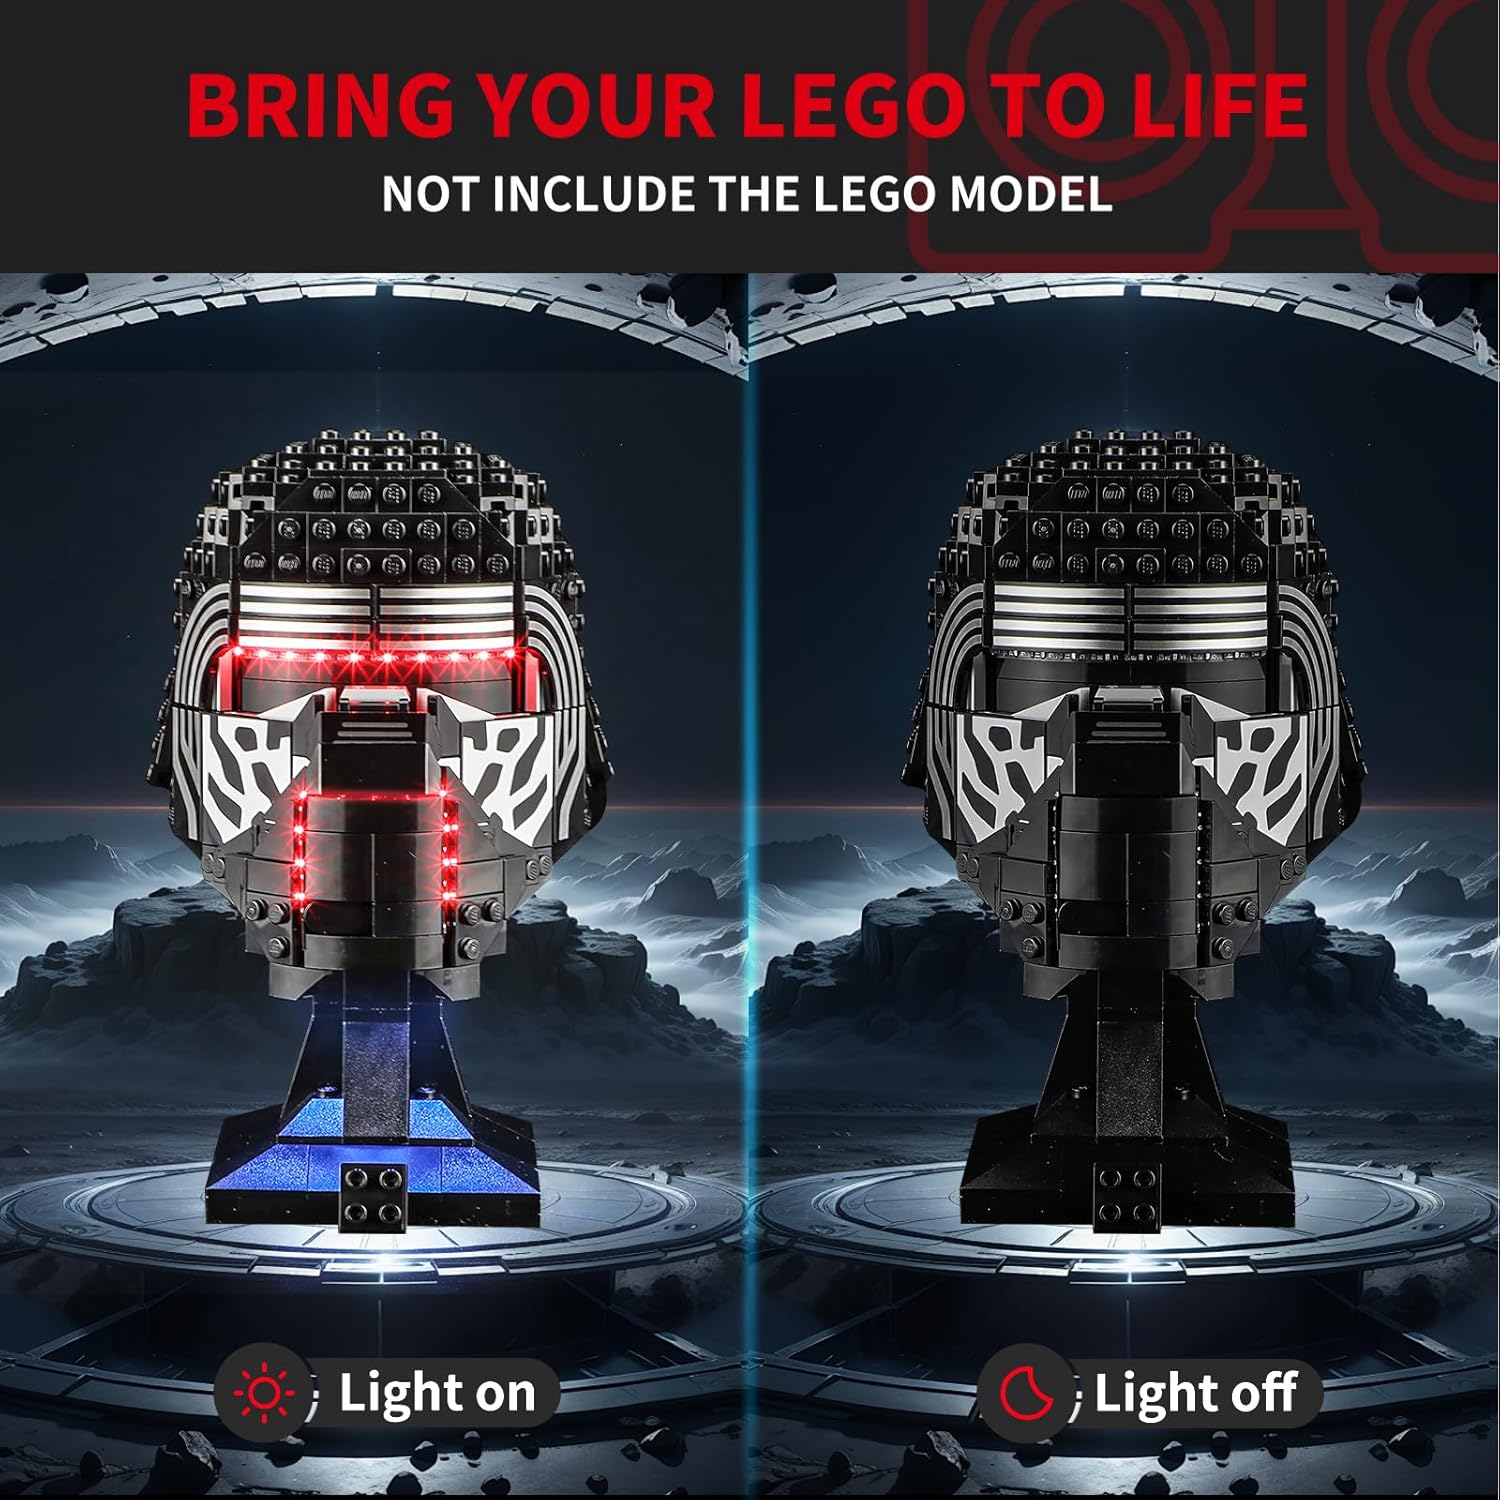
Nota: The Lego Kylo Ren Helmet set (75415) is not included with this light kit.
2. Cosa è incluso
Verifica che tutti i componenti elencati di seguito siano presenti nel tuo pacchetto:
- LED Light Kit components
- Istruzioni cartacee
- Guida per l'utente
- AA Battery Box (batteries not included)
- Cavo USB

3. Configurazione e installazione
Follow these steps to integrate the light kit with your Lego Kylo Ren Helmet (Set 75415). It is recommended to have the Lego set fully assembled before beginning the light kit installation.
- Prepare the Lego Model: Carefully identify the areas on your Lego Kylo Ren Helmet where the lights will be installed. Some disassembly of specific Lego bricks may be required to properly route wires and place light components.
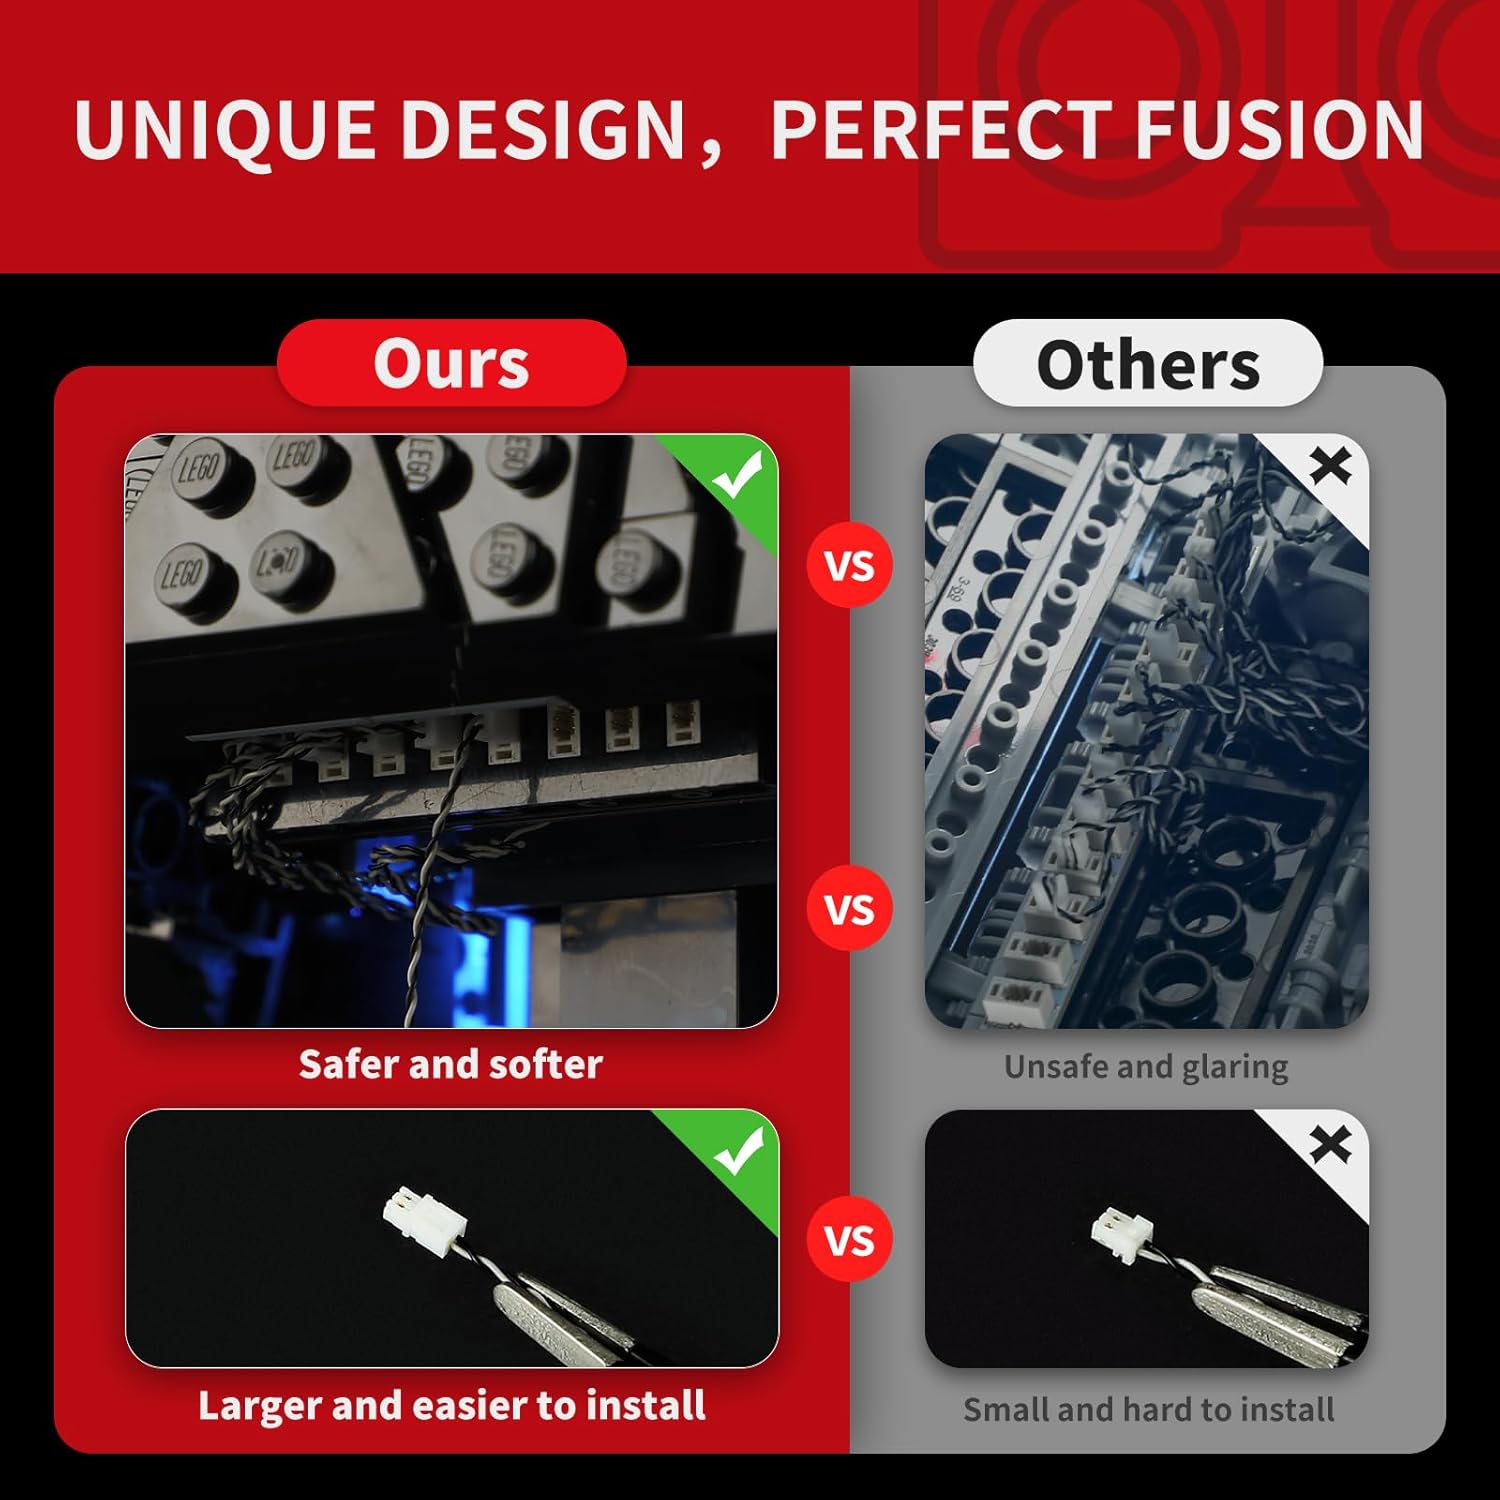
- Install LED Components: Attach the individual LED lights and light strips to the designated areas of the Lego model. The kit includes wire organizer parts designed to help conceal wires and prevent breakage, ensuring a neat and secure fit.
- Connect Expansion Boards: Connect the LED wires to the expansion boards. Ensure all connections are firm. The upgraded crafts feature brick shells around lights and expansion boards to reduce exposed components and improve aesthetics.
- Collegamento elettrico: Connect the expansion boards to the provided AA Battery Box or USB cable. If using the battery box, insert the required AA batteries (not included).
- Luci di prova: Before reassembling all Lego pieces, briefly connect power to test if all lights are functioning correctly.
- Assemblaggio finale: Carefully reassemble any disassembled Lego bricks, ensuring wires are not pinched and are neatly tucked away using the wire organizer parts.

4. Istruzioni per l'uso
Once installed, operating your BRIKSMAX light kit is straightforward.
- Accensione/spegnimento: Connect the USB cable to a power source or ensure batteries are correctly inserted into the battery box. The lights should illuminate automatically. Disconnect power to turn off.
- Modalità di illuminazione: The kit supports color changing and multiple lighting modes. Refer to the specific paper instructions included in your package for details on how to cycle through these modes, typically via a button on the battery box or a remote control if included.

Video 4.1: Official product video demonstrating the BRIKSMAX 2.0 Light Kit for Lego Star Wars 75415 Kylo Ren Helmet Set in action, showcasing its lighting effects.
5. Manutenzione
- Pulizia: Use a soft, dry cloth to gently wipe dust from the LED components and wires. Avoid using liquids or abrasive cleaners.
- Cura del filo: Ensure wires are not pulled or bent sharply, as this can cause damage. The included wire organizers help protect the wires.
- Sostituzione della batteria: If using the battery box, replace AA batteries when lights dim or cease to function. Ensure correct polarity.
- Magazzinaggio: When not in use for extended periods, disconnect the power source (remove batteries or unplug USB) to conserve power and prevent potential issues.
6. Risoluzione Dei Problemi
| Problema | Possibile causa | Soluzione |
|---|---|---|
| Le luci non si accendono. |
|
|
| Le luci sono fioche o tremolanti. |
|
|
| LED adhesive strips peel off. |
|
|
| Difficulty with installation. |
|
|
7. Specifiche
| Caratteristica | Dettaglio |
|---|---|
| Marca | BRIKSMAX |
| Numero di modello | 75415 (for Lego Kylo Ren Helmet) |
| Tipo di sorgente luminosa | Diodo ad emissione luminosa (LED) |
| Fonte di alimentazione | Battery Powered (AA batteries, not included) or USB |
| Caratteristiche della lampadina | Color changing, multiple lighting modes |
| Numero di sorgenti luminose | 2 |
| Potenza luminosa massima | 100 lumen |
| Materiale | Plastica |
| Età consigliata | 8 anni e oltre |
| Dimensioni del prodotto | 6.5 x 4.72 x 1.57 pollici |
| Peso dell'articolo | 6.3 once / 180 grammi |
8. Garanzia e supporto
BRIKSMAX is committed to providing high-quality products and excellent customer service. Our LED lighting kits are made from safe and reliable materials.
- Parti danneggiate o mancanti: If you receive any damaged or missing parts, please contact BRIKSMAX customer service immediately for a replacement.
- Assistenza tecnica: For any installation difficulties or operational questions not covered in this manual, please reach out to our support team.
- Informazioni sui contatti: Please refer to the contact details provided in your product packaging or visit the official BRIKSMAX websito di supporto.