
1. Introduzione
Grazie per l'acquistoasing the Matbip Switch2 Controller. This advanced model is designed to enhance your gaming experience across multiple platforms, including Nintendo Switch (1st and 2nd generations), Android, iOS (16.0 and above), and Windows PC. Featuring cutting-edge technology such as Hall Sensor sticks, a 6-axis gyro sensor, and customizable functions, this controller offers precise control and immersive feedback.
Please read this manual carefully before use to ensure proper operation and to fully utilize all features.
2. Contenuto della confezione
- Matbip Switch2 Pro Controller x 1
- Cavo di ricarica di tipo C x 1
- Manuale utente x 1
3. Prodotto finitoview

Figura 1: Fronte view of the Matbip Switch2 Controller.
Caratteristiche principali:
- Compatibilità multipiattaforma: Supports Switch (1st & 2nd Gen), Android, iOS (16.0+), and Windows PC.
- Connessione wireless stabile: Utilizes Bluetooth 5.0 for zero-latency communication up to 10 meters.
- Drift-Zero Hall Sensor Sticks: Non-contact Hall sensors for both joysticks and triggers eliminate drift, offering over 5 million operations durability and ±0.5% high precision.
- Pulsanti posteriori programmabili (M1, M2): Customize complex actions with macro programming for enhanced gameplay.
- Sensore giroscopico a 6 assi: High-sensitivity gyro sensor detects subtle movements for precise motion control and aiming.
- Adjustable TURBO Function: Three-speed continuous fire (5/12/20 shots/sec) for rapid actions in games.
- 4-Level HD Vibration: Adjustable vibration intensity (0%/30%/70%/100%) provides immersive tactile feedback.
- Batteria a lunga durata: Built-in 1000mAh battery provides up to 20 hours of continuous play on a 4-hour charge, with low battery alerts.
- Design ergonomico: Streamlined shape with premium faux leather material and anti-slip coating ensures comfortable grip and reduces fatigue during long gaming sessions.
4. Configurazione e connessione
4.1 Ricarica del controller
Before first use, fully charge the controller. Connect the included Type-C cable to the controller's charging port and the other end to a USB power source (e.g., Switch dock, PC, USB wall adapter). The indicator lights will show charging status. A full charge takes approximately 4 hours.

Figure 2: Battery capacity and charging details.
4.2 Connessione ai dispositivi
The controller supports wireless Bluetooth 5.0 connection across various platforms.
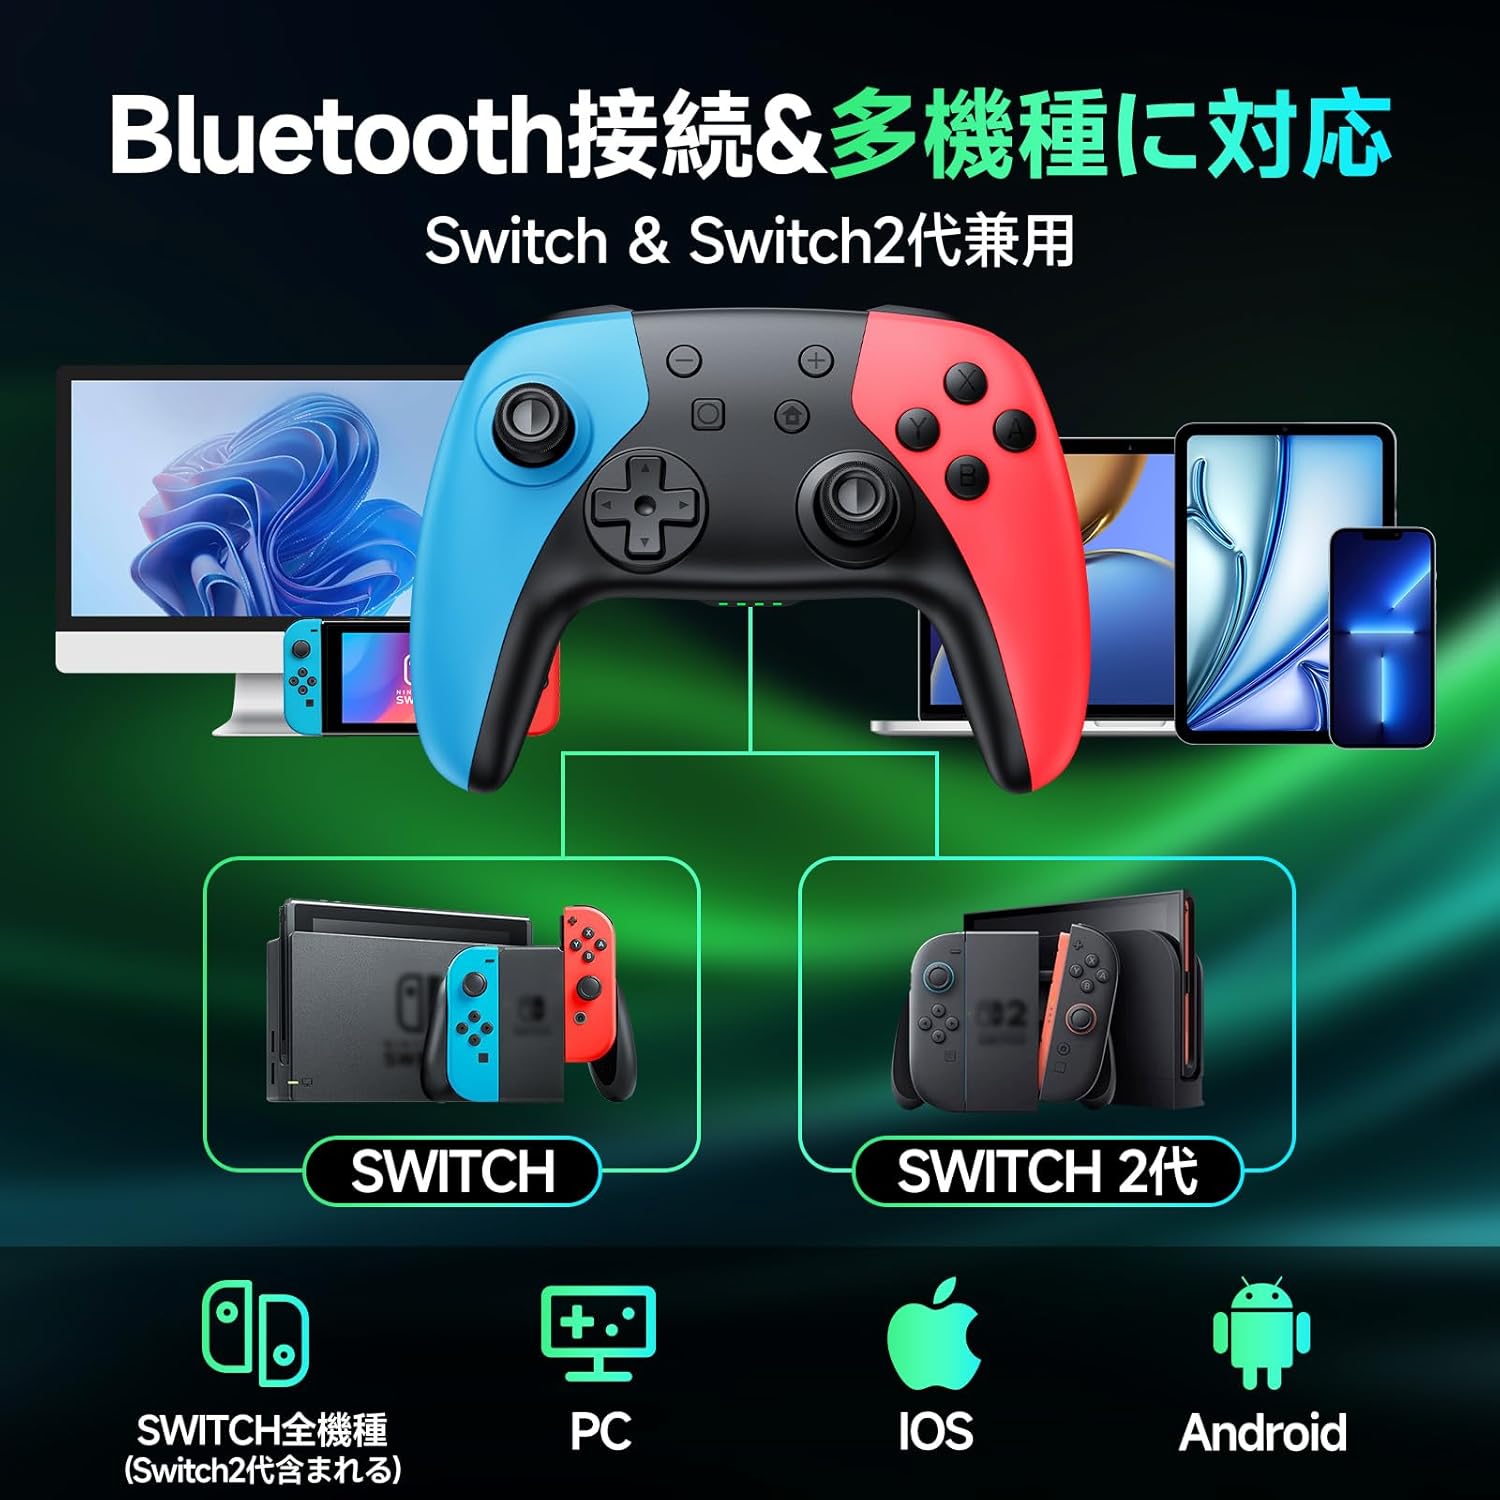
Figura 3: Compatibilità multipiattaforma tramite Bluetooth.
4.2.1 Nintendo Switch / Switch 2 Connection:
- On your Switch console, go to the HOME Menu.
- Seleziona "Controller" > "Cambia impugnatura/ordine".
- Press and hold the HOME button on the Matbip controller for 3 seconds until the indicator lights flash rapidly.
- The controller will automatically pair with the Switch. Once connected, the corresponding player indicator light(s) will remain solid.
4.2.2 Android / iOS / PC Connection:
- Ensure Bluetooth is enabled on your Android/iOS device or PC.
- Press and hold the HOME button on the Matbip controller for 3 seconds to enter pairing mode.
- On your device, search for Bluetooth devices and select "Matbip Controller" (or similar name) from the list.
- Una volta effettuata la connessione, le spie luminose sul controller diventeranno fisse.
5. Istruzioni per l'uso
5.1 Hall Sensor Sticks and Triggers
The controller features advanced Hall Sensor technology for both joysticks and triggers, providing superior precision and durability compared to traditional analog sticks. This design prevents stick drift and ensures accurate input with a response speed of just 5ms.

Figure 4: Hall Sensor technology for precise, drift-free control.
5.2 Macro Function (M1/M2 Buttons)
The M1 and M2 buttons on the back of the controller can be programmed to execute a sequence of button presses (macro). This is useful for repetitive actions or complex combos.

Figure 5: Location of programmable M1 and M2 buttons.
Passaggi di programmazione:
- Press and hold the M button (located between M1 and M2) and the M1 or M2 button you wish to program simultaneously. The indicator lights will flash slowly.
- Press the sequence of buttons you want to record (e.g., A, B, X, Y, L, R, D-pad directions, etc.).
- Press the M button again to save the macro. The indicator lights will stop flashing.
- Now, pressing the programmed M1 or M2 button will execute the recorded sequence.
Cancellazione di una macro:
To clear a macro, press and hold the M button and the M1 or M2 button simultaneously, then press the M button again without recording any sequence.
5.3 Funzione TURBO
The TURBO function allows for continuous rapid firing of a button. There are three adjustable speeds: 5, 12, and 20 shots per second.

Figure 6: TURBO function for automatic rapid fire.
Attivazione TURBO:
- Press and hold the TURBO button (T button).
- While holding TURBO, press the button you want to set for continuous fire (e.g., A, B, X, Y, L, R, ZL, ZR). The button will now continuously fire when held down.
Regolazione della velocità TURBO:
- While holding the TURBO button, move the Right Analog Stick Up or Down to cycle through the three speeds (5/12/20 shots/sec).
Disattivazione TURBO:
To deactivate TURBO for a specific button, repeat the activation steps. To deactivate TURBO for all buttons, press and hold the TURBO button for 5 seconds.
5.4 Regolazione delle vibrazioni
The controller features 4 levels of HD vibration intensity: 0% (None), 30% (Weak), 70% (Normal), and 100% (Strong).

Figure 7: Four-stage vibration adjustment.
Regolazione dell'intensità della vibrazione:
- While holding the TURBO button, move the Left Analog Stick Up or Down to cycle through the vibration levels.
5.5 Gyro Sensor Calibration
If you experience issues with motion control or aiming, you may need to calibrate the 6-axis gyro sensor.

Figure 8: 6-axis gyro sensor for directional, viewpoint, and target recognition.
Passaggi di calibrazione:
- Place the controller on a flat, level surface.
- Simultaneously press and hold the X button, Square button, and HOME button until the indicator lights flash, then release.
- The controller will calibrate itself. Once calibration is complete, the indicator lights will stop flashing and return to their normal state.
6. Manutenzione
- Mantenere pulito il controller pulendolo con un panno morbido e asciutto. Evitare l'uso di prodotti chimici aggressivi o materiali abrasivi.
- Non esporre il controller a temperature estreme, umidità o luce solare diretta.
- Evitare di far cadere il controller o di sottoporlo a forti urti.
- Press buttons gently. Excessive force is not required and may cause damage over time.
- Conservare il controller in un luogo fresco e asciutto quando non in uso.
7. Risoluzione Dei Problemi
| Problema | Possibile causa | Soluzione |
|---|---|---|
| Il controller non si accende. | Batteria scarica. | Caricare completamente il controller. |
| Impossibile connettersi tramite Bluetooth. | Controller non in modalità di associazione; interferenza Bluetooth; Bluetooth del dispositivo disattivato. | Ensure controller is in pairing mode (hold HOME button); restart controller and device; check device Bluetooth settings. |
| Stick drift or inaccurate motion control. | Gyro sensor needs calibration. | Perform gyro calibration as described in Section 5.5. |
| TURBO/Vibration not working. | Function not activated or incorrectly set. | Refer to Sections 5.3 and 5.4 for proper activation and adjustment. |
| I pulsanti non rispondono. | Batteria scarica; problema software. | Charge controller; try resetting the controller (if applicable, usually by holding a small reset button or specific button combo). |
Se il problema persiste dopo aver provato le soluzioni sopra indicate, contattare l'assistenza clienti.
8. Specifiche
- Marca: Matbip
- Numero modello: Numero di modello: AB1
- Colore: Multicolore
- Connettività: Senza fili Bluetooth 5.0
- Capacità della batteria: 1000mAh
- Tempo di ricarica: Circa 4 ore
- Tempo di riproduzione continua: Fino a 20 ore
- Dimensioni: Dimensioni: 17.2 x 11.7 x 7.3 cm
- Peso: 310 grammi
- Numero di pulsanti: 16
- Caratteristiche speciali: 6-axis Gyro Sensor, Macro Function, TURBO Continuous Fire, 4-stage HD Vibration, Hall Sensor Sticks
- Piattaforme supportate: Nintendo Switch (all generations), Android, iOS, PC
9. Garanzia e supporto
This product comes with a 1-year quality warranty from the date of purchase. All products undergo strict quality inspection before shipment and have obtained international certifications including TELEC, CE, FCC, and RoHS.
For any questions, concerns, or technical support, please do not hesitate to contact our customer service. We are committed to providing you with the best possible gaming experience.
When operating buttons, please press gently to ensure longevity of the product.