Introduzione
This manual provides instructions for the proper setup, operation, and maintenance of your SMALLRIG Push-Button Rotating Side Handle with NATO Clamp. This accessory is designed to enhance handheld camera operation by providing a comfortable and versatile grip solution for camera cages and mounting plates equipped with NATO rails.
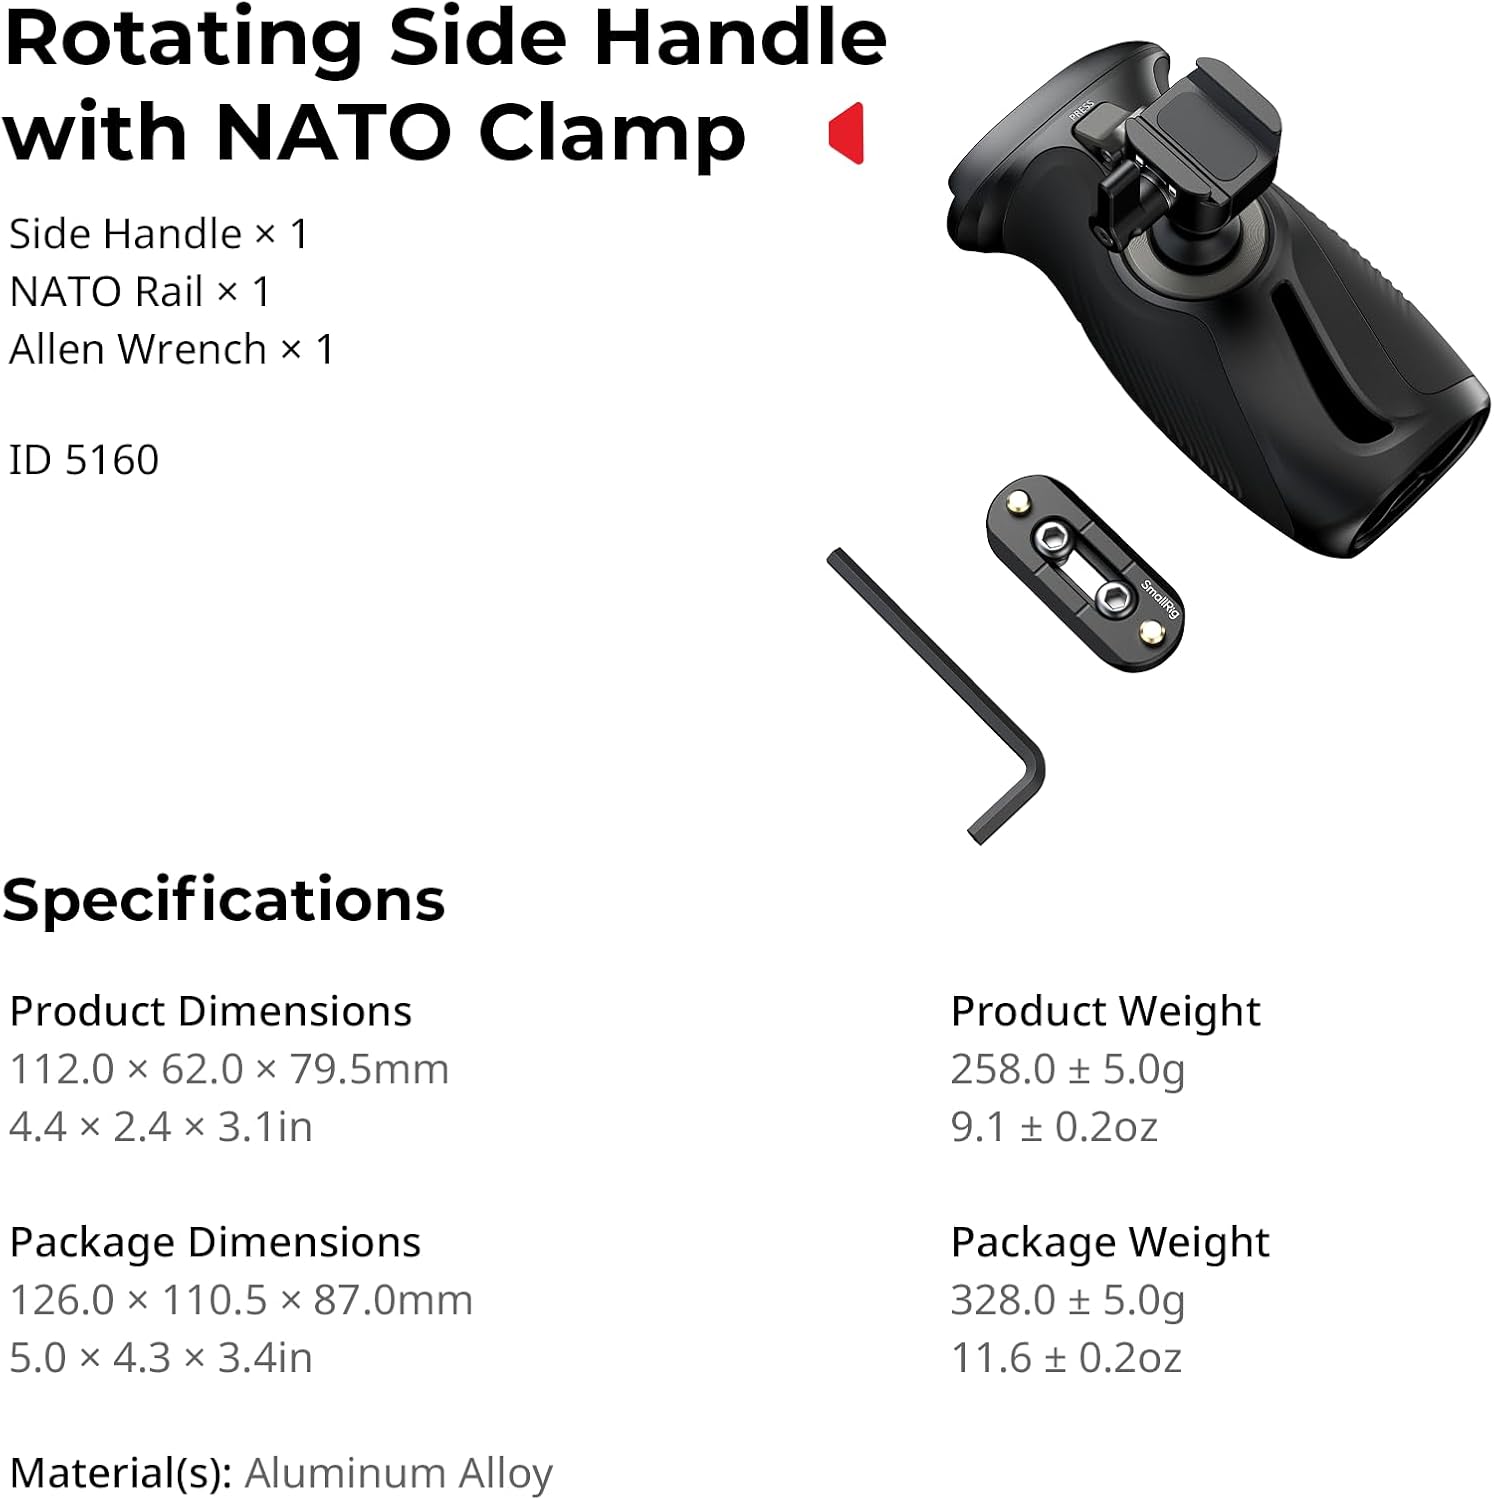
Cosa c'è nella scatola
- Maniglia laterale x 1
- NATO Rail x 1
- Chiave a brugola x 1
Caratteristiche principali
- Design girevole: Features a push-button mechanism for 360° rotation, allowing for quick and smooth angle adjustments.
- Compatibilità universale: Designed for both left and right-hand use, attaching to camera/monitor cages and mounting plates with NATO rails.
- Elevata capacità di carico: Supports a maximum load of 15kg (33lb), ensuring stability for various camera setups.
- Impugnatura ergonomica: Constructed with anti-slip silicone for a comfortable and secure hold, even in varying conditions.
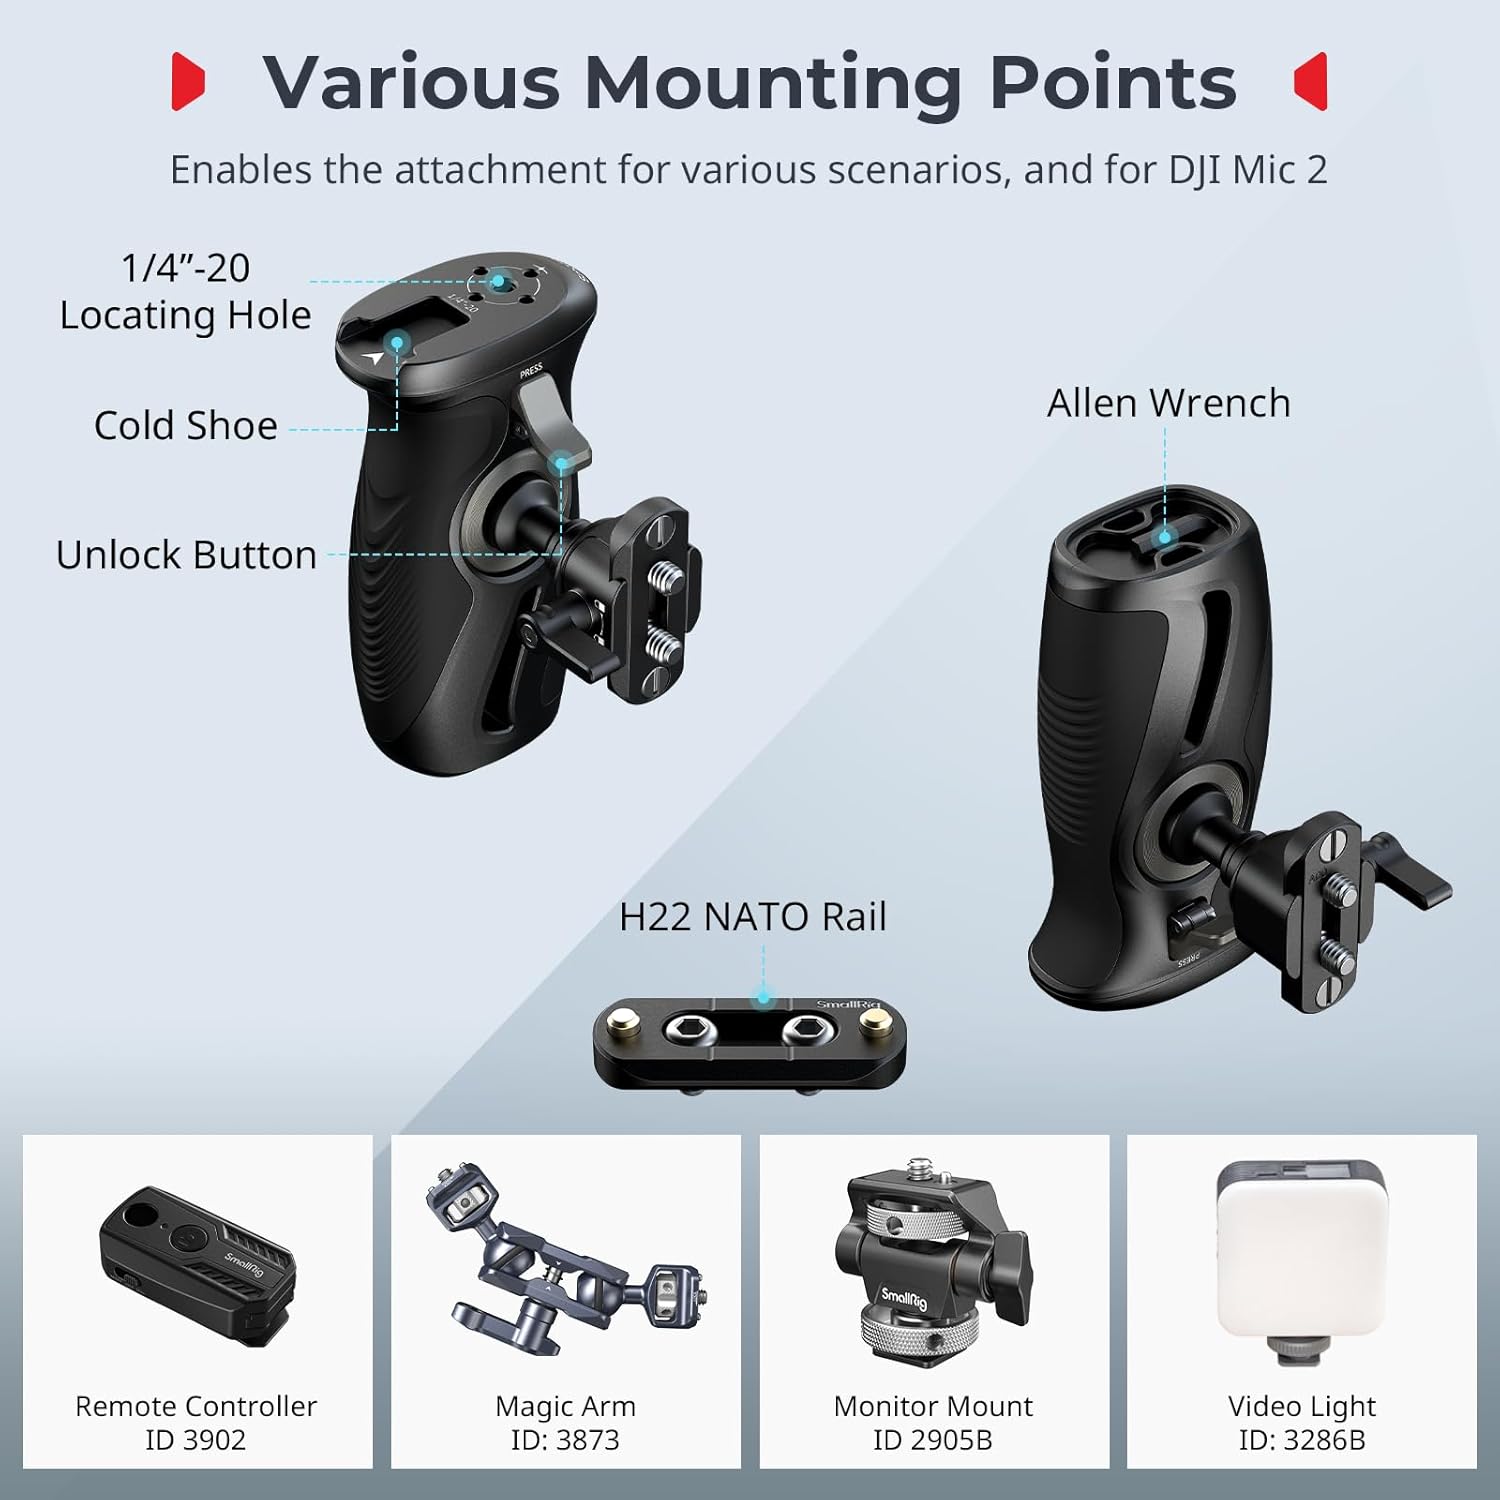
- Punti di montaggio multipli: Includes 1/4"-20 locating holes and a cold shoe mount for attaching accessories like remote controllers, magic arms, monitors, microphones, and video lights.
Istruzioni di installazione
- Attach NATO Rail (if necessary): If your camera cage or mounting plate does not have a built-in NATO rail, use the included NATO rail and Allen wrench to securely attach it to your desired position on the cage. Ensure it is tightened firmly to prevent movement.
- Mount the Side Handle: Align the NATO clamp on the side handle with the NATO rail on your camera setup. Slide the handle onto the rail.
- Fissare la maniglia: Tighten the locking knob on the NATO clamp to firmly secure the side handle in place. Verify that the handle is stable and does not wobble.

Istruzioni per l'uso
Rotazione di 360°
The side handle features a push-button mechanism for quick angle adjustments. To rotate the handle:
- Locate the unlock button on the handle.
- Premere e tenere premuto il pulsante di sblocco.
- While holding the button, rotate the handle to your desired angle (up to 360°).
- Release the button to lock the handle in the new position.
Importanti precauzioni di sicurezza: When adjusting the angle, always hold the camera or rig securely with your other hand to prevent accidental drops or damage.

Fissaggio degli accessori
The handle provides various mounting points for additional accessories:
- 1/4"-20 Locating Holes: Use these threaded holes to attach remote controllers, magic arms, or other accessories with 1/4"-20 screws.
- Supporto per pattino freddo: The integrated cold shoe mount allows for direct attachment of accessories such as monitor mounts, microphones, or video lights.
Manutenzione
- Regularly inspect all screws and connections to ensure they are tight. Use the included Allen wrench for tightening if necessary.
- Clean the handle and NATO rail with a soft, dry cloth. Avoid using harsh chemicals or abrasive materials that could damage the finish or silicone grip.
- Store the handle in a dry, dust-free environment when not in use.
Risoluzione dei problemi
Handle is loose or wobbly after attachment
Ensure the locking knob on the NATO clamp is fully tightened. If the issue persists, check if the NATO rail itself is securely attached to your camera cage. Re-tighten any loose screws using the Allen wrench.
Rotation mechanism feels stiff or does not lock properly
Ensure the unlock button is fully depressed when attempting to rotate. If the mechanism feels stiff, check for any debris or obstructions around the rotating joint. Avoid forcing the rotation; if resistance is significant, contact customer support.
Specifiche
| Caratteristica | Dettaglio |
|---|---|
| Nome del modello | 12669 |
| Dimensioni del prodotto | 112.0 x 62.0 x 79.5mm (4.41 x 2.44 x 3.15 pollici) |
| Peso del prodotto | 0.26 chilogrammi (9.1 once) |
| Materiale | Lega di alluminio, silicone |
| Max. Capacità di carico | 15 chilogrammi (33 libbre) |
| Angolo di rotazione | 360° |
| Tipo di montaggio | NATO Clamp (Montaggio superficiale) |
| Dispositivi compatibili | Camera / monitor cages, mounting plates with NATO rail |

Garanzia e supporto
Informazioni sulla garanzia
This SMALLRIG product is covered by a Garanzia del produttore di 2 anno dalla data di acquisto. La presente garanzia copre i difetti di materiali e di fabbricazione in condizioni di normale utilizzo. Non copre i danni causati da uso improprio, incidenti, modifiche non autorizzate o installazione impropria.
Assistenza clienti
For technical assistance, warranty claims, or product inquiries, please contact SMALLRIG customer support through their official website or the retailer where the product was purchased. Please have your product model number (12669) and proof of purchase ready when contacting support.