
1. Introduzione
This manual provides instructions for the assembly, operation, and maintenance of the MONTECH X5M Micro ATX Gaming PC Case. The X5M is designed for high airflow and features pre-installed ARGB fans, a glass side panel, and an integrated GPU holder.
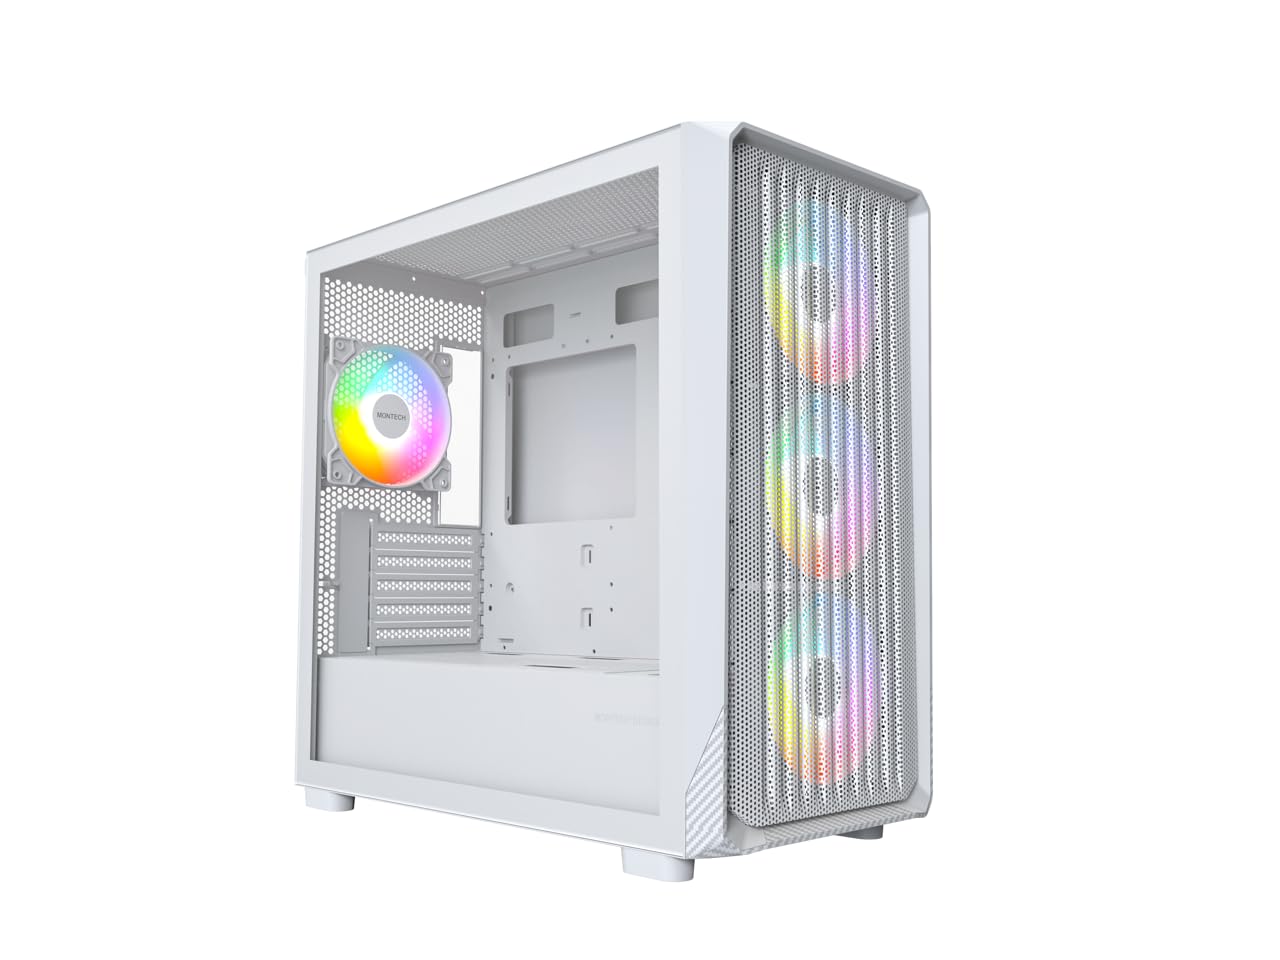
Figure 1: MONTECH X5M Micro ATX Gaming PC Case (White variant).
2. Caratteristiche principali
- Integrated GPU Holder: An adjustable GPU support stand is included to provide physical support for graphics cards.
- Design ad alto flusso d'aria: Optimized structure for efficient cooling.
- Ventole ARGB preinstallate: Four 120mm ARGB fans are pre-installed for immediate cooling and customizable lighting.
- Pannello laterale in vetro temperato: Fornisce un chiaro view dei componenti interni.
- Carbon Fiber Print Accents: Aesthetic detailing on the front panel.
- Connettività versatile: Front I/O panel includes USB 2.0, USB 3.0, USB Type-C, and audio ports.

Figura 2: Oltreview of the MONTECH X5M case highlighting internal layout and ARGB fans.
3. Specifiche
| Marca | Montech |
| Nome del modello | X5M |
| Tipo di caso | Torre centrale Micro ATX |
| Compatibilità della scheda madre | Micro-ATX |
| Ventole preinstallate | 4 ventole ARGB da 120 mm |
| Supporto lunghezza GPU | Fino a 405 mm |
| Supporto altezza dissipatore CPU | Fino a 165 mm |
| Supporto lunghezza PSU | Fino a 230 mm |
| Baie di stoccaggio | Up to 2 HDDs & 4 SSDs |
| Porte I / O anteriori | 1x USB 2.0, 1x USB 3.0, 1x USB Type-C, Mic & Audio, LED Button, Power Button |
| Metodo di raffreddamento | Aria |
| Supporto per radiatori AIO | Top: Up to 360mm; Front: Up to 360mm |
| Materiale | Plastic with Carbon Fiber Accents, Tempered Glass |
| Peso dell'articolo | 14.3 libbre (6.49 kg) |

Figure 3: Close-up of the carbon fiber print detailing on the front panel of the X5M case.
4. Configurazione e installazione
Follow these steps for installing components into your MONTECH X5M PC case. Ensure your system is powered off and unplugged before beginning any installation.
4.1. Preparazione del caso
- Carefully remove the tempered glass side panel by unscrewing the thumb screws and sliding it off.
- Rimuovere il pannello laterale posteriore per accedere all'area di gestione dei cavi.
4.2. Installazione della scheda madre
- Installare la schermatura I/O (se non è già fissata alla scheda madre) nell'apertura posteriore del case.
- Align your Micro ATX motherboard with the standoffs inside the case.
- Fissare la scheda madre utilizzando le viti fornite.
4.3. Installazione dell'unità di alimentazione (PSU)
- Place the PSU into the dedicated compartment at the bottom rear of the case.
- Fissare l'alimentatore con le viti dalla parte posteriore del case.
4.4. Storage Device Installation (HDDs/SSDs)
The X5M supports up to 2 HDDs and 4 SSDs.
- SSD da 2.5": Mount SSDs onto the designated brackets behind the motherboard tray or on the PSU shroud.
- HDD da 3.5": Install HDDs into the drive cage located under the PSU shroud.
4.5. Installazione della scheda grafica (GPU)
- Rimuovere le coperture degli slot PCIe necessari dalla parte posteriore del case.
- Inserire la GPU nello slot PCIe appropriato sulla scheda madre.
- Fissare la GPU con le viti.
- Adjust the integrated GPU support stand to provide stability for your graphics card.
4.6. Installazione di ventole e radiatori
The X5M comes with four 120mm ARGB fans pre-installed. Additional fans or AIO radiators can be installed as follows:
- Superiore: Supports 3x 120mm or 2x 140mm fans, or AIO radiators up to 360mm.
- Davanti: Supports 3x 120mm or 2x 140mm fans, or AIO radiators up to 360mm.
- Posteriore: Supports 1x 120mm fan.
- Copertura alimentatore: Supporta 2 ventole da 120 mm.

Figure 4: Illustration of airflow within the MONTECH X5M case and the pre-installed ARGB fans.

Figure 5: Diagram detailing fan and radiator support locations and sizes within the X5M case.
4.7. Gestione dei cavi
Utilizzare i fori per il passaggio dei cavi e i punti di fissaggio dietro il vassoio della scheda madre per organizzare i cavi. Questo migliora il flusso d'aria e l'estetica.
4.8. Collegamenti del pannello I/O frontale
Connect the front panel cables (USB 2.0, USB 3.0, USB Type-C, HD Audio, Power Switch, Reset Switch, LED) to the corresponding headers on your motherboard. Refer to your motherboard manual for specific header locations.

Figure 6: Front I/O panel of the MONTECH X5M, showing USB 2.0, USB 3.0, USB Type-C, Mic & Audio jacks, LED button, and Power button.
5. Funzionamento
5.1. Accensione
After all components are installed and cables connected, replace the side panels. Connect your monitor, keyboard, mouse, and power cable. Press the Power Button on the front I/O panel to start your system.
5.2. Controllo della ventola ARGB
Le ventole ARGB preinstallate possono essere controllate in due modi:
- Dedicated LED Button: Use the LED button on the front I/O panel to cycle through 25 built-in lighting modes.
- Sincronizzazione della scheda madre: Connect the ARGB cables to a compatible 5V 3-pin ARGB header on your motherboard. Use your motherboard's RGB software (e.g., ASUS Aura Sync, MSI Mystic Light Sync, GIGABYTE RGB Fusion, ASRock Polychrome Sync) to synchronize and customize lighting effects.
6. Manutenzione
Una manutenzione regolare aiuta a garantire prestazioni ottimali e longevità dei componenti del PC.
- Pulizia del filtro antipolvere: Periodically remove and clean the dust filters (located on the top, front, and bottom) to maintain optimal airflow. Use compressed air or a soft brush.
- Pulizia esterna: Pulire le superfici esterne con un panno morbido, damp stoffa. Evitare detergenti abrasivi.
- Pulizia interna: With the system powered off and unplugged, use compressed air to remove dust from internal components and fans.
7. Risoluzione Dei Problemi
- Il sistema non si accende:
- Assicurarsi che il cavo di alimentazione sia collegato saldamente all'alimentatore e alla presa a muro.
- Check that the PSU switch is in the "ON" position.
- Verify all front panel connectors (especially the Power Switch) are correctly attached to the motherboard.
- Confirm the 24-pin ATX and 8-pin CPU power cables are securely connected to the motherboard.
- Le ventole non girano / RGB non si accende:
- Check that all fan power cables are securely connected to the fan hub or motherboard headers.
- Ensure ARGB cables are properly connected to the fan hub or a compatible 5V 3-pin ARGB header on the motherboard.
- If using motherboard synchronization, verify that the RGB software is installed and configured correctly.
- Try cycling through modes using the dedicated LED button on the front panel.
- Nessuna uscita di visualizzazione:
- Ensure your monitor cable is connected to the graphics card (GPU) and not the motherboard's integrated graphics port (unless you are using integrated graphics).
- Reinserire la scheda grafica nel suo slot PCIe.
- Check that the GPU power cables are securely connected.
8. Garanzia e supporto
8.1. Informazioni sulla garanzia
The MONTECH X5M PC Case comes with a Garanzia del produttore di 1 anni. This warranty covers defects in materials and workmanship under normal use. For specific terms and conditions, please refer to the official Montech websito o contattare l'assistenza clienti.
8.2. Assistenza clienti
For further assistance, technical support, or warranty claims, please visit the official Montech website or contact their customer service department. You can find contact information on the Montech websito: www.montechpc.com