
1. Prodotto finitoview
The Cuifati Compact AM Transmitter is a versatile device designed for various applications including radio testing, audio experiments, and establishing small-scale AM broadcasting stations. It features a wide amplitude modulation frequency range and a standard 3.5mm headphone interface for audio input.

Image 1: Cuifati AM Transmitter highlighting its amplitude modulation frequency range and 3.5mm headphone jack.
Caratteristiche principali:
- Connettività versatile: Equipped with a 3.5mm headphone jack for connecting audio devices.
- Doppia alimentazione: Operates on 2 x AA lithium batteries (not included) or an external 5-12V DC power supply.
- Ampia gamma di frequenze: Supports an amplitude modulation range of 600KHz-1500KHz.
- Design compatto: Portable size for easy transport and use.
- Applicazioni multiple: Suitable for radio testing, audio experiments, and personal AM broadcasting.
2. Contenuto della confezione
Si prega di verificare che tutti gli articoli siano presenti all'apertura della confezione:
- 1 x Cuifati Compact AM Transmitter
3. Informazioni sulla sicurezza
Per garantire un funzionamento sicuro ed evitare danni, osservare quanto segue:
- Non esporre il dispositivo a umidità o temperature estreme.
- Utilizzare solo l'alimentatore specificato voltage (5-12 V).
- Tenere il dispositivo lontano da forti campi magnetici.
- Do not attempt to disassemble or modify the transmitter.
4. Impostazione
4.1 Collegamento dell'alimentazione
The AM Transmitter can be powered in two ways:
- Potenza della batteria: Insert 2 x AA lithium batteries (not included) into the designated battery power supply board.
- Alimentazione CC esterna: Connect an external DC power supply (5-12V) to the DC socket on the transmitter board.
4.2 Connessione di ingresso audio
Connect your audio source to the 3.5mm headphone interface:
- Use a standard 3.5mm audio cable to connect your audio player, mobile phone, or computer to the 'AUDIO' input jack on the transmitter.

Image 2: Diagram illustrating power supply options and audio input connections for the AM transmitter.
5. Istruzioni per l'uso
5.1 Funzionamento di base
- Ensure the transmitter is powered on. The LED indicator light should illuminate.
- Connect your audio source to the 3.5mm audio input.
- Adjust the frequency using the rotary knob on the transmitter. The frequency range is 600KHz to 1500KHz.
- Tune your AM radio receiver to the frequency selected on the transmitter.
- You should now hear the audio from your source through the AM radio.
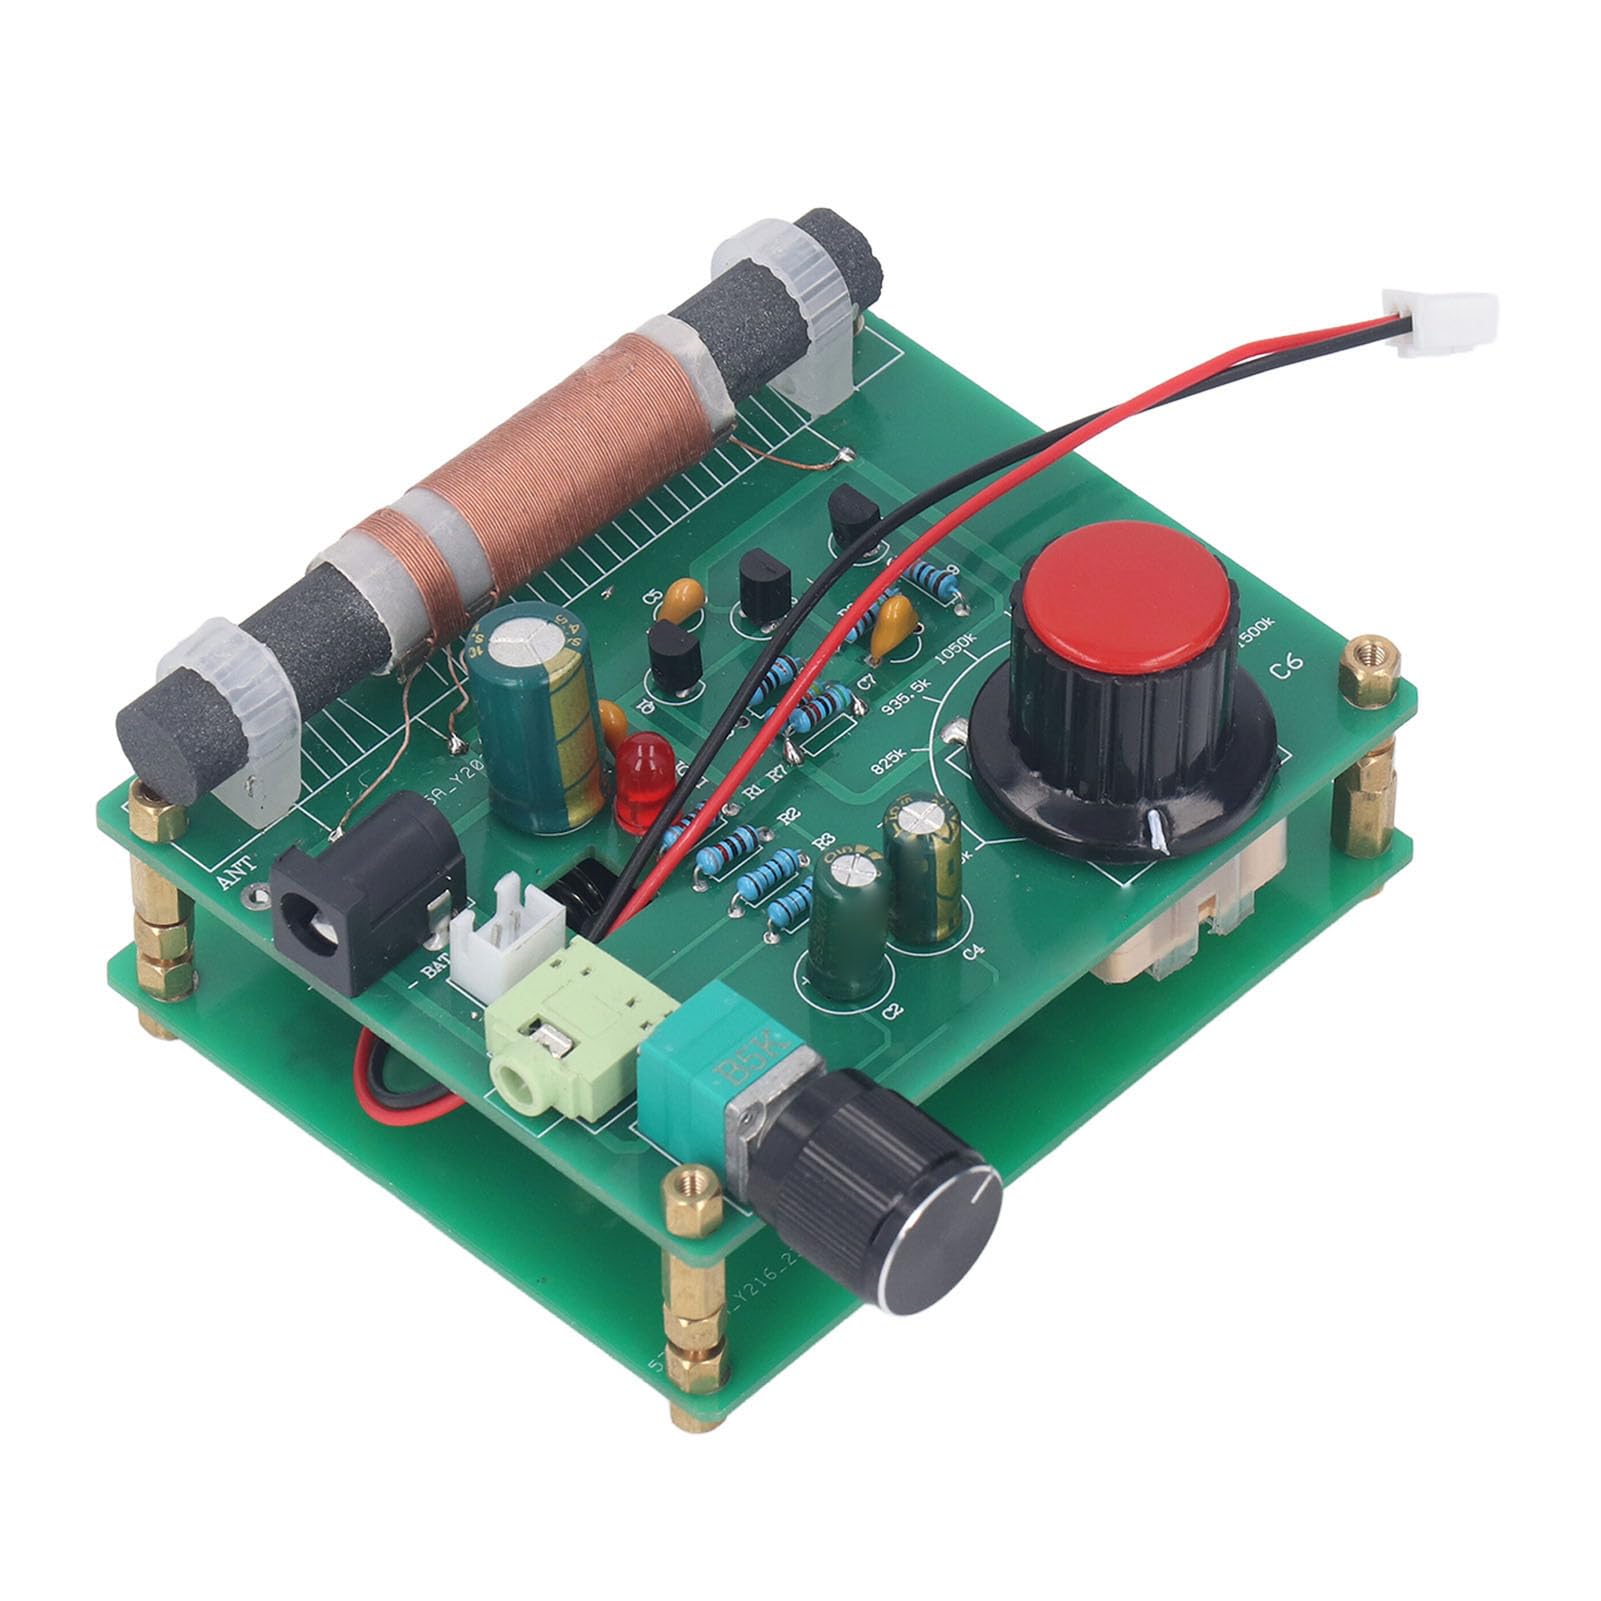
Immagine 3: Dettagliata view of the transmitter board, showing the audio input and frequency adjustment knob.

Image 4: The compact AM transmitter being used to broadcast to a car radio.
6. Manutenzione
To ensure the longevity and optimal performance of your AM Transmitter:
- Mantenere il dispositivo pulito e privo di polvere. Utilizzare un panno morbido e asciutto per la pulizia.
- Store the transmitter in a dry environment, away from direct sunlight and extreme temperatures.
- If using batteries, remove them if the device will not be used for an extended period.
7. Risoluzione Dei Problemi
If you encounter issues with your AM Transmitter, refer to the following common problems and solutions:
- No Power / LED Not Lit:
- Controllare l'installazione delle batterie e assicurarsi che siano cariche.
- Verify the external DC power supply connection and ensure it provides 5-12V.
- Nessuna trasmissione audio:
- Confirm the audio source is properly connected to the 3.5mm input.
- Assicurarsi che la sorgente audio sia in riproduzione e che il volume sia adeguato.
- Verify that your AM radio receiver is tuned to the exact frequency set on the transmitter.
- Check the distance between the transmitter and receiver; for low power transmission, an effective distance of about 5 meters is typical.
- Poor Signal Quality / Static:
- Adjust the frequency slightly on both the transmitter and receiver to find a clearer channel.
- Ridurre la distanza tra trasmettitore e ricevitore.
- Ensure there are no major obstructions or sources of interference between the devices.
8. Specifiche
| Tipo di articolo | Trasmettitore AM |
| Materiale | PCB, Brass |
| Amplitude Modulation Frequency Range | Da 600 kHz a 1500 kHz |
| Headphone Interface Specification | 3.5mm |
| Volume di alimentazionetage | 5-12 V |
| Opzioni di alimentazione | 2 x AA lithium battery (not included), External DC socket |
| Tecnologia di connettività | AUSILIARIO |
| Produttore | CUIFATI |
9. Informazioni sulla garanzia
This Cuifati Compact AM Transmitter is covered by a manufacturer's warranty for 90 days from the date of purchase. This warranty covers defects in materials and workmanship under normal use. Please retain your proof of purchase for warranty claims.
10. Assistenza clienti
For technical assistance, troubleshooting not covered in this manual, or warranty inquiries, please contact Cuifati customer service. Refer to your purchase documentation or the retailer's websito per dettagli di contatto specifici.