
1. Introduzione
This manual provides detailed instructions for the safe and effective use of your POSEIDON Wireless Tattoo Pen Kit. Please read this manual thoroughly before operating the device to ensure proper function and longevity of the equipment. This kit is designed for both beginners and experienced artists.
2. Contenuto della confezione
The POSEIDON Wireless Tattoo Pen Kit includes the following components:
- 1x Wireless Tattoo Pen
- 20x Assorted Tattoo Needle Cartridges (5x1205RL, 5x1207RL, 5x1209RS, 5x1207CM)
- 2x 1800mAh High-Capacity Batteries
- 11x Tattoo Ink Bottles (Black and assorted colors)
- Tazze d'inchiostro
- Pelle da allenamento
- Stencil Paper
- Pennarello
- Impugnature
- Cavo di ricarica USB-C

Immagine 2.1: Passoview of all items included in the POSEIDON Wireless Tattoo Pen Kit.
3. Prodotto finitoview
3.1 Wireless Tattoo Pen
The tattoo pen features a high-performance motor, an ergonomic non-slip handle, and a universal needle opening compatible with most cartridge needles. The integrated LED display shows voltage, session timer, and battery level.

Image 3.1: Key features of the POSEIDON Wireless Tattoo Pen, including the high-performance motor, non-slip handle, and needle opening.
3.2 Batterie
The kit includes two 1800mAh lithium polymer batteries, providing 5-8 hours of operation per charge. Each battery has a digital display indicating current voltage, frequency, and session time. Charging time is approximately 2 hours via USB-C.

Image 3.2: The two 1800mAh batteries, showing their digital displays for voltage and session time.
4. Impostazione
4.1 Caricamento della batteria
- Collegare il cavo di ricarica USB-C in dotazione alla porta di ricarica della batteria.
- Collegare l'altra estremità del cavo a un adattatore di alimentazione USB compatibile (non incluso).
- The battery display will indicate charging status. A full charge takes approximately 2 hours.
4.2 Assemblaggio della penna per tatuaggi
- Ensure the tattoo pen is clean and sterilized according to standard hygiene practices.
- Twist the battery clockwise onto the top of the tattoo pen until securely fastened.
- Select the desired needle cartridge.
- Insert the needle cartridge into the front opening of the pen by pushing it firmly until it clicks into place.
- To remove, twist the cartridge counter-clockwise and pull it out.
5. Istruzioni per l'uso
5.1 Accensione/spegnimento
- To power on, press and hold the power button (usually marked with a circle or power symbol) for a few seconds until the display illuminates.
- Per spegnere, tenere premuto nuovamente il pulsante di accensione finché il display non si spegne.
- To start/pause operation, short press the power button.
5.2 volumitage Regolazione
- il volumetage can be adjusted from 4V to 12V in 0.1V increments.
- Use the "+" button to increase voltage.
- Use the "-" button to decrease voltage.
- L'attuale voltage is displayed on the LED screen.
5.3 Stroke Length Adjustment
The tattoo pen features 7 adjustable stroke settings, ranging from 2.4mm to 4.2mm. Adjust the stroke length by rotating the grip section of the pen.
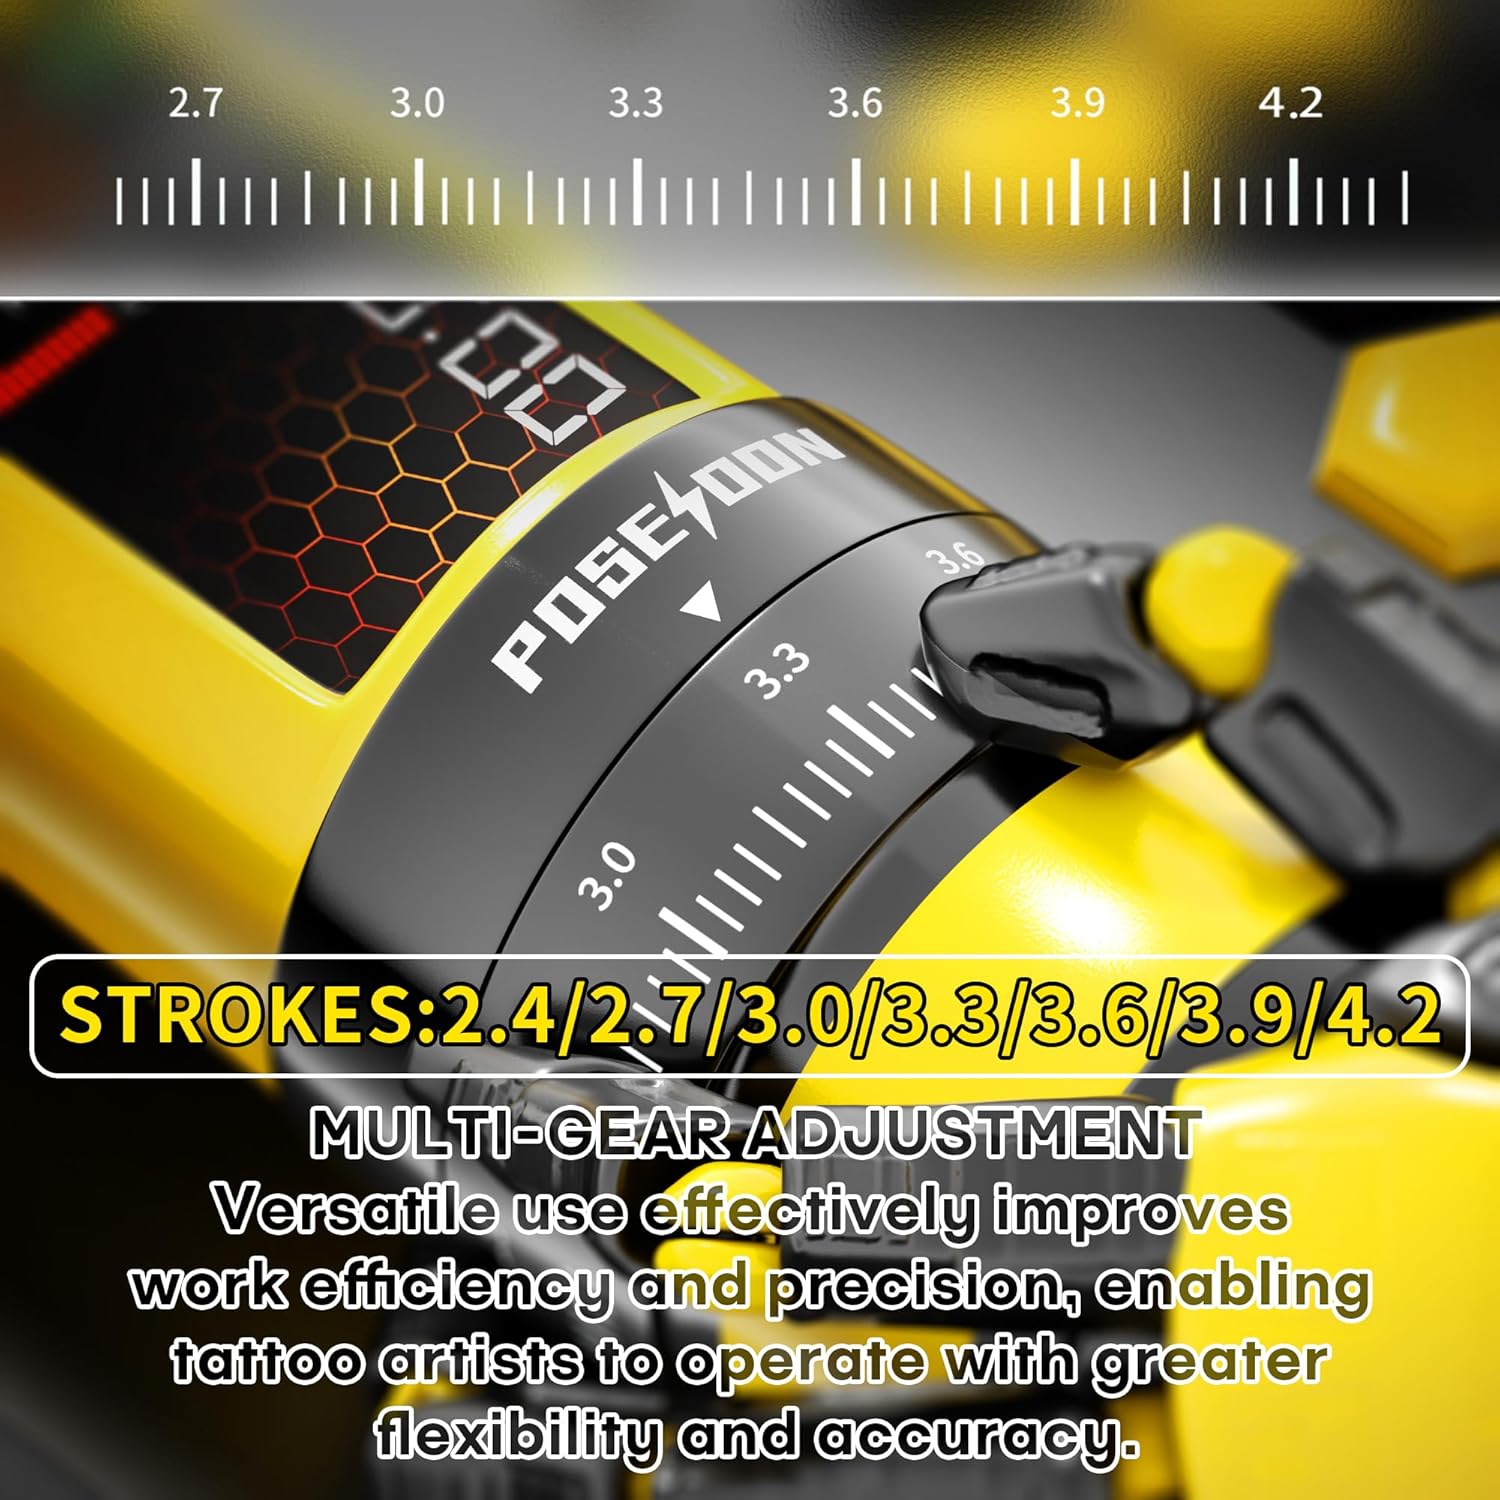
Image 5.1: Detail of the stroke length adjustment mechanism on the tattoo pen.

Image 5.2: Visual guide to the multi-gear stroke adjustment and control buttons for voltage selezione della modalità.
5.4 Working Modes (Normal/Dot)
- The pen supports two working modes: Normal mode (standard operation) and Dot mode (for precise dotwork/stippling).
- To switch between modes, long press the function switch key (usually marked 'M'). The display will indicate the active mode.
5.5 Session Timer
The integrated digital timer on the LED display tracks the duration of your tattooing session. This feature assists with time management during appointments.
6. Manutenzione
6.1 Pulizia e sterilizzazione
- Always disconnect the battery from the pen before cleaning.
- Wipe the exterior of the tattoo pen with a sterile wipe or a cloth dampened with an approved disinfectant solution after each use.
- Do not immerse the tattoo pen or battery in liquid.
- Needle cartridges are single-use and must be disposed of properly after each session.
6.2 Conservazione
- Store the tattoo pen and accessories in a clean, dry place away from direct sunlight and extreme temperatures.
- Ensure batteries are partially charged (around 50%) before long-term storage to maintain battery health.
7. Risoluzione Dei Problemi
Per i problemi più comuni e le relative soluzioni, fare riferimento alla tabella sottostante:
| Problema | Possibile causa | Soluzione |
|---|---|---|
| La penna non si accende. | La batteria è scarica o non è collegata correttamente. | Charge the battery. Ensure the battery is securely twisted onto the pen. |
| L'ago non si muove o si muove debolmente. | Basso volumetage setting, faulty needle cartridge, or motor issue. | Aumenta il voltage. Replace the needle cartridge. If problem persists, contact support. |
| Batteria non in carica. | Cavo USB-C o adattatore di alimentazione difettoso. | Prova un cavo USB-C e un adattatore di alimentazione diversi. Assicurati che i collegamenti siano saldi. |
| Prestazioni incoerenti. | Low battery, incorrect stroke setting, or worn-out needle. | Ensure battery is fully charged. Adjust stroke length. Replace needle cartridge. |
8. Specifiche
| Caratteristica | Dettaglio |
|---|---|
| Numero di modello | TK208-UK |
| Capacità della batteria | 2 x 1800mAh ai polimeri di litio |
| Volume di lavorotage | 4-12V (adjustable in 0.1V increments) |
| Stroke Settings | 7 settings (2.4mm - 4.2mm) |
| Velocità del motore | 8V, 8000RPM |
| Tempo di ricarica | Circa 2 ore |
| Orario di lavoro | 5-8 ore per batteria |
| Dimensioni del pacco | 8.54 x 7.87 x 3.9 pollici |
| Peso | 2.69 libbre |
| Codice UPC | 716597329713 |
9. Informazioni sulla sicurezza
- This device is intended for professional use or supervised training.
- Always follow proper sterilization and hygiene protocols to prevent cross-contamination.
- Use only compatible needle cartridges.
- Tenere il dispositivo fuori dalla portata dei bambini.
- Non tentare di smontare o modificare il dispositivo, poiché ciò potrebbe invalidare la garanzia e comportare rischi per la sicurezza.
- Consult a medical professional if you experience any adverse reactions or complications.

Image 9.1: Illustration of the internal silicone safety system designed to reduce skin lesions and protect the machine.
10. Garanzia e supporto
For warranty information, technical support, or service inquiries, please contact POSEIDON customer service through the retailer where the product was purchased or visit the official POSEIDON brand store online. Please retain your proof of purchase for warranty claims.