1. Introduzione
This manual provides detailed instructions for the installation, operation, and maintenance of your Duronic DM6A2 Dual Monitor Arm. The DM6A2 is designed to securely hold two computer monitors, offering flexible adjustments for an ergonomic workspace. It features a gas spring mechanism for smooth height adjustments and integrated cable management to maintain an organized desk.
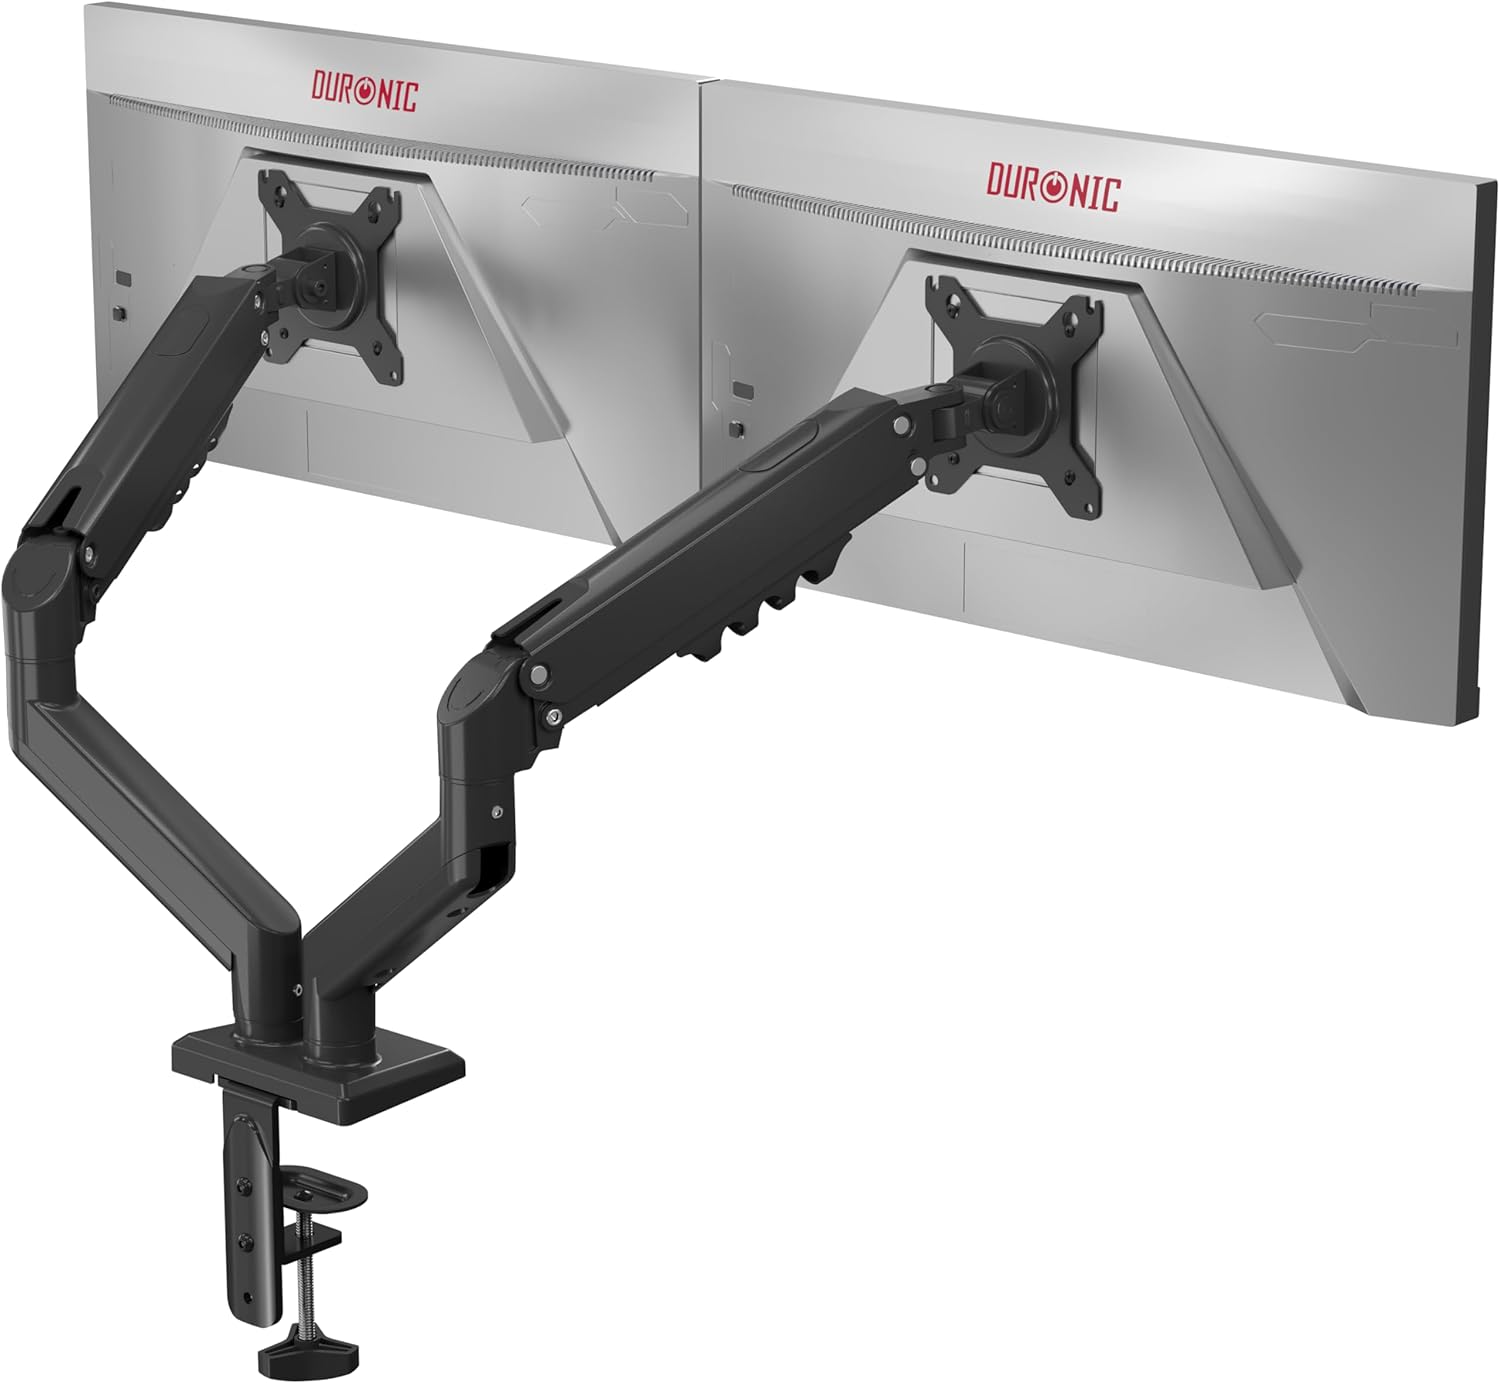
Image 1.1: The Duronic DM6A2 Dual Monitor Arm supporting two monitors.
2. Informazioni sulla sicurezza
Please read all instructions carefully before installation and use. Failure to follow these instructions may result in product damage, injury, or property damage.
- Ensure your desk surface is strong enough to support the combined weight of the monitor arm and two monitors.
- Non superare la capacità di peso massima di 9 kg (19.8 libbre) per braccio.
- Assicurarsi che tutte le viti siano ben serrate prima dell'uso. Non serrare eccessivamente.
- Tenere bambini e animali domestici lontani dall'area di installazione.
- Adjust the gas spring tension carefully to match your monitor's weight. Improper tension can cause monitors to drop or spring up unexpectedly.
3. Contenuto della confezione
Verify that all components are present before beginning installation. If any parts are missing or damaged, please contact Duronic customer support.
- Main pole and base
- Two monitor arms with gas springs
- Two VESA mounting plates
- Scrivania clamp and grommet mounting hardware
- Cable management clips/covers
- Assembly tools (Allen keys, screws)
4. Istruzioni per l'installazione
4.1. Choose Your Mounting Method (Clamp o Occhiello)
The DM6A2 offers two installation options: desk clamp or grommet mount. Select the method suitable for your desk.

Image 4.1: Desk clamp supports thickness from 15mm to 100mm. Grommet mount supports thickness from 15mm to 50mm.
4.1.1. Scrivania Clamp Installazione
- Allega il clamp base to the main pole.
- Posizionare il clamp sul bordo della scrivania.
- Stringere la clamp screw until the arm is securely fastened to the desk. Ensure it is stable.
4.1.2. Installazione del supporto passacavo
- Se la scrivania è dotata di un foro passacavo, inserire la base passacavo attraverso il foro.
- Secure the base from underneath the desk using the provided plate and nut.
- Fissare il palo principale alla base dell'occhiello.
4.2. Fissare le piastre VESA ai monitor
The DM6A2 supports VESA 75x75mm and 100x100mm mounting patterns.

Image 4.2: The DM6A2 supports monitors from 13 to 32 inches and VESA patterns 75x75mm and 100x100mm, with a maximum weight of 9kg per arm.
- Posizionare con cautela il monitor con lo schermo rivolto verso il basso su una superficie morbida e pulita.
- Allineare la piastra di montaggio VESA con i fori delle viti sul retro del monitor.
- Secure the plate using the appropriate screws provided. Do not overtighten.
4.3. Montare i monitor sui bracci
- Slide the VESA plate with the attached monitor onto the end of each monitor arm.
- Assicurarsi che il monitor sia fissato saldamente al braccio.
- Tighten any locking screws on the VESA head to prevent accidental detachment.
4.4. Regolare la tensione della molla a gas
The gas spring mechanism allows for smooth and stable monitor positioning. You must adjust the tension to match the weight of your monitors.

Image 4.3: The internal gas spring mechanism provides smooth monitor adjustments.

Image 4.4: Adjust the gas spring tension using the provided tool.
- Use the provided Allen key to adjust the tension screw located on the arm.
- Turn clockwise to increase tension (for heavier monitors) or counter-clockwise to decrease tension (for lighter monitors).
- Adjust until the monitor stays at the desired height when released, without drifting up or down.
4.5. Gestione dei cavi
Route your monitor cables through the integrated cable management clips or covers on the arms to keep your workspace tidy.
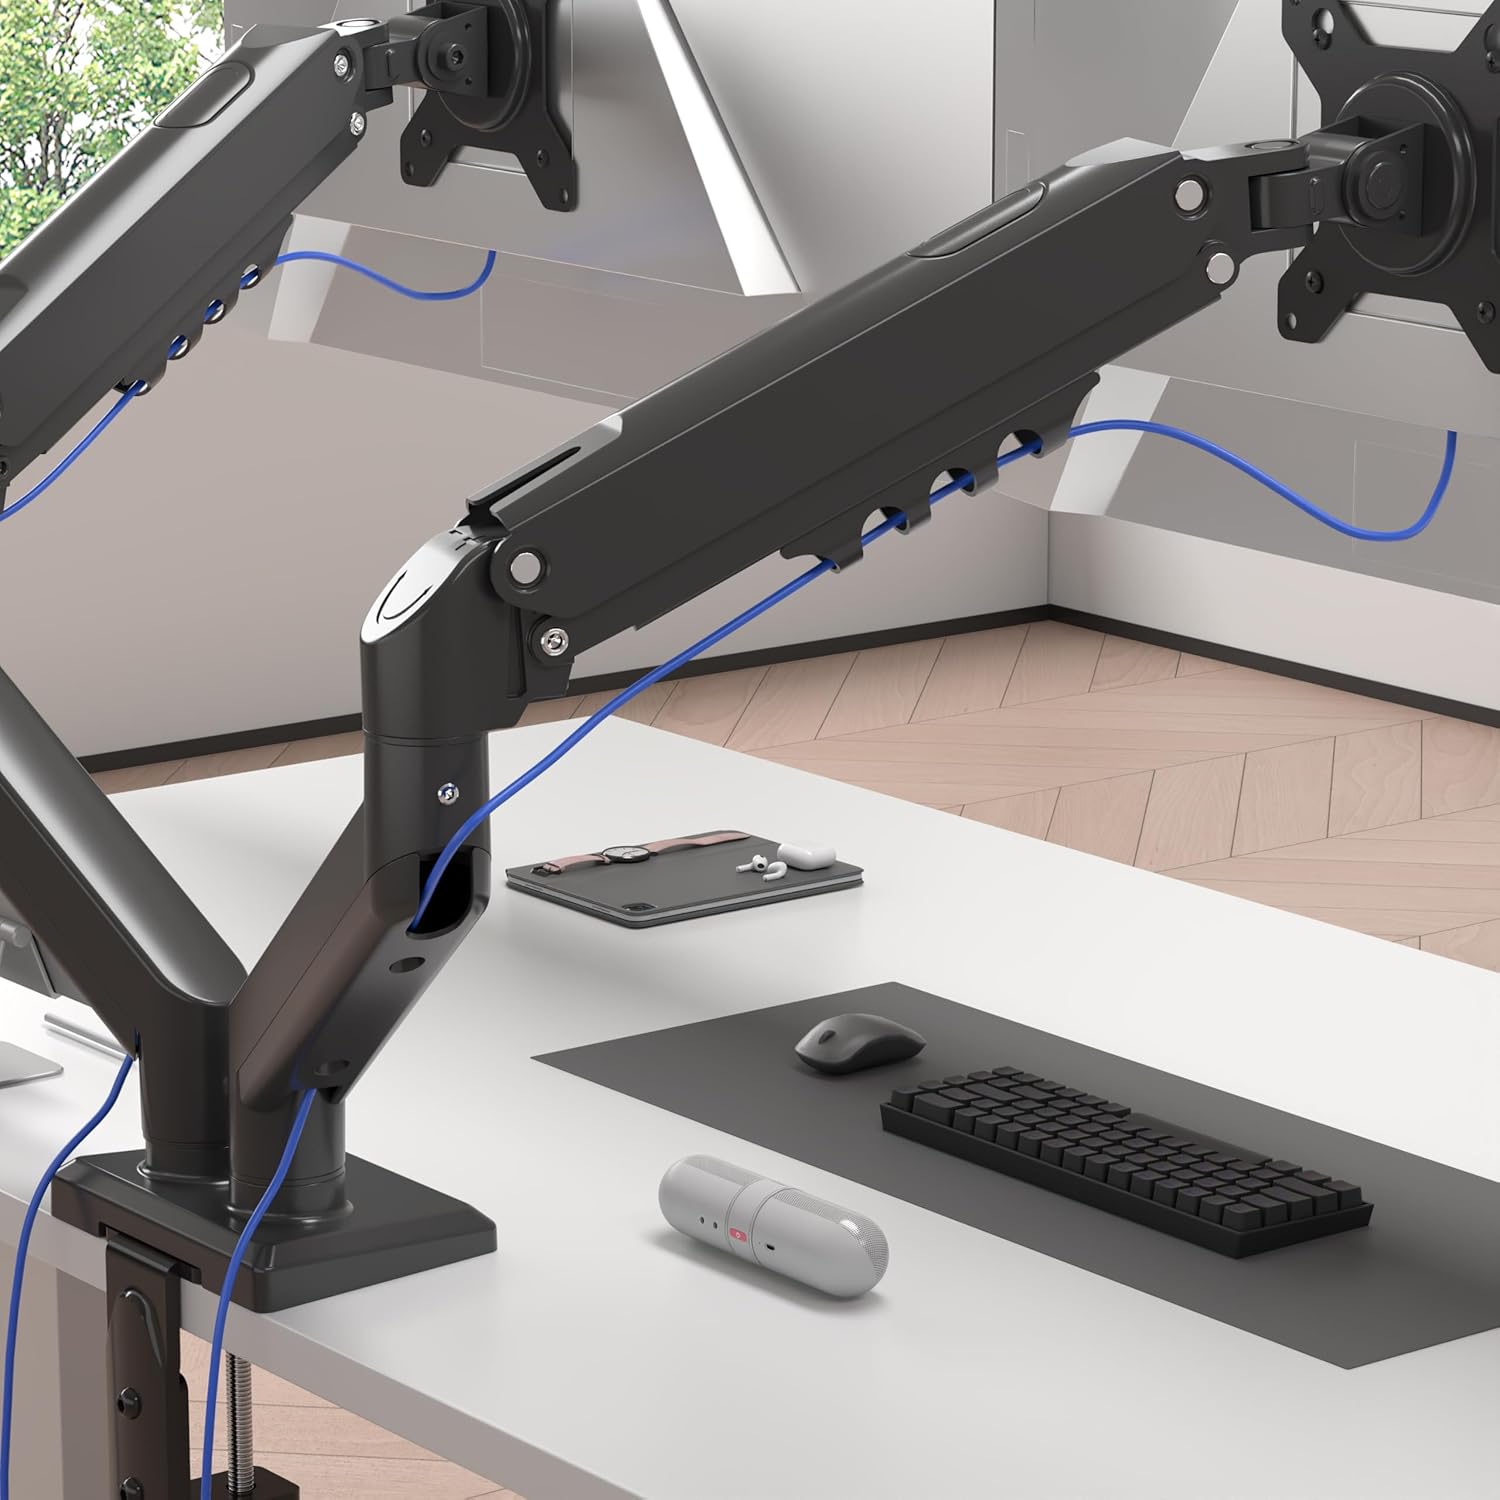
Image 4.5: Cables are neatly organized using the arm's cable management system.
5. Istruzioni per l'uso (Regolazioni)
The Duronic DM6A2 offers a range of adjustments for optimal viewcomfort.
5.1. Regolazione dell'altezza
Gently push or pull the monitor to the desired vertical position. The gas spring will hold it in place once the tension is correctly set.
5.2. Regolazione dell'inclinazione
The monitor can be tilted up or down to reduce glare and improve viewangoli di inclinazione.

Image 5.1: The monitor can be tilted from -90° to +85°.
5.3. Regolazione della rotazione
Swivel the monitor left or right to share your screen with others or adjust your viewangolo di ing.

Image 5.2: The monitor can swivel +/-90°.
5.4. Regolazione della rotazione
Ruotare il monitor di 360 gradi per passare dall'orientamento orizzontale a quello verticale e viceversa.

Image 5.3: The monitor can rotate 360° for landscape or portrait viewing.
6. Manutenzione
- Pulizia: Pulire il braccio del monitor con un panno morbido eamp stoffa. Evitare detergenti abrasivi.
- Controlli periodici: Controllare regolarmente tutte le viti e i collegamenti per assicurarsi che siano ben serrati e sicuri. Serrare nuovamente se necessario.
- Regolazione della molla a gas: If your monitor's weight changes, or if the arm starts to drift, readjust the gas spring tension as described in Section 4.4.
7. Risoluzione Dei Problemi
- Monitor sags or drops: The gas spring tension is too low for the monitor's weight. Increase tension by turning the adjustment screw clockwise.
- Monitor springs up or is difficult to push down: The gas spring tension is too high for the monitor's weight. Decrease tension by turning the adjustment screw counter-clockwise.
- Arm is unstable: Assicurare la scrivaniaamp or grommet mount is securely tightened to the desk. Check all arm connections for tightness.
- Monitor does not rotate/tilt/swivel smoothly: Check for any obstructions. Ensure the pivot points are not overtightened. A small amount of silicone lubricant can be applied to moving parts if needed, but avoid contact with electrical components.
8. Specifiche
| Numero di modello | Codice articolo: DM6A2 |
| Marca | Duronic |
| Dimensioni del monitor compatibili | 13 - 32 pollici |
| Capacità di peso per braccio | Fino a 9 kg (19.8 libbre) |
| Compatibilità VESA | 75x75mm, 100x100mm |
| Gamma di inclinazione | da -90° a +85° |
| Gamma girevole | +/- 90 ° |
| Rotazione | 360° (Paesaggio/Ritratto) |
| Opzioni di montaggio | Scrivania Clamp, montaggio passacavo |
| Scrivania Clamp Spessore | 15 mm - 100 mm |
| Spessore del supporto passacavo | 15 mm - 50 mm |
| Materiale | Alluminio, Metallo |
9. Garanzia e supporto
For warranty information or technical support, please refer to the documentation included with your purchase or visit the official Duronic website. If you encounter any issues not covered in this manual, please contact Duronic customer service for assistance.