
1. Introduzione
Thank you for choosing the LEOTEC Portable AM FM Radio. This compact and lightweight radio is designed for convenient listening on the go, offering clear AM and FM reception. This manual provides essential information for safe and effective use of your device. Please read it thoroughly before operation and retain it for future reference.
2. Informazioni sulla sicurezza
- Non esporre l'unità a temperature estreme, alla luce solare diretta o a elevata umidità.
- Evitare di far cadere la radio o di sottoporla a forti urti.
- Tenere il dispositivo lontano dall'acqua e da altri liquidi.
- Utilizzare solo il tipo di batteria specificato (2 batterie AAA).
- Non tentare di smontare o modificare la radio. Ciò invaliderà la garanzia.
- Pulire il dispositivo con un panno morbido e asciutto. Non utilizzare detergenti abrasivi o solventi.
- Ascoltare musica ad alto volume per periodi prolungati può causare danni permanenti all'udito.
3. Contenuto della confezione
- Radio AM FM portatile LEOTEC
- Auricolari cablati (jack da 3.5 mm)
- Manuale d'uso
4. Prodotto finitoview
The LEOTEC Portable AM FM Radio is designed for simplicity and portability. It features an intuitive interface and a compact form factor, making it ideal for various activities.

Immagine: Frontale view of the LEOTEC Portable AM FM Radio, showing the display, controls, and connected earphones.

Image: Diagram illustrating the AM (530-1700KHz) and FM (88-108MHz) frequency ranges supported by the radio, with radio waves emanating from the device.

Immagine: Primo piano view highlighting the radio's controls: Function Switch (OFF/AM/FM), Volume Control, and Tuning Control. A belt clip is also visible on the side.

Image: A size comparison of the LEOTEC Portable AM FM Radio next to a smartphone, illustrating its compact dimensions (1.85 x 0.63 x 3.54 inches).
5. Impostazione
5.1 Installazione della batteria
The radio requires 2 AAA batteries (not included) for operation.
- Individuare il coperchio del vano batteria sul retro della radio.
- Far scorrere il coperchio per aprirlo.
- Inserire 2 batterie AAA, assicurandosi della corretta polarità (+ e -).
- Chiudere saldamente il coperchio del vano batterie.
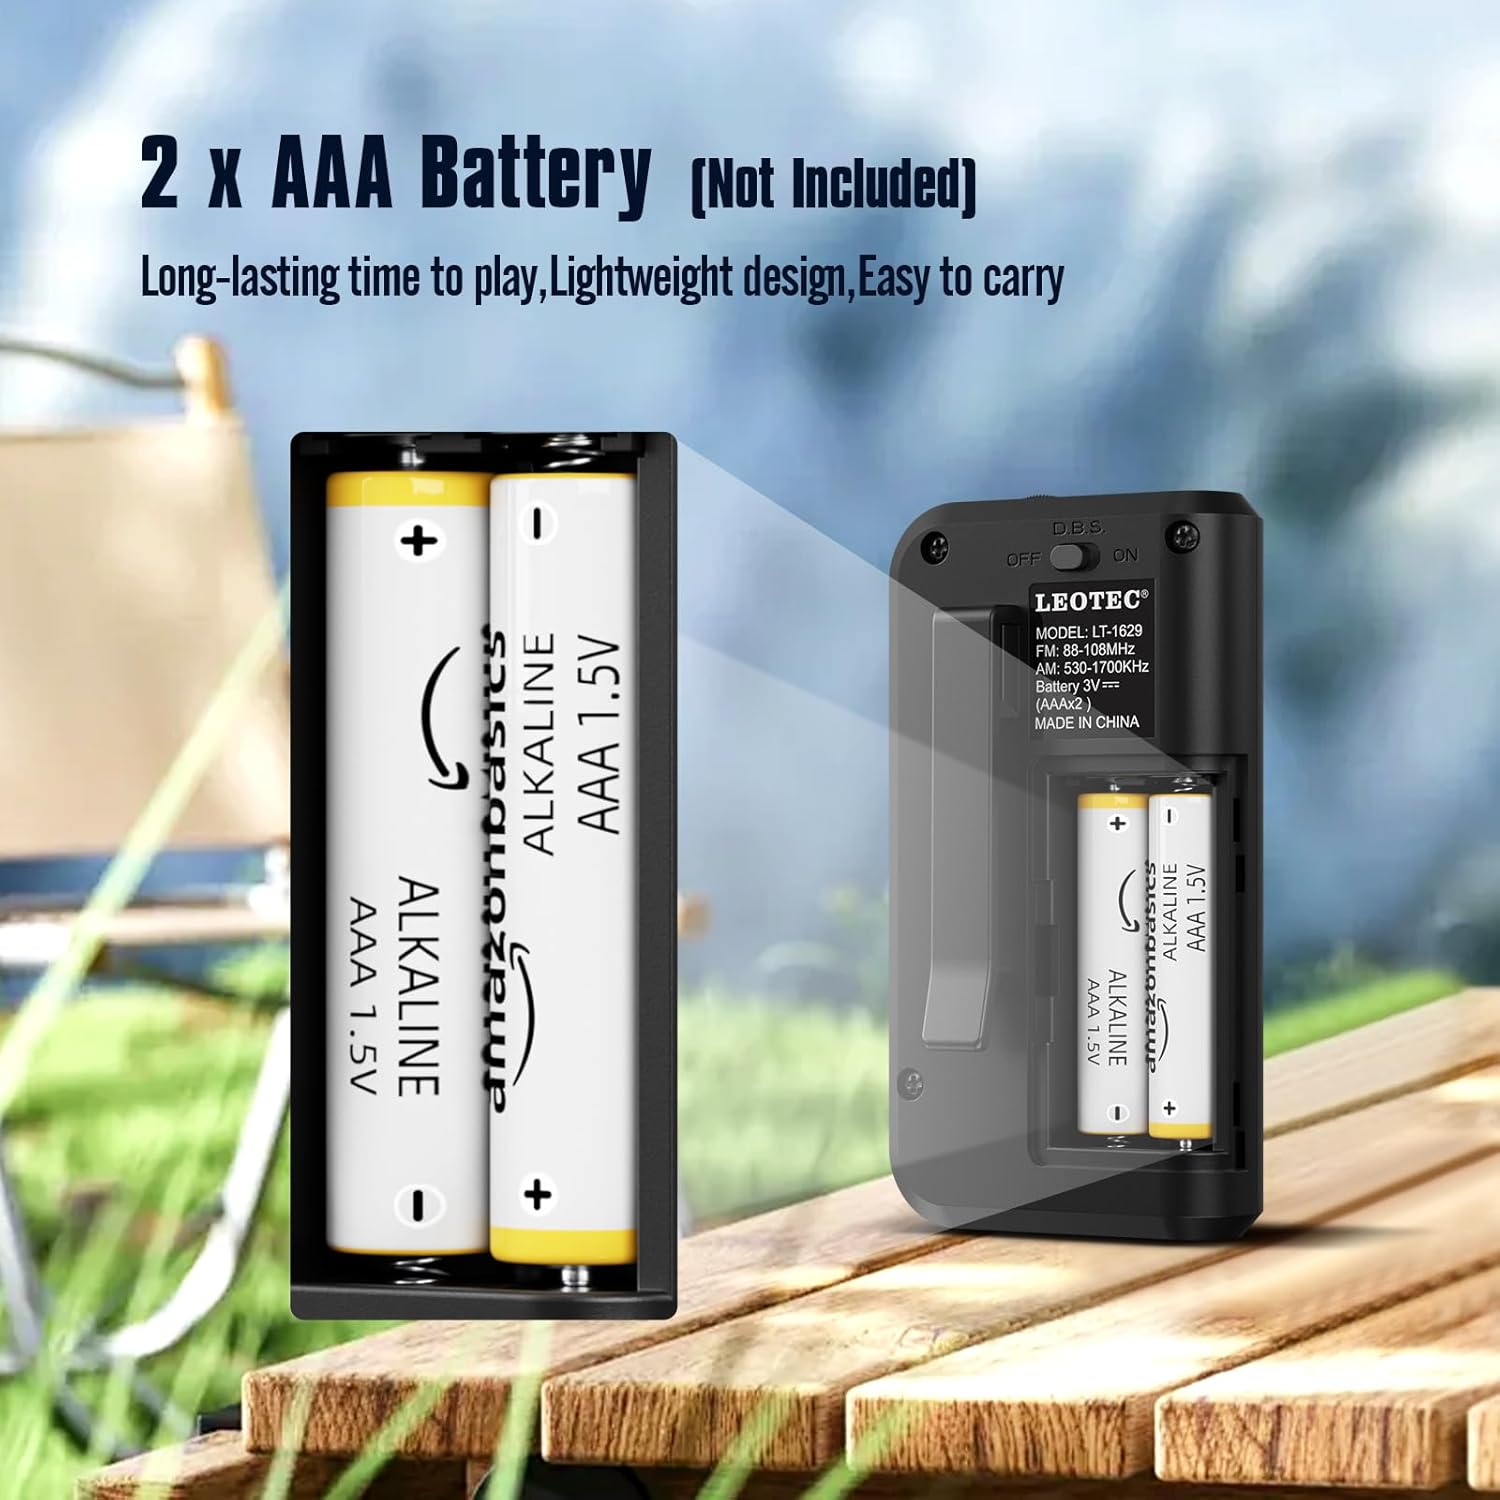
Image: The open battery compartment of the radio, clearly showing the slots for two AAA batteries and their polarity markings.
5.2 Collegamento delle cuffie
The radio operates with earphones, which also function as the antenna for optimal reception.
- Locate the 3.5mm earphone jack on the top of the radio.
- Insert the earphones firmly into the jack.

Immagine: un primo piano view of the radio's top, showing the 3.5mm earphone jack where headphones are to be connected. The earphones serve as the antenna.
6. Istruzioni per l'uso
6.1 Accensione/spegnimento
To power on the radio, long press the 'Power' button. The display will show the time and enter standby status. Short press the 'Power' button again to enter radio mode.
Video: This video demonstrates how to long press the power button to turn on the radio and enter standby mode, then short press it again to activate radio mode. It also shows switching between FM, AM, and MP3 modes.
6.2 Switching AM/FM/MP3 Modes
In radio mode, short press the 'MODE' button to cycle through FM, AM, and MP3 modes. Ensure earphones are plugged in for FM reception.
6.3 Sintonizzazione delle stazioni
Sintonizzazione manuale: In FM or AM mode, short press the 'TUNER' key to adjust frequencies by 0.1 stepping.
Scansione automatica: Long press the 'M+/SCAN' button to automatically search for and store available stations.
6.4 Controllo del volume
Use the 'VOLUME +/-' buttons to adjust the listening volume. The volume level ranges from U00 to U32.
6.5 Impostazione del timer di spegnimento
The radio features a sleep timer function. Press the 'SLEEP' button to set the radio to turn off automatically after a set period (e.g., 60, 30 minutes, or OFF).
Video: This video demonstrates various functions including inserting a TF card to use the radio as an MP3 player, setting the sleep timer, adjusting the time, and using the button lock function.
6.6 Impostazione dell'ora
To set the time, long press the 'TIME' button. Use the 'TUNER' buttons to adjust hours and minutes, and the 'MODE' button to switch between 12H and 24H format.
6.7 Funzione di blocco dei pulsanti
To prevent accidental button presses, long press the 'LOCK' button to activate or deactivate the button lock function.
6.8 Using as MP3 Player
Insert a TF (MicroSD) card (not included) into the designated slot. The radio can then be switched to MP3 mode to play audio files dalla carta.
7. Manutenzione
- Pulizia: Wipe the radio with a soft, lint-free cloth. Do not use liquid or aerosol cleaners.
- Magazzinaggio: When not in use for extended periods, remove the batteries to prevent leakage and store the radio in a cool, dry place.
8. Risoluzione Dei Problemi
| Problema | Possibile causa | Soluzione |
|---|---|---|
| Nessun potere | Le batterie sono scariche o inserite in modo errato. | Sostituire le batterie o controllare la polarità. |
| Scarsa ricezione | Earphones not fully plugged in or weak signal. | Ensure earphones are securely connected. Try adjusting your position or the earphone cable. |
| Nessun suono | Volume is too low or earphones are faulty. | Increase volume. Try different earphones. |
| I pulsanti non rispondono | La funzione di blocco dei pulsanti è attiva. | Long press the 'LOCK' button to deactivate. |
9. Specifiche
| Caratteristica | Dettaglio |
|---|---|
| Marca | LEOTEC |
| Numero di modello | ccb5cd8d-9570-4ebc-83c2-baec0349bbd0 |
| Dimensioni del prodotto | 2.02 x 1.02 x 3.66 pollici |
| Peso dell'articolo | 1.6 once |
| Fonte di alimentazione | 2 batterie AAA (non incluse) |
| Bande radio supportate | AM/FM |
| Intervallo di frequenza AM | Da 530 a 1700 kHz |
| Gamma di frequenza FM | Frequenza 88-108 MHz |
| Tecnologia di connettività | Ausiliario (jack per cuffie da 3.5 mm) |
| Caratteristica speciale | Leggero, compatto |
10. Garanzia e supporto
For warranty information or technical support, please refer to the contact details provided with your purchase or visit the official LEOTEC websito. Conservare la ricevuta d'acquisto come prova d'acquisto per eventuali reclami in garanzia.