
1. Introduzione
This manual provides detailed instructions for the installation, operation, and maintenance of your ZALMAN P60 Mid Tower PC Case. Please read this manual thoroughly before beginning assembly to ensure correct setup and optimal performance. Keep this manual for future reference.
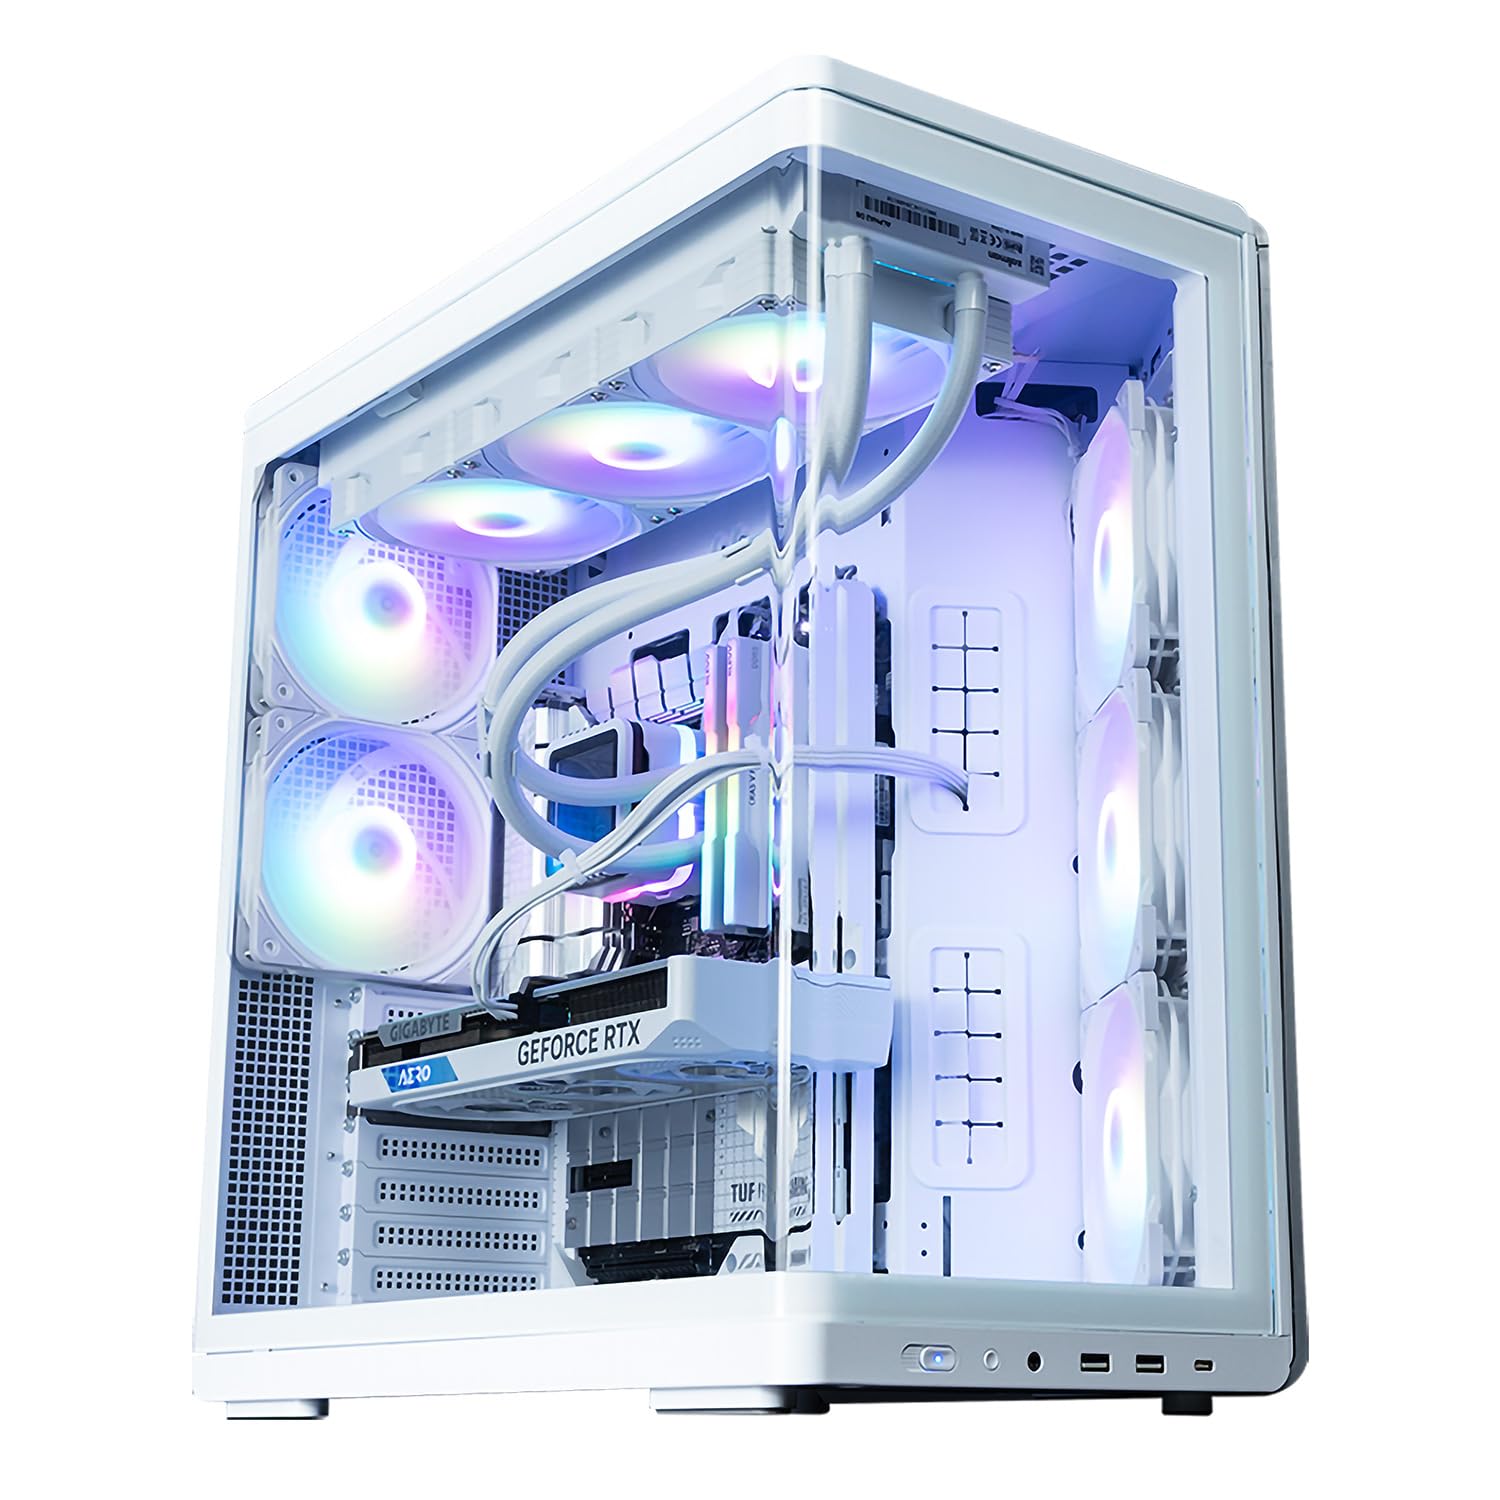
Image 1.1: ZALMAN P60 White Mid Tower PC Case with internal RGB lighting, showcasing its curved glass panel and spacious interior.
2. Informazioni sulla sicurezza
- Scollegare sempre l'alimentatore dalla presa a muro prima di installare o rimuovere qualsiasi componente.
- Handle all components with care to prevent damage. Static electricity can harm sensitive electronic parts. Consider using an anti-static wrist strap.
- Tenere le parti e gli accessori di piccole dimensioni fuori dalla portata dei bambini.
- Assicurare una corretta ventilazione attorno al case del PC per evitare il surriscaldamento.
- Non tentare di modificare la struttura della custodia, poiché ciò potrebbe invalidare la garanzia e comportare rischi per la sicurezza.
3. Contenuto della confezione
Si prega di verificare che tutti gli articoli elencati di seguito siano presenti nel pacco:
- ZALMAN P60 Mid Tower PC Case
- Kit di accessori (viti, distanziatori, fascette)
- Guida rapida
- Staffa di supporto GPU
- Pre-installed Fans: 3x 120mm Reverse ARGB Fans (Side), 2x 120mm ARGB Fans (Rear)
4. Caratteristiche del prodotto
- Curved Tempered Glass Design: Features integrated curved tempered glass on the front and side, creating an open design that highlights ARGB lighting and allows for neat cable management.
- Flusso d'aria ottimizzato: Includes a total of five 120mm ARGB fans for angled side airflow, with support for up to 11 fans. This ensures robust cooling performance and ideal airflow.
- Interni spaziosi: Fornisce ample space for graphics cards up to 435mm in length and supports 360mm radiators, offering flexible compatibility for various builds.
- Compatibilità della scheda madre: Compatible with ATX, Micro-ATX, and Mini-ITX motherboards, including those with rear-facing connectors from brands like ASUS, MSI, and GIGABYTE.
- Supporto GPU dedicato: Standard equipped with a height-adjustable dedicated GPU support bracket for secure installation of large graphics cards.

Image 4.1: The ZALMAN P60 case design, highlighting its aesthetic appeal and available color options.
5. Configurazione e installazione
5.1. Preparazione del caso
- Posizionare la custodia su una superficie piana e stabile.
- Carefully remove the side panels by unscrewing the thumbscrews at the rear of the case and sliding the panels off.
5.2. Installazione della scheda madre
- Installare la schermatura I/O nell'apertura del vassoio della scheda madre dall'interno del case.
- Align the motherboard with the pre-installed standoffs. If necessary, install additional standoffs from the accessory kit for your specific motherboard size (ATX, Micro-ATX, Mini-ITX).
- Fissare la scheda madre con le viti fornite.
5.3. Installazione dell'unità di alimentazione (PSU)
- Mount the PSU into its designated compartment at the rear of the case.
- Fissare l'alimentatore con le viti del kit di accessori.
5.4. Installazione dell'unità di archiviazione
The ZALMAN P60 supports 1x 2.5/3.5" Combo, 1x 2.5", and 2x 3.5" drives.
- Unità da 2.5": Locate the 2.5" drive mounts, typically behind the motherboard tray. Secure the SSDs using the provided screws.
- Unità da 3.5": Install HDDs into the drive cages, usually located in the lower chamber. Slide the drives into the trays and secure them.
5.5. Installazione della scheda grafica (GPU)
- Rimuovere le coperture degli slot di espansione necessari nella parte posteriore del case.
- Inserisci la scheda grafica nello slot PCIe sulla scheda madre.
- Fissare la scheda grafica con le viti.
- Utilize the included height-adjustable GPU support bracket to prevent sag for larger cards. Adjust its height to firmly support the GPU.

Immagine 5.1: Interno view highlighting the GPU support bracket and drive bay area.
5.6. Installazione di ventole e radiatori
The ZALMAN P60 comes with 5 pre-installed ARGB fans and supports additional fans and radiators as detailed in the specifications.
- Altri fan: Mount additional 120mm or 140mm fans to the top, side, or bottom mounts as needed, securing them with screws.
- Radiatori: Install liquid cooling radiators to the top, rear, or bottom mounts, ensuring proper alignment and securing with screws.

Immagine 5.2: Interno view illustrating various fan mounting locations and radiator support.
5.7. Gestione dei cavi
Utilizzate i fori per il passaggio dei cavi e i punti di fissaggio dietro il vassoio della scheda madre per gestire i cavi in modo ordinato. Questo migliora il flusso d'aria e l'estetica.
6. Funzionamento
6.1. Accensione
After all components are installed and cables are connected, close the side panels. Connect the power cable to the PSU and a wall outlet. Press the power button on the front I/O panel to start your PC.
6.2. Controllo dell'illuminazione ARGB
The pre-installed ARGB fans can be controlled via your motherboard's ARGB software (if compatible) or a dedicated ARGB controller (if included or purchased separately). Refer to your motherboard manual for specific ARGB header connections and software instructions.
7. Manutenzione
7.1. Pulizia dei filtri antipolvere
Regularly clean the dust filters to maintain optimal airflow and cooling performance. Dust filters are typically located at the top, front, and bottom of the case and can be easily removed for cleaning.
7.2. Pulizia generale
Use a soft, dry cloth to wipe down the exterior of the case. For stubborn marks, a slightly damp cloth can be used. Avoid abrasive cleaners or solvents that may damage the finish or tempered glass.
8. Risoluzione Dei Problemi
- PC not powering on: Ensure all power cables (24-pin ATX, 8-pin CPU, GPU power) are securely connected. Check the power switch on the PSU. Verify front panel header connections to the motherboard.
- Fans not spinning/RGB not lighting up: Check fan and ARGB cable connections to the motherboard or controller. Ensure ARGB software is correctly configured.
- Surriscaldamento: Verify all fans are spinning correctly and are oriented for proper airflow (intake/exhaust). Clean dust filters. Ensure no cables are obstructing airflow.
- Componenti sciolti: Periodically check that all screws and connections are secure, especially after moving the PC.
9. Specifiche
| Caratteristica | Specificazione |
|---|---|
| Marca | ZALMAN |
| Nome del modello | P60 |
| Tipo di caso | Mid Tower |
| Colore | Bianco |
| Dimensioni del prodotto (L×P×A) | Dimensioni: 290 × 475 × 478 mm |
| Peso del prodotto | 10.2 kg |
| Materiali | Acciaio, Vetro Temperato, Plastica |
| Schede madri supportate | ATX, Micro ATX, Mini ITX |
| Alimentazione supportata | ATX (Rear Mount) |
| Alloggiamenti unità | 1x 2.5"/3.5" Combo, 1x 2.5", 2x 3.5" |
| Slot di espansione | 7 |
| Included Case Fans | Side: 3x 120mm Reverse ARGB, Rear: 2x 120mm ARGB |
| Supported Case Fans | Top: 3x 120mm / 2x 140mm, Side/Bottom: 3x 120mm, Rear: 2x 120mm |
| Supported Radiators | Top: 360/280/240/140/120mm, Rear: 120mm, Bottom: 360/240/120mm |
| Altezza libera del dissipatore della CPU | Massimo 170mm |
| Spazio libero sulla lunghezza della GPU | Massimo 435mm |
| Spazio libero sulla lunghezza dell'alimentatore | Massimo 180mm |
| Porte I / O anteriori | 1x USB 20Gbps Type-C, 2x USB 5Gbps Type-A, 1x Audio Jack |
| Caratteristiche speciali | Curved Tempered Glass, Dual-Chamber Structure, Included GPU Support Bracket, ARGB Lighting |
10. Garanzia e supporto
10.1. Informazioni sulla garanzia
The ZALMAN P60 Mid Tower PC Case comes with a Garanzia di 1 anno from the date of purchase. This warranty covers manufacturing defects and faulty materials under normal use. It does not cover damage caused by misuse, accidents, unauthorized modifications, or improper installation.
10.2. Supporto tecnico
For technical assistance, troubleshooting, or warranty claims, please visit the official ZALMAN website or contact their customer support. Ensure you have your product model and proof of purchase ready when seeking support.
Official ZALMAN Websito: www.zalman.com