
1. Introduzione
Thank you for choosing the XTUGA J02S Wireless In-Ear Monitor System. This system provides high-fidelity stereo audio monitoring with low latency, designed for musicians, singers, and performers on stage, in church, or for content creation. This manual will guide you through the setup, operation, and maintenance of your new wireless IEM system.
2. Contenuto della confezione
Si prega di selezionare la casella per i seguenti elementi:
- 1 x XTUGA J02S Transmitter
- 1 x XTUGA J02S Receiver
- 1 x 3.5mm to 3.5mm Connecting Cable
- Cavo di ricarica 1 x USB-C
- 1 x 6.35mm Audio Adapter Plug
- 1 x Manuale utente

3. Prodotto finitoview
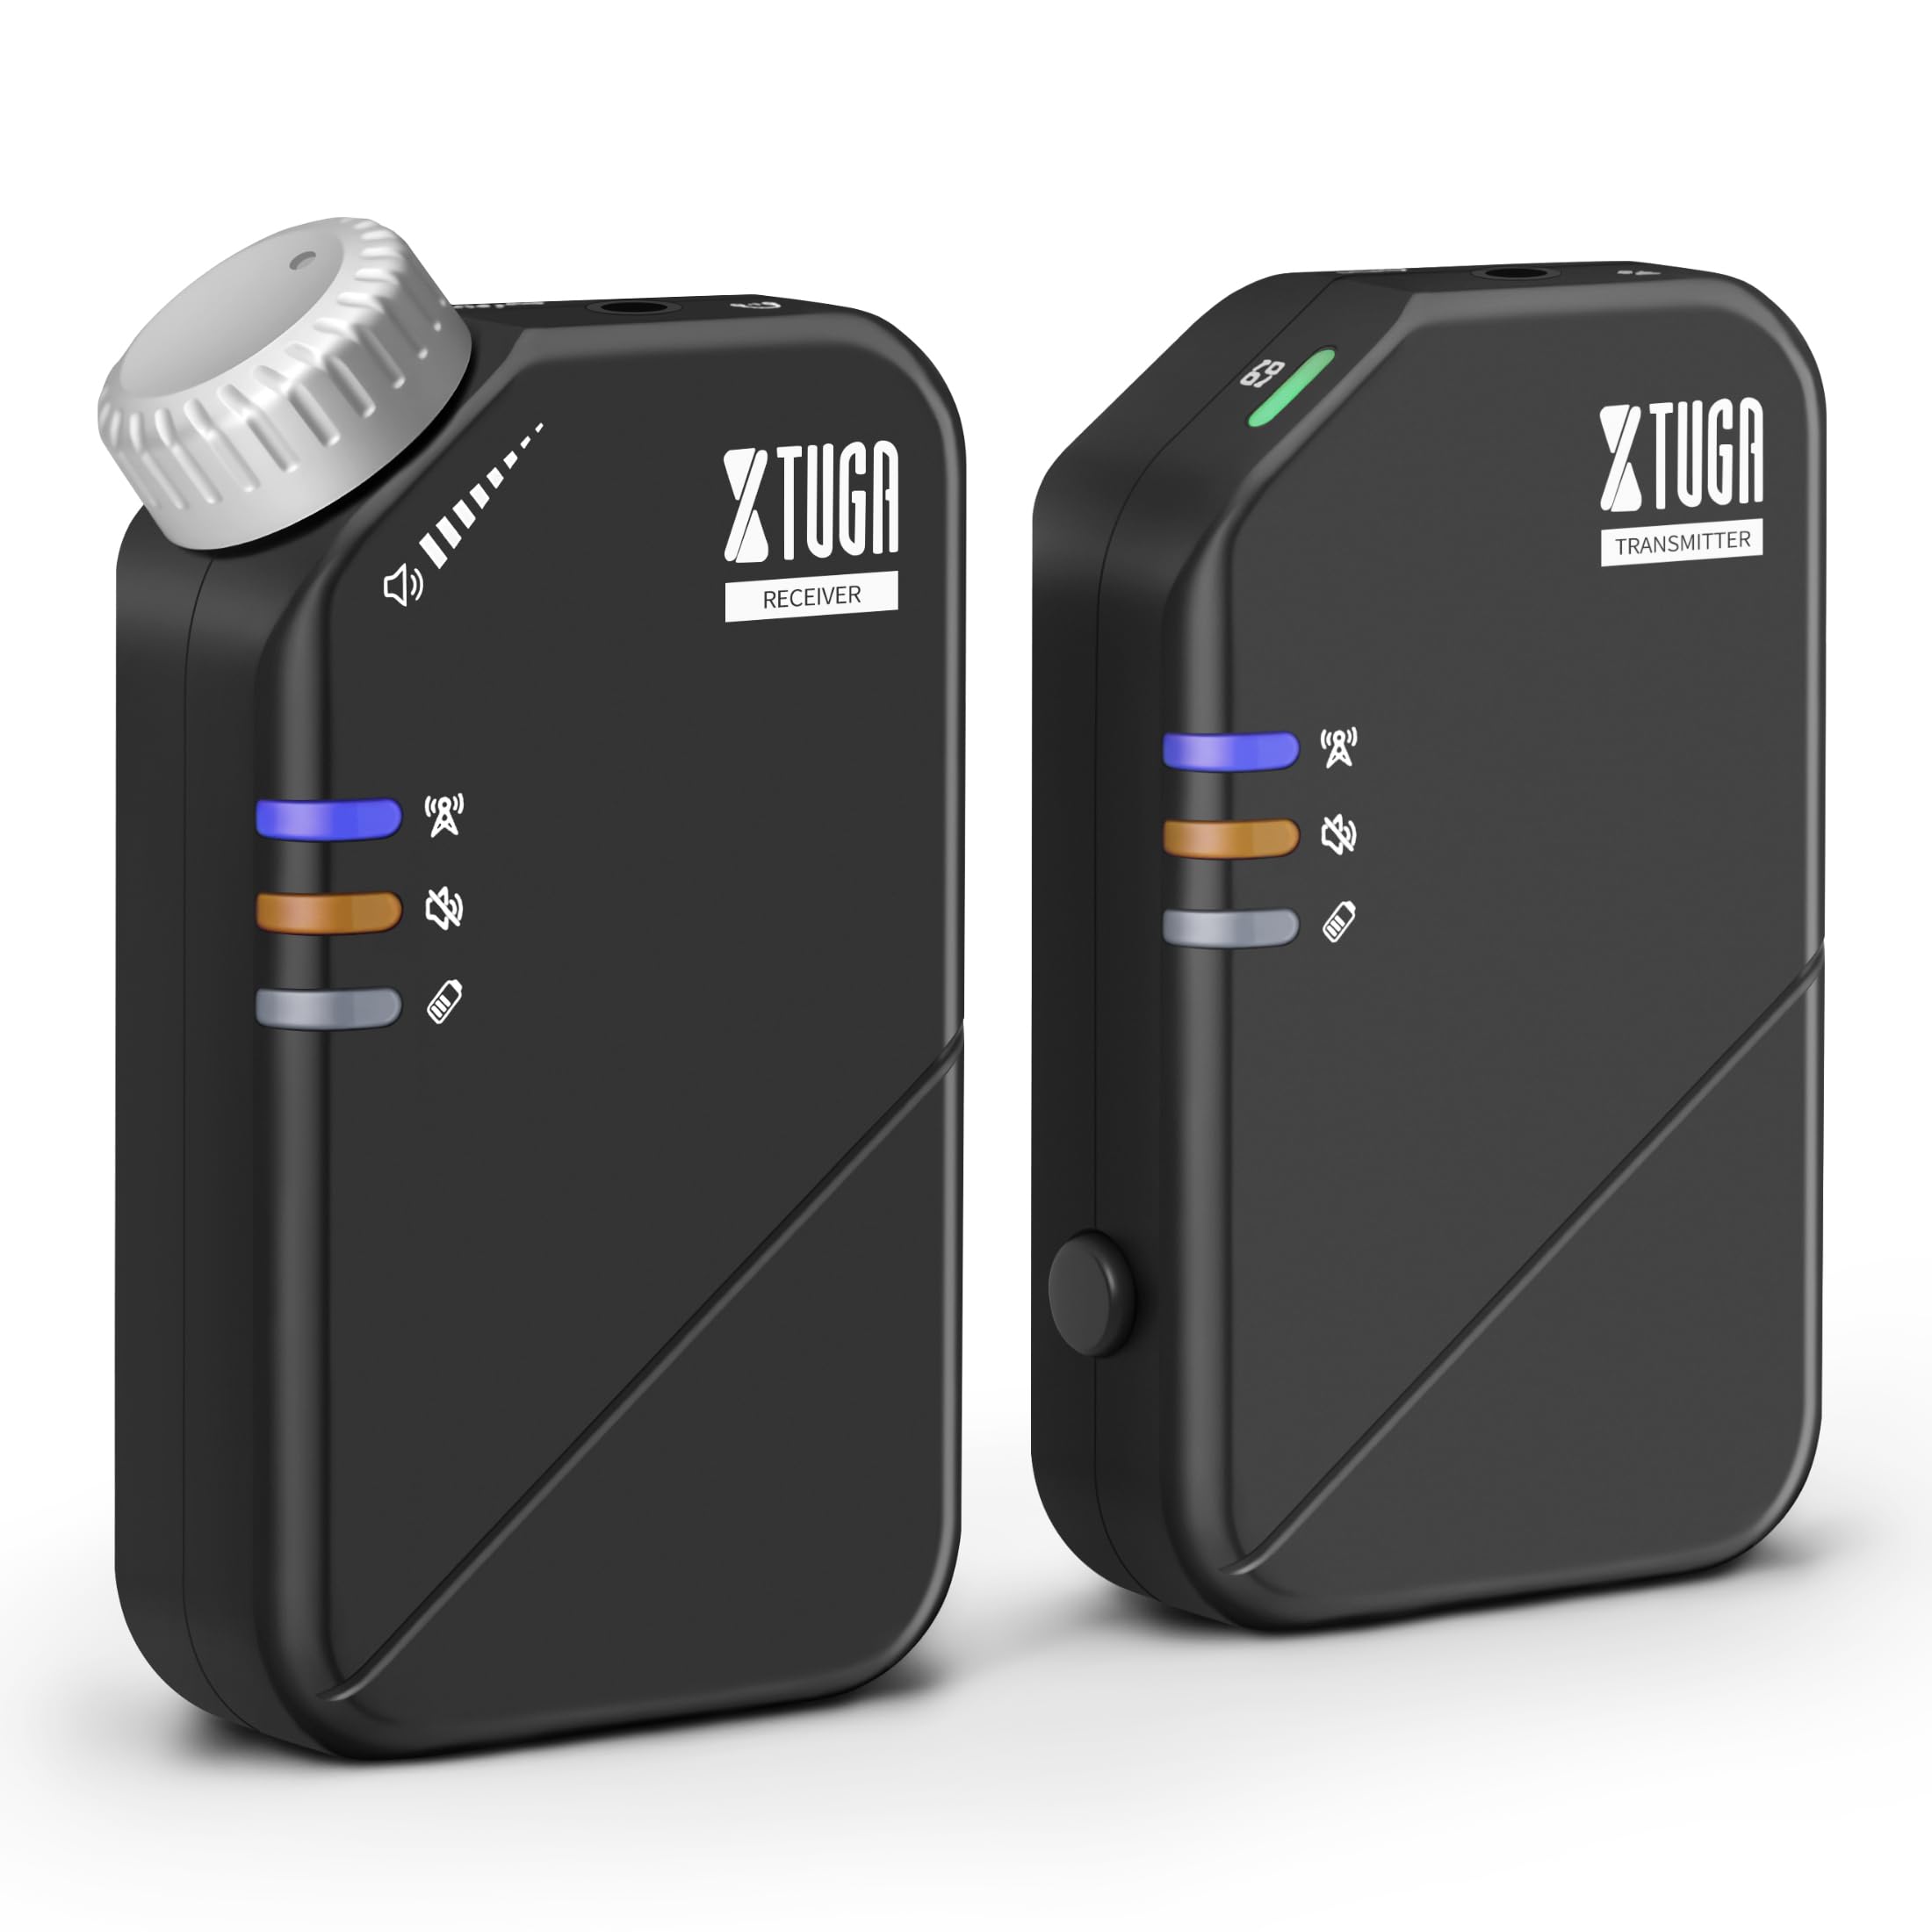
The XTUGA J02S system consists of a compact transmitter and receiver unit, designed for portability and ease of use. Both units feature durable ABS construction and integrated belt clips for convenient attachment during performances.
4. Impostazione
4.1 Ricarica delle unità
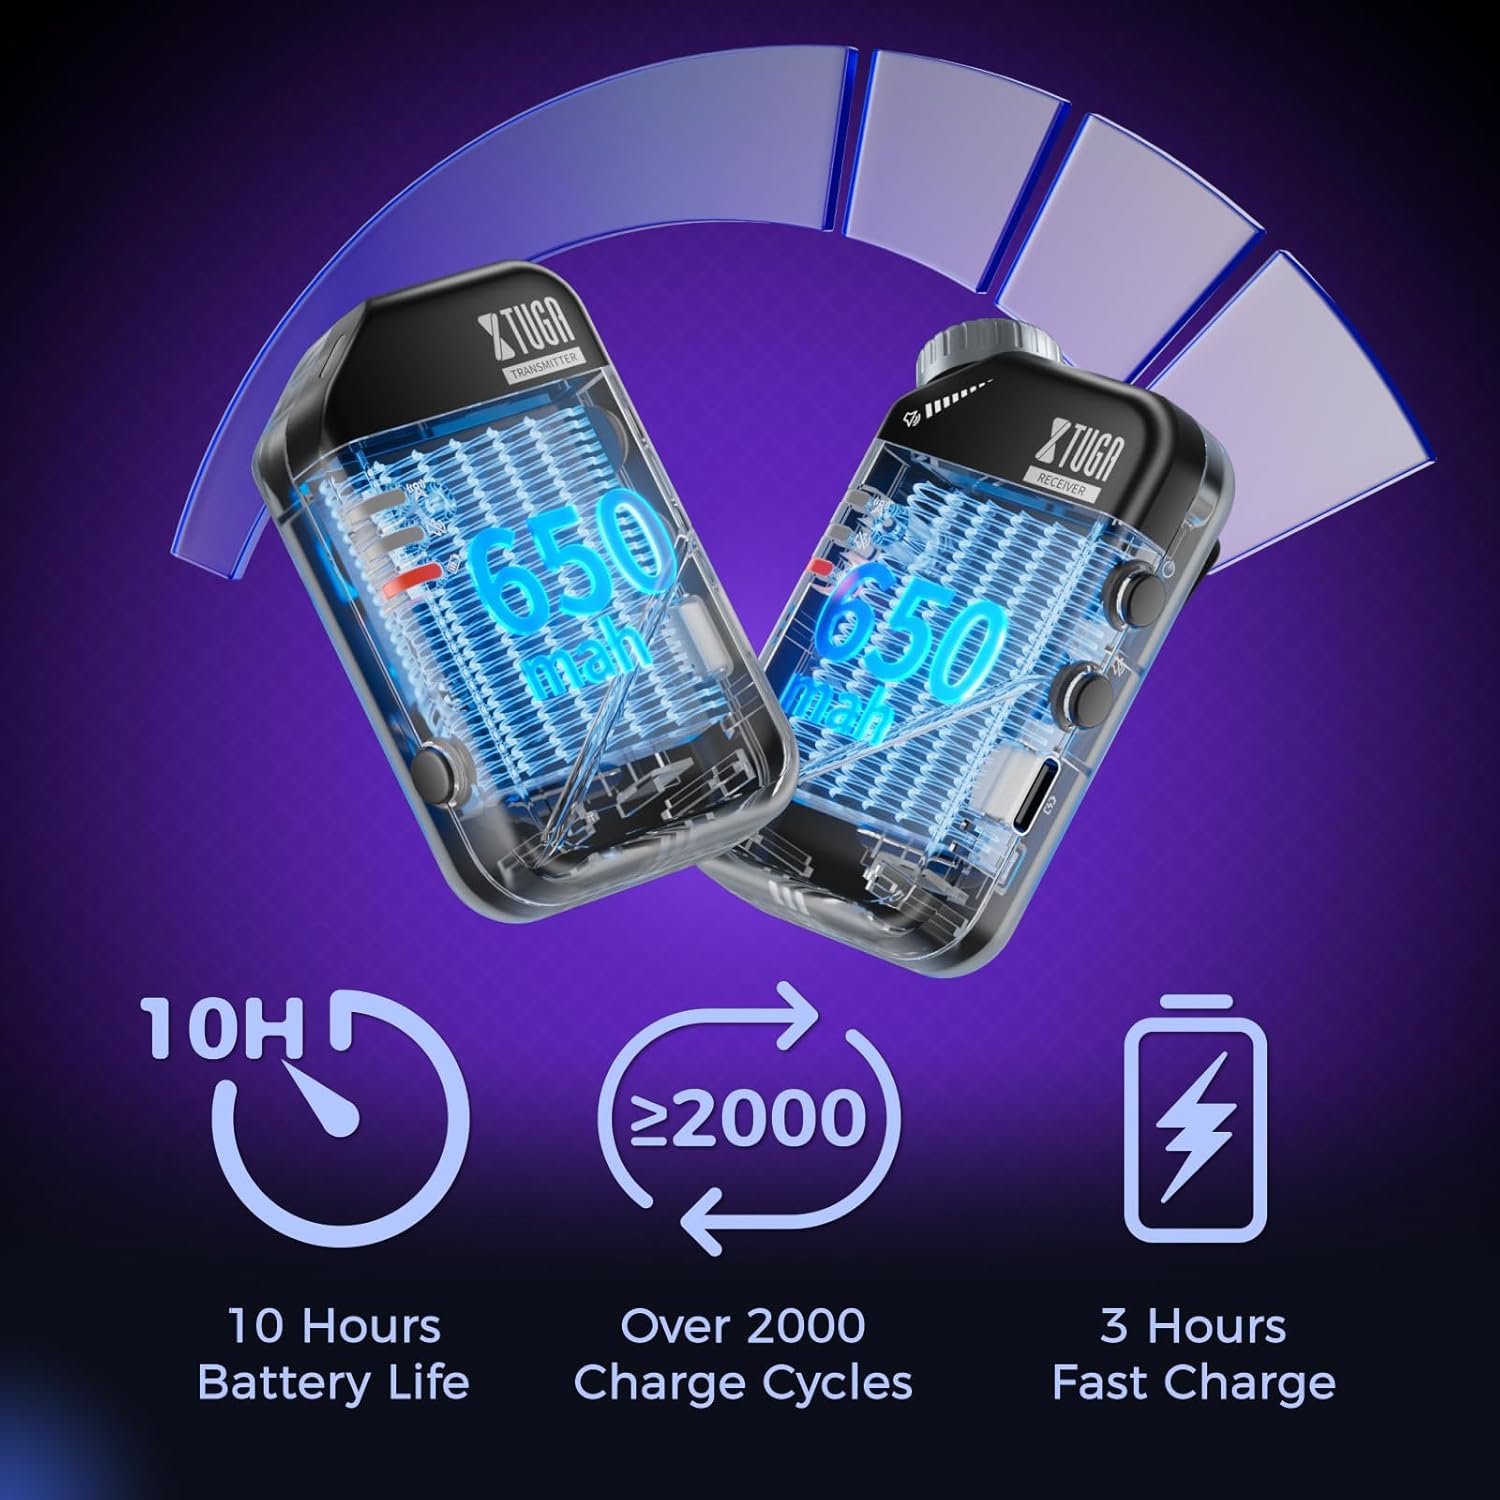
Before first use, fully charge both the transmitter and receiver using the provided USB-C charging cable. A red light will flash to indicate low battery and will turn solid red while charging, turning off when fully charged.
4.2 Collegamento del trasmettitore
- Connect the 3.5mm connecting cable to the 'INPUT' jack on the transmitter.
- If your audio source has a 6.35mm output, use the provided 6.35mm adapter plug.
- Plug the other end of the connecting cable into your audio source (e.g., mixer, audio interface, phone, sound card).
4.3 Collegamento del ricevitore
- Plug your in-ear monitors or headphones into the 'OUTPUT' jack on the receiver.
- Clip the receiver to your belt or waistband for convenient monitoring.
4.4 Abbinamento delle unità
The units are typically pre-paired. If re-pairing is needed:
- Accendere sia il trasmettitore che il ricevitore.
- The blue indicator light will be solid when connected. A flashing blue light indicates no connection.
- If they do not connect automatically, refer to the detailed pairing instructions in the included user manual.
5. Istruzioni per l'uso
5.1 Accensione/spegnimento
Long press the power button on each unit to turn it on or off.
5.2 Funzione Mute
Press the mute button on either the transmitter or receiver to mute the audio. A yellow light indicates the unit is muted.

5.3 Commutazione Mono/Stereo
The system supports both mono and stereo modes. Use the dedicated button on the transmitter to switch between modes. A green light indicates mono mode, while no light indicates stereo mode.
5.4 Controllo del volume
Adjust the volume directly on the receiver unit using the tactile volume knob. This allows for precise, on-the-fly adjustments without needing to look at the unit.

6. Caratteristiche principali
- Suono ad alta fedeltà: The 2.4GHz wireless system offers a low-noise design (SNR>100dB) and ultra-low latency (≤4.5ms mono, <12ms stereo) for clear audio.
- Portata wireless estesa: Enjoy freedom of movement with a wireless transmission range of up to 164ft (50m).
- Batteria a lunga durata: Each unit provides up to 10 hours of continuous use on a single 3-hour fast charge, with a lifespan of over 2000 charge cycles.
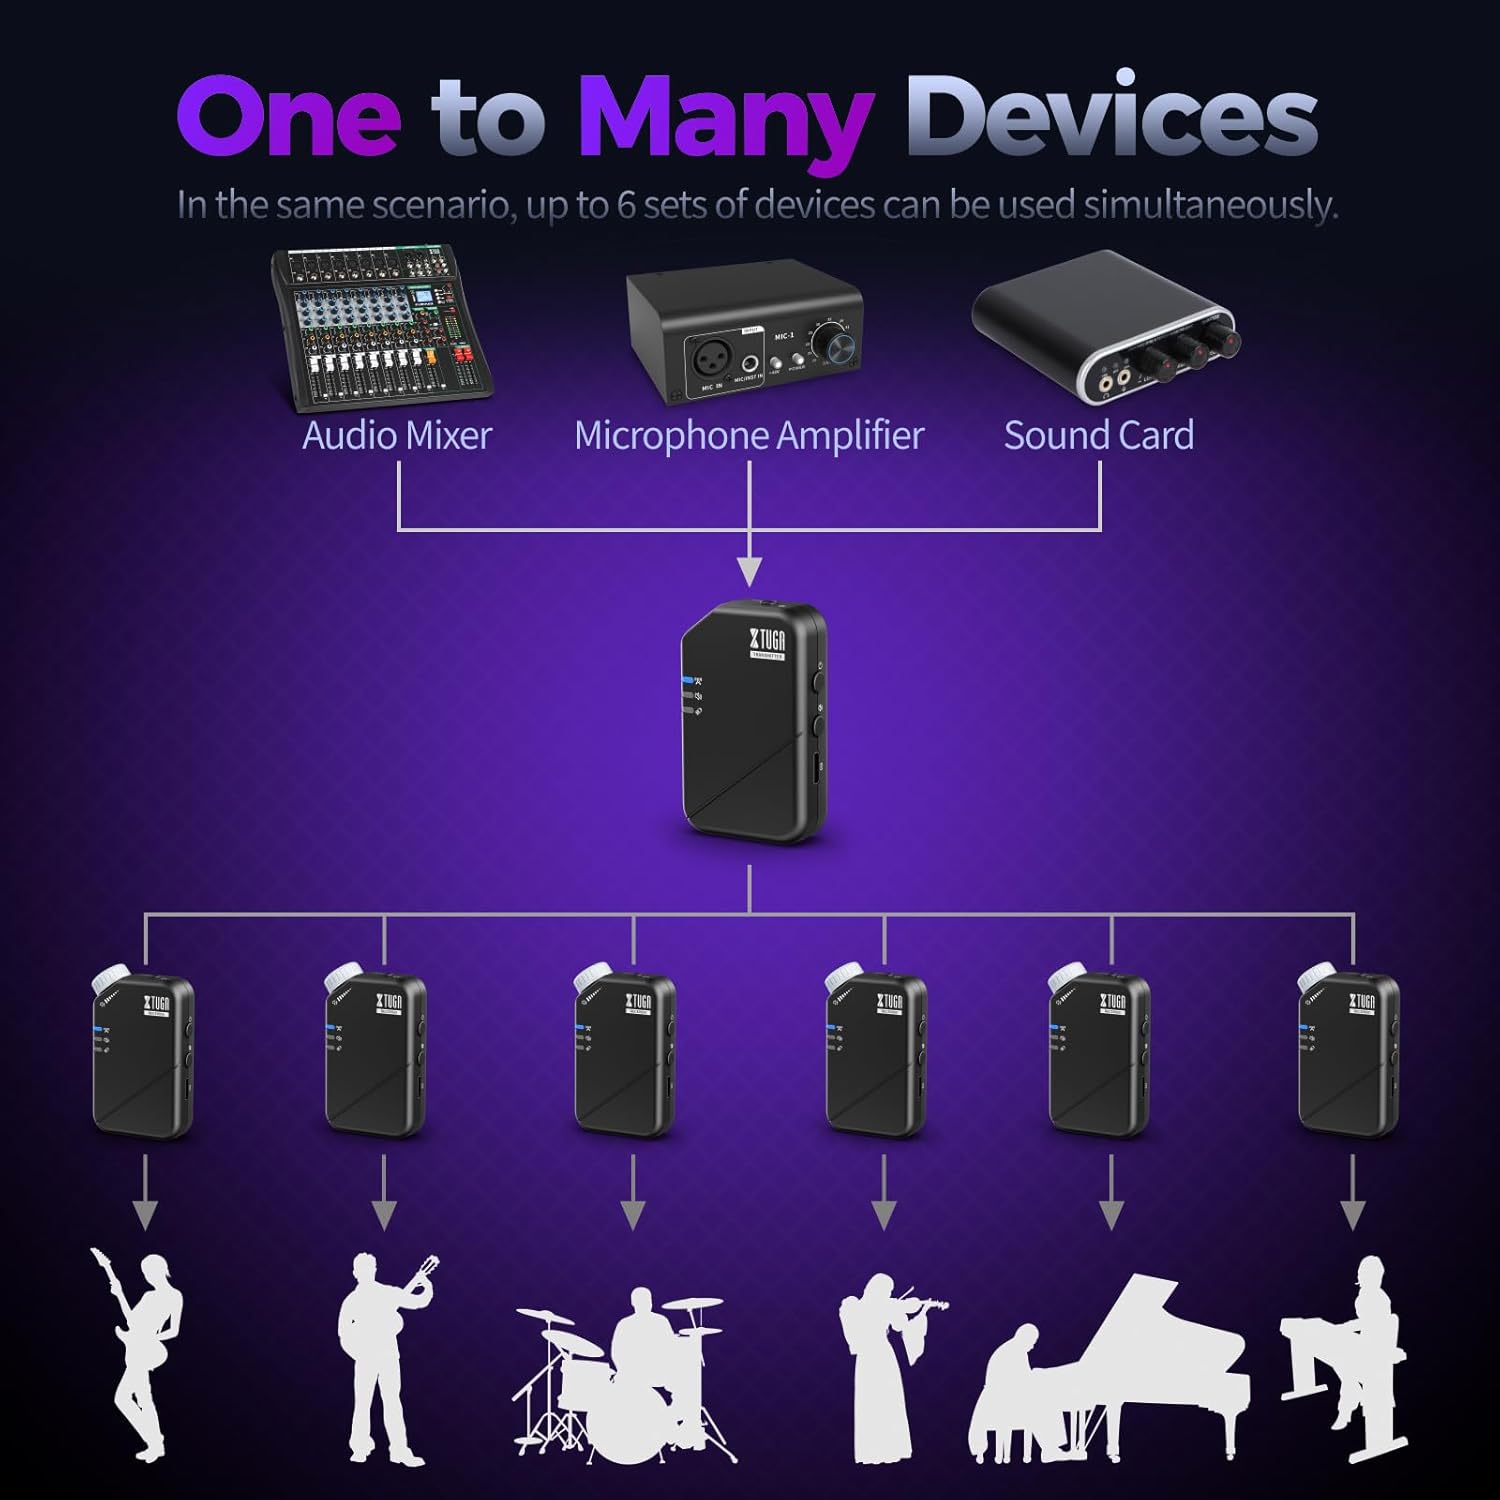
- One Transmitter to Many Receivers: A single transmitter can send signals to multiple receivers simultaneously (up to 6 pairs), ideal for band monitoring.


7. Specifiche
| Specificazione | Valore |
|---|---|
| Nome del modello | J02S-JT |
| Tecnologia di connettività | Senza fili (2.4 GHz) |
| Gamma di frequenza | Da 20 a 24 kHz |
| Samptasso di ling | 48KHz/24bit |
| Low Latency (Mono) | ≤4.5 ms |
| Low Latency (Stereo) | <12 ms |
| wireless Range | Fino a 164 piedi (50 m) |
| Durata della batteria | 10 ore |
| Tempo di ricarica | 3 ore |
| Materiale | Acrilonitrile Butadiene Stirene (ABS) |
| Presa per cuffie | 3.5mm (with 6.35mm adapter) |
| Ricevitori compatibili | Up to 6 pairs per transmitter |
| Peso dell'articolo | 7 once (0.2 kg) |
| Dimensioni del prodotto | 6.89 x 4.72 x 1.97 pollici |

8. Risoluzione Dei Problemi
8.1 Nessuna uscita audio
- Assicurarsi che sia il trasmettitore che il ricevitore siano accesi e completamente carichi.
- Check that the units are successfully paired (solid blue indicator light).
- Verify that your headphones/IEMs are correctly plugged into the receiver's 'OUTPUT' jack.
- Regolare la manopola del volume sul ricevitore.
- Confirm the audio source is active and connected correctly to the transmitter's 'INPUT'.
- Check if the mute function is active (yellow indicator light). Deactivate if necessary.
8.2 Intermittent Signal/Dropouts
- Assicurarsi che il trasmettitore e il ricevitore si trovino entro un raggio operativo di 50 m (164 piedi).
- Minimize physical obstructions (walls, large metal objects) between the units.
- Avoid areas with high 2.4GHz wireless interference (e.g., multiple Wi-Fi routers, other wireless devices).
- Ensure units are fully charged to maintain optimal signal strength.
8.3 Problemi di latenza
- The system is designed for low latency. Ensure you are operating within optimal conditions (clear line of sight, minimal interference).
- Consider switching to mono mode if stereo latency is noticeable, as mono mode offers lower latency.
9. Manutenzione
- Pulizia: Use a soft, dry cloth to clean the units. Avoid liquid cleaners or solvents.
- Magazzinaggio: Conservare il sistema in un luogo fresco e asciutto, lontano dalla luce solare diretta e da temperature estreme.
- Cura della batteria: For optimal battery longevity, avoid completely draining the battery frequently. Charge the units regularly, even if not in constant use.
- Gestione: While durable, avoid dropping the units or subjecting them to harsh impacts to prevent damage to internal components.
10. Garanzia e supporto
XTUGA products are designed for reliability and performance. For warranty information, technical support, or service inquiries, please refer to the contact details provided in the original product packaging or visit the official XTUGA websito. Conservare la ricevuta d'acquisto come prova d'acquisto per eventuali reclami in garanzia.