
1. Introduzione
This manual provides essential information for the safe and effective use of your Brightown 100FT Solar String Lights. Please read all instructions carefully before installation and operation. These lights are designed for outdoor use, featuring durable, shatterproof LED bulbs and dual charging capabilities.
2. Contenuto della confezione
- 1 x Solar String Lights (100FT with 31+2 LED Shatterproof Bulbs)
- 1 pannello solare staccabile
- 2 x Spare LED Bulbs
- 1 x telecomando
- 1 x USB-Type C Cable
- Mounting Accessories (Cable Ties, Spring Clip, Ground Stake, Screws)
- 1 x Manuale utente
3. Importanti istruzioni di sicurezza
- Non montare o posizionare vicino a stufe a gas o elettriche, caminetti, candele o altre fonti di calore simili.
- Do not secure the wiring of the product with staples or nails, or place on sharp hooks or nails. Install only using the mounting kits provided.
- Non lasciare che il prodotto poggi sul cavo di alimentazione o su qualsiasi altro cavo elettrico.
- Non utilizzare il prodotto per scopi diversi da quelli previsti.
- Do not hang other decoration or objects on cord, wire, or light string.
- Non chiudere porte o finestre se clampdanneggiare o danneggiare i prodotti o il cavo.
- Non coprire il prodotto con panni, carta o qualsiasi altro materiale non facente parte del prodotto stesso quando è in uso.
- Leggere e seguire tutte le istruzioni riportate su questo prodotto.
- AVVERTIMENTO: Questo prodotto può esporti a sostanze chimiche, tra cui il piombo, che è noto allo Stato della California come causa di cancro e difetti alla nascita o altri danni riproduttivi. Per maggiori informazioni, vai a www.P65Warnings.ca.gov.
4. Configurazione e installazione
The Brightown Solar String Lights offer flexible installation options to suit your outdoor space. Ensure the solar panel is placed where it receives 7-8 hours of direct sunlight daily for optimal charging.
4.1. Collegamento delle luci
Connect the string lights to the solar panel. The connection is designed for easy plug-and-play setup without requiring special tools or outlets.
4.2. Opzioni di montaggio
Choose the most suitable method for your installation:
- Installazione a parete:
- On brick or concrete walls, mark the installation position, use an electric drill to create three holes. Hammer the plastic plugs into the holes. Use a screwdriver to drive screws firmly.
- On wooden walls, use screws directly without plastic plugs.
- Plug in the Ground: Insert the provided stake firmly into the ground.
- Clip on Deck: Use the provided spring clip to attach the solar panel to a deck railing or similar surface.
Adjust the joint bolt to fix the solar panel direction, allowing for a 180° adjustment to maximize sun exposure.

Image: Solar panel with battery life indicators and a tip to ensure the panel is turned on before use.

Immagine: dettagliata view of the light string construction and bulb dimensions (3.2 inches long, 1.5 inches wide).
Video: Unboxing and initial setup of the Brightown 100FT Solar String Lights, demonstrating the components and basic installation steps.
5. Funzionamento
The string lights are equipped with a dusk-to-dawn sensor, automatically turning on at night and off at dawn. For manual control and advanced settings, use the included remote.
5.1. Attivazione iniziale
Press the button on the back of the solar panel to switch it on. The indicator light will turn blue when active.
5.2. Funzioni di controllo remoto
The remote control allows for customization of your lighting experience:
- ACCESO/SPENTO: Accende o spegne le luci.
- Livelli di luminosità: Adjusts brightness to 25%, 50%, 75%, or 100%.
- Modalità di illuminazione: Choose from 3 modes: Steady On, Breath, or Flash.
- Regolazione della velocità: Increase or decrease the speed of the Breath and Flash modes.
- Impostazioni timer: Set the lights to operate for 6 hours or 8 hours. The lights will flash once when the timer is set.

Image: Remote control with various settings for brightness, modes, and timers.
6. Ricarica
Your Brightown Solar String Lights feature dual charging options to ensure continuous illumination.
6.1. Ricarica solare
The 180° adjustable solar panel maximizes sun exposure. Under 7-8 hours of direct sunlight, the internal battery will fully charge, providing 10+ hours of lighting.
6.2. Ricarica USB di tipo C
For cloudy days or when solar charging is insufficient, use the Type-C USB port for fast charging. A full charge takes approximately 4 hours. The indicator on the panel will turn red during charging or in low power, and green when the battery is fully charged.
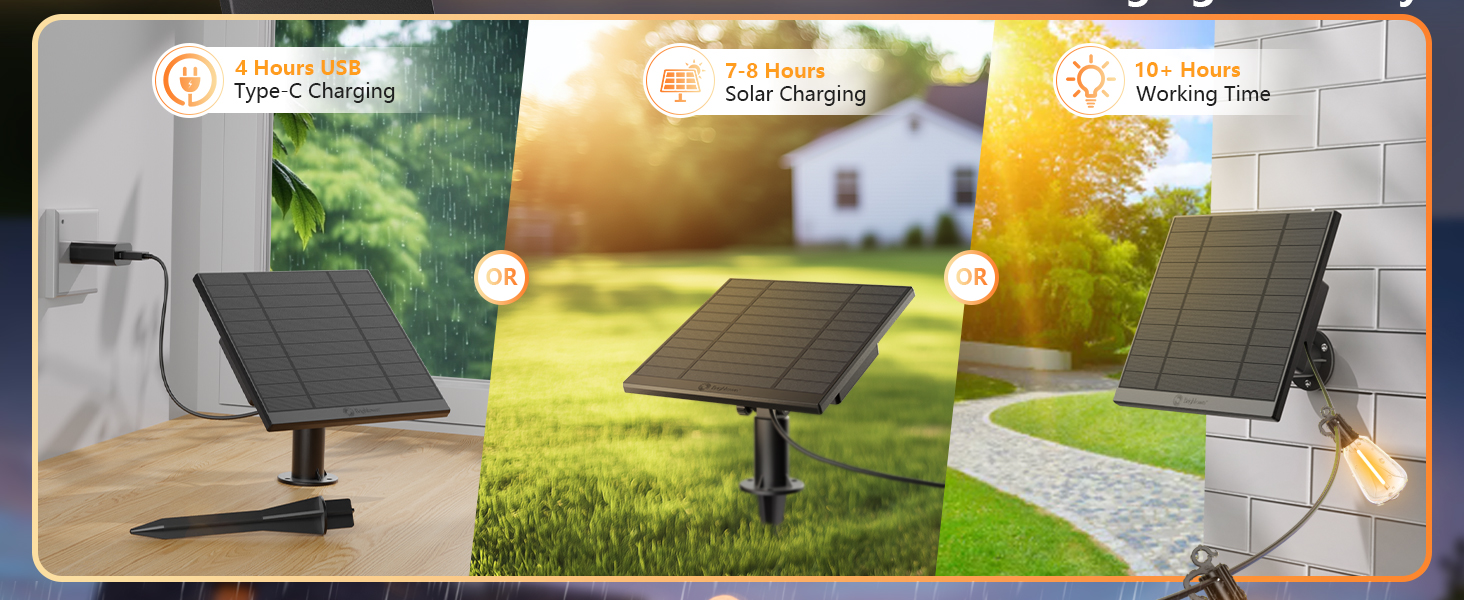
Image: Visual representation of the dual charging options: 4 hours via USB-C or 7-8 hours via solar power.
7. Manutenzione e durata
These string lights are built to withstand various outdoor conditions, requiring minimal maintenance.
- Lampadine infrangibili: The PET plastic bulbs are designed to resist drops, wind, rain, and snow, ensuring long-lasting performance.
- Grado di impermeabilità IP65: The lights are rigorously tested to be waterproof, making them suitable for year-round outdoor use without needing to be taken down during bad weather.
- Resistenza alle intemperie: Engineered to resist rain, snow, and winds up to 50 MPH.
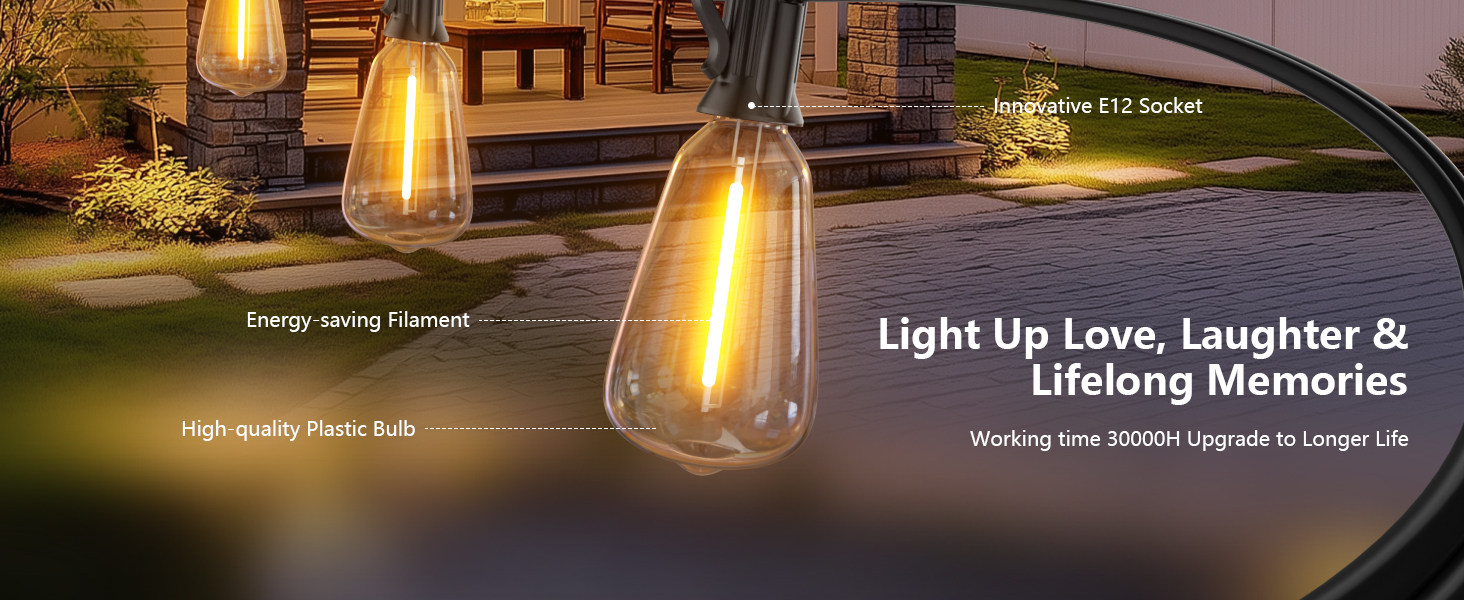
Image: The lights are shown operating effectively during rainfall, demonstrating their IP65 waterproof design.
8. Sostituzione della lampadina
If a bulb needs replacement, follow these steps:
- Screw out the old bulb from the holder counter-clockwise.
- Screw in a new bulb clockwise until secure.
- Ensure the replacement bulb is an LED ST38 24V bulb with an E12 base.
9. Risoluzione Dei Problemi
Fare riferimento ai seguenti problemi comuni e alle relative soluzioni:
| Problema | Soluzione |
|---|---|
| String lights do not work. | Make sure the solar panel is switched on. Ensure the solar panel is not covered by other objects. Recharge the solar panel or place it in direct sunlight. |
| Light flashes. | The battery may be exhausted. Replace with a new battery. |
| Il telecomando non funziona. | Replace the remote battery (2 x AAA 1.5V batteries, not included). |
| Altri problemi. | If the above cases do not work, consult a professional electrician or contact customer support. |
10. Specifiche
| Caratteristica | Dettaglio |
|---|---|
| Numero di modello | GY-S-C31 |
| Lunghezza | 100 piedi |
| Numero di lampadine | 31 + 2 Spare LED Bulbs |
| Tipo di lampadina | LED ST38, Shatterproof PET Plastic |
| Base della lampadina | E12 |
| Colore chiaro | Bianco caldo (2700 Kelvin) |
| Fonte di alimentazione | Solar Powered & Type-C USB |
| Tempo di ricarica solare | 7-8 ore (luce solare diretta) |
| Tempo di ricarica USB | 4 ore |
| Orario di lavoro | 10+ ore (completamente carica) |
| Grado di impermeabilità | Grado di protezione IP65 |
| Caratteristiche speciali | Adjustable, Remote Controlled, Shatterproof, Timer, Waterproof, Dusk-to-Dawn Sensor |
| Batterie | Sono necessarie 2 batterie da 12 V (incluse) |
| Peso dell'articolo | 2.2 libbre (1 chilogrammo) |
11. Garanzia e assistenza clienti
The Brightown team is committed to providing excellent customer service. We offer 24-hour professional customer support to assist with any inquiries or issues regarding your solar string lights.
Please feel free to contact us if you need support. Contact details are typically found on the product packaging or our official websito.