Importanti istruzioni di sicurezza
Quando si utilizzano apparecchi elettrici, è necessario adottare sempre le seguenti precauzioni di sicurezza di base per ridurre il rischio di incendi, scosse elettriche e/o lesioni alle persone, tra cui:
- Leggere tutte le istruzioni prima di utilizzare il frullatore.
- Per proteggersi dal rischio di scosse elettriche, non immergere la base, il cavo o la spina del frullatore in acqua o altri liquidi.
- È necessaria un'attenta supervisione quando un elettrodomestico viene utilizzato da bambini o nelle loro vicinanze.
- Scollegare dalla presa quando non in uso, prima di montare o smontare parti e prima della pulizia.
- Evitare il contatto con le parti in movimento.
- Non utilizzare alcun apparecchio con cavo o spina danneggiati, o dopo un malfunzionamento, una caduta o un danneggiamento dell'apparecchio. Contattare il servizio clienti per un controllo, una riparazione o una regolazione.
- L'uso di accessori non consigliati o venduti dal produttore può causare incendi, scosse elettriche o lesioni.
- Non utilizzare all'aperto.
- Non lasciare che il cavo penda dal bordo del tavolo o del bancone o che tocchi superfici calde.
- Tenere mani e utensili fuori dal contenitore durante la miscelazione per evitare il rischio di gravi lesioni personali o danni al frullatore. È possibile utilizzare un raschietto, ma solo quando il frullatore non è in funzione.
- Le lame sono affilate. Maneggiare con cura.
- Utilizzare sempre il frullatore con il coperchio inserito.
- When blending hot liquids, use caution; steam can cause burns. Do not fill the jar above the maximum fill line for hot liquids.
- Ensure the appliance is switched OFF before connecting to the power source.
SALVA QUESTE ISTRUZIONI
Prodotto finitoview
The Aeitto Professional Countertop Blender is designed for efficient blending of various ingredients, from ice crushing to smoothies and juices. It features a powerful motor and a large capacity jar for family use.
Componenti:
- Base del frullatore (con motore e pannello di controllo)
- 68 oz Blending Jar (with lid and measuring cap)
- Stantuffo
- Recipe Cookbook

Figure 1: Aeitto Professional Countertop Blender with its main components and fresh ingredients.
Pannello di controllo:
- Interruttore di ALIMENTAZIONE: Turns the blender ON/OFF.
- Chiamata rapida: Regola la velocità di miscelazione da 1 a 7.
- Pulsante IMPULSI: Provides short bursts of high-speed blending.
- Funzioni preimpostate: Dedicated buttons for Ice Crush (P01), Smoothie (P02), and Juice (P03).
- Display digitale: Shows speed level and blending time.

Figura 2: dettagliata view of the blender's control panel for easy operation.
Sistema di lame:
The blender features an upgraded 8-point 3D blade system designed to break down ingredients more finely, extracting maximum nutrients and ensuring smoother results.
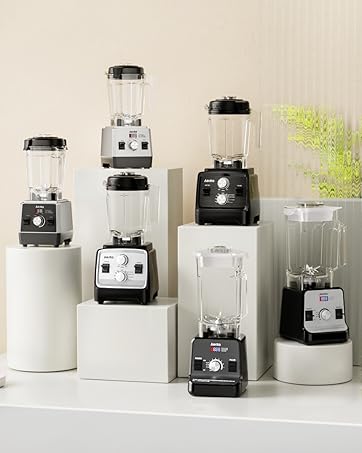
Figure 3: The advanced 8-point 3D blade system for superior blending performance.
Impostare
- Disimballare: Rimuovere con cautela tutti i componenti dall'imballaggio. Conservare l'imballaggio per un eventuale stoccaggio o spedizione futura.
- Pulire prima del primo utilizzo: Wash the blending jar, lid, and plunger in warm, soapy water. Rinse thoroughly and dry. Wipe the blender base with a damp cloth. Do not immerse the blender base in water.
- Assembla il barattolo: Assicurarsi che il gruppo lame sia saldamente fissato al fondo del contenitore del frullatore.
- Place the Jar: Position the assembled blending jar onto the blender base, ensuring it is seated correctly and locked into place.
- Connetti alimentazione: Collegare il cavo di alimentazione a una presa elettrica dotata di messa a terra.
Istruzioni per l'uso
Per una miscelazione sicura ed efficace, segui questi passaggi:
- Preparare gli ingredienti: Cut ingredients into small pieces (approximately 1 inch) for optimal blending. Add liquids first, then soft ingredients, followed by harder ingredients and ice. Do not overfill the jar beyond the maximum fill line.
- Fissare il coperchio: Place the lid firmly on the blending jar and ensure the measuring cap is inserted into the lid opening.
- Attiva: Flip the POWER switch to the 'ON' position. The digital display will illuminate.
- Seleziona la funzione:
- Velocità manuale: Turn the Speed Dial to select a speed from 1 to 7. Start with a lower speed and gradually increase as needed.
- Funzioni preimpostate: Press the desired preset button (P01 for Ice Crush, P02 for Smoothie, P03 for Juice). The blender will automatically run through a pre-programmed cycle.
- Modalità pulsazioni: For short bursts of power, press and hold the PULSE button. Release to stop. This is ideal for chopping or quick mixing.
- Miscelazione: Allow the blender to process ingredients until desired consistency is achieved. Use the plunger through the lid opening to push down ingredients if necessary, but only when the blender is running.
- Fine: Once blending is complete, turn the Speed Dial to 'OFF' or press the POWER switch to 'OFF'. Unplug the blender from the power outlet.

Figure 4: The 3 preset functions simplify common blending tasks.
Pulizia e manutenzione
Una pulizia adeguata garantisce la longevità e l'igiene del frullatore.
- Scollegare: Scollegare sempre il frullatore prima di pulirlo.
- Self-Cleaning Method:
- Fill the blending jar halfway with warm water and add a few drops of dish soap.
- Chiudere bene il coperchio e posizionare il barattolo sulla base del frullatore.
- Run the blender on a medium speed (e.g., speed 4) for 30-60 seconds, or use the 'PULSE' function a few times.
- Svuotare il barattolo, sciacquare abbondantemente con acqua pulita e asciugare.
- Lavabile in lavastoviglie: The blending jar, lid, and plunger are dishwasher safe. Place them on the top rack of your dishwasher.
- Lavaggio delle mani: For thorough cleaning, disassemble the jar components (if applicable) and wash with warm, soapy water. Use a brush to clean around the blades carefully.
- Base del frullatore: Pulisci la base del frullatore con l'annuncioamp stoffa. Non immergere la base in acqua o altro liquido.
- Magazzinaggio: Store the blender in a clean, dry place with the lid loosely placed on the jar to allow air circulation.

Figure 5: Cleaning options: self-cleaning with water or dishwasher safe components.
Risoluzione dei problemi
| Problema | Possibile causa | Soluzione |
|---|---|---|
| Blender non si accende. | Not plugged in; Power switch is OFF; Jar not properly seated. | Ensure the power cord is securely plugged into a working outlet. Flip the POWER switch to 'ON'. Make sure the blending jar is correctly placed and locked onto the base. |
| Gli ingredienti non si amalgamano bene. | Too little liquid; Too many ingredients; Ingredients are too large; Air pocket around blades. | Add more liquid. Reduce the amount of ingredients. Cut ingredients into smaller pieces. Use the plunger to push ingredients towards the blades. Increase speed or use Pulse function. |
| Il frullatore si ferma durante il funzionamento. | Overheating; Overload protection activated. | Turn off and unplug the blender. Remove some ingredients. Let the motor cool down for at least 15-20 minutes before restarting. |
| Perdita dal fondo del barattolo. | Gruppo lame non serrato; anello di tenuta mancante o danneggiato. | Ensure the blade assembly is securely tightened to the jar. Check if the seal ring is properly in place and undamaged. Replace if necessary. |
Specifiche
| Marca | Aeito |
| Modello | B0FK4HRZFP |
| Potenza del motore | 1800 Watt (picco) |
| Capacità | 68 once (2 litri) |
| Numero di velocità | 7 + Pulse + 3 Presets |
| Dimensioni del prodotto | 8.27"P x 7.24"L x 16.73"A |
| Peso dell'articolo | 8.62 libbre |
| Materiale del contenitore | Plastica |
| Caratteristica speciale | Design portatile |
Garanzia e supporto
This Aeitto Professional Countertop Blender comes with a Garanzia limitata. Please refer to the warranty card included in your product packaging for specific terms and conditions.
For technical support, warranty claims, or general inquiries, please contact Aeitto Customer Service:
- Websito: Visit the official Aeitto website (link not provided in product data, please refer to product packaging).
- E-mail: Refer to your product documentation for customer support email.
- Telefono: Refer to your product documentation for customer support phone number.
Please have your model number (B0FK4HRZFP) and purchase date available when contacting support.