
1. Introduzione
This manual provides detailed instructions for the setup, operation, and maintenance of your DinoFire RF 2.4GHz Wireless Presentation Clicker. This device is designed to enhance your presentations by offering seamless control over slides and a convenient green laser pointer.
2. Caratteristiche del prodotto
- Connettività Plug & Play: No software or drivers required. Simply plug the USB receiver into your computer.
- Green Laser Pointer: A bright green laser for clear highlighting of presentation content.
- Batteria ricaricabile: Built-in 300mAh battery, fully rechargeable in approximately 2.5 hours, providing weeks of use.
- Essential Presentation Controls: Intuitive buttons for page up/down, full screen, and black screen functions.
- Design ergonomico: Comfortable to hold with clearly spaced buttons for confident operation.
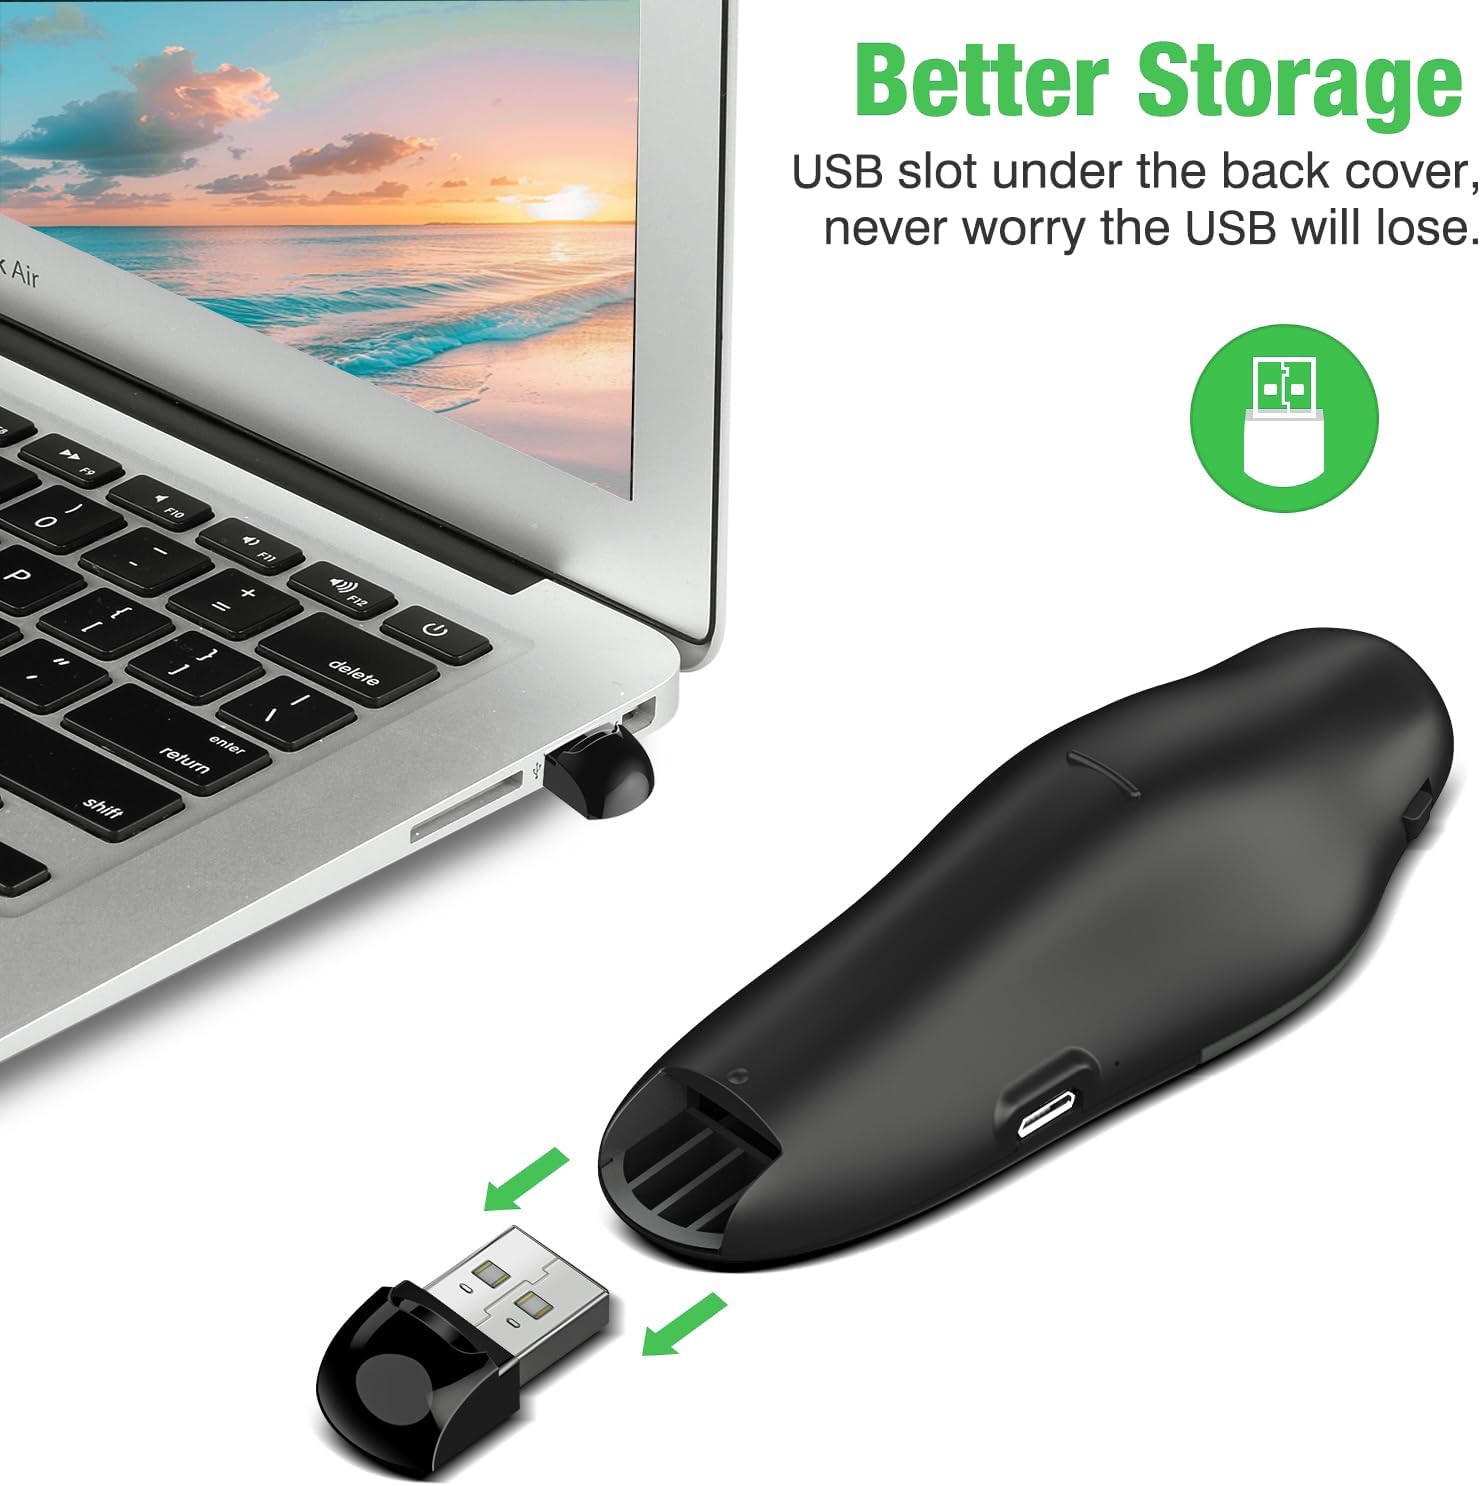
- Ricevitore USB integrato: The USB receiver stores securely inside the remote to prevent loss.
- Portata wireless: 2.4GHz wireless connection offers a control range of up to 115 feet (approximately 35 meters).
3. Istruzioni per l'installazione
- Addebita al presentatore: Before first use, ensure the presentation clicker is fully charged. Connect the clicker to a USB power source using the provided Micro USB cable. A full charge takes approximately 2.5 hours.
- Recupera ricevitore USB: Open the battery compartment or the designated storage slot on the back of the clicker to retrieve the USB receiver.
- Collegare il ricevitore: Plug the USB receiver into an available USB port on your computer or laptop. The system will automatically detect and install the necessary drivers.
- Accensione: Locate the power switch on the side of the clicker and slide it to the 'ON' position.
4. Istruzioni per l'uso
Once the USB receiver is connected and the clicker is powered on, you can begin controlling your presentation.
- Pagina su/giù: Use the arrow buttons (usually left/right or up/down arrows) to navigate through your presentation slides.
- Green Laser Pointer: Press and hold the central button (often marked with a triangle or laser icon) to activate the green laser pointer. Release the button to turn off the laser.
- Schermo intero/Schermo nero: The clicker features dedicated buttons for entering full-screen mode or blacking out the screen to redirect audience attention. Refer to the button icons for specific functions.

5. Informazioni sulla batteria e ricarica
The DinoFire Presentation Clicker is equipped with a long-lasting 300mAh rechargeable battery.
- Ricarica: Connect the clicker to any standard USB port using the included Micro USB cable. The charging indicator light will show the charging status.
- Tempo di ricarica: Una carica completa richiede in genere circa 2.5 ore.
- Durata della batteria: A fully charged battery can last for several weeks, depending on usage.

6. Manutenzione e conservazione
- Pulizia: Use a soft, dry cloth to clean the surface of the clicker. Avoid using harsh chemicals or abrasive materials.
- Magazzinaggio: When not in use, turn off the clicker to conserve battery life. Store the USB receiver securely within the clicker's designated compartment to prevent loss. Keep the device in a cool, dry place away from direct sunlight and extreme temperatures.

7. Risoluzione Dei Problemi
- Il dispositivo non risponde:
- Assicurarsi che il ricevitore USB sia collegato saldamente a una porta USB funzionante.
- Check if the clicker is powered on.
- Verify the clicker's battery level and recharge if necessary.
- Prova a collegare il ricevitore USB a una porta USB diversa o a un altro computer per escludere problemi con la porta.
- Puntatore laser non funzionante:
- Ensure the clicker is powered on and fully charged.
- Premere e tenere premuto con decisione il pulsante laser.
- Gamma limitata:
- Ensure there are no significant obstructions (e.g., walls, large metal objects) between the clicker and the USB receiver.
- Move closer to the computer if possible.
- Avoid using the clicker near other 2.4GHz wireless devices that might cause interference.
8. Specifiche
| Caratteristica | Dettaglio |
|---|---|
| Marca | DinoFuoco |
| Tecnologia di connettività | Radio Frequency (RF 2.4GHz) |
| Dispositivi compatibili | Computer portatile |
| Caratteristica speciale | Lightweight, Rechargeable, Green Laser |
| Numero massimo di dispositivi supportati | 1 |
| Peso dell'articolo | 2.08 once |
| Dimensioni del pacco | 4.72 x 2.4 x 1.26 pollici |
9. Garanzia e supporto
For warranty information and customer support, please refer to the product packaging or contact DinoFire customer service directly. Keep your purchase receipt for warranty claims.