
1. Introduzione
This manual provides instructions for the installation, operation, and maintenance of your AOOEPU WD-R1200U Dual Band WiFi Extender Signal Booster. This device is designed to expand your existing wireless network coverage, eliminate dead zones, and provide stable internet access throughout your home or office.
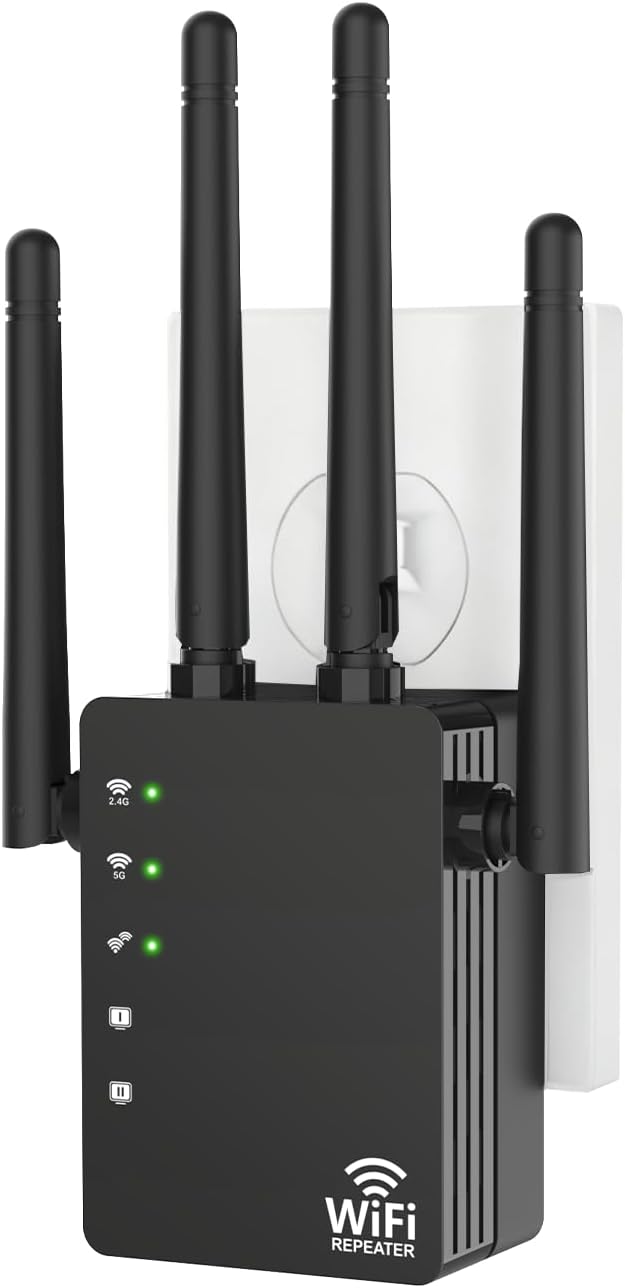
Immagine 1.1: anteriore view of the AOOEPU WD-R1200U WiFi Extender.
2. Contenuto della confezione
Verifica che tutti gli articoli siano presenti nel tuo pacco:
- AOOEPU WD-R1200U WiFi Extender (1 unit)
- Cavo Ethernet (1 unità)
- Quick Installation Guide (1 unit)
3. Caratteristiche del prodotto
- Ampia copertura: Extends WiFi network coverage up to 12800 Sq.Ft, eliminating dead zones.
- Doppia banda ad alta velocità: Supports 2.4GHz (up to 300Mbps) and 5GHz (up to 867-1200Mbps) frequencies for a combined speed of up to 1200Mbps.
- Ampia compatibilità: Compatible with most standard routers and supports up to 105 connected devices simultaneously.
- Sicurezza avanzata: Features WPA/WPA2 security protocols and encryption standards to protect your network.
- Stable Signal Penetration: Maintains strong connectivity through walls and other barriers.
- Modalità di accesso multiple: Supporta le modalità Repeater, Access Point (AP) e Router.
- Porte Ethernet: Includes Ethernet ports for wired connections to devices like game consoles and smart TVs.

Immagine 3.1: Passoview of key features including easy setup, device compatibility, and network coverage.

Image 3.2: Visual representation of the extender's extensive coverage capability.

Image 3.3: Illustration of the wide range of devices compatible with the extender.
4. Istruzioni per l'installazione
The AOOEPU WD-R1200U WiFi Extender offers a straightforward setup process. You can use either the WPS button method or a manual setup via a web browser.
4.1. WPS Button Setup (Recommended)
- Plug the WiFi Extender into a power outlet near your existing router. Wait for the power indicator light to turn on.
- Press the WPS button on your existing router. The WPS light on your router should start blinking.
- Within two minutes, press the WPS button on the AOOEPU WD-R1200U WiFi Extender. The WPS indicator on the extender will blink.
- Wait for approximately 30-60 seconds. The indicator lights on the extender should become solid, indicating a successful connection.
- Unplug the extender and relocate it to a desired location between your router and the WiFi dead zone. Ensure the signal strength indicator on the extender shows a good connection to your router.

Image 4.1: Step-by-step visual guide for WPS setup.
4.2. Configurazione manuale tramite Web Navigatore
- Plug the WiFi Extender into a power outlet near your existing router.
- Connect your computer or mobile device to the extender's default WiFi network (e.g., 'AOOEPU_EXT' or similar, usually found on a label on the device). No password is required initially.
- Aprire un web browser e immettere l'indirizzo IP predefinito o il nome di dominio (ad esempio,
192.168.10.1orrepeater.net) fornito nella Guida di installazione rapida. - Follow the on-screen instructions to log in (default username/password is usually 'admin'/'admin') and select your desired operating mode (Repeater, AP, or Router).
- If selecting Repeater mode, choose your existing WiFi network from the list and enter its password.
- Configure the extender's network name (SSID) and password. It is recommended to use a different SSID to distinguish it from your main network.
- Complete the setup. The extender will restart.
- Relocate the extender to an optimal position and connect your devices to the new extended network.
5. Modalità operative
The AOOEPU WD-R1200U supports three primary operating modes:
- Modalità ripetitore: Extends the coverage of an existing wireless network. This is the most common use case for a WiFi extender.
- Modalità punto di accesso (AP): Converts a wired network connection into a wireless one. Ideal for areas with Ethernet access but no WiFi.
- Modalità router: Functions as a primary router, creating a new private wireless network from a modem connection.

Image 5.1: Visual explanation of the three access modes.
6. Manutenzione
To ensure optimal performance and longevity of your WiFi Extender, consider the following maintenance tips:
- Posizionamento: Position the extender in an open area, away from obstructions like large metal objects, thick walls, or other electronic devices that may cause interference.
- Pulizia: Pulire delicatamente il dispositivo con un panno asciutto e morbido. Non utilizzare detergenti liquidi o spray.
- Aggiornamenti del firmware: Controllare periodicamente le istruzioni del produttore websito per gli aggiornamenti del firmware. L'aggiornamento del firmware può migliorare le prestazioni, aggiungere nuove funzionalità e aumentare la sicurezza.
- Reset: If the device becomes unresponsive or you forget your settings, you can perform a factory reset by pressing and holding the reset button (usually a small pinhole) for about 8-10 seconds. This will revert all settings to their factory defaults.
7. Risoluzione Dei Problemi
If you encounter issues with your AOOEPU WD-R1200U WiFi Extender, refer to the following common problems and solutions:
| Problema | Possibile soluzione |
|---|---|
| Nessuna alimentazione/Il dispositivo non si accende | Assicurati che l'extender sia collegato saldamente a una presa di corrente funzionante. Prova una presa diversa. |
| Cannot connect to the extender's WiFi network | Verify the extender is powered on. Check if you are selecting the correct network name (SSID). If using manual setup, ensure the password is correct. Try resetting the extender. |
| Weak or unstable signal from the extender | Relocate the extender closer to your main router. Ensure there are no major obstructions. Adjust the antennas for better reception. |
| Internet access issues after connecting to the extender | Confirm your main router has internet access. Re-run the setup process to ensure the extender is correctly configured to your main network. Check for IP address conflicts. |
| La configurazione WPS non riesce | Ensure both WPS buttons are pressed within the two-minute window. Some routers require WPS to be enabled in their settings. Try the manual setup method. |
8. Specifiche
| Caratteristica | Dettaglio |
|---|---|
| Numero di modello | WD-R1200U |
| Dimensioni del prodotto | 6.8 x 3.66 x 2 pollici |
| Peso dell'articolo | 5.3 once |
| Standard di comunicazione wireless | 802.11a/b/g/n/ac |
| Velocità di trasferimento dati | 1200 Megabyte al secondo (Mbps) |
| Bande di frequenza | 2.4 GHz e 5 GHz |
| Caratteristiche speciali | 1-Tap Setup, 360 Degree Coverage, Directional Antenna, Firewall, WiFi Mesh |
| Produttore | Shenzhen Century Xinyang Tech Co.,Ltd |
9. Garanzia e supporto
For warranty information and technical support, please refer to the documentation included with your product or visit the official AOOEPU webluogo. Conserva la ricevuta di acquisto per eventuali richieste di garanzia.
