
1. Introduzione
The Retevis RB666S is a user-friendly, rechargeable two-way radio designed for clear and reliable communication. It is ideal for family activities, hiking, camping, and other outdoor adventures. This manual provides detailed instructions on how to set up, operate, and maintain your RB666S walkie talkie.

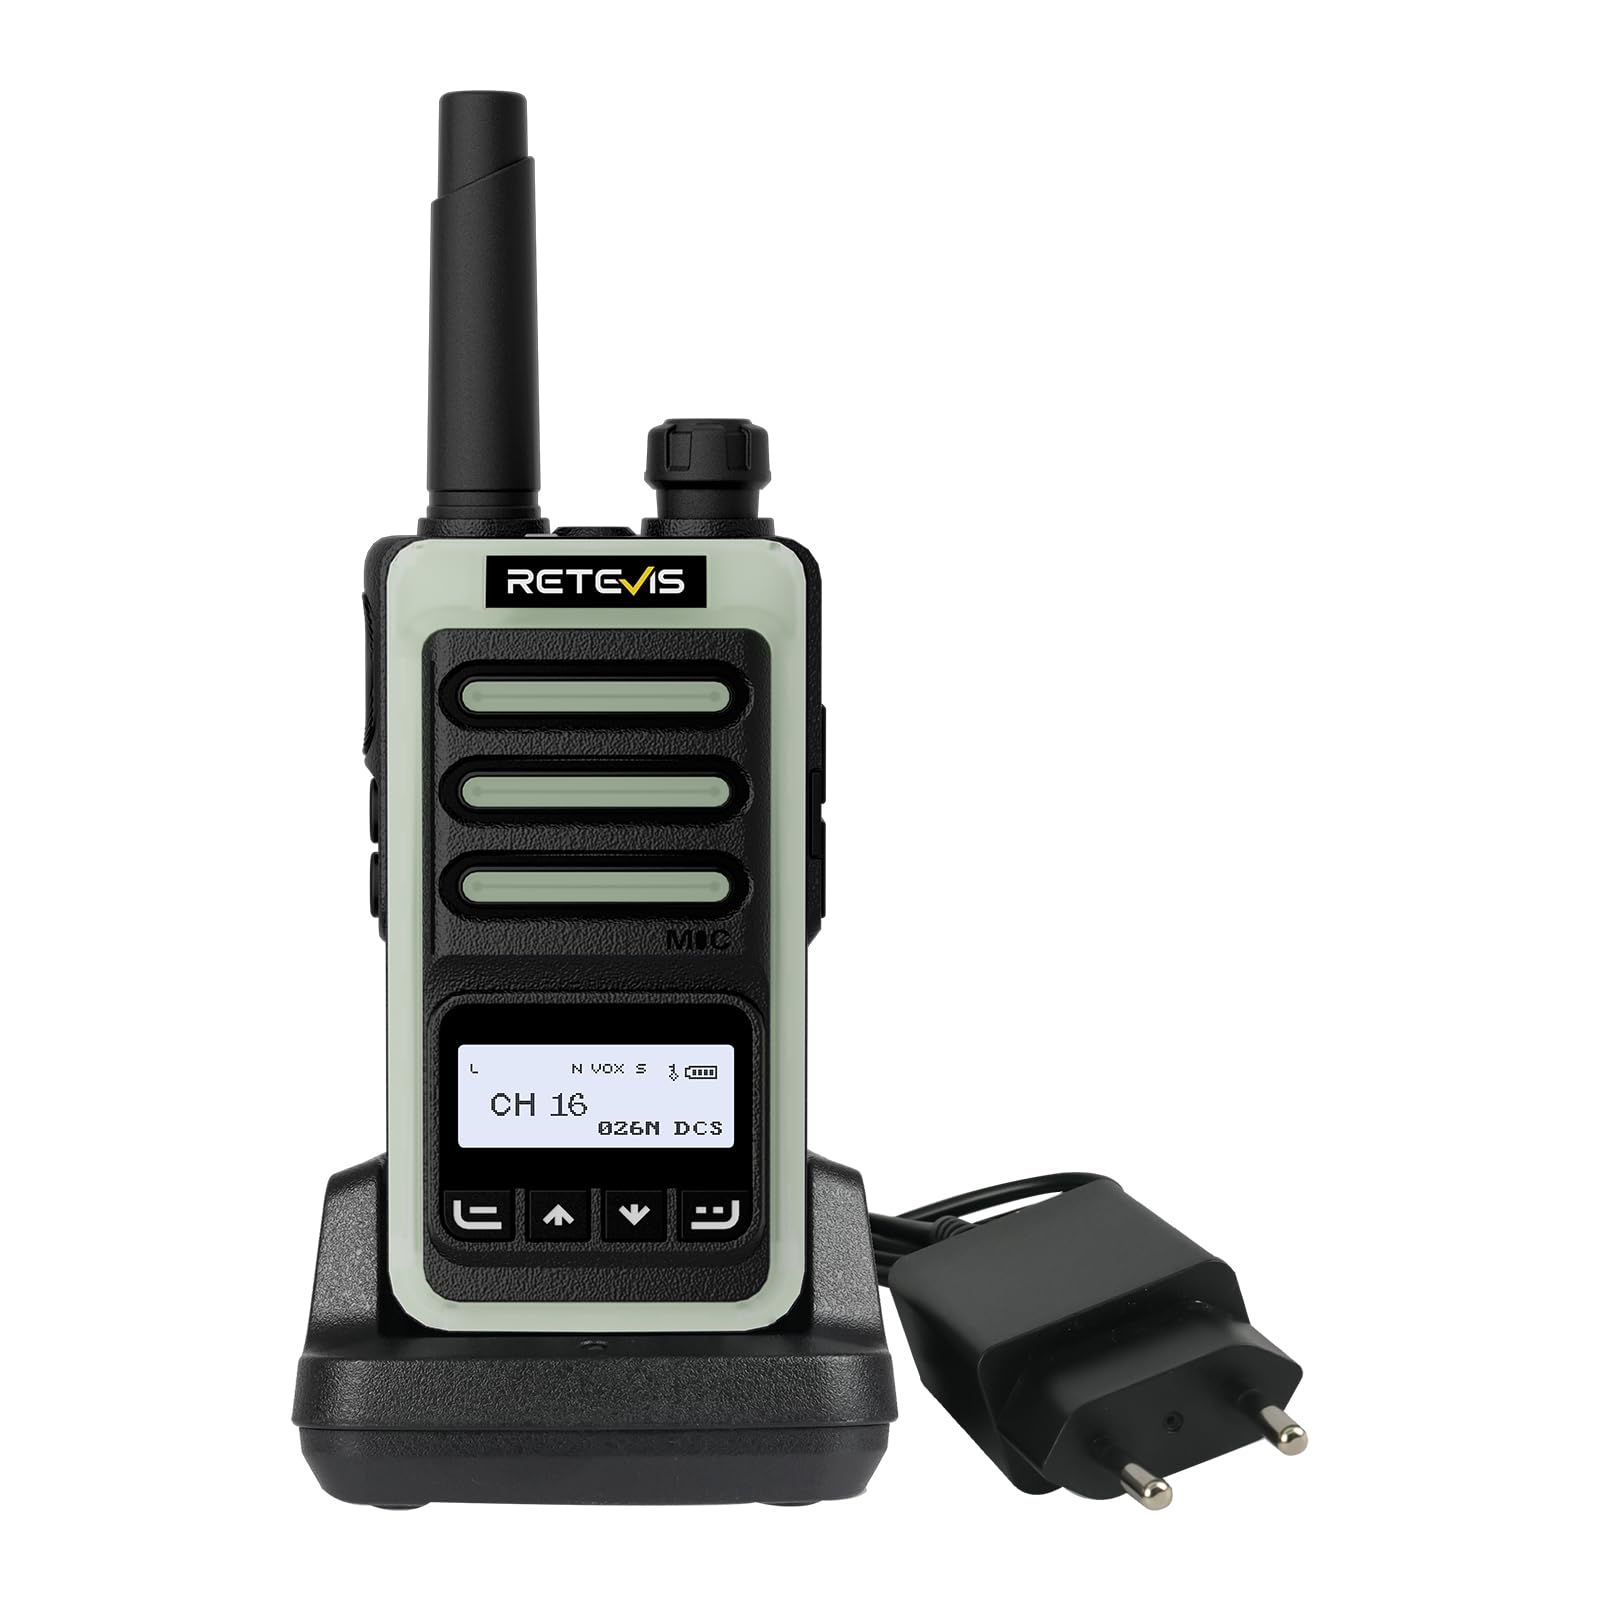
The Retevis RB666S walkie talkie is designed for easy communication during outdoor activities.
2. Contenuto della confezione
Si prega di controllare attentamente il pacco per assicurarsi che siano presenti tutti gli articoli:
- 1 x RB666S Walkie Talkie
- 1 x Batteria
- 1 x Base di ricarica
- 1 x Cavo di ricarica di tipo C
- 1 x adattatore
- 1 x clip per cintura
- 1 x cordino
- 1 x Manuale utente

All components included in the RB666S package.
3. Prodotto finitoview
3.1 Componenti
Familiarize yourself with the main components of your RB666S walkie talkie:

Dettagliato view of the RB666S walkie talkie components.
- Manopola On/Off/Volume: Ruotare per accendere/spegnere e regolare il volume.
- Torcia elettrica: Luce LED integrata.
- Porta di ricarica: Type-C port for direct charging.
- Spia luminosa: Mostra lo stato (ad esempio, trasmissione, ricezione, carica).
- Pulsante PTT (premi per parlare): Tieni premuto per trasmettere la tua voce.
- Pulsante laterale 1: Multi-function button, typically for emergency alarm.
- Pulsante laterale 2: Multi-function button, typically for flashlight activation.
- MICROFONO: Microfono per input vocale.
- Schermo di visualizzazione: 1.3-inch LCD for channel, battery, and signal information.
- Pulsante Menu: Accede alle opzioni del menu.
- Up/Channel+ Button: Navigates up or changes channel.
- Down/Channel- Button: Navigates down or changes channel.
- Pulsante Indietro: Returns to previous screen or exits menu.
4. Impostazione
4.1 Installazione della batteria
- Assicurarsi che il walkie-talkie sia spento.
- Individuare il coperchio del vano batterie sul retro dell'unità.
- Far scorrere il coperchio verso il basso e rimuoverlo.
- Inserire la batteria allineando correttamente i contatti.
- Richiudere il coperchio del vano batteria e farlo scorrere verso l'alto finché non scatta in posizione.
4.2 Fissaggio della clip da cintura e del cordino
- Per un trasporto più comodo, agganciare la clip da cintura all'apposito slot sul retro della radio.
- Thread the lanyard through the loop on the top or side of the radio for added security.
5. Carica del dispositivo
Before first use, fully charge the battery. The RB666S offers two convenient charging methods:
5.1 Utilizzo della base di ricarica
- Connect the adapter to the charging cradle and plug it into a power outlet.
- Place the walkie talkie into the charging cradle. Ensure the charging contacts align.
- The indicator light on the radio or cradle will show the charging status (e.g., red for charging, green for fully charged).
5.2 Using the Type-C Cable
- Connect the Type-C charging cable to the charging port on the side of the walkie talkie.
- Plug the other end of the cable into a compatible USB power source (e.g., wall adapter, car charger, power bank, PC).
- L'indicatore luminoso mostrerà lo stato di carica.
Una carica completa richiede circa 1 ora, fornendo oltre 14 hours of autonomy e oltre 46 ore di standby.
Fast charging in 1 hour using the cradle.

Versatile Type-C charging options.
6. Funzionamento di base
6.1 Accensione/spegnimento e regolazione del volume
- Per accendere, ruotare la manopola On/Off/Volume in senso orario finché non si sente un clic.
- Per spegnere, ruotare la manopola in senso antiorario fino a sentire un clic.
- Regolare il volume ruotando la stessa manopola.
6.2 Visualizzazione sullo schermo LCD
The 1.3-inch LCD screen provides essential information at a glance:
- Numero del canale: Indicates the current communication channel.
- Livello della batteria: Mostra la carica residua della batteria.
- Potenza del segnale: Visualizza l'intensità del segnale ricevuto.

Clear 1.3-inch LCD screen for essential information.
6.3 Selezione di un canale
Use the Up/Channel+ and Down/Channel- buttons to select your desired communication channel. Ensure all radios in your group are on the same channel.
6.4 Trasmissione e ricezione
- A trasmettere, press and hold the PTT (Push-to-Talk) button. Speak clearly into the microphone. The indicator light will typically glow red.
- A ricevere, release the PTT button. The indicator light will typically glow green when a signal is received.

Intuitive 4-button layout for easy control.
7. Funzionalità avanzate
7.1 Clear Sound Quality
The RB666S is engineered to provide clear audio, ensuring every word is heard distinctly, even in noisy outdoor environments like windy trails or busy campsiti.

Enjoy clear sound quality for effective communication.
7.2 Funzione VOX (Centralino a comando vocale)
The VOX function allows for hands-free transmission. When activated, the radio will automatically transmit when it detects your voice, eliminating the need to press the PTT button.

Hands-free communication with VOX function.
7.3 One-Touch Pairing
Simplify connecting with other compatible radios using the one-touch pairing feature. Refer to the specific instructions for pairing in the full manual if available.

Effortless connection with one-touch pairing.
7.4 CTCSS/DCS (Sistema di squelch a tono continuo/Squelch codificato digitale)
Utilize CTCSS/DCS codes to filter out unwanted signals and ensure more private communication within your group. This feature helps to reduce interference from other users on the same channel.

Enhanced privacy with CTCSS/DCS codes.
Torcia elettrica 7.5 LED
The integrated LED flashlight provides illumination for navigating in low-light conditions. Briefly press Side Button 2 to activate or deactivate the flashlight.

Illuminate your path with the built-in LED flashlight.
7.6 Design fluorescente
The RB666S features a fluorescent design, making it highly visible and easy to locate in low-light outdoor environments, enhancing safety during nighttime activities.

High visibility in low light with fluorescent design.
7.7 Allarme di emergenza
For added safety, the RB666S includes an emergency alarm function. Long-press Side Button 1 to activate the alarm, alerting others to your situation.

Activate the emergency alarm for enhanced safety.
7.8 Channel Lock / Keypad Lock
To prevent accidental channel changes or button presses, you can activate the channel lock or keypad lock feature. This ensures stable communication, especially during active use like climbing or cycling.

Maintain stable communication with channel lock.
8. Manutenzione
- Pulizia: Utilizzare un morbido, damp panno per pulire l'esterno della radio. Non utilizzare prodotti chimici aggressivi o detergenti abrasivi.
- Magazzinaggio: Store the walkie talkie in a cool, dry place away from direct sunlight and extreme temperatures. Remove the battery if storing for extended periods.
- Cura della batteria: Avoid fully discharging the battery frequently. Recharge regularly to prolong battery life.
- Evitare l'acqua: While designed for outdoor use, avoid submerging the radio in water unless specified as waterproof.
9. Risoluzione Dei Problemi
| Problema | Possibile causa | Soluzione |
|---|---|---|
| La radio non si accende | La batteria è scarica o non è installata correttamente. | Caricare la batteria o reinstallarla correttamente. |
| Impossibile trasmettere o ricevere | Canale selezionato non corretto; fuori portata; batteria scarica. | Ensure correct channel; move closer to other radios; charge battery. |
| Scarsa qualità audio | Volume too low; interference; microphone/speaker obstructed. | Adjust volume; move away from interference sources; check microphone/speaker. |
| La tastiera non risponde | Il blocco tastiera è attivato. | Deactivate keypad lock (refer to specific instructions in the full manual). |
10. Specifiche
- Marca: Retevis
- Numero modello: Modello RB666S
- Numero di canali: 16
- Batteria: 1 x 12V (incluso)
- Voltage: 7.4 Volt
- Dimensioni del prodotto (P x L x A): 2.5 x 5.3 x 9.5 cm (0.98 x 2.09 x 3.74 pollici)
- Display: Schermo LCD da 1.3 pollice
- Ricarica: Type-C Fast Charging, Charging Cradle
- Caratteristiche speciali: LED Flashlight, Fluorescent Design, Emergency Alarm, VOX, CTCSS/DCS, Channel Lock
11. Garanzia e supporto
11.1 Informazioni sulla garanzia
Retevis offre un Garanzia di 2 anno per il corpo della radio e un Garanzia di 1 anno for accessories. We also provide a Politica di reso senza motivo entro 30 giorni. Beyond the warranty period, maintenance services are available, with buyers responsible for associated costs.
11.2 Assistenza clienti
For any questions, issues, or support needs, please contact us through Amazon. We are committed to responding to your inquiries within 12 hours.
11.3 Informazioni sulla sicurezza
For important safety guidelines, please refer to the official safety information document: Informazioni sulla sicurezza (PDF)