1. Introduzione
This manual provides comprehensive instructions for the setup, operation, maintenance, and troubleshooting of your GMKtec Mini PC G3S. Please read this manual thoroughly before using the device to ensure optimal performance and longevity.

Figure 1: GMKtec Mini PC G3S, showcasingrazie al suo design compatto e alle sue numerose porte.
2. Contenuto della confezione
Verifica che tutti gli articoli elencati di seguito siano presenti nella confezione del prodotto:
- GMKtec Nucbox G3 S Mini PC (16GB RAM, 512GB SSD)
- Supporto VESA con viti
- Cavo HDMI
- Adattatore di alimentazione
- Manuale d'uso
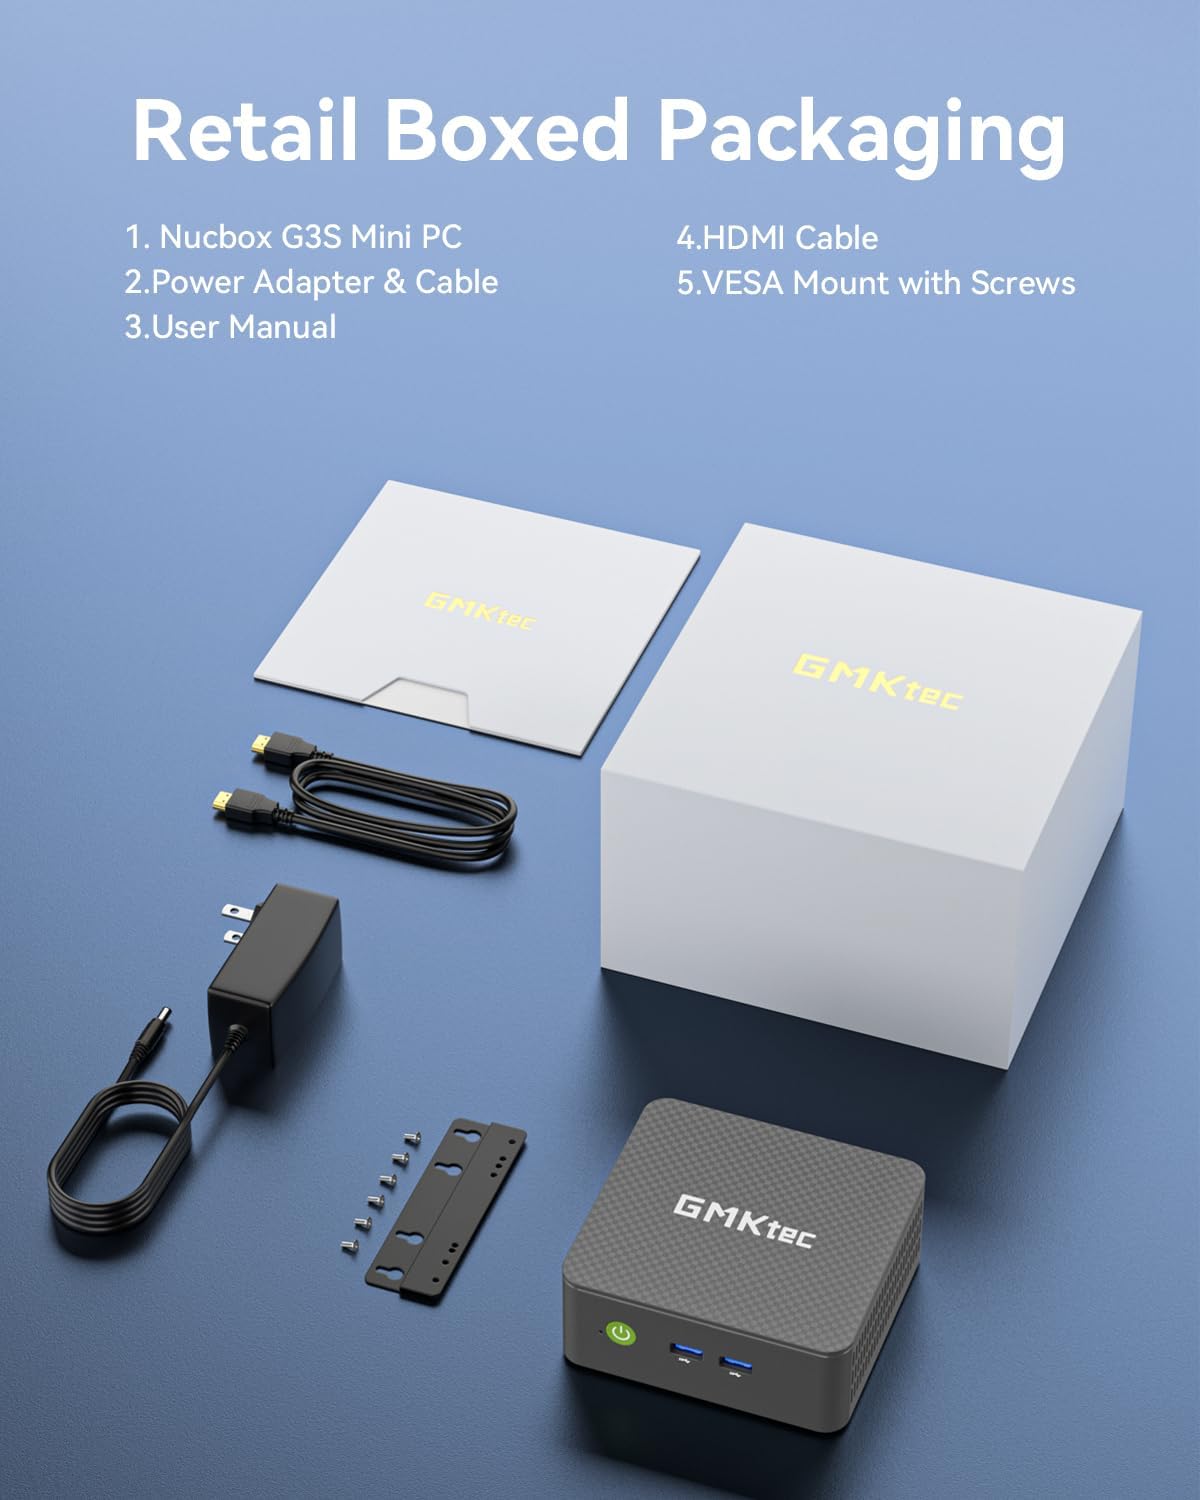
Figure 2: All components included in the GMKtec Mini PC G3S retail packaging.
3. Caratteristiche fisiche e porte
The GMKtec Mini PC G3S is designed with a variety of ports for versatile connectivity:
- Pannello frontale: Power Button, 2x USB 3.2 (Gen 2) ports.
- Pannello laterale: Kensington Lock slot, Micro SD Card Reader.
- Pannello posteriore: 2x HDMI 2.0 ports (4K@60Hz support), 1x USB 2.0 port, 1x USB 3.2 (Gen 2) port, 1x Gigabit Ethernet (RJ45 1000MbE) port, 1x 3.5mm Audio Jack, DC 12V 3A Power Input.

Figura 3: dettagliata view of the front and rear ports on the GMKtec Mini PC G3S.
4. Guida all'installazione
Per la configurazione iniziale del tuo Mini PC, segui questi passaggi:
- Connetti le periferiche: Connect your monitor(s) to the HDMI ports using the provided HDMI cable. Connect a USB keyboard and mouse to the available USB ports.
- Collegamento elettrico: Connect the power adapter to the DC 12V 3A input port on the rear of the Mini PC, then plug the adapter into a power outlet.
- Accensione: Premere il pulsante di accensione situato sul pannello frontale del Mini PC. La spia di alimentazione si illuminerà.
- Avvio iniziale: Il sistema si avvierà in Windows 11 Pro. Seguire le istruzioni visualizzate sullo schermo per completare la configurazione iniziale di Windows, inclusa la lingua, la regione, la connessione di rete e la creazione dell'account utente.
- Installazione con montaggio VESA (opzionale): If desired, attach the VESA mount to the back of a compatible monitor using the provided screws, then secure the Mini PC to the VESA mount. This allows for a clutter-free desktop setup.

Figure 4: The GMKtec Mini PC G3S demonstrating VESA mount compatibility and compact desk placement.
5. Funzionamento
5.1. Dual 4K Display Support
The Mini PC G3S supports dual 4K@60Hz displays via its two HDMI 2.0 outputs. This allows for extended desktop environments, enhancing productivity for multitasking.
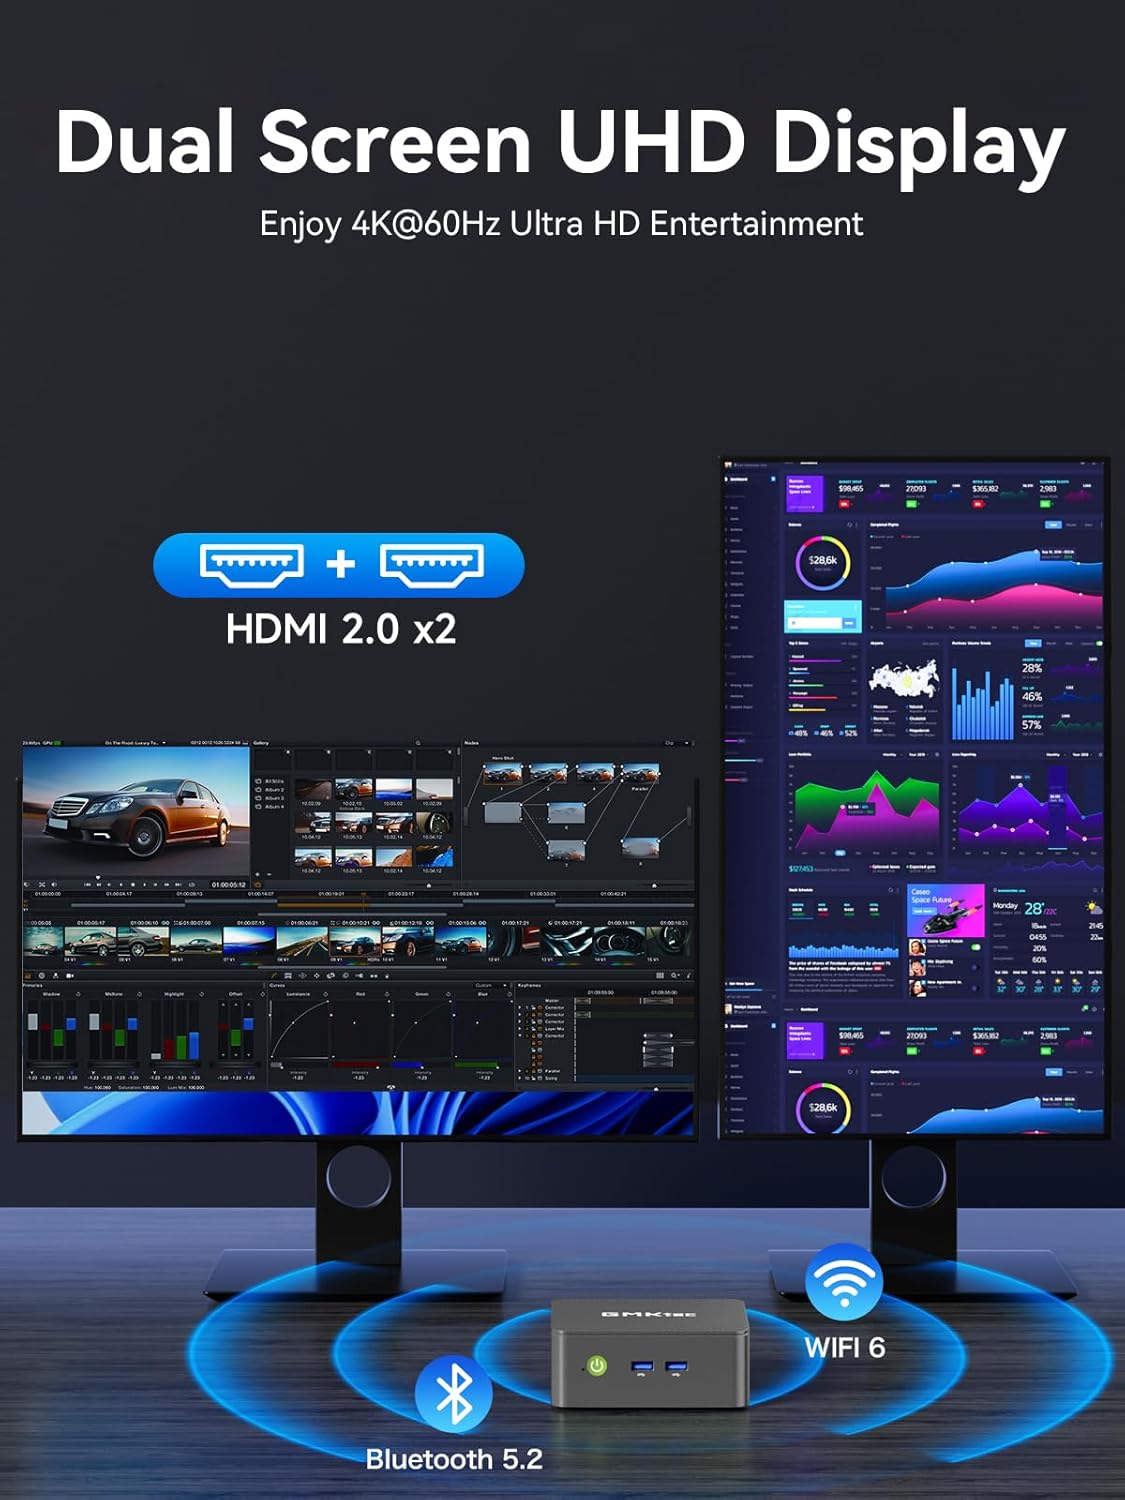
Figure 5: The Mini PC G3S powering a dual 4K display setup for enhanced workspace.
5.2. Connettività di rete e wireless
Il dispositivo offre solide opzioni di connettività:
- Wired: Gigabit Ethernet (RJ45 1000MbE) for stable and high-speed internet access.
- Senza fili: Integrated WiFi 5 (802.11ac) for wireless internet and Bluetooth 5.0 for connecting wireless peripherals.
5.3. Modalità di prestazione
The Mini PC G3S features adjustable performance modes to suit different usage scenarios. These modes can be accessed and configured via the BIOS settings:
- Modalità silenziosa: Optimized for minimal fan noise, suitable for light tasks and quiet environments.
- Modalità normale (predefinita): Balanced performance for everyday computing.
- Modalità di prestazione: Maximizes CPU and GPU performance for demanding applications.
To adjust modes, press the Esc key during boot-up to enter the BIOS page, then navigate to BIOS Setup to select your preferred mode.
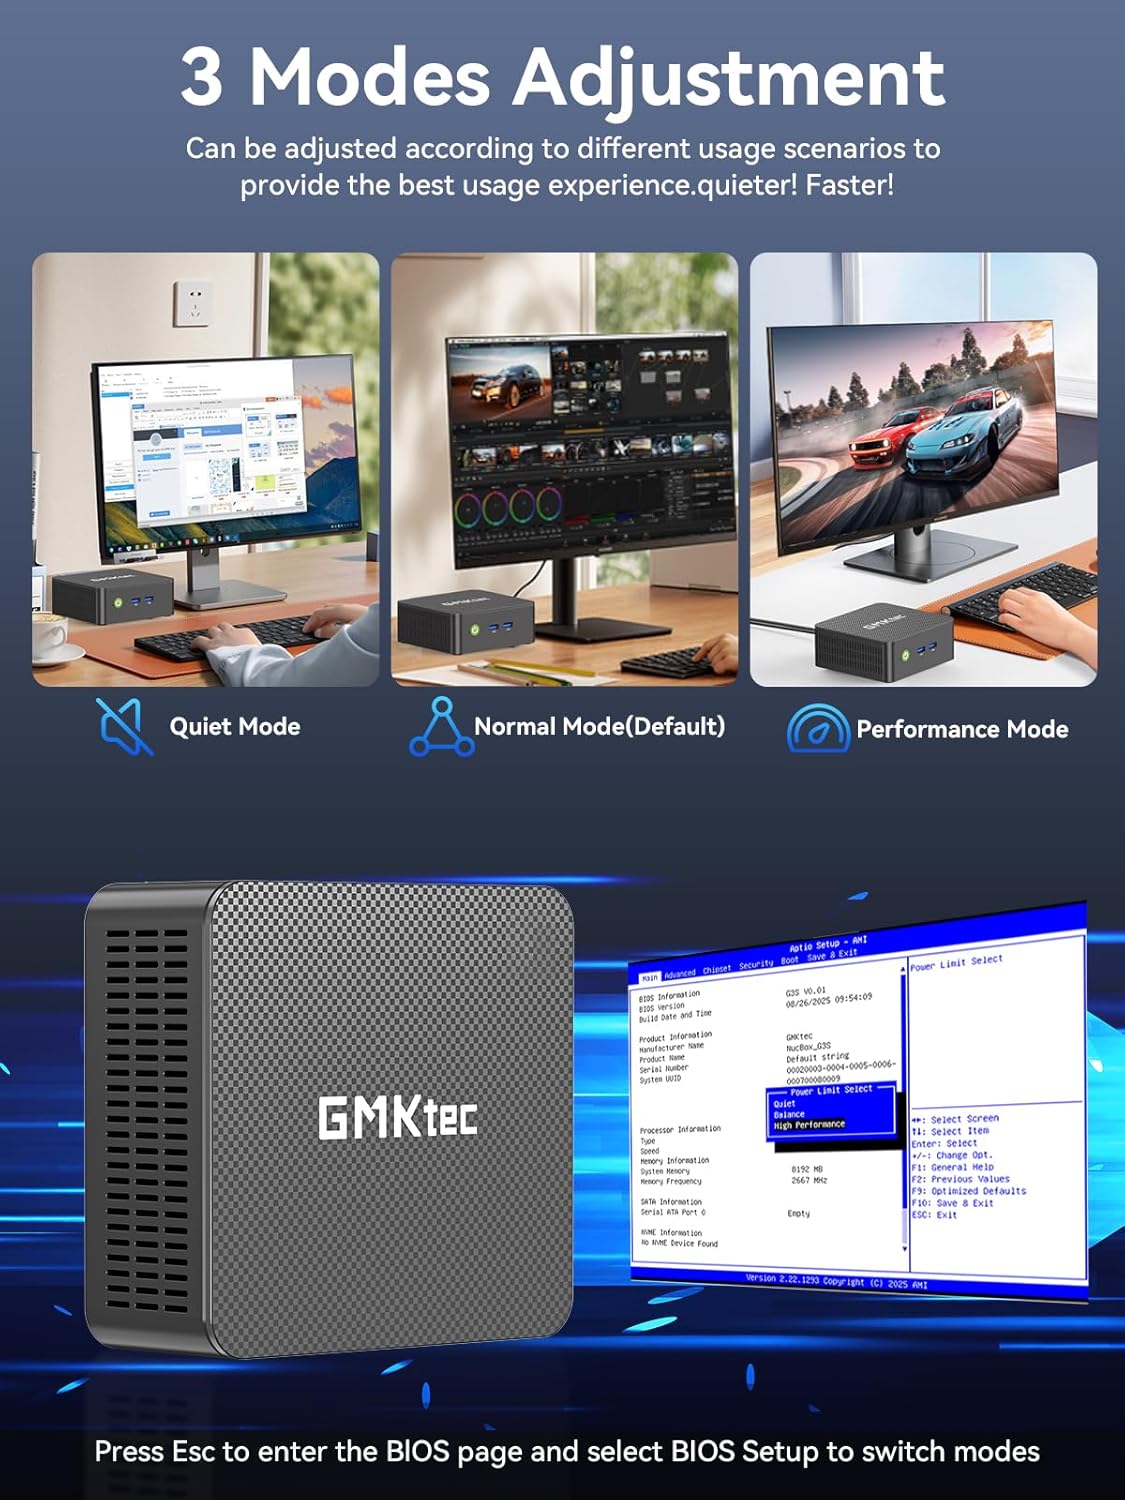
Figure 6: Illustration of the three performance modes and the BIOS entry screen.
6. Espansione della memoria
The GMKtec Mini PC G3S comes with a 512GB M.2 2242 SSD and 16GB DDR4 RAM. For additional storage, the device supports expansion:
- M.2 2280 PCIe: Expandable up to 8TB.
- M.2 2242 SATA: Expandable up to 2TB.
Consult a qualified technician for storage upgrades to ensure proper installation and avoid damage to the device.

Figura 7: Interno view illustrating the RAM and dual SSD slots for storage expansion.
7. Specifiche tecniche
| Caratteristica | Specificazione |
|---|---|
| Processore | 12th Gen Intel N95 (up to 3.4GHz, 4 Cores/4 Threads, 6MB Cache) |
| Grafica | Grafica Intel UHD (fino a 1200 MHz) |
| Memoria RAM | 16 GB DDR4 SO-DIMM |
| Magazzinaggio | 512GB M.2 2242 SATA SSD |
| Espansione di archiviazione | 1x M.2 2280 PCIe Gen3*2 (Max 8TB), 1x M.2 2242 SATA (Max 2TB) |
| Uscita video | 2x HDMI 2.0 (4K a 60 Hz) |
| Porte USB | 3x USB 3.2 (Gen 2), 1x USB 2.0 |
| Rete | Gigabit Ethernet (RJ45 1000MbE), WiFi 5 (802.11ac), Bluetooth 5.0 |
| Sistema operativo | Windows 11 Pro |
| Dimensioni | Circa 6.46 x 6.3 x 4.21 pollici |
| Peso | Circa 2.07 libbre |
8. Manutenzione
To ensure the longevity and optimal performance of your GMKtec Mini PC G3S, follow these maintenance guidelines:
- Pulizia: Regularly clean the exterior of the Mini PC with a soft, dry cloth. Use compressed air to clear dust from ventilation grilles to prevent overheating. Ensure the device is powered off and unplugged before cleaning.
- Aggiornamenti software: Mantieni il sistema operativo e i driver aggiornati alle versioni più recenti. Questo migliora sicurezza, stabilità e prestazioni.
- Ventilazione: Ensure the Mini PC is placed in a well-ventilated area and that its vents are not obstructed. Proper airflow is crucial for heat dissipation.
- Alimentazione elettrica: Utilizzare solo l'adattatore di alimentazione originale fornito con il dispositivo.
9. Risoluzione Dei Problemi
Se riscontri problemi con il tuo Mini PC, fai riferimento alle seguenti soluzioni comuni:
- Nessuna visualizzazione:
- Ensure the monitor is powered on and correctly connected to the Mini PC via HDMI.
- Verificare che sul monitor sia selezionata la sorgente di input corretta.
- Se disponibile, provare un altro cavo HDMI o un altro monitor.
- Nessun potere:
- Check that the power adapter is securely connected to both the Mini PC and a working power outlet.
- Assicurarsi che il pulsante di accensione sia premuto saldamente.
- Problemi di connettività di rete:
- Per le connessioni cablate, assicurarsi che il cavo Ethernet sia collegato correttamente e che il router funzioni.
- For Wi-Fi, check that Wi-Fi is enabled in Windows settings and you are connected to the correct network with the correct password.
- Riavvia il router/modem e il Mini PC.
- Prestazioni lente:
- Chiudere le applicazioni non necessarie in esecuzione in background.
- Ensure the system is updated and free of malware.
- Consider switching to 'Performance Mode' in BIOS settings if sustained high performance is required.
If problems persist, please contact GMKtec customer support.
10. Garanzia e supporto
GMKtec offre un Garanzia limitata di 1 anno for each Mini PC, effective from the date of purchase. This warranty covers defects due to design and workmanship. For any issues or inquiries, please utilize the following support channels:
- Servizio Clienti Amazon: Accedi al tuo account Amazon, vai su "I tuoi ordini" e seleziona "Fai una domanda sul prodotto" per ricevere assistenza.
- GMKtec After-Sales Team: Contact support directly via email at support@gmktec.com.
- 24/7 Client Support: GMKtec provides continuous client support for your convenience.

Figura 8: Oltreview of available customer support options for GMKtec products.
Video ufficiale del prodotto
Video 1: Un prodotto ufficialeview of the GMKtec Mini PC G3S, highlighting its features and capabilities.