
1. Istruzioni di sicurezza
Always wear appropriate personal protective equipment (PPE) including safety glasses, hearing protection, and gloves when operating the tool. Ensure the work area is well-lit and clear of obstructions. Disconnect the battery before changing accessories or performing maintenance. Keep children and bystanders away from the operating area. Read and understand all instructions before use.
- Protezione degli occhi: Indossare sempre occhiali di sicurezza per proteggersi dai detriti volanti.
- Protezione dell'udito: Use earplugs or earmuffs during extended operation.
- Protezione della mano: Wear work gloves to improve grip and protect hands.
- Area di lavoro: Maintain a clean, well-lit, and organized workspace.
- Sicurezza della batteria: Use only compatible Makita 18V batteries. Do not expose batteries to water or extreme temperatures.
- Manipolazione degli utensili: Hold the tool firmly with both hands during operation. Avoid overreaching.
2. Componenti del prodotto
The DIYtoolifz Cordless Oscillating Tool comes with several components designed for versatility and ease of use. Familiarize yourself with each part before operation.

Figura 2.1: Sopraview of the DIYtoolifz Cordless Oscillating Tool and included accessories. Key components include the LED Light, Rib, Locking Rod, Quick Release Lever, ON/OFF Switch, Rear Handle, and Variable Speed Dial. Accessories shown are straight blades, semicircular blade, sanding pad, sanding papers, auxiliary handle, earplugs, and storage bag.
- Oscillating Tool Body: The main unit housing the brushless motor and controls.
- Leva di sgancio rapido: For tool-free blade changes.
- Composizione a velocità variabile: Adjusts oscillation speed from 1 to 5, or Auto mode.
- Interruttore ON/OFF: Attiva e disattiva lo strumento.
- Luce LED: Illumina l'area di lavoro per una migliore visibilità.
- Maniglia ausiliaria: Provides additional grip and control, can be mounted on either side.
- Lame: Includes straight oscillating saw blade and semicircular blade for various cutting tasks.
- Sanding Pad & Papers: For sanding applications.
- Tappi per le orecchie: For hearing protection.
- Borsa portaoggetti: For convenient storage and transport of the tool and accessories.
3. Impostazione
3.1. Collegamento della batteria
This tool is compatible with Makita 18V batteries (BL1860, BL1850, BL1840, BL1830, BL1815, etc.). Ensure the battery is fully charged before use.
- Align the battery with the side-loading battery slot on the tool.
- Inserire la batteria nell'apposito alloggiamento finché non scatta in posizione.
- Per rimuoverla, premere il pulsante di rilascio della batteria e farla scorrere fuori.

Figura 3.1: Proper method for attaching a compatible Makita 18V battery to the tool. The side-loading design allows for better balance and access.
3.2. Installing/Changing Accessories
The tool features a universal accessory interface for quick and tool-free blade changes.
- Assicurarsi che la batteria sia rimossa dall'utensile.
- Lift the quick release lever on the tool head to a 180-degree open position.
- Align the desired accessory (blade or sanding pad) with the universal interface.
- Insert the accessory firmly onto the tool head.
- Push the quick release lever back down until it locks into place, securing the accessory.
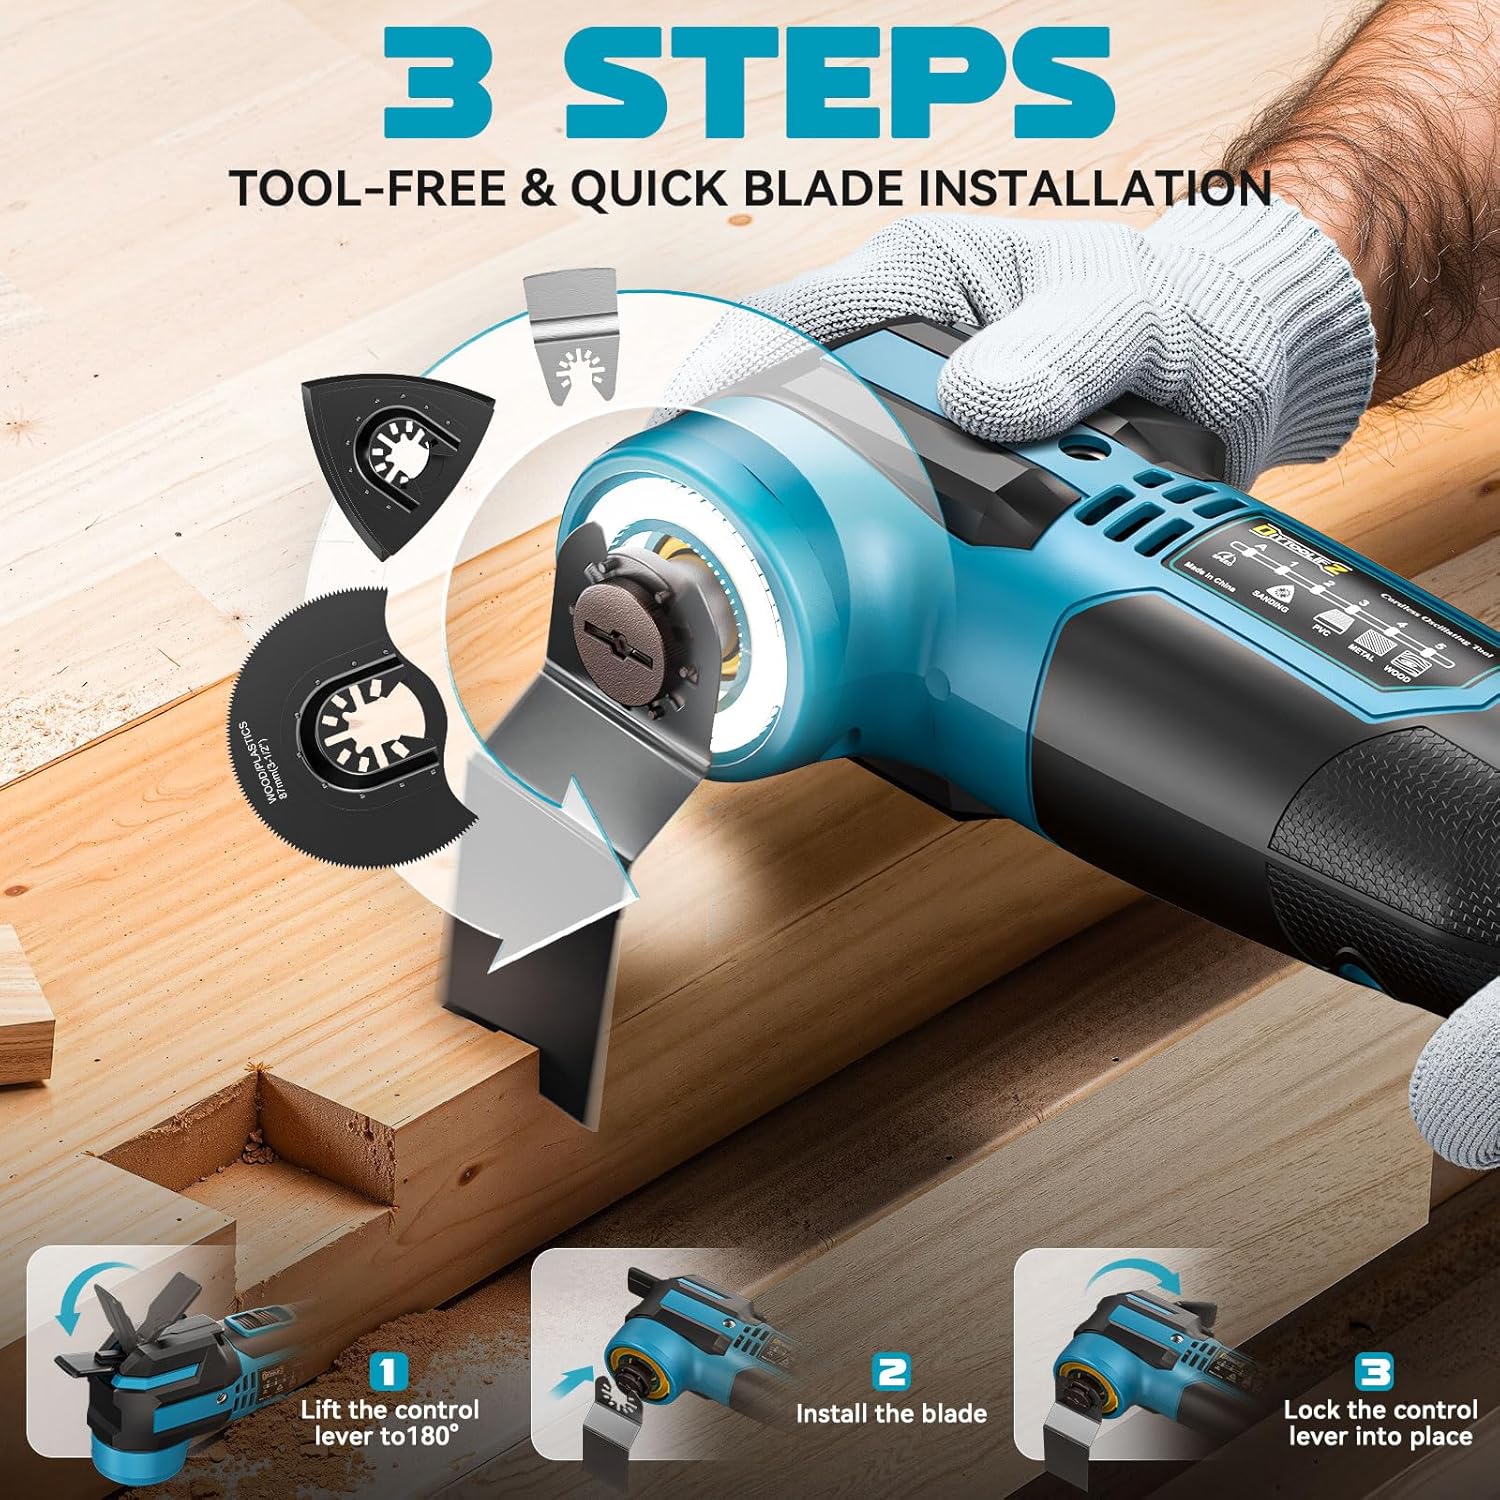
Figura 3.2: Illustrated steps for tool-free blade installation: 1. Lift the control lever to 180°. 2. Install the blade. 3. Lock the control lever into place.
3.3. Fissaggio della maniglia ausiliaria
For enhanced control and stability, especially during demanding tasks, attach the auxiliary handle.
- Locate the threaded inserts on either side of the tool head.
- Avvitare la maniglia ausiliaria nel lato desiderato fino a fissarla saldamente.
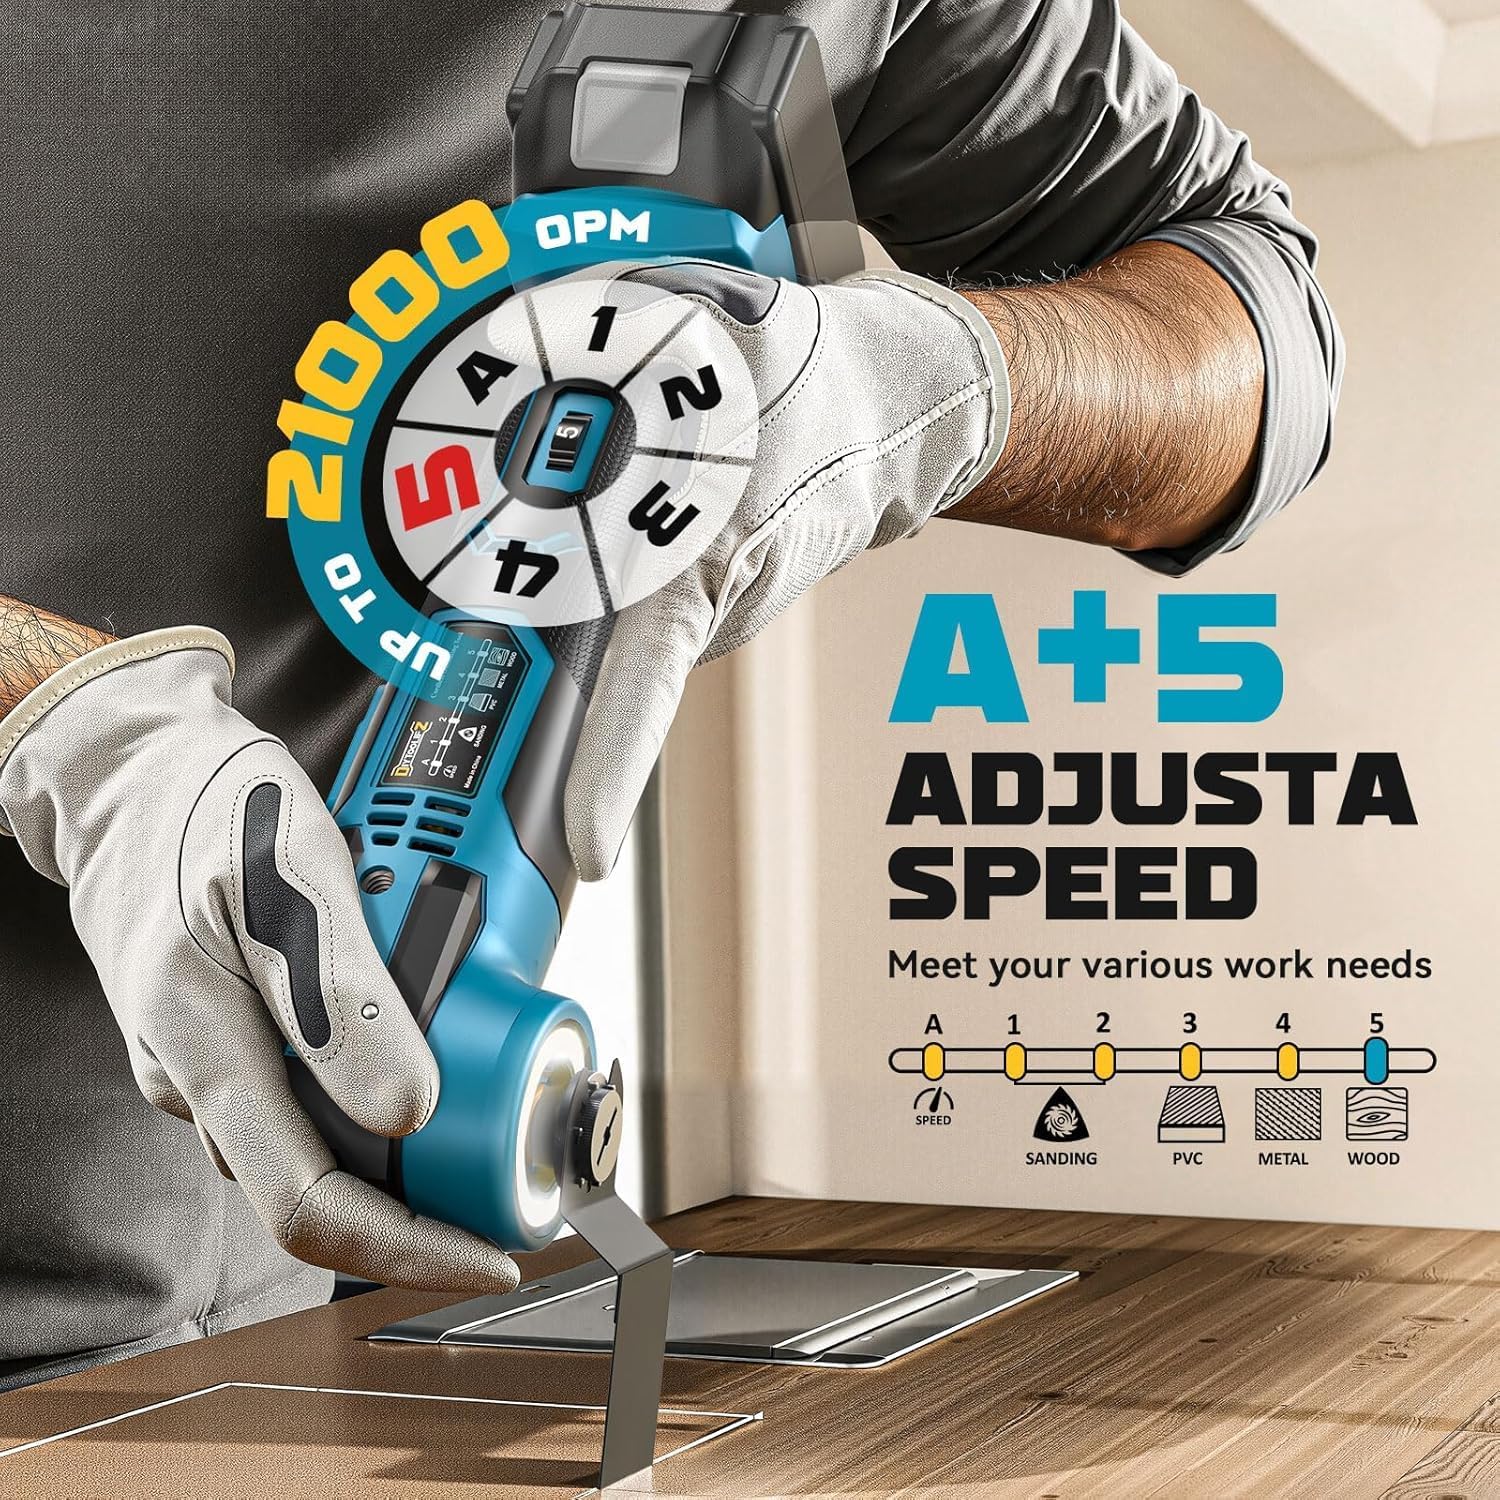
Figura 3.3: The auxiliary handle can be installed on either the left or right side of the tool for improved cutting power and stability.
4. Funzionamento
4.1. Accensione/Spegnimento
To turn the tool on, slide the ON/OFF switch forward. To turn it off, slide the switch backward. The tool does not have a trigger; the switch locks the tool in the ON position.
4.2. Regolazione della velocità
The variable speed dial allows you to select the appropriate oscillation speed for your task. Speeds range from 12,000 to 21,000 OPM (Oscillations Per Minute).
- Impostazioni di velocità (1-5): Manually select a speed based on the material and application.
- 1: Sanding
- 2: PVC
- 3: Metal
- 4-5: Wood
- Modalità automatica (A): The tool intelligently adjusts the speed based on the material resistance, optimizing performance and battery life.
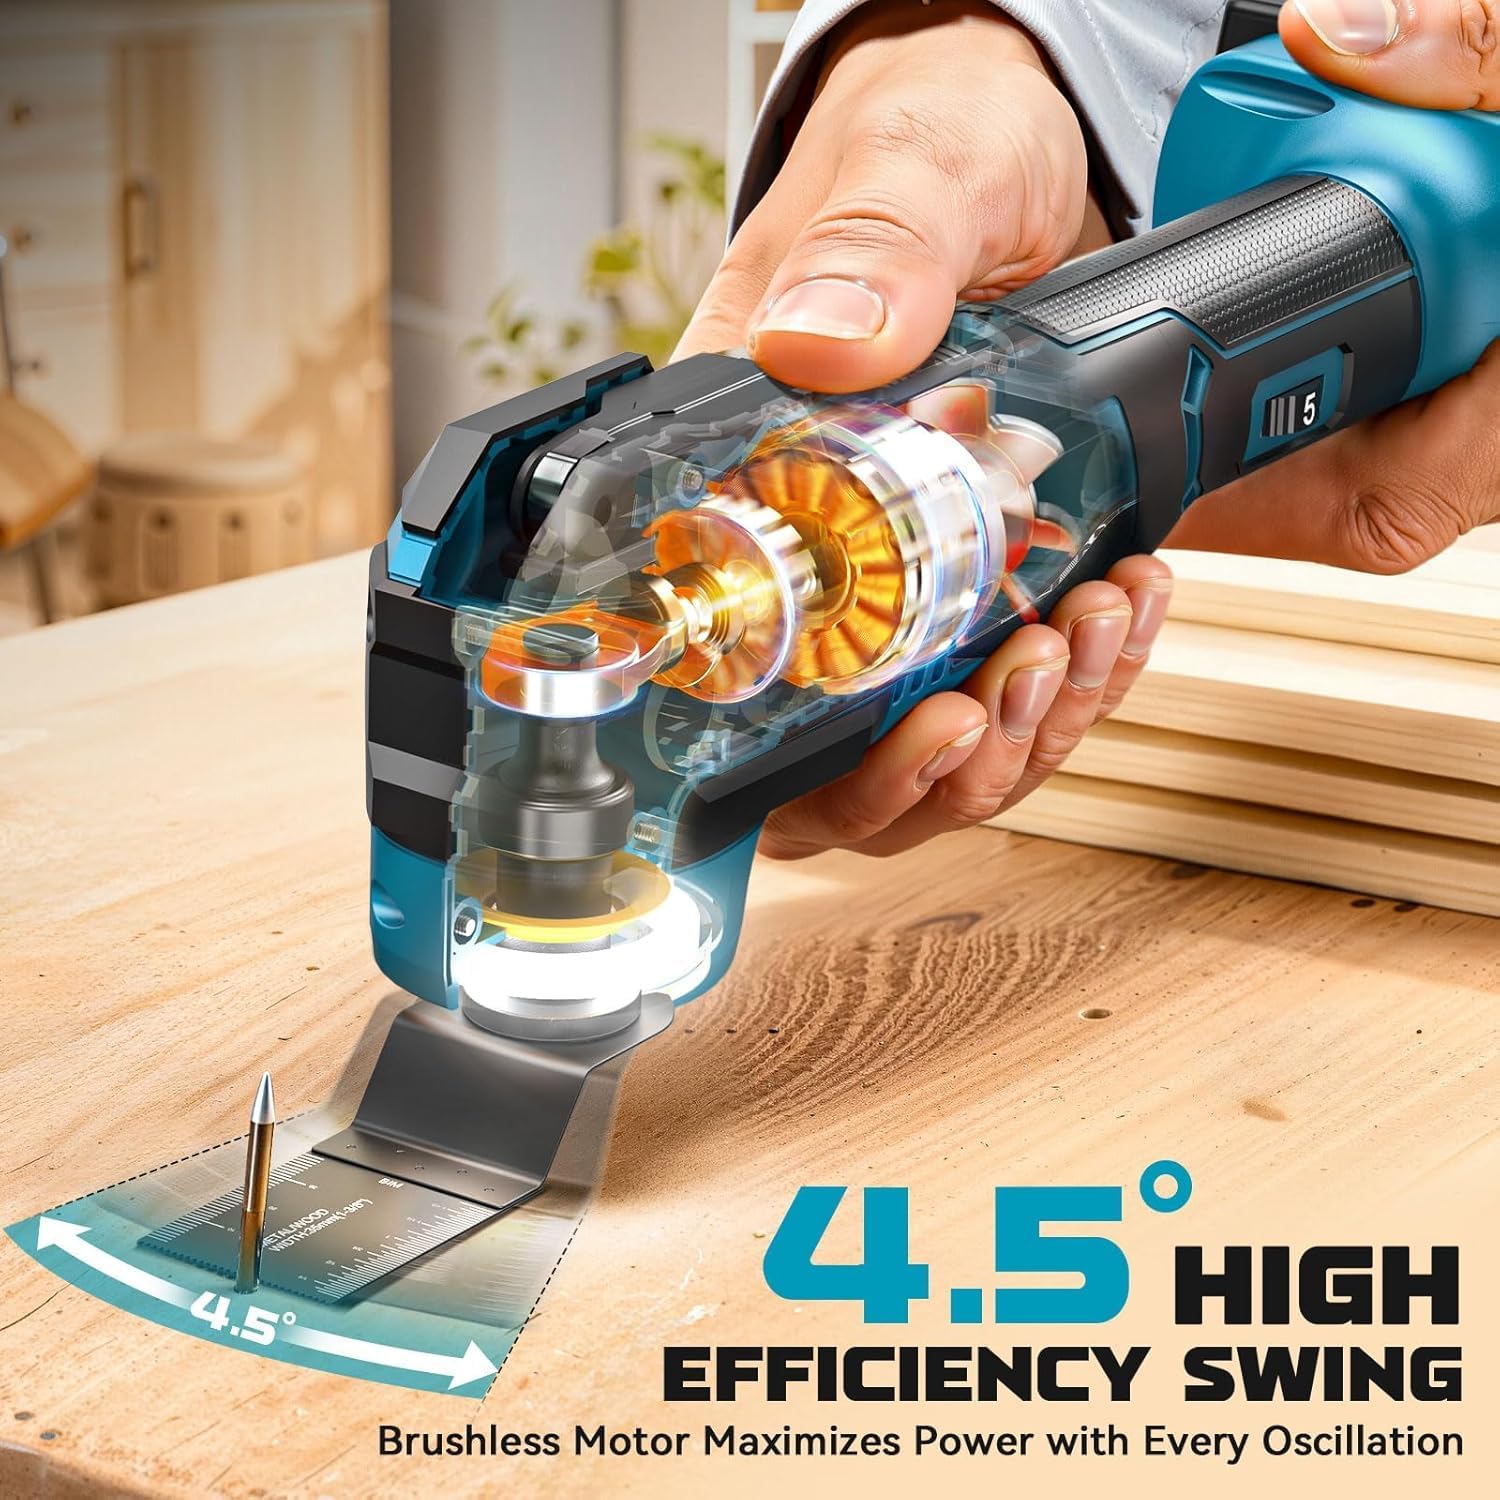
Figura 4.1: The variable speed dial offers both manual settings (1-5) and an Auto mode for intelligent speed adjustment.
4.3. Suggerimenti generali per l'uso
- Applicare una pressione leggera e costante. Lasciare che sia lo strumento a fare il lavoro.
- For cutting, allow the blade to reach full speed before engaging the workpiece.
- For sanding, move the tool in a consistent pattern to avoid uneven removal.
- The 4.5° oscillation angle provides efficient material removal.
- Utilize the built-in LED light for improved visibility in dimly lit areas.
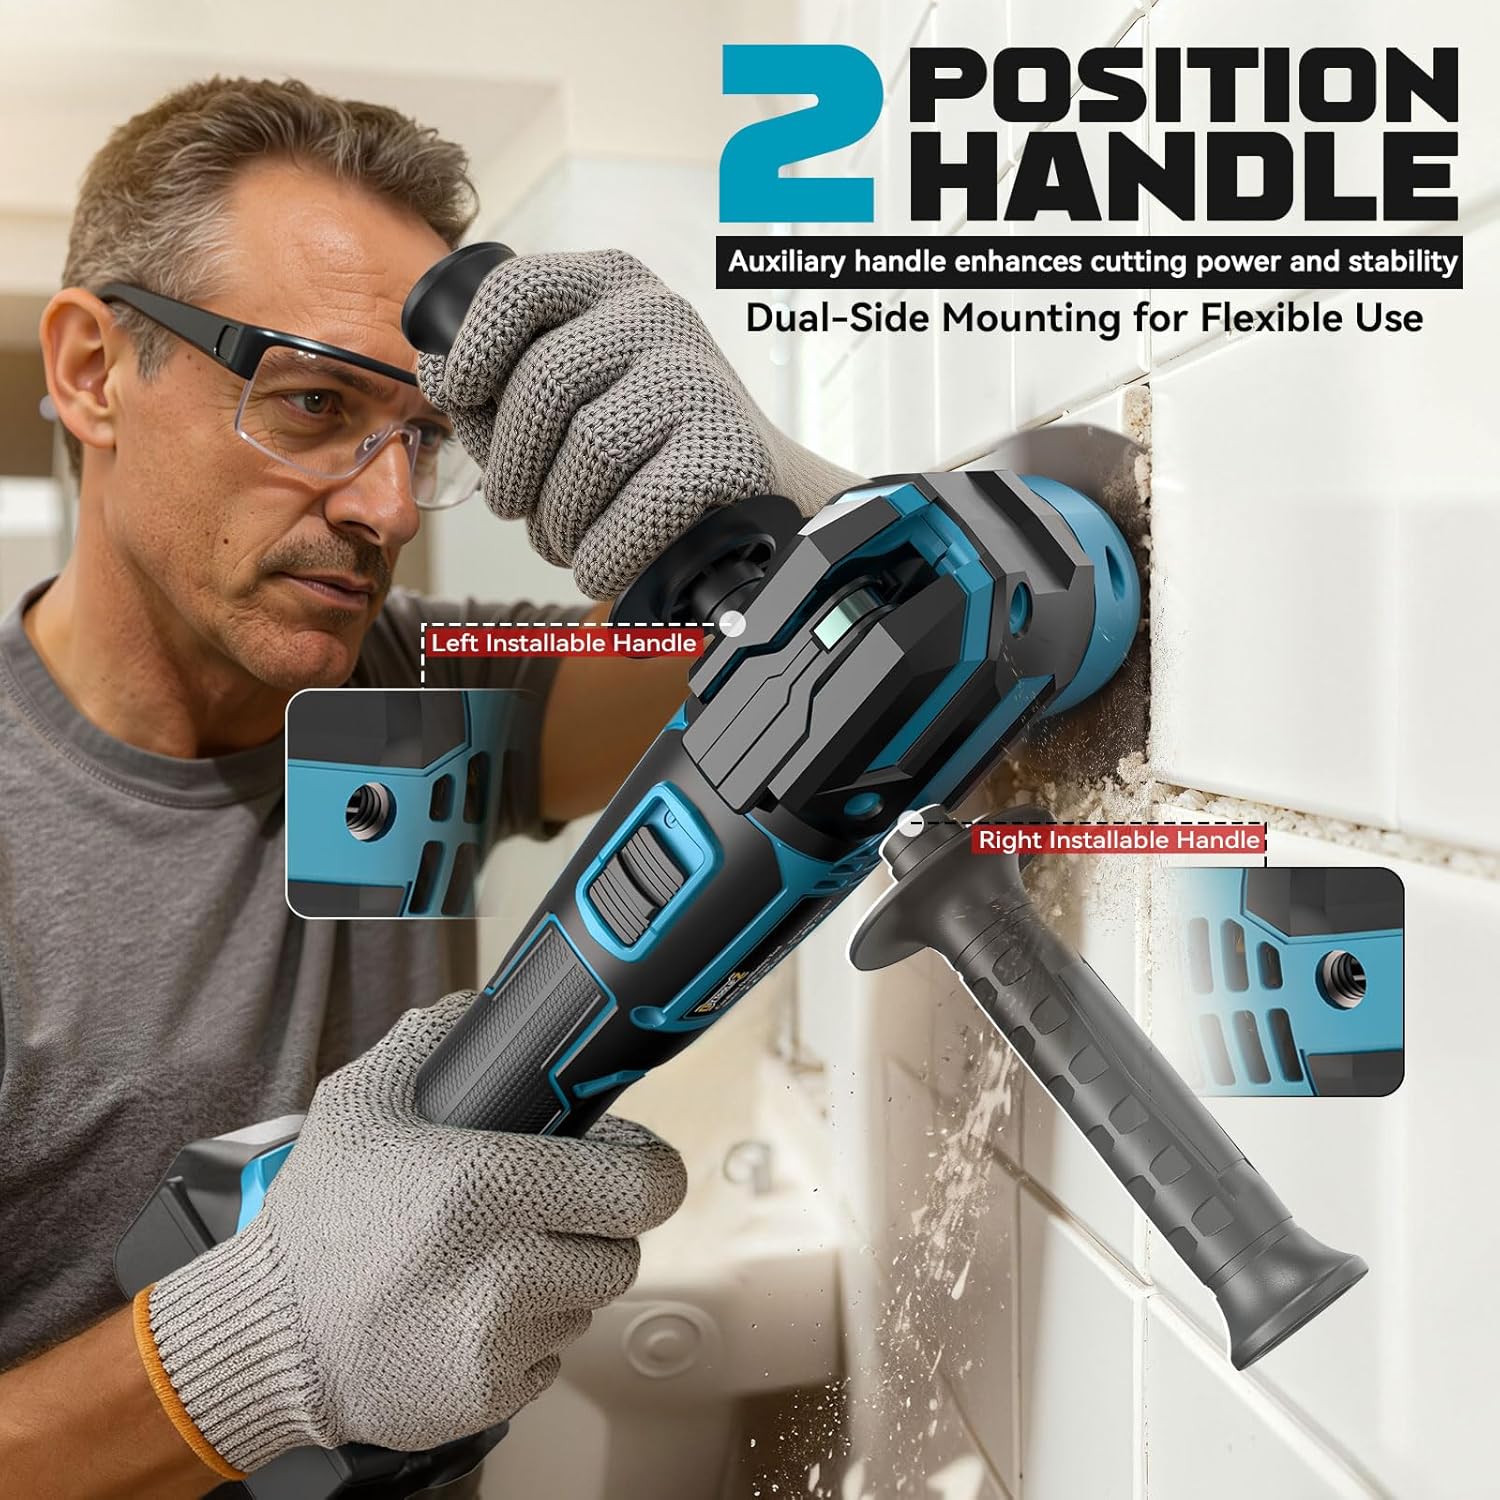
Figura 4.2: The multi-function tool kit can be used for diverse applications including cutting nails, sawing pipes, sanding cork wood, cutting holes, scraping wallpaper, and cutting cork wood.
5. Manutenzione
Regular maintenance ensures the longevity and optimal performance of your oscillating tool. Always disconnect the battery before performing any maintenance.
- Pulizia: After each use, wipe down the tool with a clean, dry cloth. Remove any dust or debris from the ventilation slots and accessory interface. Do not use harsh chemicals or abrasive cleaners.
- Ispezione degli accessori: Regularly inspect blades and sanding pads for wear or damage. Replace worn accessories to maintain cutting efficiency and safety.
- Cura della batteria: Conservare le batterie in un luogo fresco e asciutto, lontano dalla luce solare diretta. Non conservare batterie completamente scariche per periodi prolungati.
- Magazzinaggio: Conservare l'utensile e i suoi accessori nella custodia fornita in dotazione, in un luogo asciutto e sicuro, fuori dalla portata dei bambini.
6. Risoluzione Dei Problemi
This section addresses common issues you might encounter with your DIYtoolifz oscillating tool.
| Problema | Possibile causa | Soluzione |
|---|---|---|
| Lo strumento non si avvia. | Battery not inserted correctly or discharged. ON/OFF switch not fully engaged. | Ensure battery is fully inserted and charged. Fully slide the ON/OFF switch to the 'ON' position. |
| Prestazioni ridotte o vibrazioni eccessive. | Worn or dull accessory. Incorrect speed setting. Overloading the tool. | Replace the accessory. Adjust speed setting for the material. Reduce pressure on the tool. |
| L'accessorio non è fissato saldamente. | Quick release lever not fully locked. Debris in the accessory interface. | Ensure the quick release lever is fully closed. Clean the accessory interface. |
| L'utensile si surriscalda. | Uso intenso e continuo. Fessure di ventilazione bloccate. | Allow the tool to cool down. Clear any obstructions from ventilation slots. Avoid prolonged heavy use. |
7. Specifiche
- Modello: WYBZ041
- Marca: DIYtoolifz
- Fonte di energia: Battery Powered (Compatible with Makita 18V batteries)
- Voltage: 18 Volt
- Oscillations Per Minute (OPM): 12,000 – 21,000 OPM (6-speed control + Auto Mode)
- Angolo di oscillazione: 4.5°
- Tipo di motore: Senza spazzole
- Peso dell'articolo: Circa 4 libbre (senza batteria)
- Dimensioni della confezione: 14.37 x 12.32 x 4.21 pollici
- Componenti inclusi: 1 Oscillating Tool (Bare Tool Only), Straight Oscillating Saw Blade, Semicircular Blade, Sanding Pad, 10 Sanding Papers, Dual-Position Handle, Earplugs, Storage Bag.
8. Garanzia e supporto
This DIYtoolifz product comes with a 5-year manufacturer's warranty. If you encounter any issues with the product, please contact the manufacturer or seller for support.
For customer support, please refer to the contact information provided at the point of purchase or on the official DIYtoolifz websito.
9. Video di prodotto
9.1. Cordless Multi Tool Compatible with DeWalt Battery (Seller Video)
This video demonstrates the features and operation of the cordless oscillating multi-tool, highlighting its compatibility with DeWalt batteries. It shows the tool in action for various cutting and sanding tasks.
9.2. Cordless Oscillating Tool Compatible with DeWalt Battery (Seller Video)
This video provides another demonstration of the cordless oscillating tool, focusing on its compatibility with DeWalt batteries and showcasing its versatility in different applications.