1. Introduzione
Thank you for choosing the AVAPOW A37/TJ18 Jump Starter. This device is designed to safely and efficiently jump-start vehicles with dead 12V batteries and serve as a portable power bank for electronic devices. Please read this manual thoroughly before use to ensure proper operation and to prevent damage to the product or your vehicle.
2. Informazioni sulla sicurezza
WARNING: Improper use may result in injury or damage to the device or vehicle.
- Collegare sempre il rosso clamp al terminale positivo (+) e al cl . neroamp al terminale negativo (-).
- Non toccare il cl red rosso e neroamps insieme per evitare cortocircuiti.
- Non avviare un veicolo con i cavi se il livello della batteria dell'avviatore è inferiore al 20%.
- Non tentare di avviare i veicoli con il motore accesotagdiverso da 12V.
- Tenere il dispositivo lontano dalla portata dei bambini.
- Non esporre il dispositivo a temperature estreme, alla luce solare diretta o all'acqua.
- If the jump starter becomes excessively hot during use, discontinue operation immediately.
- Assicurare una ventilazione adeguata durante l'uso e la ricarica.
3. Contenuto della confezione
Verifica che tutti gli articoli siano presenti nel tuo pacco:
- AVAPOW Jump Starter Unit (A37 or TJ18)
- Smart Jumper Clamps
- Cavo di ricarica USB-C
- Custodia di stoccaggio
- Manuale dell'utente (questo documento)
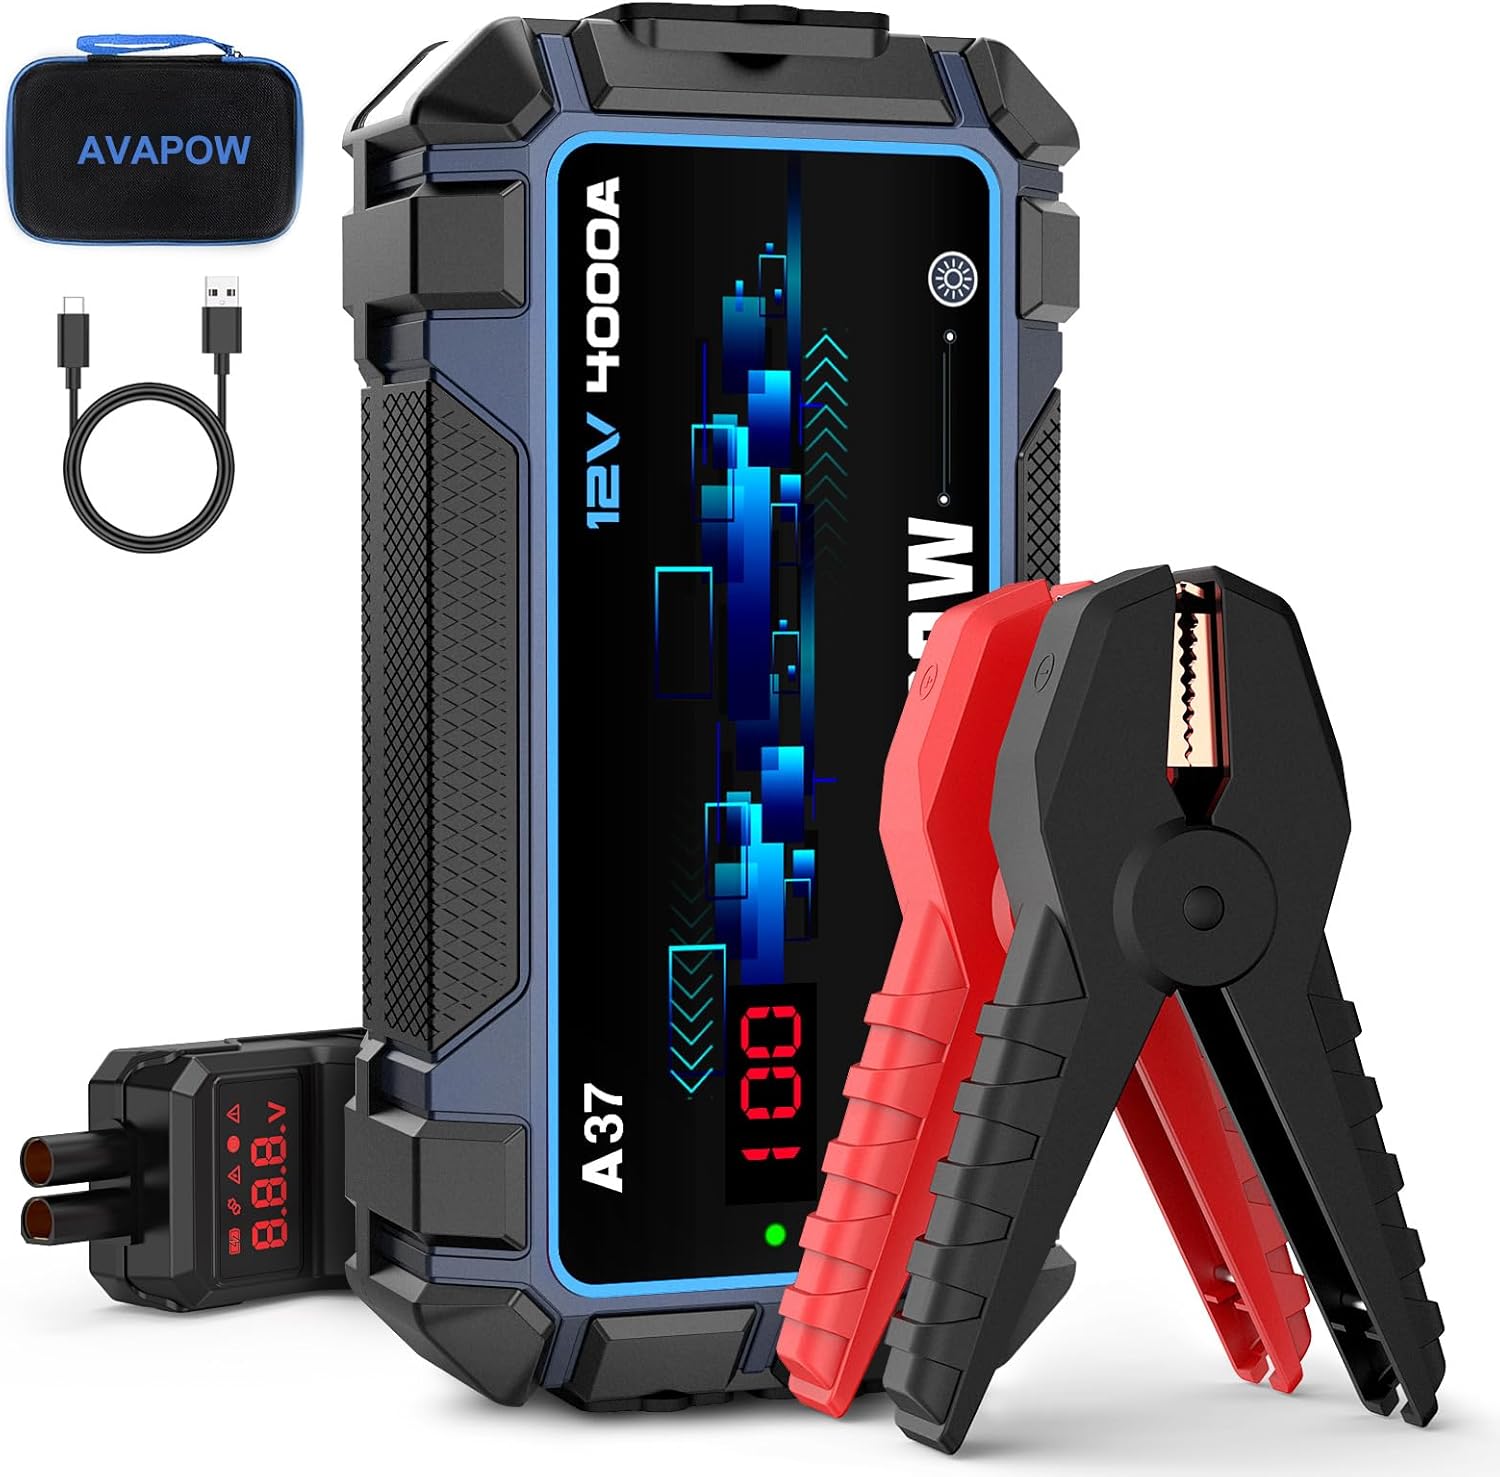
Image 3.1: Contents of the AVAPOW Jump Starter package, including the main unit, smart jumper clamps, USB-C charging cable, and a protective storage case.
4. Prodotto finitoview
Familiarize yourself with the components and features of your AVAPOW Jump Starter.

Immagine 4.1: Lato view illustrating the Force-Start Button, LED Light, EC5 Output Port, USB-C Input/Output (18W Max), USB-A Output, and DC Output.
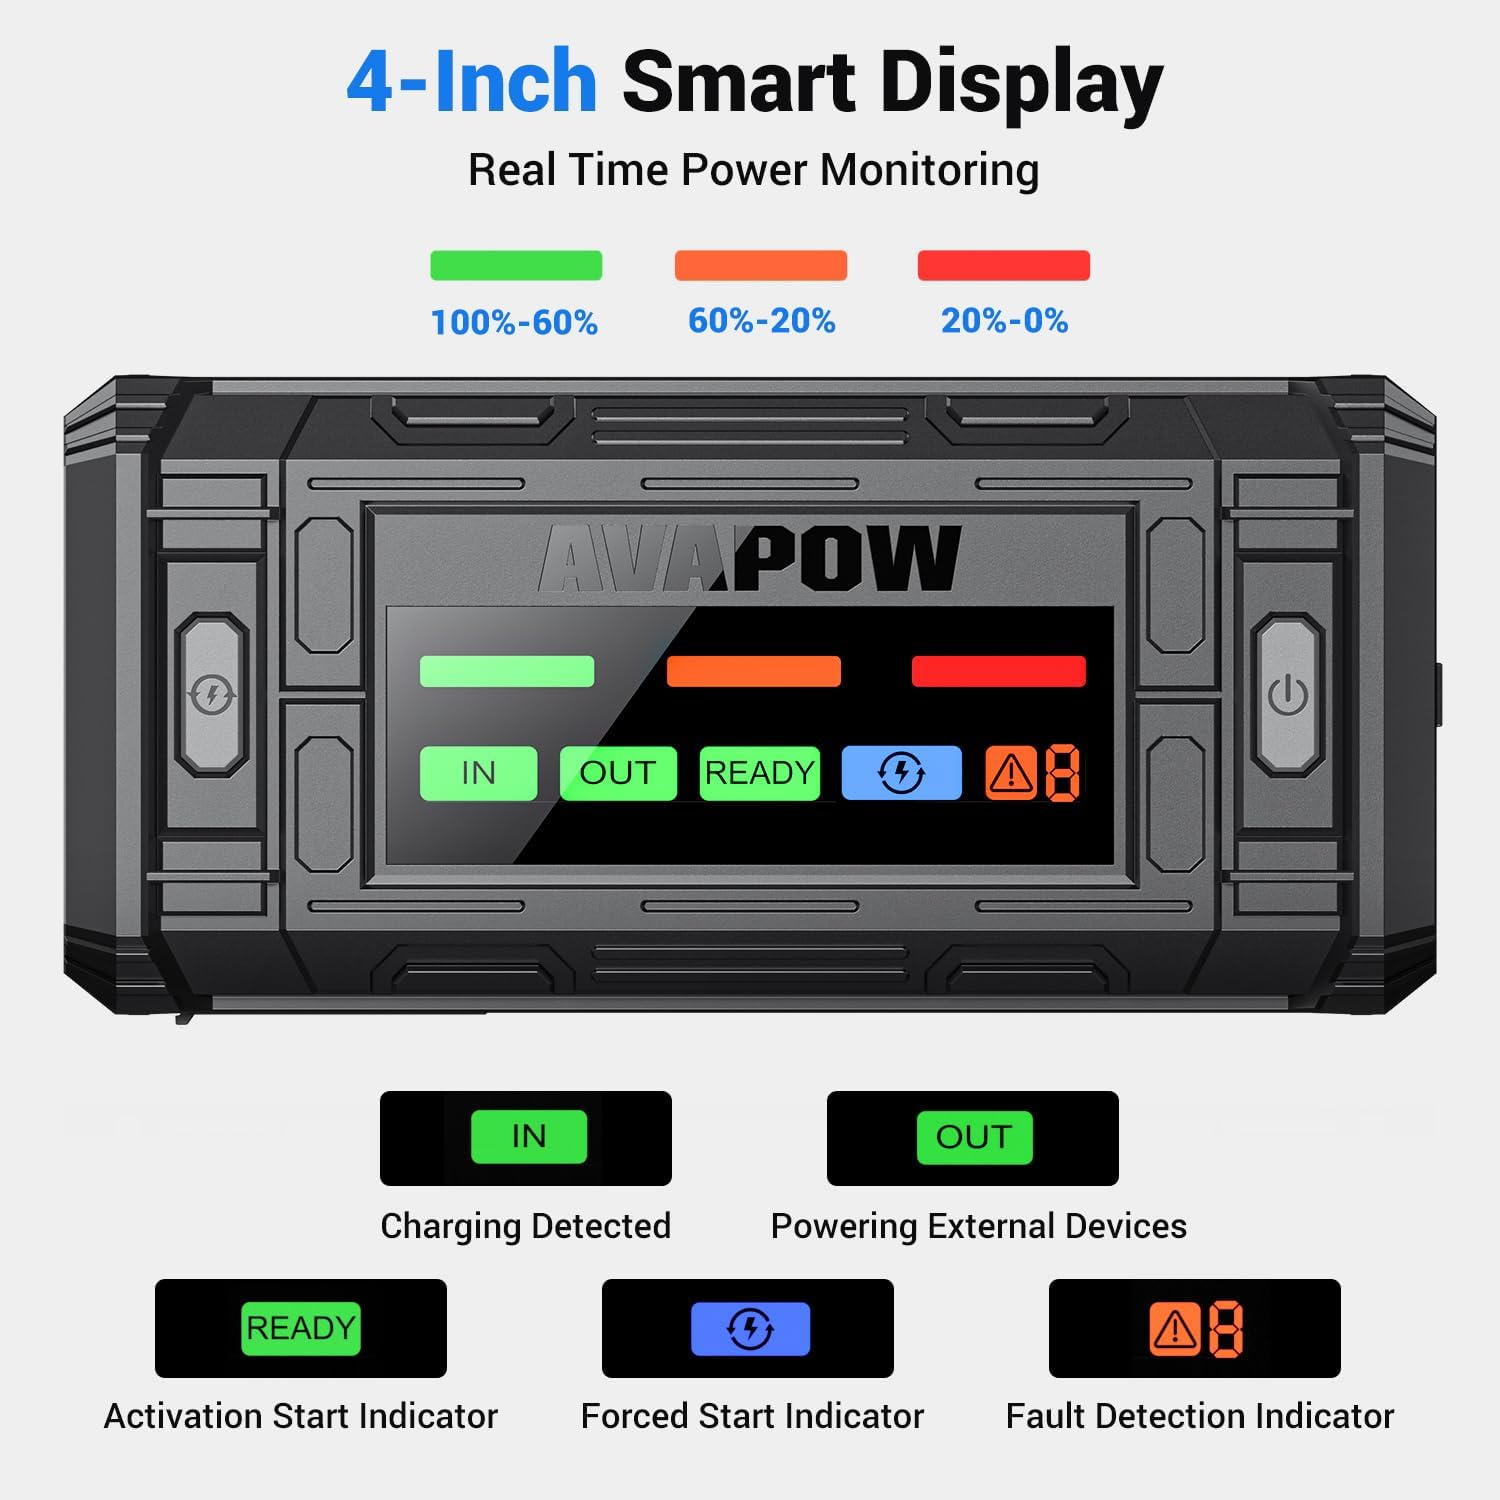
Image 4.2: The 4-inch smart display provides real-time power monitoring. Indicators include 'IN' (Charging Detected), 'OUT' (Powering External Devices), 'READY' (Activation Start Indicator), 'Force Start Indicator', and 'Fault Detection Indicator'.
Caratteristiche principali:
- Corrente di picco elevata: Up to 4000A (A37) or 3000A (TJ18) for starting 12V vehicles.
- Dual Starter Modes: Normal Mode for low-voltage batteries and Force Start Mode for completely dead batteries.
- Protezione di sicurezza avanzata: 10-layer safety features including short-circuit, reverse polarity, over-current, and over-temperature protection.
- 4-inch Digital Display: Clear LED screen showing battery level, voltage, and operational alerts.
- Versatile Power Hub: USB-C PD 18W input/output, dual USB-A outputs, and a 12V DC output for charging various devices.
- Ultra-Bright Emergency Light: Features Steady, Strobe, and SOS modes for various situations.
5. Impostazione
Carica iniziale:
Before first use, fully charge the AVAPOW Jump Starter. It is recommended to charge the device every 3-6 months to maintain optimal battery health.
- Connect the provided USB-C charging cable to the USB-C input/output port on the jump starter.
- Connect the other end of the USB-C cable to a USB wall adapter (not included) or a car charger. For fastest charging, use a PD 18W compatible charger.
- The digital display will show 'IN' and the battery level will increase, indicating charging is in progress.
- Charging is complete when the display shows 100%. A full charge typically takes approximately 2.5 hours with an 18W PD charger.
6. Istruzioni per l'uso
6.1. Avviamento di emergenza di un veicolo
Prima di tentare di avviare un veicolo, assicurarsi che l'avviatore di emergenza sia carico almeno al 20%.
- Connetti Clamps: Plug the smart jumper clamps into the EC5 output port of the jump starter. Ensure a secure connection.
- Collegare alla batteria: Collegare il rosso (+) clamp al terminale positivo della batteria del veicolo. Collegare il polo nero (-)amp al terminale negativo della batteria del veicolo.
- Controlla lo schermo: The jump starter's display should show 'READY' if the connection is correct and the battery voltage is detected. If a fault is detected, the 'Fault Detection Indicator' will illuminate.
- Avviare il veicolo: Start your vehicle's engine. If the vehicle does not start immediately, wait 30 seconds before trying again. Do not crank the engine for more than 3 seconds per attempt.
- Rimuovere Clamps: Una volta avviato il veicolo, rimuovere immediatamente la chiave intelligenteampdalla batteria del veicolo, quindi scollegarli dall'avviatore di emergenza.

Image 6.1: The AVAPOW Jump Starter connected to a vehicle battery using the smart clamps, ready to initiate a jump start.
Modalità di avvio forzato:
If your vehicle's battery is completely dead (0V) and the jump starter does not display 'READY', you may need to use Force Start Mode.
- Connetti il cl smart intelligenteamps to the jump starter and then to the vehicle battery terminals as described above.
- Press and hold the 'Force-Start Button' on the jump starter for 3 seconds. The 'Force Start Indicator' will illuminate.
- Avviare il motore del veicolo entro 30 secondi.
- Una volta avviato il veicolo, rimuovere immediatamente la chiave intelligenteamps.
CAUTION: Use Force Start Mode only when necessary, as it bypasses some safety checks. Ensure correct polarity before activating.
6.2. Utilizzo come power bank portatile
The AVAPOW Jump Starter can charge various electronic devices.
- Uscita USB-C: Connect your device to the USB-C port using a compatible cable for fast charging up to 18W.
- Uscita USB-A: Connect your device to either of the USB-A ports for standard charging (e.g., 5V/3A, 9V/2A, 12V/1.5A).
- Uscita 12 V CC: Use the 12V DC output port to power 12V accessories (e.g., tire inflators, car vacuums).
6.3. Utilizzo della luce LED di emergenza
The built-in LED light offers three modes for various emergency situations.
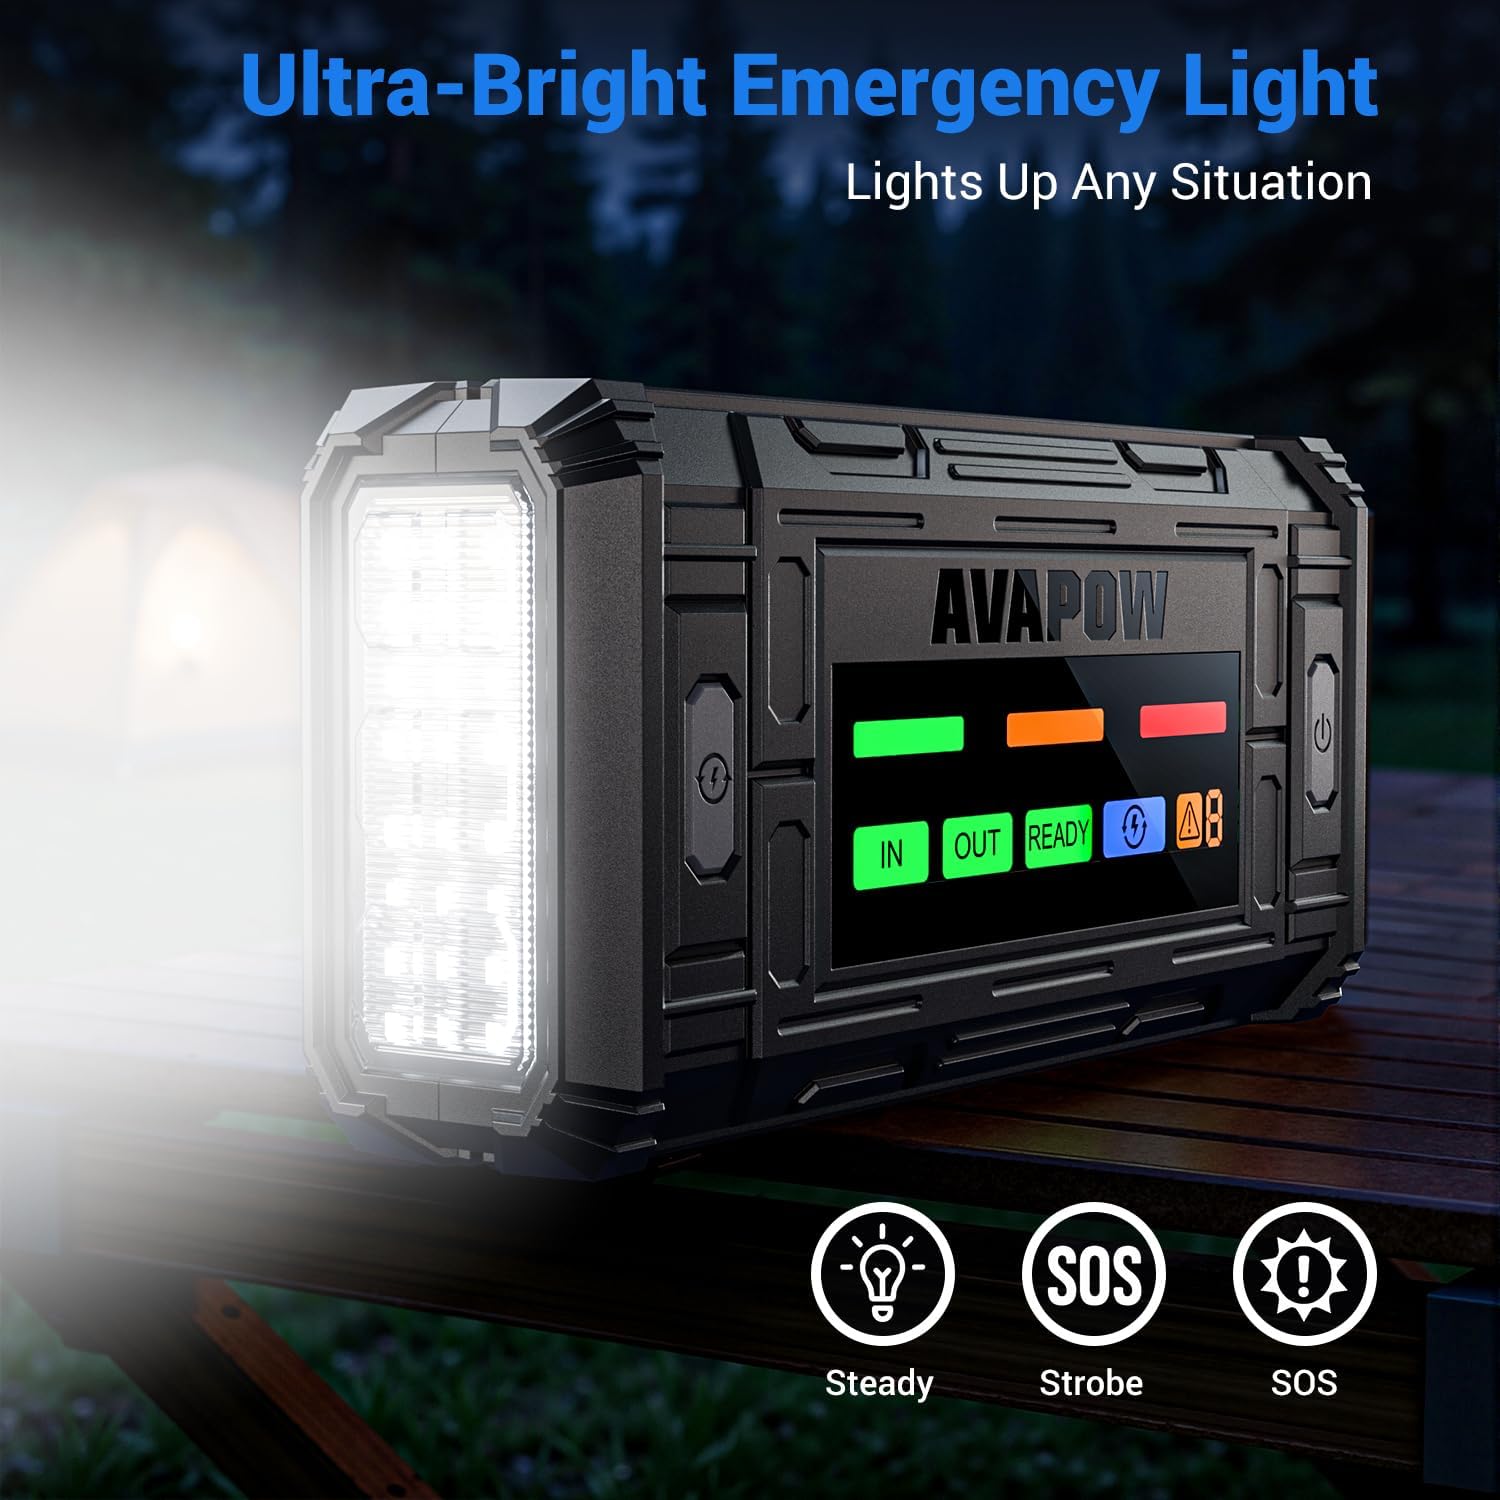
Image 6.2: The AVAPOW Jump Starter's ultra-bright LED light, capable of Steady, Strobe, and SOS modes for emergency illumination.
- Press the LED light button once for Steady mode.
- Premere nuovamente per la modalità Strobo.
- Premere una terza volta per la modalità SOS.
- Premere una quarta volta per spegnere la luce.
7. Manutenzione
- Ricarica: Recharge the jump starter at least once every 3-6 months to prolong battery life, even if not in use.
- Magazzinaggio: Store the device in a cool, dry place, away from direct sunlight and moisture. The recommended storage temperature is between -4°F to 140°F (-20°C to 60°C).
- Pulizia: Utilizzare un panno morbido e asciutto per pulire l'esterno del dispositivo. Non utilizzare prodotti chimici aggressivi o materiali abrasivi.
- Cura della batteria: Do not disassemble the unit. The internal battery is not user-replaceable.
8. Risoluzione Dei Problemi
| Problema | Possibile causa | Soluzione |
|---|---|---|
| Il veicolo non si avvia. | Jump starter battery too low; clamps not connected properly; vehicle battery completely dead. | Ensure jump starter is sufficiently charged (>20%). Check clamp connections. Try Force Start Mode if battery is completely dead. |
| Jump starter display shows 'Fault'. | Collegamento con polarità invertita; cortocircuito; sovratemperatura. | Disconnetti clamps and re-connect with correct polarity. Ensure clamps are not touching. Allow device to cool down if hot. |
| L'avviatore di emergenza non si carica. | Charging cable or adapter faulty; port obstruction. | Try a different USB-C cable and wall adapter. Ensure the USB-C port is clean and free of debris. |
| I dispositivi esterni non si caricano. | Jump starter battery too low; incorrect cable; device not compatible. | Charge the jump starter. Use the correct charging cable for your device. Verify device compatibility with output specifications. |
9. Specifiche
- Modello: A37, TJ18
- Corrente di picco: Up to 4000A (A37), 3000A (TJ18)
- Volume inizialetage: 12V
- Compatibilità motore: Motori a benzina fino a 8.0 l / diesel 8.0 l
- Ingresso/uscita USB-C: PD 18 W max
- Uscita USB-A 1: 5V/3A, 9V/2A, 12V/1.5A
- Uscita USB-A 2: 5V/2.4A
- Uscita CC: 12V/10A
- Temperatura di esercizio: Da -4°C a 140°C (da -20°F a 60°F)
- Tempo di ricarica: Approximately 2.5 hours (with 18W PD charger)
- Certificazioni di sicurezza: UL/FC/CE certified
10. Garanzia e supporto
AVAPOW products are designed for reliability and performance. For warranty information, technical support, or any questions regarding your AVAPOW Jump Starter, please refer to the warranty card included in your package or visit the official AVAPOW website. Please have your model number (A37 or TJ18) and purchase information ready when contacting support.