
1. Introduzione
Thank you for choosing the ROCKBROS Bike Taillight Smart Tag. This device is designed to enhance your cycling safety and provide additional security features. It integrates a powerful taillight with smart functionalities, including brake sensing, multiple light modes, and a built-in tracking locator compatible with iOS devices. Please read this manual carefully before use to ensure proper operation and maintenance.
2. Elenco prodotti (contenuto della confezione)
Prima dell'installazione, verificare che tutti i componenti siano presenti:
- ROCKBROS Bike Taillight Smart Tag
- Cavo di ricarica di tipo C
- Dado M5
- Vite
- Seat cushion bracket
- Chiave
- Rubber rings for seat post mounting

3. Configurazione e installazione
The taillight offers dual mounting options: under the seat (saddle bow) or on the seat post.
3.1. Montaggio del reggisella
- Attach the seat post bracket to your bicycle's seat post using the provided rubber rings. Ensure a snug fit.
- Slide the taillight onto the bracket until it clicks into place.
- Adjust the angle of the taillight as desired.

3.2. Under-Seat (Saddle Bow) Mounting
- Secure the seat cushion bracket to the saddle rails using the M5 nut and screw with the provided wrench.
- Slide the taillight onto the bracket until it locks securely.
- Adjust the angle of the taillight for optimal visibility.
3.3. Angolo regolabile
The taillight features an adjustable angle mechanism, allowing you to tilt it up or down to suit your riding position and ensure maximum visibility.

4. Istruzioni per l'uso
4.1. Accensione/spegnimento e selezione della modalità
Press and hold the power button to turn the taillight on or off. Short press the button to cycle through the 6 available light modes. The device includes a memory function, retaining the last used mode upon restart.
4.2. Modalità luce e luminosità
The taillight offers 6 distinct light modes and 2 brightness levels. To switch between high and low brightness, press the button when the taillight is off.
- Ring Steady: 11-15 hours runtime
- Center Steady: 26-35 hours runtime
- Center Slow Flash: 12-14 hours runtime
- Ring Fast Flash: 11-13 hours runtime
- Modalità di respirazione: 27-29 hours runtime
- Center Fast Flash: 42-45 hours runtime

4.3. Rilevamento intelligente dei freni
The taillight is equipped with a smart brake sensor. When deceleration is detected, the light will automatically brighten and flash rapidly for approximately 3 seconds to alert vehicles and pedestrians behind you.

Turning Brake Sensor On/Off:
- Disabilitare: Rotate the light upward and hold for 1 second.
- Abilitare: Rotate the light in the opposite direction and hold for 1 second. When enabled, the light will stay bright if tilted.
4.4. Built-in Tracking Locator
The taillight features an integrated tracking locator, compatible with iOS devices. This allows you to monitor your bike's location in real-time via a connected app, aiding in theft prevention and tracking during rides or when parked. Follow the instructions provided with your iOS device for pairing and tracking setup.
5. Ricarica e batteria
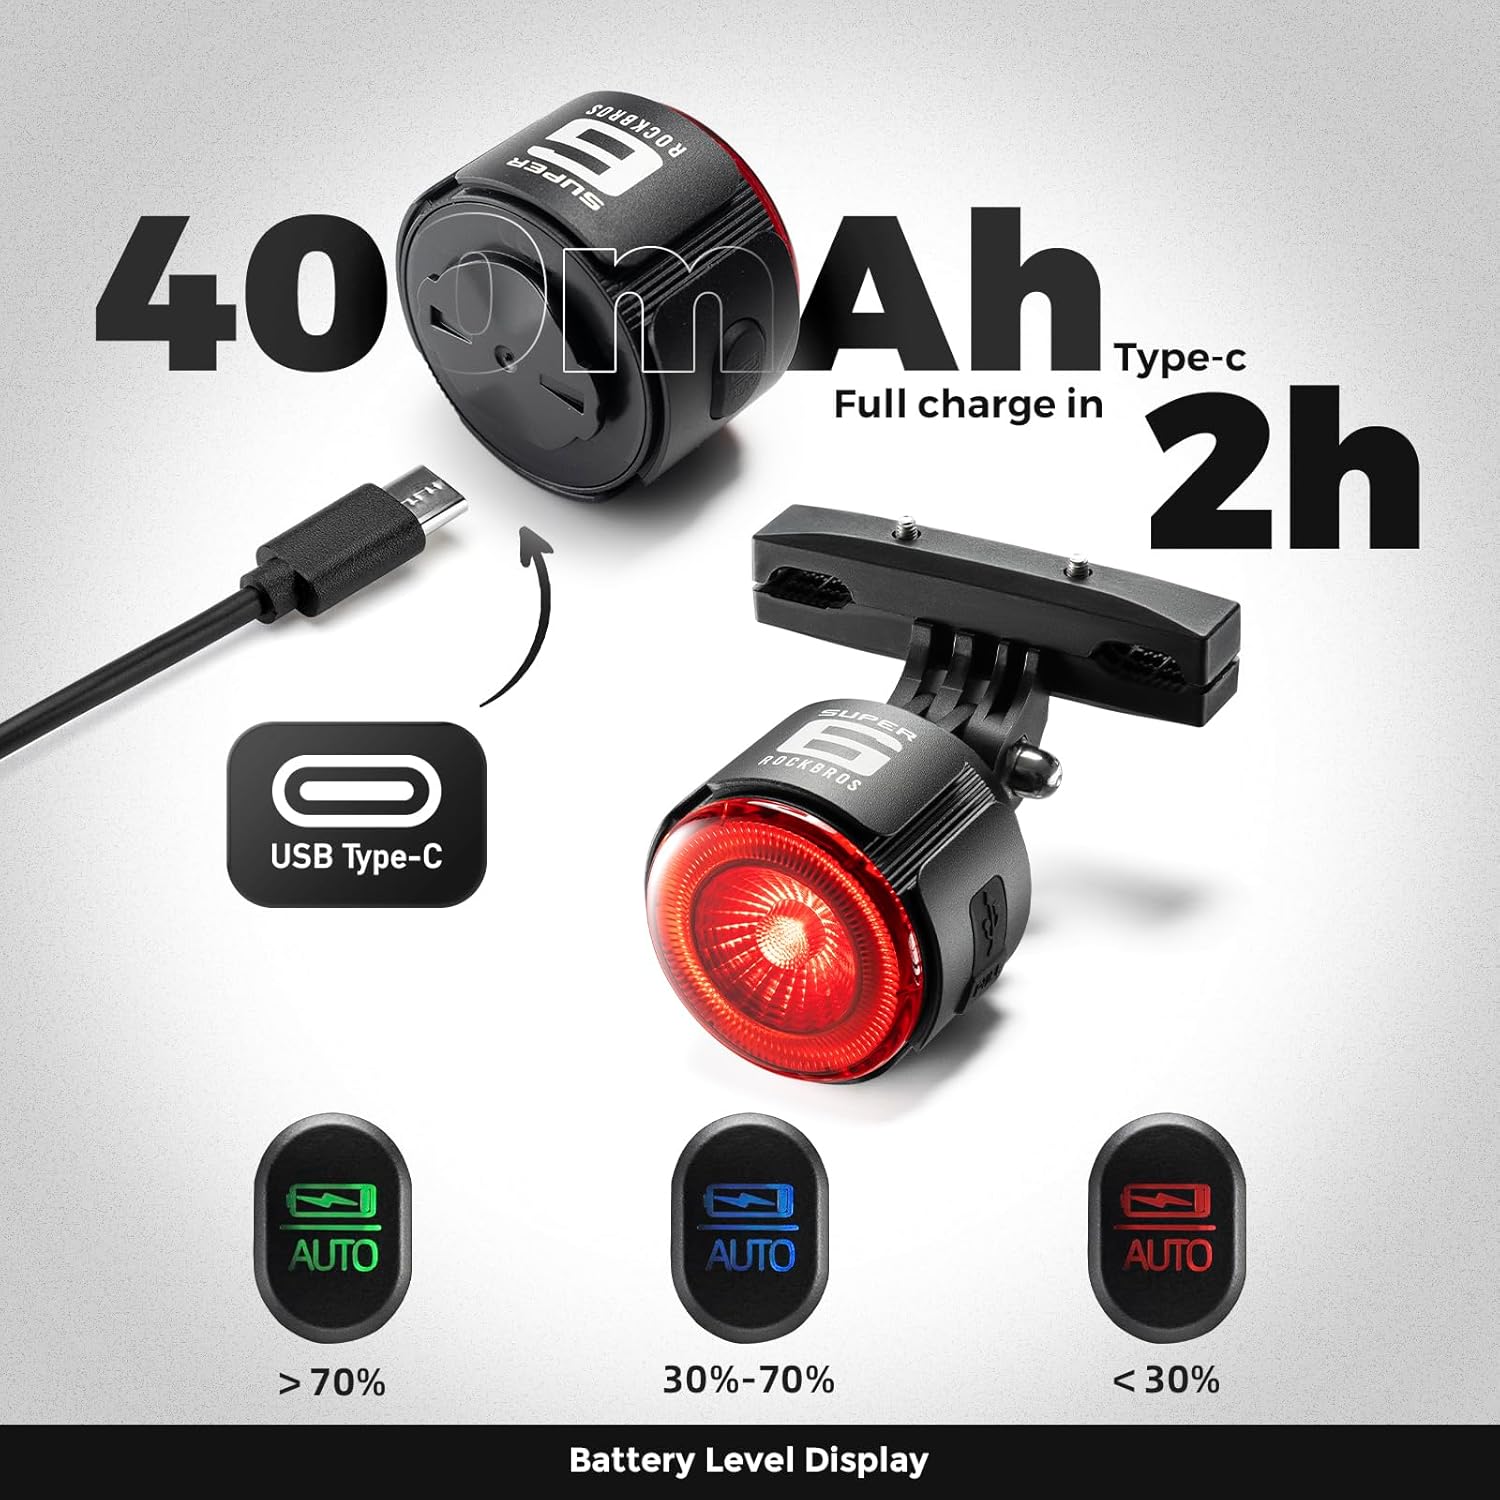
The taillight is powered by a 420mAh battery and charges via a Type-C port. A full charge typically takes approximately 2 hours.
5.1. Indicazione di carica
- Luce rossa: Indica che il dispositivo è attualmente in carica.
- Luce verde: Indica che il dispositivo è completamente carico.
5.2. Power Status Indication
The remaining battery power is indicated by different light colors:
- Luce verde: Livello batteria > 70%
- Luce blu: Livello batteria 30% - 70%
- Luce rossa: Livello batteria < 30%
6. Manutenzione
- Pulizia: Pulisci il fanale posteriore con un panno morbido eamp stoffa. Evitare l'uso di detergenti o solventi abrasivi.
- Resistenza all'acqua: The device is rated IPX5 waterproof. Ensure the Type-C charging port's dust plug is firmly inserted to maintain water resistance, especially before riding in wet conditions.
- Dissipazione del calore: The aluminum alloy shell is designed for efficient heat dissipation. Ensure the light is not covered during operation to prevent overheating.
- Magazzinaggio: Store the taillight in a cool, dry place when not in use. If storing for extended periods, charge the battery to approximately 50% to prolong its lifespan.

7. Risoluzione Dei Problemi
- La luce non si accende: Assicurarsi che la batteria sia carica. Collegare il fanale posteriore a una fonte di alimentazione utilizzando il cavo Type-C.
- Il rilevamento dei freni non funziona: Verify that the brake sensor is enabled (refer to section 4.3). Ensure the taillight is mounted securely and not obstructed.
- Tracking locator not connecting to iOS: Ensure Bluetooth is enabled on your iOS device. Follow the specific pairing instructions for the tracking feature. If issues persist, try resetting the taillight or consulting your iOS device's support resources.
- Breve durata della batteria: Ensure the taillight is fully charged before use. Operating in high brightness or certain flash modes will consume battery faster. Check for any background processes if the tracking feature is constantly active.
- La luce appare fioca: The light has two brightness levels. Ensure you have selected the desired brightness level (refer to section 4.2).
8. Specifiche
| Marca | Fratelli Rock |
| Numero di modello | 2420002001 |
| Materiale | Alluminio |
| Colore | Nero |
| Fonte di alimentazione | Alimentato a batteria (420 mAh) |
| Porta di ricarica | Tipo C |
| Livello di resistenza all'acqua | IPX5 (impermeabile) |
| Number of Light Settings | 6 Modes, 2 Brightness Levels |
| Tipo di montaggio | Seat Mount & Seatpost Mount |
9. Garanzia e supporto
9.1. Informazioni sulla garanzia
This ROCKBROS Bike Taillight Smart Tag viene fornito con un Garanzia del produttore di 2 annoLa presente garanzia copre i difetti di materiali e fabbricazione in condizioni di normale utilizzo. Non copre i danni causati da uso improprio, incidenti, modifiche non autorizzate o normale usura. Si prega di conservare la prova d'acquisto per eventuali reclami in garanzia.
9.2. Assistenza clienti
For technical assistance, warranty claims, or any questions regarding your ROCKBROS product, please visit the official ROCKBROS store or contact their customer service. You can find more information and contact details at the ROCKBROS Store on Amazon.