
1. Introduzione
Thank you for choosing the Rowenta Force Pro 500 Steam Generator Iron. This manual provides essential information for the safe and efficient use of your appliance. Please read all instructions carefully before first use and keep them for future reference.
2. Importanti istruzioni di sicurezza
- Assicurare sempre il volumetage indicato sull'apparecchio corrisponde al volume della rete elettricatage.
- Non lasciare il ferro da stiro incustodito mentre è acceso o collegato alla rete elettrica.
- Tenere l'apparecchio fuori dalla portata dei bambini e delle persone con capacità fisiche, sensoriali o mentali ridotte.
- Non immergere mai l'apparecchio, il cavo di alimentazione o la spina in acqua o altri liquidi.
- Non utilizzare l'apparecchio se è caduto, se presenta segni visibili di danni o se presenta perdite.
- Always place the iron on a stable, flat, and heat-resistant surface.
- Scollegare l'apparecchio dalla presa di corrente prima di riempire il serbatoio dell'acqua, pulirlo o effettuare qualsiasi operazione di manutenzione.
- La piastra e il vapore sono estremamente caldi e possono causare ustioni. Maneggiare con cura.
3. Componenti del prodotto
Familiarize yourself with the main parts of your Rowenta Force Pro 500 steam generator iron:
- Unità di ferro: The handheld part with the soleplate.
- Base del generatore di vapore: Contiene il serbatoio dell'acqua e il pannello di controllo.
- Serbatoio dell'acqua: Serbatoio rimovibile per il riempimento con acqua.
- Pannello di controllo: Buttons for power, Eco mode, Max mode, and Anti-calc.
- Tubo vapore: Connects the iron unit to the steam generator base.
- Collettore di calcoli: Removable part for collecting limescale.
- Sistema di bloccaggio: Secures the iron unit to the base for transport and storage.
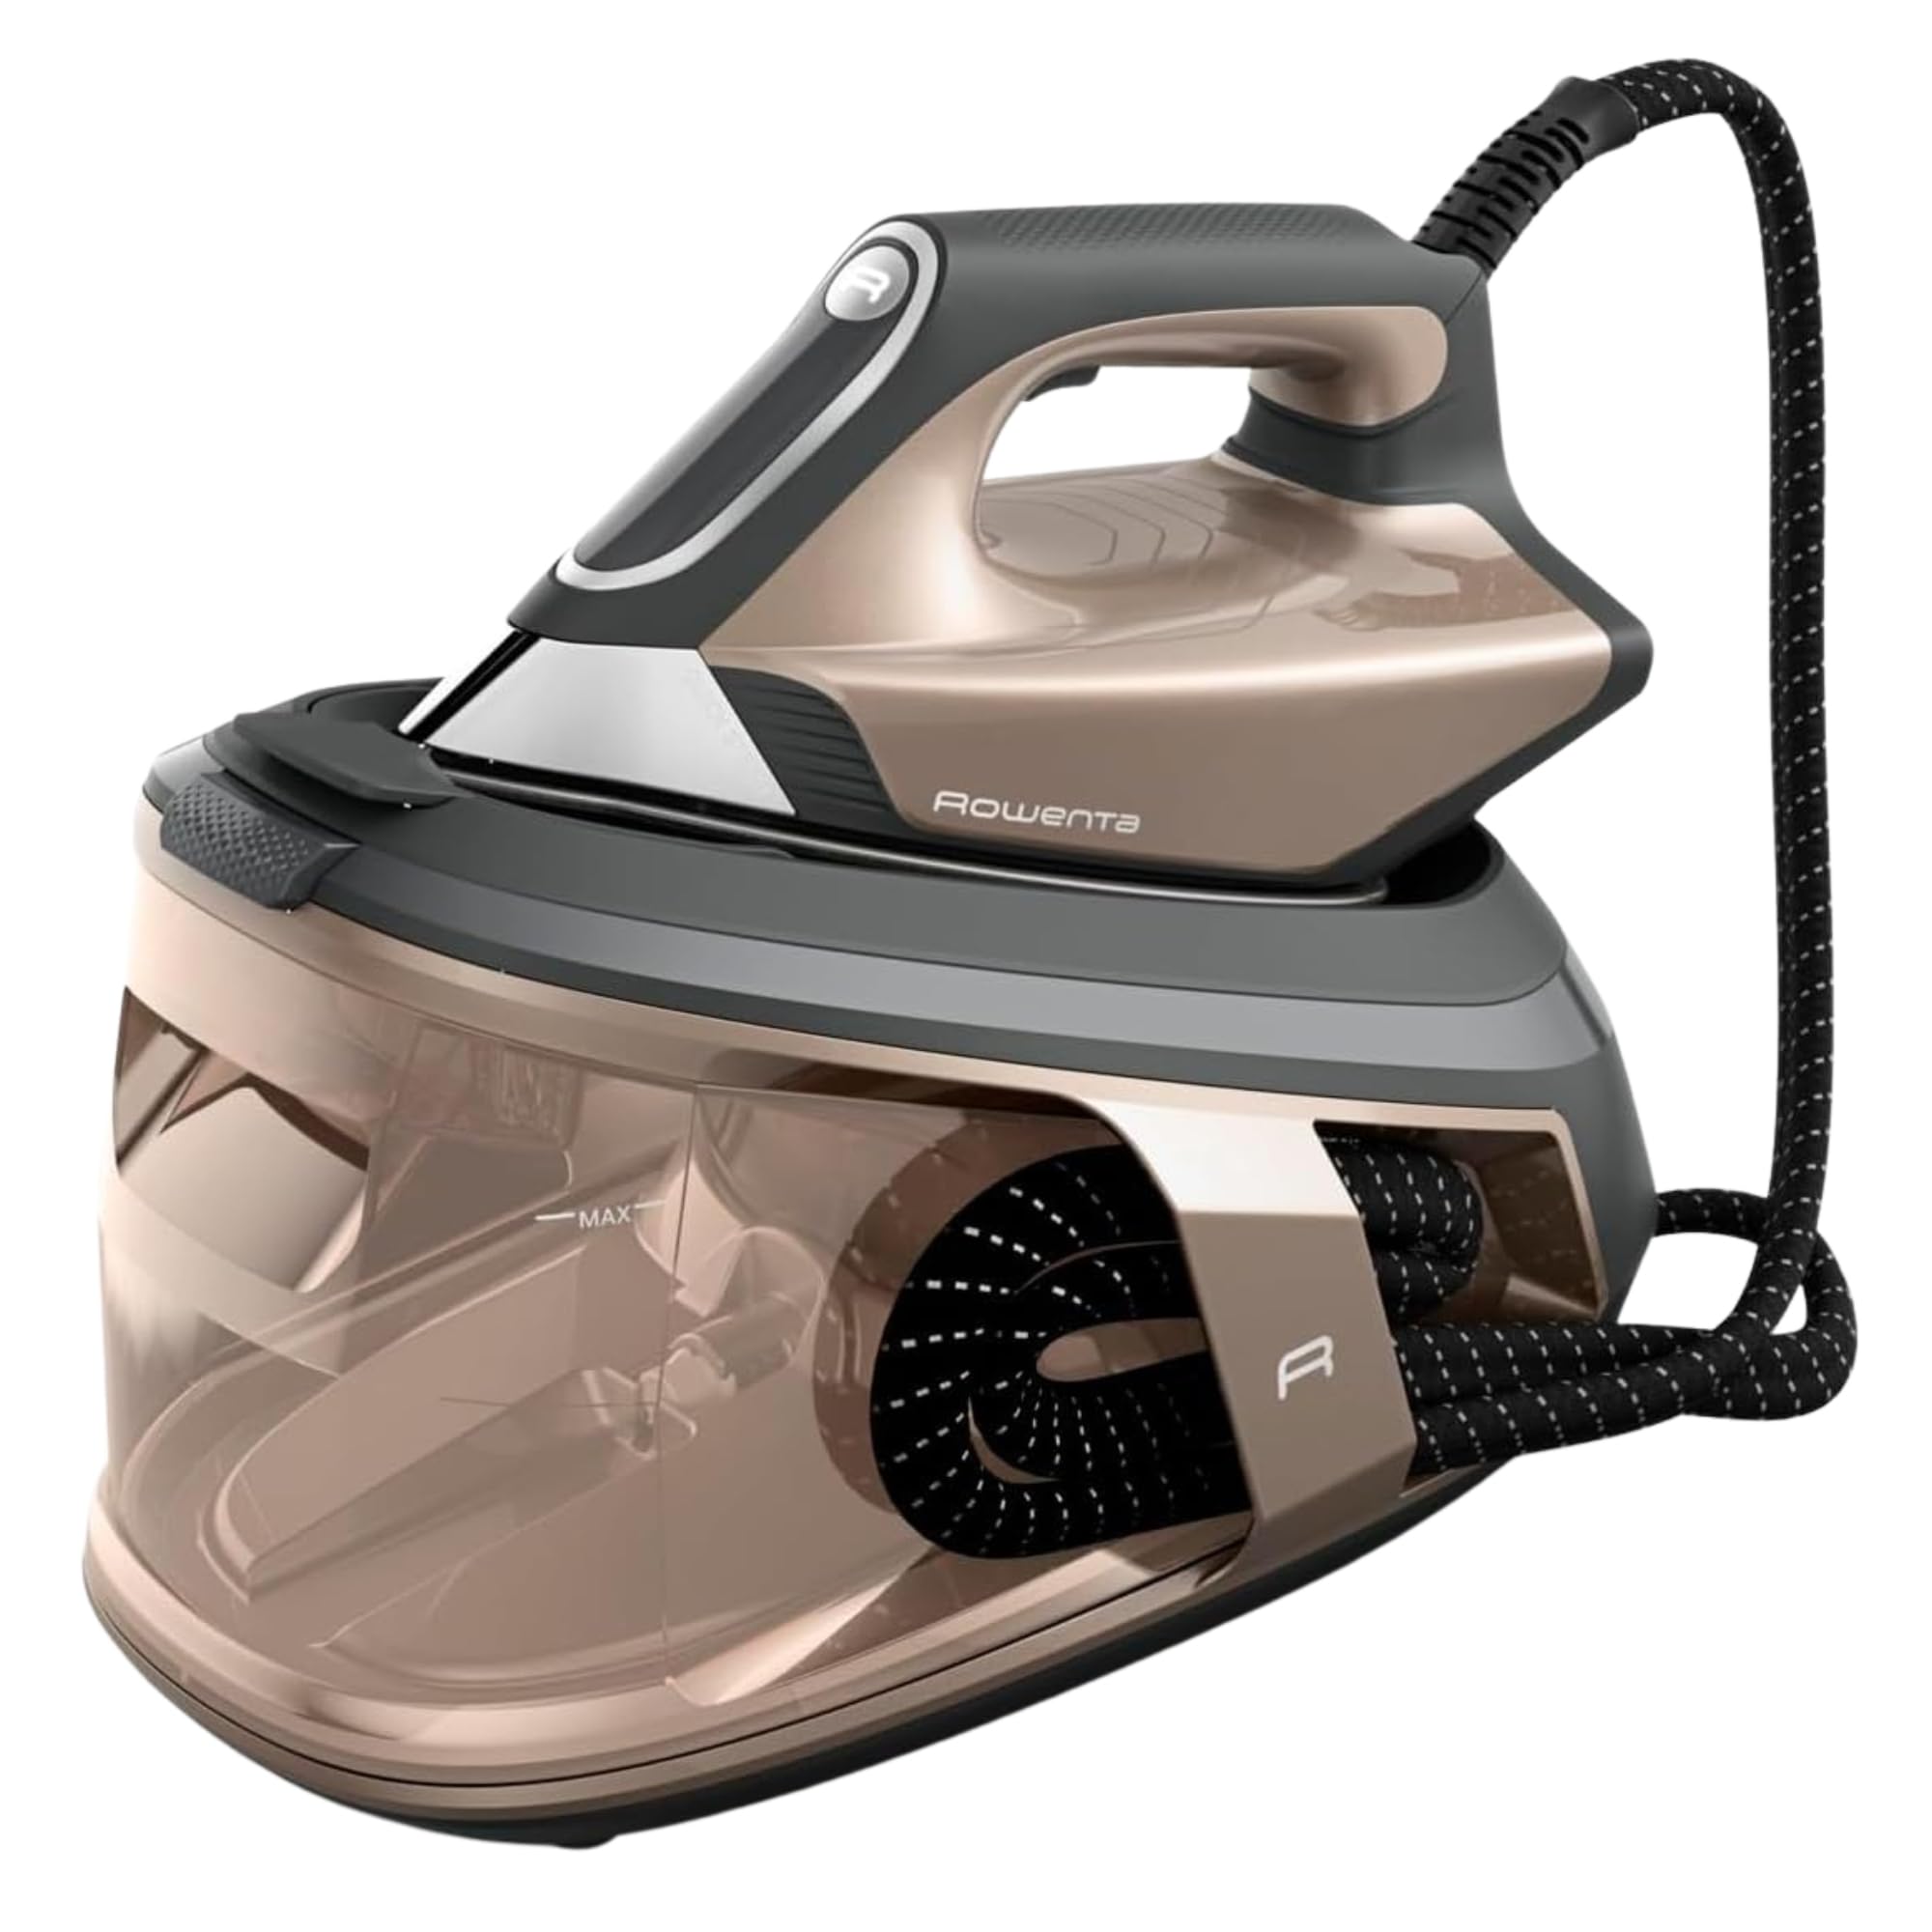
Figura 1: Oltreview of the Rowenta Force Pro 500 Steam Generator Iron.

Figure 2: Illustration of the removable water tank.
4. Configurazione e primo utilizzo
- Disimballaggio: Rimuovere con cautela tutto il materiale di imballaggio e assicurarsi che tutti i componenti siano presenti.
- Posizionamento: Posizionare la base del generatore di vapore su una superficie stabile, piana e resistente al calore.
- Riempimento del serbatoio dell'acqua:
- Rimuovere il serbatoio dell'acqua dalla base.
- Fill the tank with tap water up to the 'MAX' level indicator. Do not use distilled or demineralized water exclusively, as it can affect steam performance.
- Reinsert the water tank firmly into the base until it clicks into place.
- Collegamento all'alimentazione: Collegare il cavo di alimentazione a una presa elettrica dotata di messa a terra.
- Preparazione al primo utilizzo: Before ironing garments, allow the iron to heat up completely. Press the steam trigger a few times to prime the system and release any initial impurities.
5. Istruzioni per l'uso
5.1 Accensione e riscaldamento
Press the power button on the control panel. The indicator light will flash while the appliance heats up. Once the light becomes steady, the iron is ready for use.
5.2 Selecting Ironing Modes
The Rowenta Force Pro 500 features two primary ironing modes:
- Modalità ecologica: For energy-efficient ironing of most fabrics. This mode saves up to 50% energy while still providing effective steam.
- Modalità MAX: For stubborn creases and thicker fabrics, providing maximum steam output (550 g/minute steam boost).
Select your desired mode directly from the control panel. The iron automatically adjusts the temperature, eliminating the need for manual temperature settings.

Figure 3: Eco mode for energy saving.

Figure 4: Control panel showing Eco and Max mode selection.
5.3 Steam Generation (Quicksteam Technology)
The Quicksteam technology provides instant steam on demand. Press the steam trigger located under the iron handle to activate continuous steam. For a powerful steam boost, press the trigger firmly.

Figure 5: Iron in use, demonstrating powerful steam output.

Figure 6: Visual representation of instant steam on demand.
5.4 Optimal Steam Distribution
The soleplate features 400 active micro-holes designed for maximum and even steam distribution, ensuring efficient wrinkle removal.

Figure 7: Close-up of the soleplate demonstrating steam distribution.
5.5 Cottura a vapore verticale
The powerful steam output allows for vertical steaming of hanging garments, curtains, and delicate fabrics. Hold the iron a few centimeters away from the fabric and press the steam trigger.
5.6 Stoccaggio e Trasporto
After use, allow the iron to cool down completely. Secure the iron unit to the base using the locking system. The integrated cable management system allows for easy storage of the power cord and steam hose.
6. Manutenzione e pulizia
6.1 Decalcificazione (Calc Collector)
The integrated Calc Collector ensures long-lasting steam performance by capturing limescale. Regularly clean the Calc Collector:
- Assicurarsi che l'apparecchio sia scollegato e completamente freddo.
- Locate the Calc Collector on the steam generator base.
- Twist and pull out the collector.
- Sciacquare il collettore sotto l'acqua corrente per rimuovere eventuali depositi di calcare.
- Reinsert the clean Calc Collector firmly until it locks into place.
Figure 8: Location of the Calc Collector on the control panel.
6.2 Pulizia della piastra
To maintain optimal glide and performance, clean the soleplate regularly:
- Assicurarsi che il ferro da stiro sia scollegato e freddo.
- Pulisci la piastra con l'annuncioamp cloth. For stubborn marks, use a specialized soleplate cleaning stick (available separately) according to its instructions.
- Do not use abrasive cleaners or metallic scouring pads, as these can damage the soleplate.

Figura 9: Esample of cleaning the iron's soleplate.
6.3 Svuotamento del serbatoio dell'acqua
It is recommended to empty the water tank after each use to prevent limescale buildup and ensure hygiene.
7. Risoluzione Dei Problemi
| Problema | Possibile causa | Soluzione |
|---|---|---|
| Non viene prodotto vapore. | Il serbatoio dell'acqua è vuoto. L'apparecchio non si è riscaldato. Il grilletto del vapore non è premuto. | Fill the water tank. Wait for the indicator light to become steady. Press the steam trigger. |
| Water droplets or brown stains appear on fabric. | Limescale buildup. Iron not hot enough. | Clean the Calc Collector. Allow the iron to heat up completely before use. |
| Il ferro non si riscalda. | Non collegato. Pulsante di accensione non premuto. | Controllare il collegamento elettrico. Premere il pulsante di accensione. |
| Riduzione della produzione di vapore. | Limescale buildup. Water tank low. | Clean the Calc Collector. Refill the water tank. |
Se il problema persiste dopo aver provato queste soluzioni, contattare l'assistenza clienti.
8. Specifiche tecniche
- Modello: VR9033F0
- Pressione: 7.5 Barre
- Aumento di vapore: Fino a 550 g/minuto
- Emissione di vapore continua: Approx. 120-140 g/minute
- Potenza (Wattage): 2800 Watt
- Capacità del serbatoio dell'acqua: Approx. 1.5-1.8 Liters
- Materiale della piastra: Acciaio inossidabile
- Dimensioni del prodotto (L x P x A): Dimensioni: 38.5 x 29 x 34 cm
- Peso del prodotto: 3.4 kg
- Voltage: 220V
- Caratteristiche speciali: Quicksteam Technology, Eco Mode, Max Mode, Calc Collector.

Figura 10: Dimensioni del prodotto.
9. Garanzia e assistenza clienti
Rowenta is committed to product quality and durability. This product is designed for long-term use, with a focus on reparability.
- Riparabilità: Rowenta offers 15 years of reparability at a fair price, supported by a network of 6200 repair centers worldwide. This commitment aims to extend the product's lifespan and reduce waste.
- Assistenza clienti: For any questions, technical assistance, or warranty claims, please refer to the official Rowenta website or contact your local customer service center.
- Risorse online: Visita il sito ufficiale Negozio del marchio Rowenta per ulteriori informazioni e supporto sul prodotto.