1. Introduzione
Thank you for choosing the Sanpyl Triple Car Camera Dash Cam. This device is designed to provide comprehensive surveillance of your vehicle's surroundings and interior, enhancing driving safety and providing crucial evidence in case of incidents. This manual will guide you through the installation, operation, and maintenance of your dash cam to ensure optimal performance.
2. Prodotto finitoview
The Sanpyl Triple Car Camera Dash Cam features a three-channel recording system, capturing video from the front, interior, and rear of your vehicle. Key features include:
- Triple Camera Coverage: Front camera (1920x1080), interior camera (1280x720), and rear camera (640x480) for complete vehicle monitoring.
- Wide Angle Front Lens: A 140 to 170-degree high-definition front lens captures a broad field of view.
- 2 Inch LCD Display: A user-friendly screen for convenient recording review and management directly on the device.
- Enhanced Rear Camera Features: Provides reversing assistance and records rear-end collisions.
- Connettività WiFi: Supports wireless connections for real-time viewing e download di footage to smartphones or tablets via a dedicated app.
- Registrazione in loop: Sovrascrive automaticamente il più vecchio filequando la scheda di memoria è piena, garantendo una registrazione continua.
- Sensore G integrato: Rileva impatti o collisioni improvvisi e blocca automaticamente il video correntetage per evitare che venga sovrascritto.

Image: Illustration of the dash cam's 360-degree surveillance capability, showing front, cabin, and rear camera coverage.

Image: Split screen showing simultaneous views from the front (road), interior (cabin), and rear cameras.
3. Contenuto della confezione
Si prega di controllare la confezione per verificare la presenza dei seguenti elementi:
- Sanpyl Triple Car Camera Dash Cam Unit
- Fotocamera posteriore con cavo
- Caricabatterie per auto
- Mounting Bracket (with adhesive pad)
- Cavo USB
- Manuale dell'utente (questo documento)
- Scheda Micro SD da 32 GB (preinstallata o inclusa separatamente)

Image: The dash cam unit, rear camera, car charger, mounting bracket, and cables included in the package.
4. Impostazione
4.1 Inserimento della scheda Micro SD
- Assicurarsi che la dash cam sia spenta.
- Individuare lo slot per la scheda Micro SD sul lato della dash cam.
- Insert the Micro SD card with the gold contacts facing the back of the dash cam until it clicks into place.
- Per rimuoverla, spingere delicatamente la scheda finché non scatta, quindi rilasciarla.
Nota: A Class 10 or higher Micro SD card (up to 128GB) is recommended for reliable recording. Format the card regularly to maintain performance.
4.2 Montaggio della Dash Cam
- Clean the windshield area where you intend to mount the dash cam. Ensure it does not obstruct your driving view.
- Attach the adhesive mounting bracket to the dash cam.
- Rimuovere la pellicola protettiva dal cuscinetto adesivo sulla staffa.
- Firmly press the dash cam onto the chosen spot on the windshield for at least 30 seconds.
- Adjust the lens angle to ensure the front camera captures the road ahead clearly.

Image: The dash cam unit mounted on the car's windshield, showing its position relative to the driver's view.
4.3 Installazione della telecamera posteriore
- Mount the rear camera on the rear windshield or license plate area using its adhesive or screws.
- Route the rear camera cable to the main dash cam unit, ensuring it does not interfere with vehicle operations.
- Collegare il cavo della telecamera posteriore alla porta designata sull'unità principale della dash cam.
4.4 Collegamento di alimentazione
- Collegare il caricabatteria per auto alla porta di ingresso dell'alimentazione della dash cam.
- Collegare l'altra estremità del caricabatteria per auto alla presa di corrente da 12 V del veicolo (presa accendisigari).
- La dash cam si accenderà automaticamente e inizierà a registrare quando si accende il motore del veicolo.
5. Istruzioni per l'uso
5.1 Registrazione di base
Once powered on, the dash cam will automatically start recording in a continuous loop. Video filevengono salvati in segmenti (ad esempio, 1, 3 o 5 minuti) sulla scheda Micro SD. Quando la scheda è piena, il più vecchio sbloccato fileverranno sovrascritti dalle nuove registrazioni.
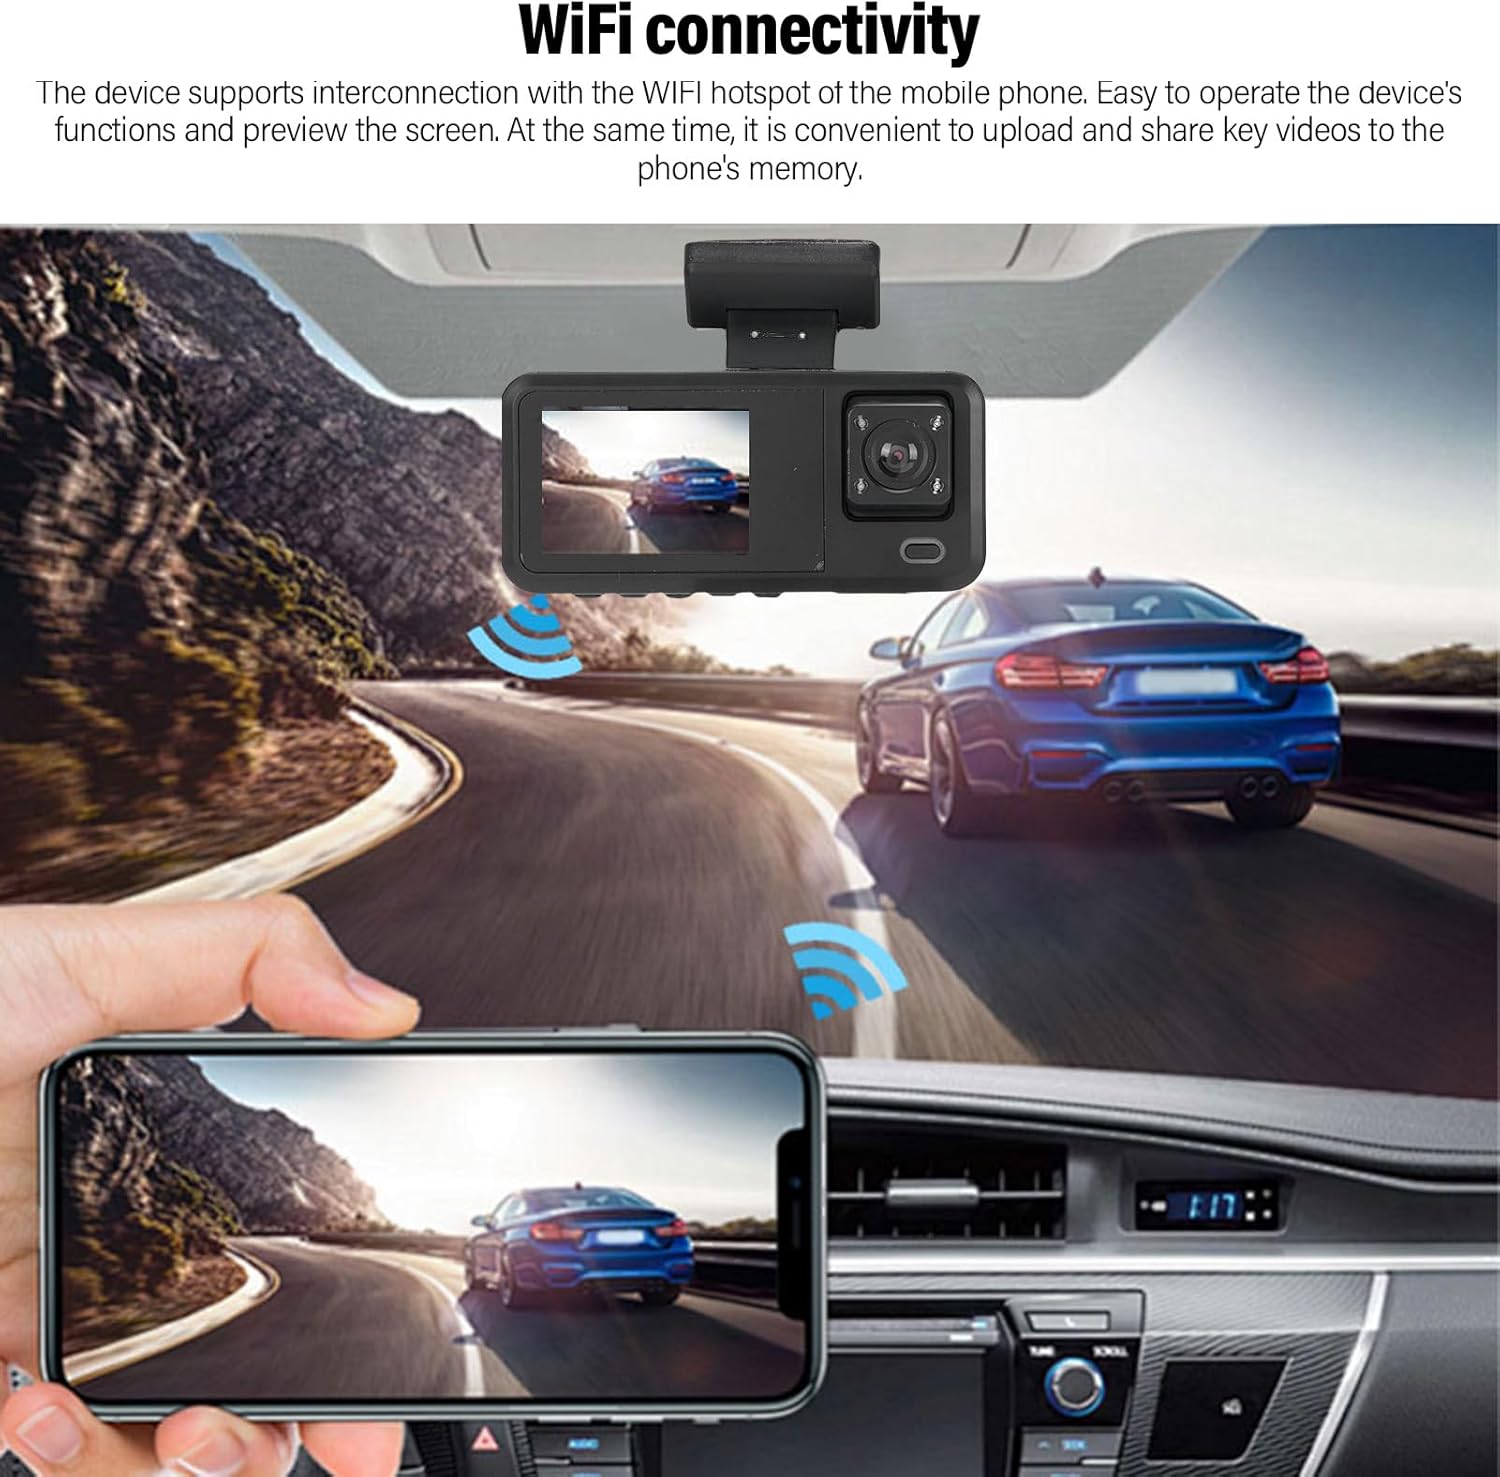
Image: A circular diagram showing how loop recording continuously records and overwrites older footage quando la scheda di memoria è piena.
5.2 G-Sensor (registrazione di emergenza)
The built-in G-sensor detects sudden acceleration, braking, or collisions. When triggered, the current video segment is automatically locked and saved to a protected folder on the Micro SD card, preventing it from being overwritten by loop recording. This ensures critical incident footage è conservato.
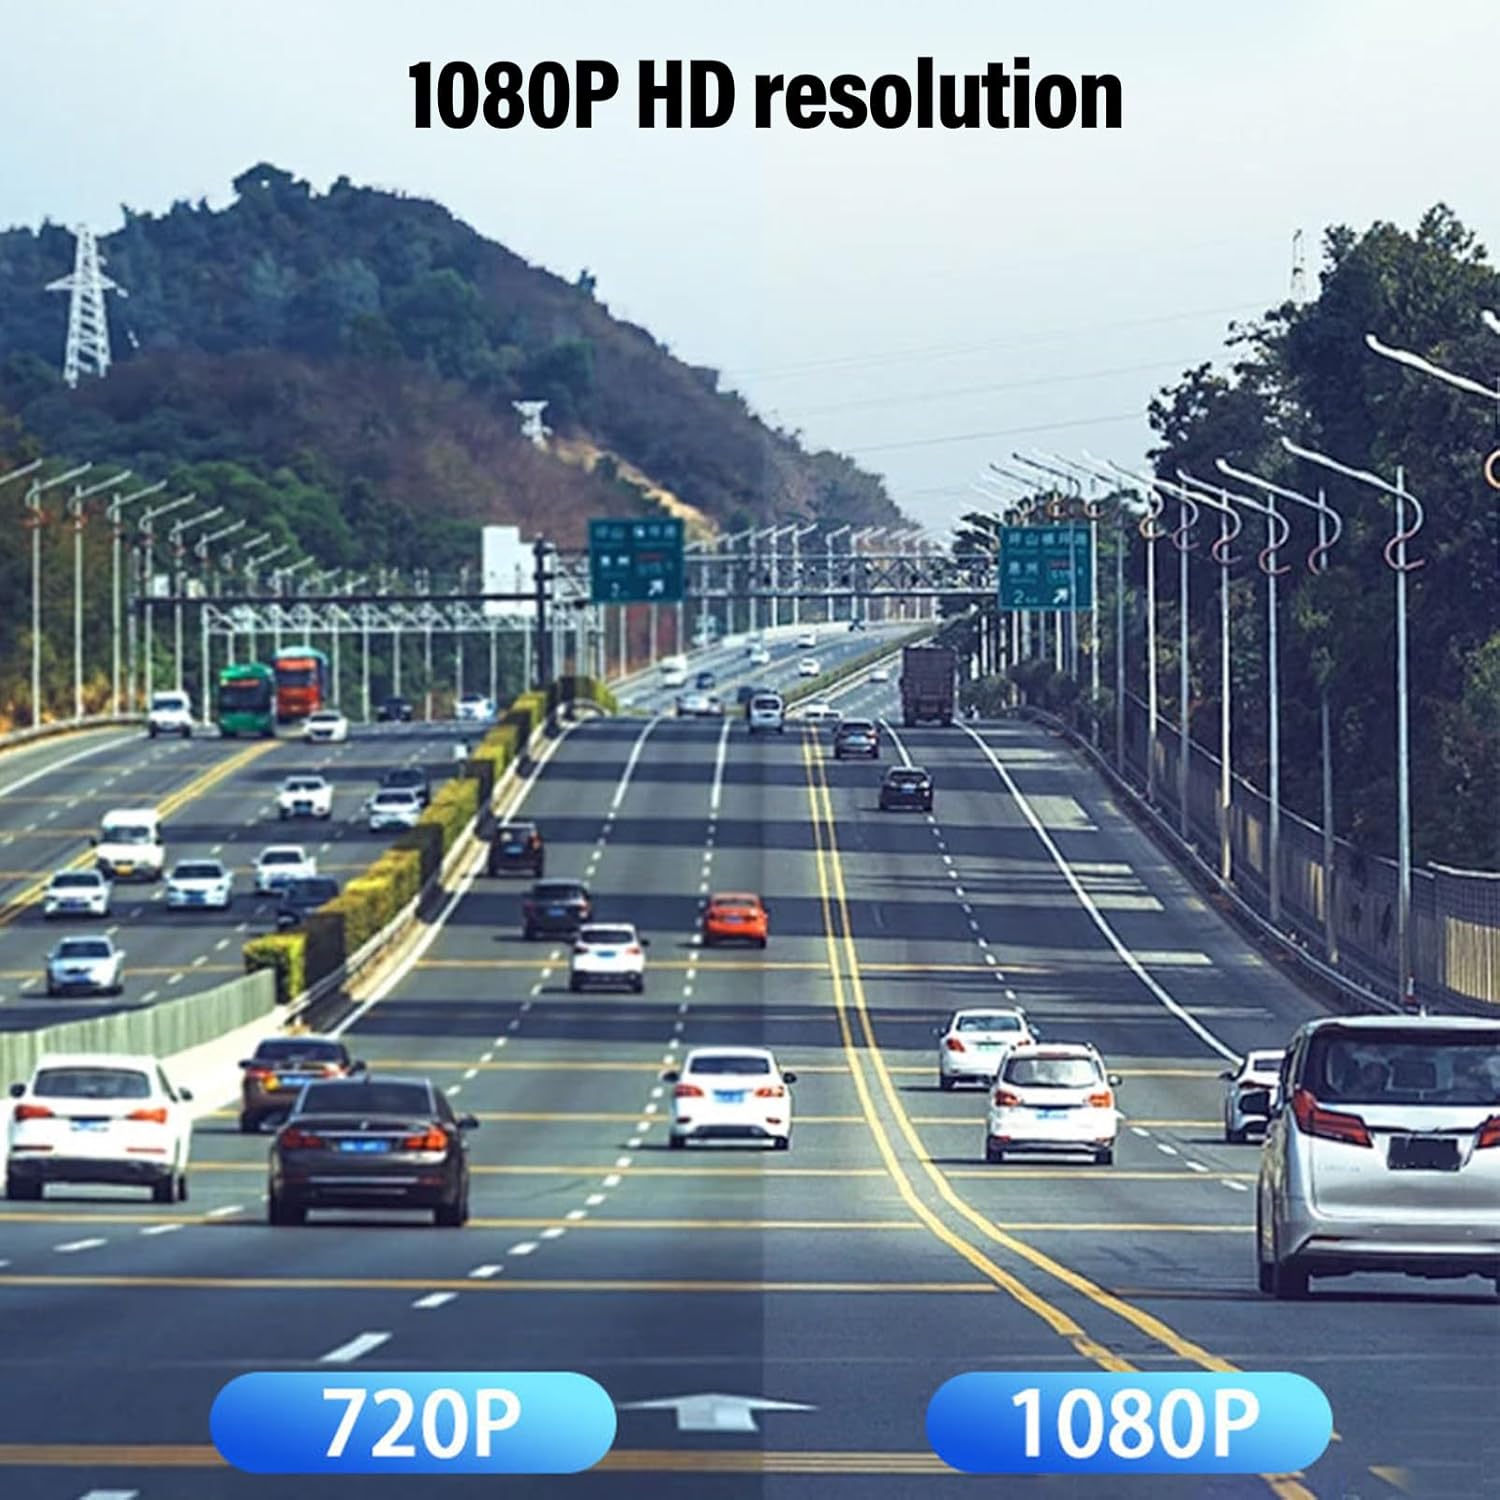
Image: Two individuals inspecting car damage, with an overlay indicating the G-sensor automatically locking video footage during an emergency.
5.3 Parking Assistance (Rear Camera)
When the vehicle is put into reverse gear (and the rear camera is correctly wired to the reverse light trigger), the dash cam display will automatically switch to the rear camera view, often with parking guidelines, to assist with parking maneuvers.

Image: The dash cam screen displaying the rear camera feed with visual parking assistance guidelines, showing a car backing into a parking spot.
5.4 Connettività WiFi e utilizzo delle app
The dash cam supports WiFi connectivity, allowing you to connect your smartphone or tablet to the device for real-time viewing, downloading, and managing recordings.
- Download the dedicated dash cam app from your device's app store (refer to the dash cam's on-screen instructions or packaging for the app name).
- On the dash cam, enable WiFi mode (usually via the menu settings). The dash cam will broadcast a WiFi network.
- On your smartphone/tablet, go to WiFi settings and connect to the dash cam's WiFi network (SSID and password will be displayed on the dash cam screen).
- Apri l'app per view cibo vivotage, sfoglia i video registrati, scarica filesul tuo telefono e regola le impostazioni.
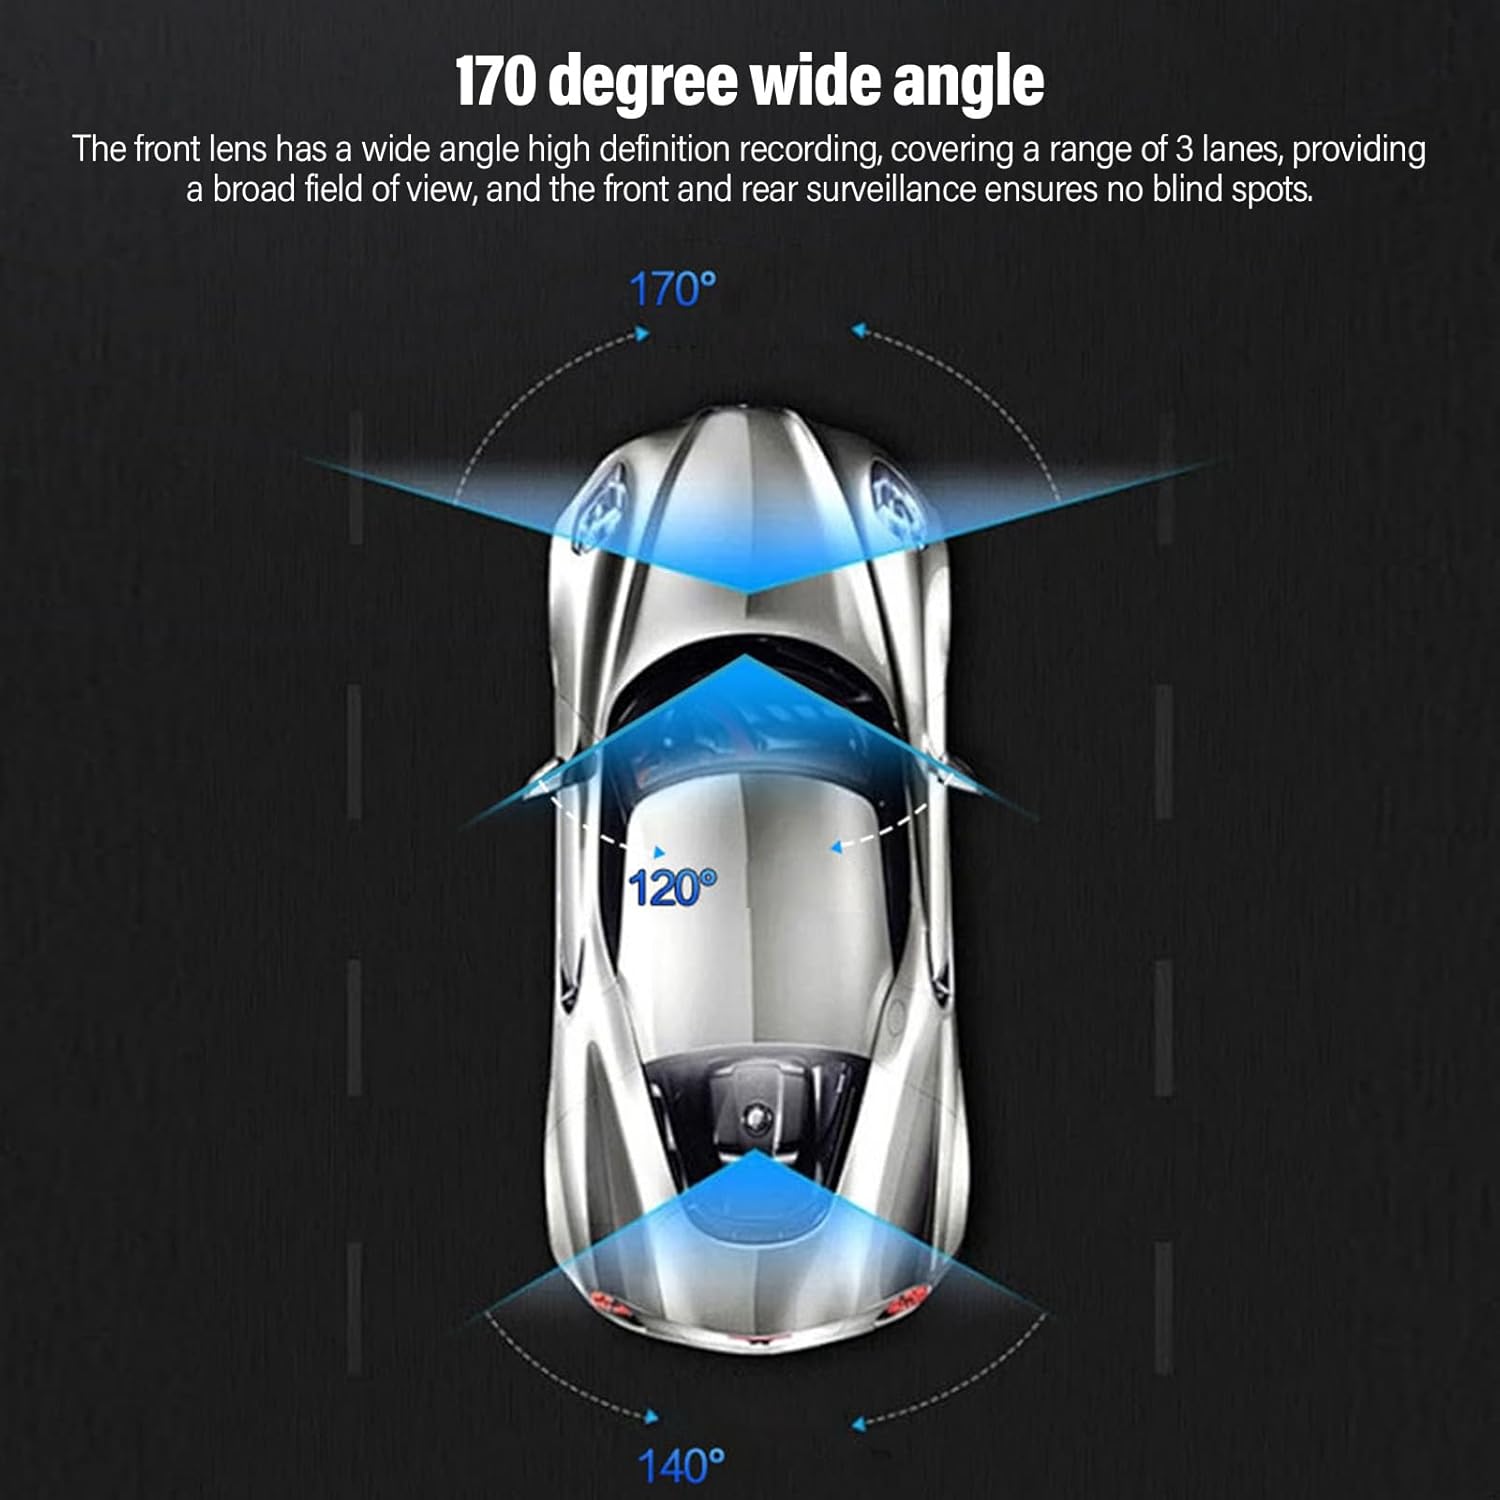
Image: A smartphone screen showing live video feed from the dash cam, demonstrating WiFi connectivity for remote viewing.
6. Manutenzione
6.1 Formattazione della scheda Micro SD
It is recommended to format the Micro SD card once a month to prevent data corruption and ensure optimal recording performance. This can usually be done through the dash cam's menu settings.
6.2 Pulizia delle lenti e dello schermo
Use a soft, lint-free cloth to gently wipe the camera lenses and the LCD screen. Avoid using abrasive cleaners or solvents, as they may damage the surfaces.
6.3 Considerazioni ambientali
Avoid exposing the dash cam to extreme temperatures for prolonged periods. If the vehicle is parked in direct sunlight during hot weather, consider removing the dash cam or using a sunshade to protect it.
7. Risoluzione Dei Problemi
7.1 La Dash Cam non si accende
- Check if the car charger is securely plugged into both the dash cam and the vehicle's 12V outlet.
- Ensure the vehicle's 12V outlet is receiving power (test with another device if possible).
- Provare un caricabatterie per auto o un cavo USB diverso, se disponibile.
7.2 Recording Stops or Freezes
- Formattare la scheda Micro SD tramite le impostazioni della dash cam.
- Assicurati di utilizzare una scheda Micro SD ad alta velocità (classe 10 o superiore).
- Prova una scheda Micro SD diversa per escludere problemi con la scheda stessa.
- Check for firmware updates (if applicable, refer to manufacturer's webposto).
7.3 Scarsa qualità video
- Pulire le lenti della fotocamera con un panno morbido.
- Assicurarsi che la pellicola protettiva sia stata rimossa dalle lenti.
- Check video resolution settings in the dash cam menu; ensure it's set to 1080P for the front camera.

Image: A visual comparison demonstrating the difference in clarity between 720P and 1080P video resolutions for dash cam footage.
7.4 Problemi di connessione WiFi
- Assicurati che il Wi-Fi sia abilitato sulla dash cam e sullo smartphone.
- Verify you are connecting to the correct WiFi network broadcast by the dash cam.
- Riavvia sia la dash cam che lo smartphone.
- Ensure the dash cam app is up to date.
8. Specifiche
| Marca | Sanpil |
| Numero di modello | Sanpylskbofg43at |
| Risoluzione della fotocamera frontale | Risoluzione: 1920x1080P |
| Risoluzione della telecamera interna | Risoluzione: 1280x720P |
| Risoluzione della telecamera posteriore | Risoluzione: 640x480P |
| Angolo della fotocamera frontale | 140-170 gradi |
| Display | LCD da 2.0 pollici |
| Tecnologia di connettività | Wifi |
| Magazzinaggio | Scheda Micro SD (fino a 128 GB, classe 10 consigliata) |
| Caratteristiche speciali | Loop Recording, G-Sensor, Parking Assistance, Adjustable |
| Dimensioni del prodotto | 5.91"P x 4.33"L x 2.76"A (150 mm x 110 mm x 70 mm) |

Image: Technical drawing illustrating the physical dimensions of the dash cam unit.
9. Garanzia e supporto
9.1 Informazioni sulla garanzia
This Sanpyl product is covered by a manufacturer's warranty for 90 days from the date of purchase. This warranty covers defects in materials and workmanship under normal use. It does not cover damage caused by misuse, accidents, unauthorized modifications, or improper installation.
9.2 Assistenza clienti
For technical assistance, troubleshooting, or warranty claims, please contact Sanpyl customer support. Refer to the contact information provided on the product packaging or the official Sanpyl websito.