
1. Prodotto finitoview
The Mars Gaming MC-Pulsar is an ATX gaming case designed for optimal performance and aesthetics. It features a panoramic tempered glass design and a front LCD display for real-time system monitoring. The chassis includes a Cablehatch system for efficient cable management and offers versatile connectivity options.
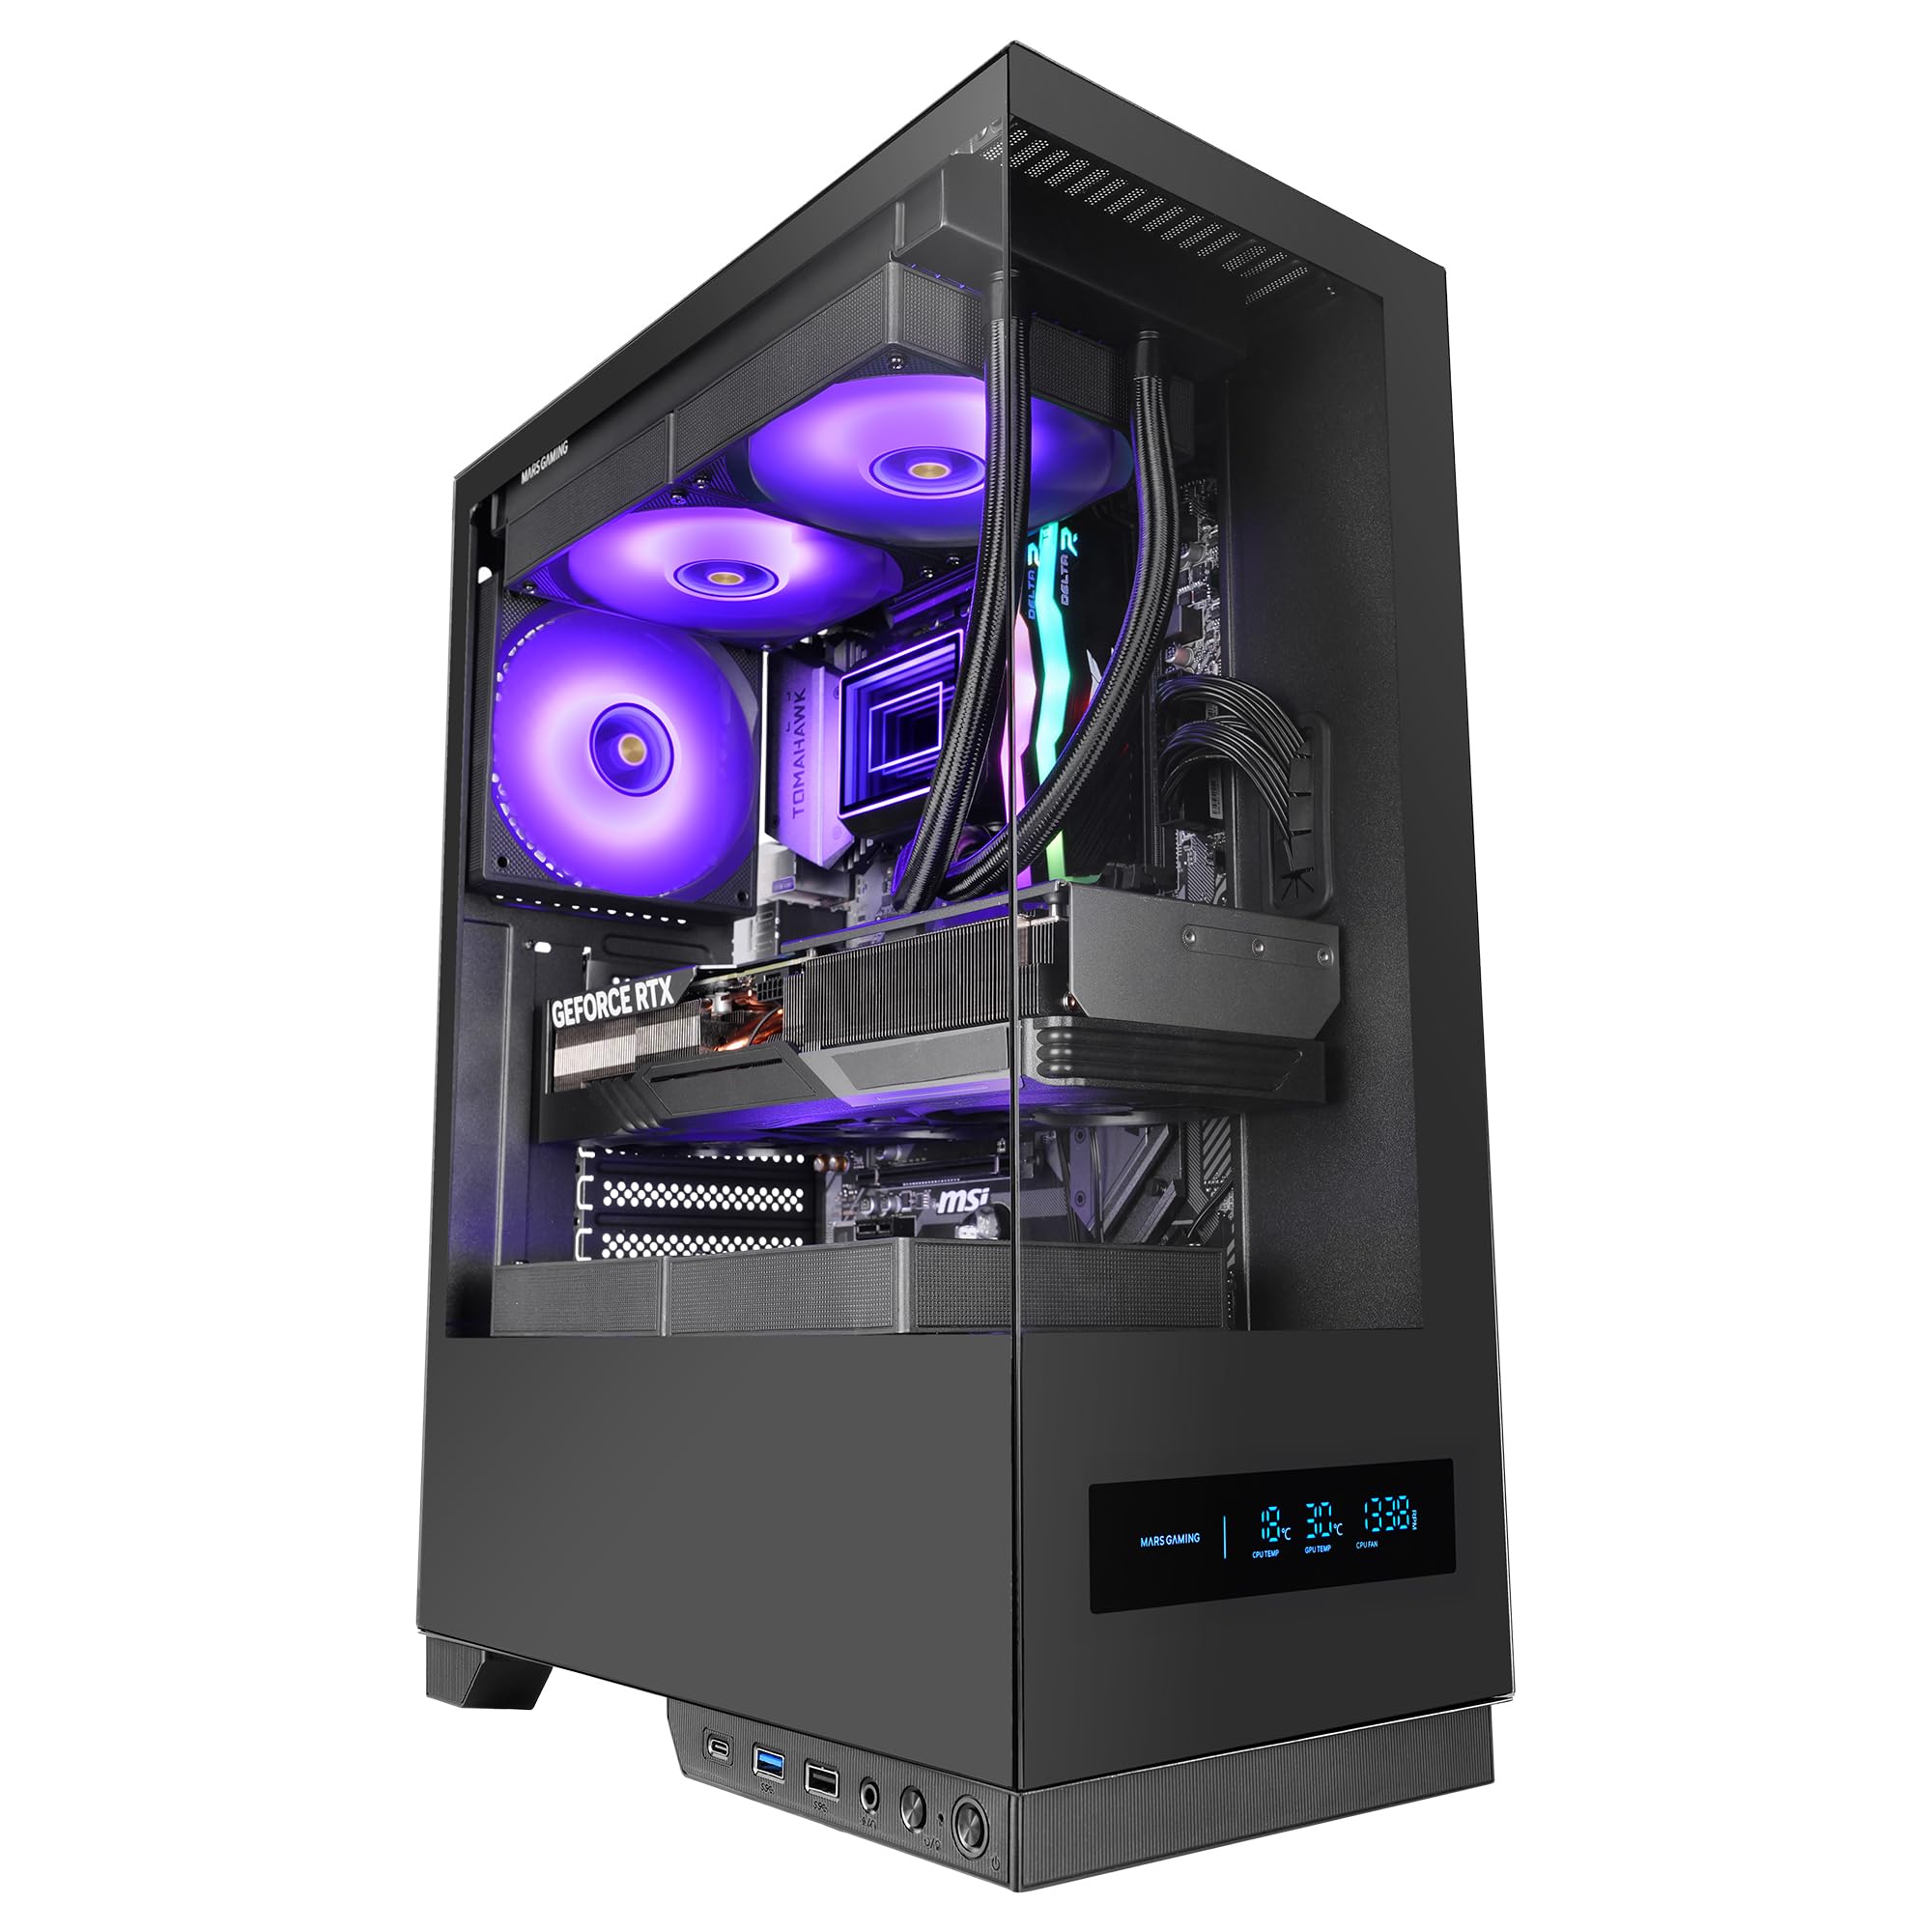
Figure 1: Mars Gaming MC-Pulsar ATX Gaming Case, front view.
Caratteristiche principali:
- Real-Time Front LCD Display: Monitor CPU/GPU temperatures and fan RPM directly on the case.
- Double Tempered Glass: Front and side panels provide a clear view dei componenti interni.
- Cablehatch System: Side cable bay with tool-free quick access for simplified cable management.
- Interni ottimizzati: Supports ATX, MicroATX, and Mini-ITX motherboards, with ample space for graphics cards and CPU coolers.
- Supporto per il raffreddamento a liquido: Accommodates liquid cooling radiators up to 240mm at the top and bottom, and 120mm at the rear.
- Connettività moderna: Includes USB-C, USB 3.0, USB 2.0, and HD audio ports on the I/O panel.

Figure 2: The MC-Pulsar case features dual tempered glass panels on the front and side.
2. Configurazione e installazione
Follow these steps for proper installation of your computer components into the MC-Pulsar case.
2.1 Preparazione del caso
- Unpack the MC-Pulsar case and place it on a stable, flat surface.
- Carefully remove the tempered glass side panel by unscrewing the thumb screws, if present, or by releasing il meccanismo di chiusura.
- Identify the internal layout for motherboard, power supply, and drive installation.

Figure 3: Internal layout showing maximum CPU cooler height (162mm), VGA length (332mm), and VGA width (152mm) clearances, along with fan and radiator mounting points.
2.2 Installazione della scheda madre
- Install the necessary standoffs for your ATX, MicroATX, or Mini-ITX motherboard.
- Place the motherboard into the case, aligning it with the standoffs and the I/O shield opening.
- Fissare la scheda madre con le viti.
2.3 Installazione dell'alimentatore
- The power supply mounts at the bottom of the case. Slide the ATX power supply into its designated bay.
- Fissare l'alimentatore con le viti dalla parte posteriore del case.
2.4 Installazione dell'unità di archiviazione
- Install 3.5" HDDs in the designated drive cage.
- Install 2.5" SSDs in their respective mounting points. The case supports 1x 3.5" HDD and 2x 2.5" SSDs.
2.5 Scheda grafica e schede di espansione
- Rimuovere le coperture degli slot di espansione necessari.
- Insert your graphics card (up to 332mm length, 152mm width) and other expansion cards into the PCIe slots on the motherboard.
- Fissare le schede con le viti.
2.6 Installazione del sistema di raffreddamento
- Install CPU coolers (up to 162mm height).
- For liquid cooling, radiators up to 240mm can be installed at the top and bottom, and a 120mm radiator at the rear.
- Install additional fans as needed: top (2x 120mm or 2x 140mm), bottom (2x 120mm), rear (1x 120mm).
2.7 Gestione dei cavi
Utilize the Cablehatch system for organized cable routing. This side cable bay offers tool-free quick access to manage and hide cables, ensuring optimal airflow and a clean interior.

Figure 4: The Cablehatch system provides convenient side access for cable management without tools.
3. Funzionamento
This section details the operational aspects of your MC-Pulsar gaming case.
3.1 Connettività del pannello frontale
The front I/O panel provides convenient access to various ports:
- Porta USB-C: For modern peripherals and fast data transfer.
- Porte USB: 3.0 Two ports for high-speed USB devices.
- Porte USB: 2.0 Connettività USB standard.
- Jack audio HD: Porte separate per microfono e cuffie.
- Pulsante di accensione: Per accendere/spegnere il sistema.
- Pulsante di reset: Per riavviare il sistema.
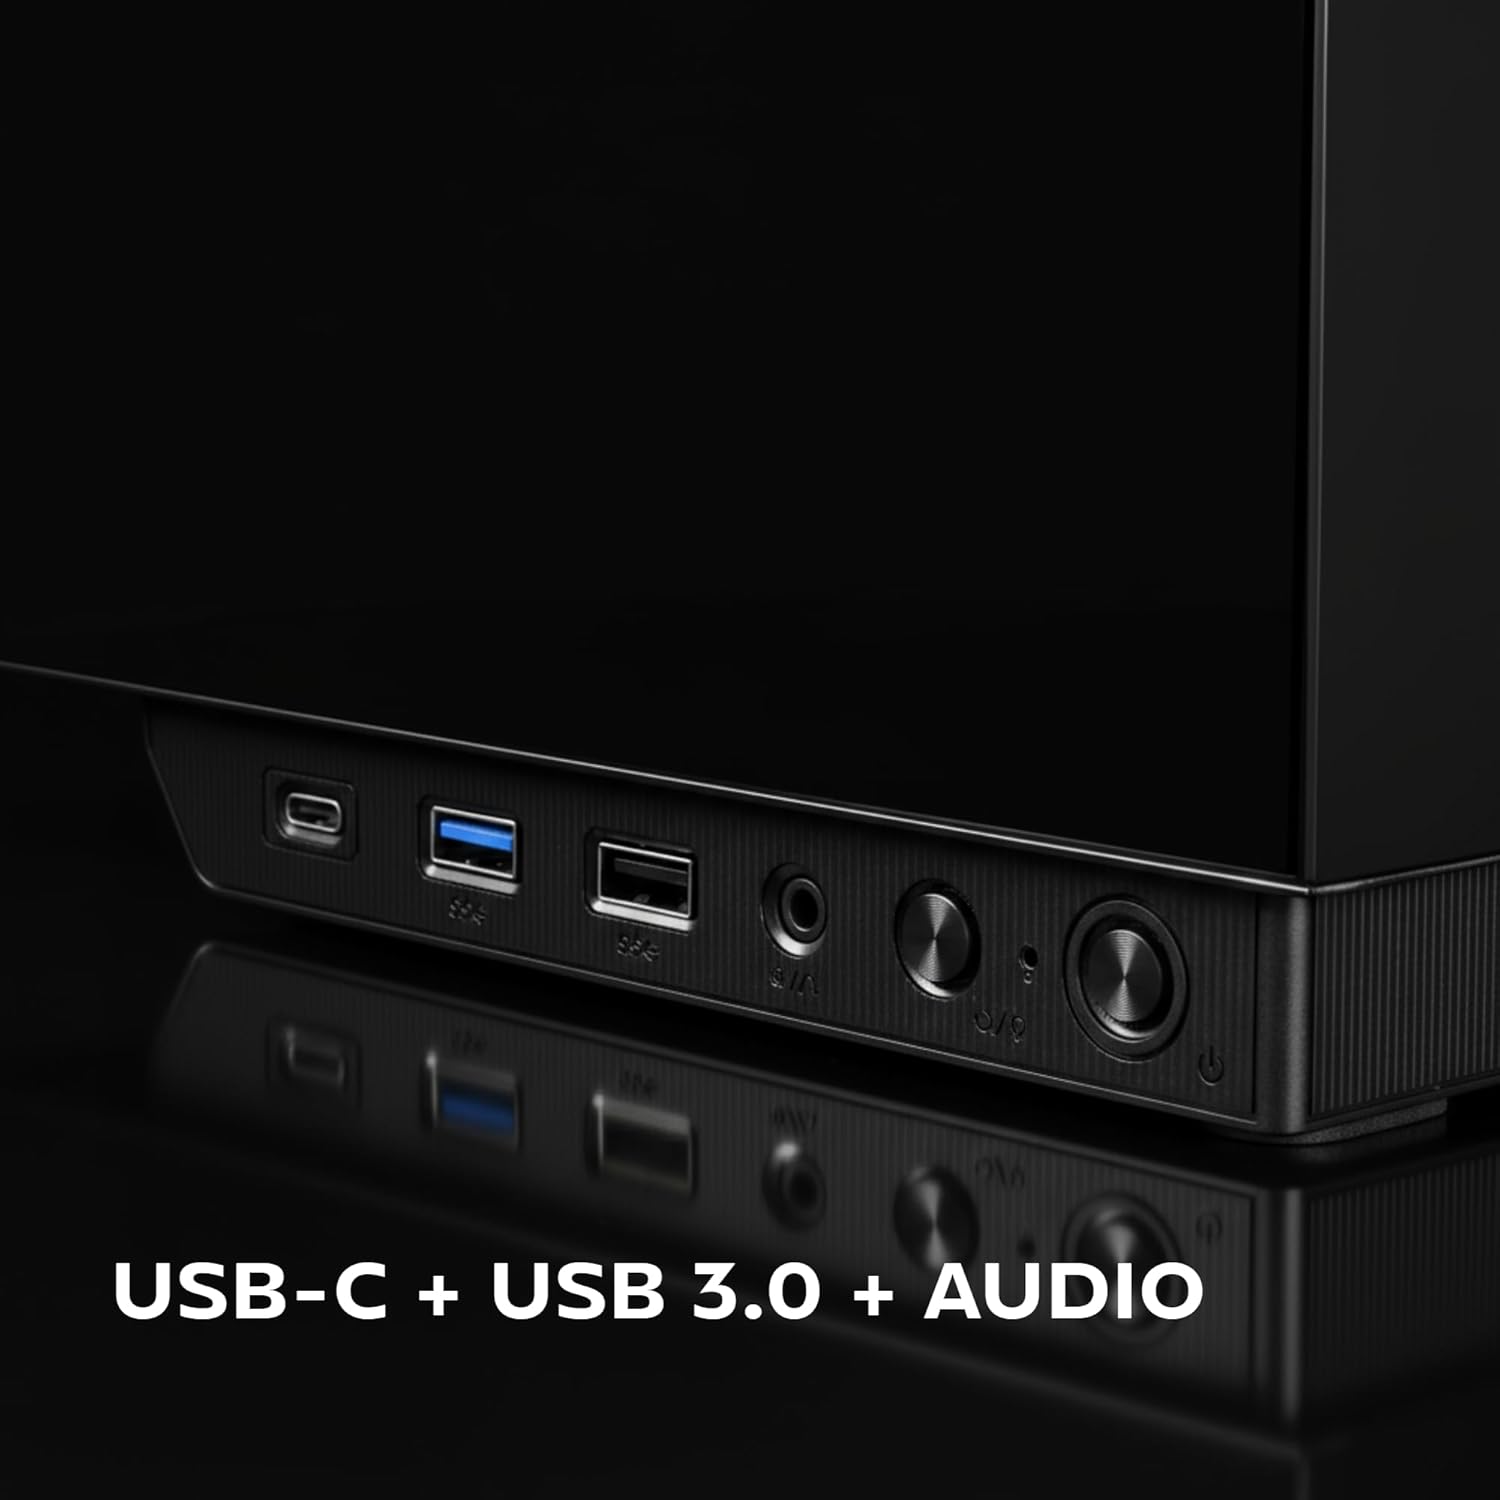
Figure 5: Close-up of the front I/O panel, showing USB-C, USB 3.0, and audio ports.
3.2 Front LCD Display
The integrated rectangular LCD display on the front panel provides real-time monitoring of critical system parameters. This includes:
- Temperatura della CPU: Displays the current temperature of your Central Processing Unit.
- GPU Temperature: Displays the current temperature of your Graphics Processing Unit.
- Fan RPM: Shows the rotational speed of your system fans.
Ensure the necessary internal connections from the case to your motherboard are made for the LCD display to function correctly. Refer to your motherboard manual for specific header locations.
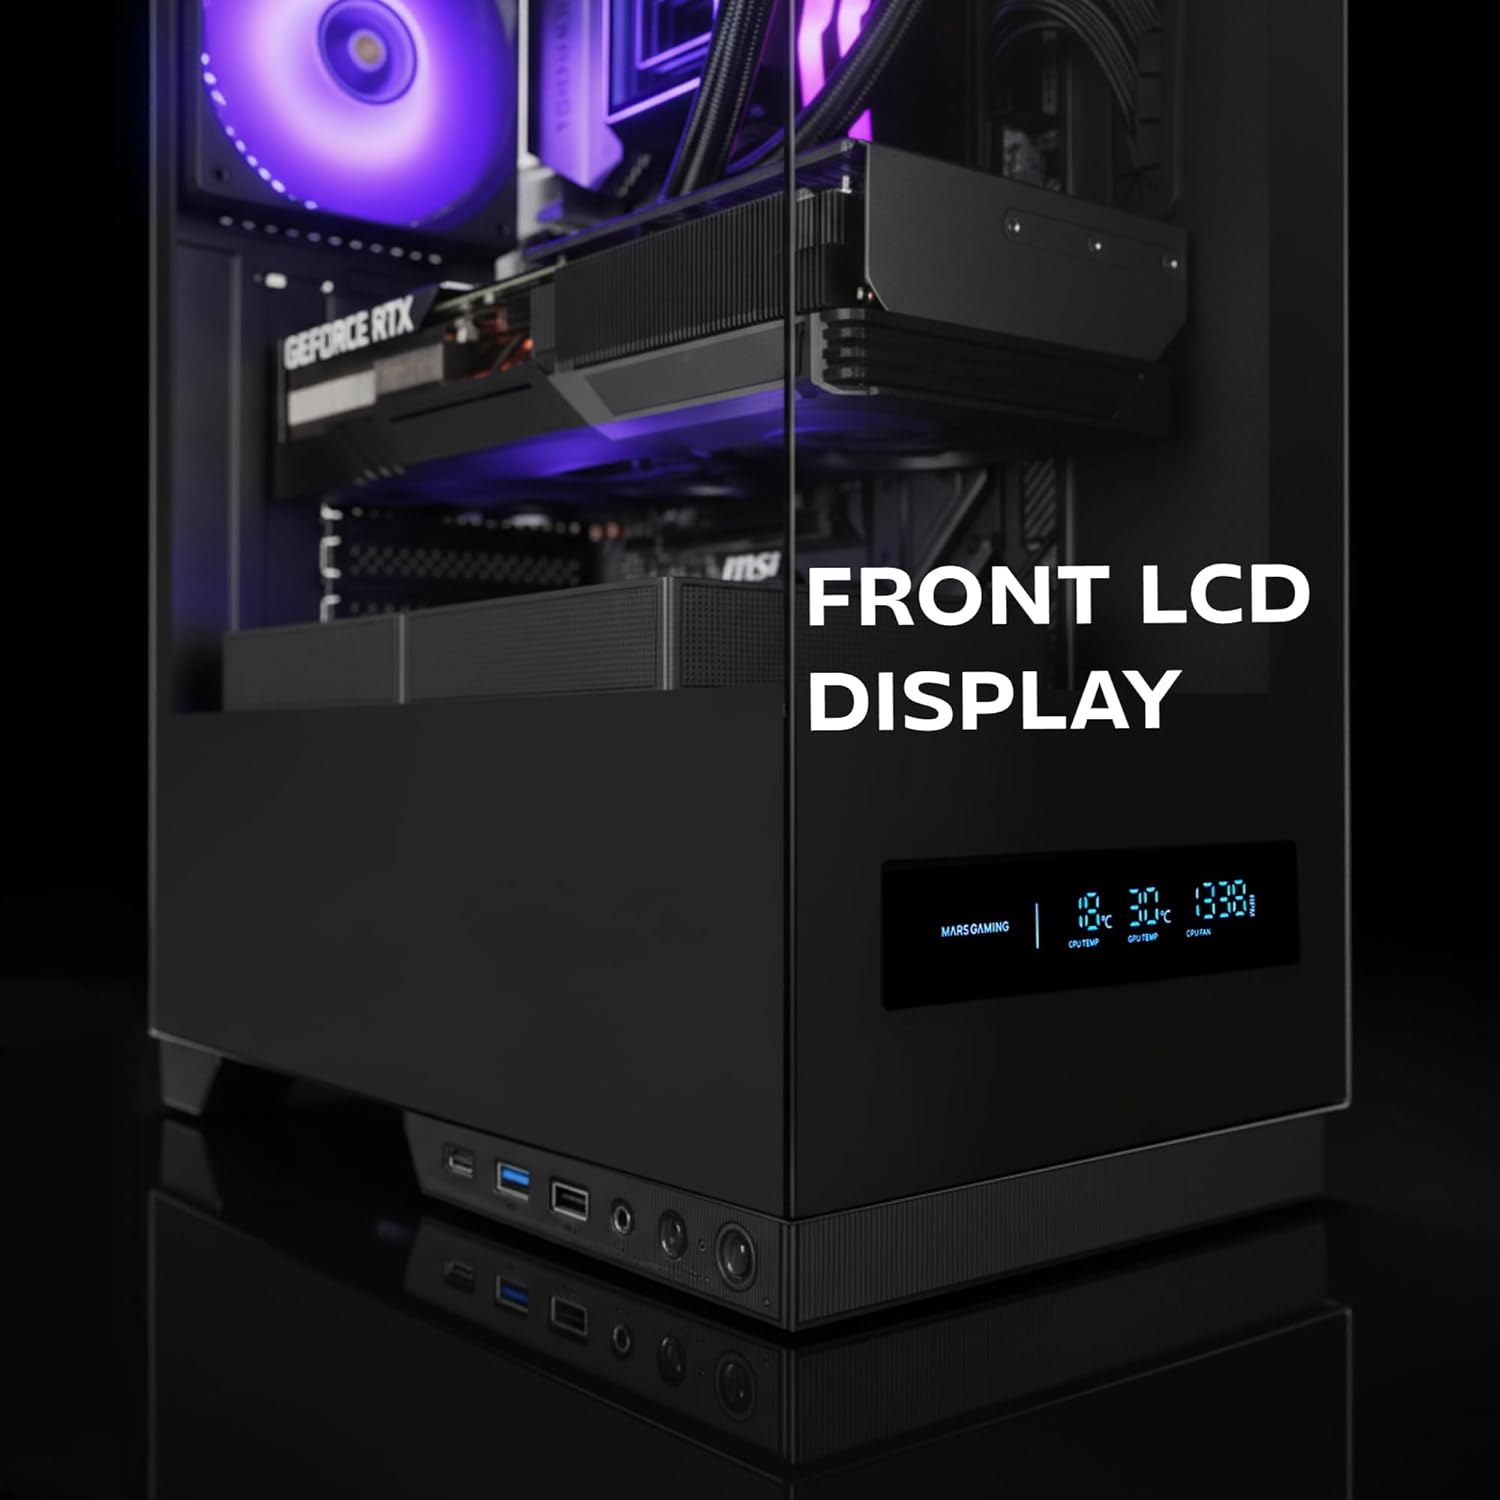
Figure 6: The front LCD display provides real-time system information.
4. Manutenzione
Regular maintenance helps ensure the longevity and optimal performance of your MC-Pulsar case and its components.
4.1 Pulizia del filtro antipolvere
- The MC-Pulsar case includes a magnetic dust filter at the top.
- Periodically remove and clean this filter to prevent dust buildup inside the case, which can impede airflow and component cooling.
- Pulire con aria compressa o una spazzola morbida.
4.2 Pulizia degli interni
- With the system powered off and unplugged, carefully open the side panel.
- Use compressed air to remove dust from internal components and surfaces.
- Ensure all cables remain neatly managed using the Cablehatch system to maintain good airflow.
4.3 Cura del vetro temperato
- Clean tempered glass panels with a soft, lint-free cloth and a non-abrasive glass cleaner.
- Evitare prodotti chimici aggressivi o materiali abrasivi che potrebbero graffiare il vetro.
5. Risoluzione Dei Problemi
This section provides solutions to common issues you might encounter with your MC-Pulsar case.
5.1 Il sistema non si accende
- Controllare i collegamenti di alimentazione: Ensure the power supply is properly connected to the wall outlet and the motherboard.
- Connettori del pannello frontale: Verify that the power button cable from the case is correctly connected to the motherboard's front panel header. Refer to your motherboard manual.
- Interruttore di alimentazione: Confirm the power supply's main switch is in the "ON" position.
5.2 Front LCD Display Not Working
- Collegamenti interni: Ensure all necessary data and power cables for the LCD display are securely connected from the case to the motherboard or power supply.
- Software/Driver: Check if any specific software or drivers are required for the display and install them if necessary (refer to Mars Gaming webposto).
5.3 USB Ports or Audio Jacks Not Functioning
- Internal Header Connections: Verify that the USB and audio cables from the front I/O panel are correctly connected to the corresponding headers on your motherboard.
- Driver della scheda madre: Ensure your motherboard's USB and audio drivers are up to date.
5.4 Flusso d'aria scarso o surriscaldamento
- Filtri antipolvere: Clean the magnetic dust filter and any other mesh areas regularly.
- Orientamento della ventola: Ensure case fans are installed with correct airflow direction (intake/exhaust).
- Gestione dei cavi: Improve cable routing using the Cablehatch system to reduce obstructions to airflow.
- Spazio libero sui componenti: Verify that large components like CPU coolers or GPUs are not blocking critical airflow paths.
6. Specifiche tecniche
Below are the detailed specifications for the Mars Gaming MC-Pulsar ATX Gaming Case.
| Caratteristica | Dettaglio |
|---|---|
| Marca | Mars Gaming |
| Nome del modello | MCPULSAR |
| Tipo di caso | Mid Tower |
| Compatibilità della scheda madre | ATX, MicroATX, Mini-ITX |
| Materiale | Vetro temperato, acciaio |
| Colore | Nero |
| Peso dell'articolo | 4.21 chilogrammi |
| Dimensioni dell'articolo (P x L x A) | 45.3P x 35L x 19.6A centimetri |
| Lunghezza massima VGA | 332 millimetri |
| Larghezza massima VGA | 152 millimetri |
| Altezza massima del dissipatore della CPU | 162 millimetri |
| Supporto per il raffreddamento a liquido | Top: 240mm, Bottom: 240mm, Rear: 120mm |
| Capacità della ventola | Top: 2x 120mm or 2x 140mm, Bottom: 2x 120mm, Rear: 1x 120mm |
| Alloggiamenti per unità interne | 1x HDD da 3.5", 2x SSD da 2.5" |
| Porte I / O anteriori | 1x USB-C, 2x USB 3.0, 1x USB 2.0, HD Audio (Mic/Headphone) |
| Caratteristiche speciali | Front LCD Display, Cablehatch System, Magnetic Dust Filter |

Figure 7: External dimensions of the MC-Pulsar case.
7. Garanzia e supporto
7.1 Informazioni sulla garanzia
Mars Gaming products are manufactured to high quality standards. For specific warranty terms and conditions, please refer to the warranty card included with your product or visit the official Mars Gaming websito. Conservare la prova d'acquisto per eventuali reclami in garanzia.
Note: A 30-day return policy may be available through your retailer. This is separate from the manufacturer's warranty.
7.2 Supporto tecnico
If you encounter any issues not covered in this manual or require further assistance, please contact Mars Gaming customer support through their official website. You may need to provide your product model (MCPULSAR) and serial number.
Ufficiale Websito: www.marsgaming.eu