
Introduzione
This manual provides detailed instructions for the installation, operation, and maintenance of your GAMDIAS Aura GC11 ARGB Mid-Tower PC Case. Please read this manual thoroughly before beginning installation to ensure proper setup and safe use of the product. The GAMDIAS Aura GC11 ARGB is designed to accommodate Mini-ITX, Micro-ATX, and ATX motherboards, featuring a bar-patterned mesh front panel for optimal airflow and four pre-installed 120mm ARGB fans.
Informazioni sulla sicurezza
- Scollegare sempre l'alimentatore dalla presa a muro prima di installare o rimuovere qualsiasi componente per evitare scosse elettriche.
- Maneggiare con cura tutti i componenti per evitare danni.
- Indossare un braccialetto antistatico o toccare frequentemente un oggetto metallico collegato a terra per scaricare l'elettricità statica prima di maneggiare i componenti interni.
- Tenere le parti di piccole dimensioni e i materiali di imballaggio fuori dalla portata dei bambini.
- Assicurare una corretta ventilazione attorno al case del PC per evitare il surriscaldamento.
Contenuto della confezione
Verify that all the following items are present in your package:
- GAMDIAS Aura GC11 ARGB Mid-Tower PC Case
- 4 x Pre-installed 120mm ARGB Fans
- Kit di accessori (viti, distanziatori, fascette)
- Manuale dell'utente (questo documento)
Configurazione e installazione
1. Disimballaggio della custodia
Carefully remove the PC case from its packaging. Inspect the case for any signs of damage during transit. Remove any protective films from the tempered glass panel.

Immagine: Angolata view of the GAMDIAS Aura GC11 ARGB PC case, showcasing the tempered glass side panel and the distinctive bar-patterned mesh front panel.
2. Accesso all'interno
To access the interior of the case, locate and remove the thumbscrews securing the tempered glass side panel. Carefully lift and remove the panel. The opposite solid side panel can also be removed for cable management access.

Immagine: Interno view of the GAMDIAS Aura GC11 ARGB PC case, with the side panel removed, revealing the motherboard mounting area, fan cutouts, and cable management space.
3. Installazione della scheda madre
- Install the necessary motherboard standoffs into the motherboard tray according to your motherboard's form factor (Mini-ITX, Micro-ATX, or ATX).
- Installare la schermatura I/O della scheda madre nell'apertura posteriore del case.
- Posizionare con attenzione la scheda madre sui distanziatori, allineando i fori delle viti.
- Fissare la scheda madre con le viti fornite.
4. Installazione dell'unità di alimentazione (PSU)
- Mount your PSU into the dedicated compartment at the bottom rear of the case.
- Fissare l'alimentatore con le viti dalla parte posteriore del case.
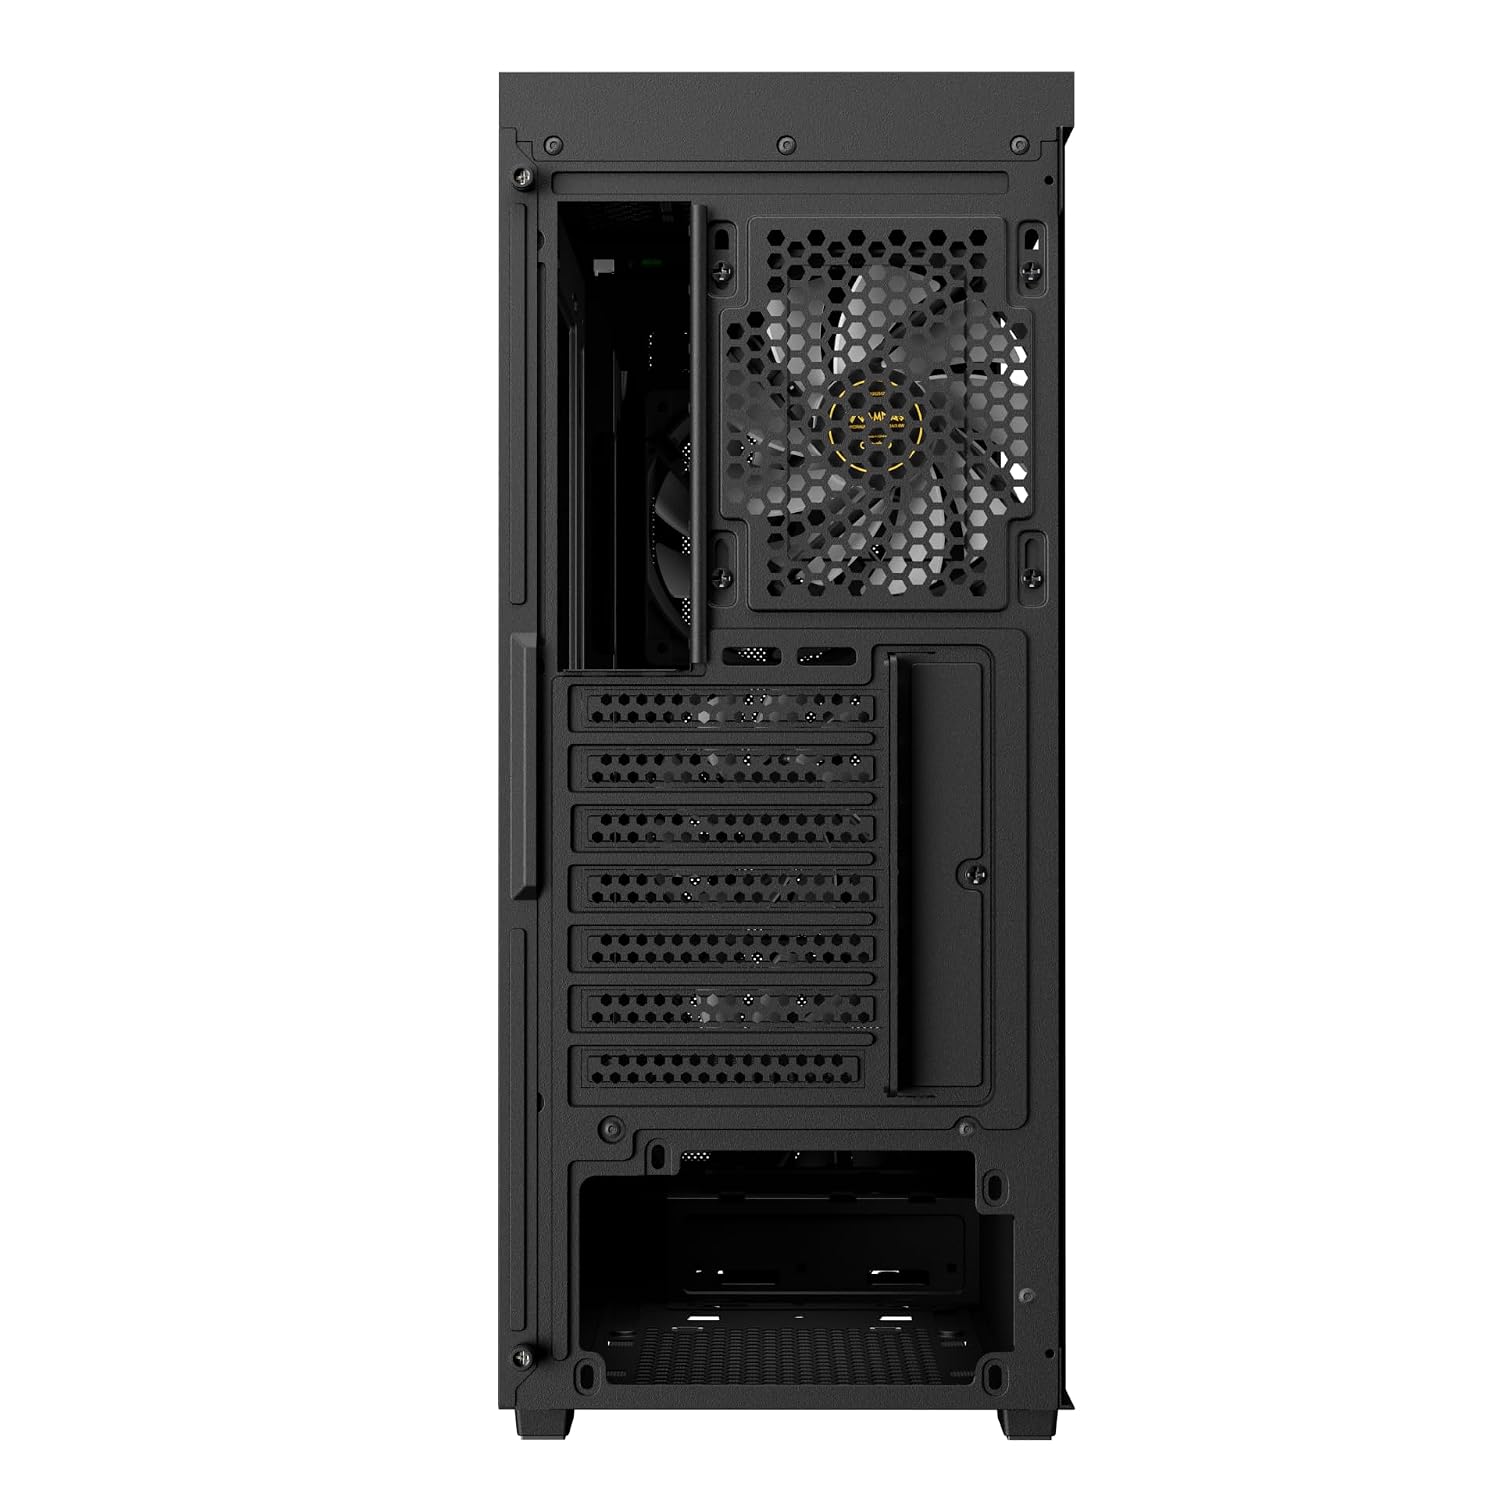
Immagine: Posteriore view of the GAMDIAS Aura GC11 ARGB PC case, highlighting the power supply unit mounting bracket at the bottom and the expansion slots for graphics cards and other components.
5. Installazione dell'unità di archiviazione
The case supports multiple storage drives. Refer to the accessory kit for specific mounting hardware.
- SSD da 2.5": Mount SSDs to the designated trays or mounting points behind the motherboard tray.
- HDD da 3.5": Installare gli HDD nell'apposito alloggiamento situato sotto la copertura dell'alimentatore.
6. Graphics Card (VGA) and Expansion Card Installation
- Rimuovere le coperture degli slot di espansione necessari dalla parte posteriore del case.
- Inserisci la scheda grafica o altre schede di espansione negli slot PCIe appropriati sulla scheda madre.
- Fissare le schede con le viti.
7. Cable Management and Front Panel Connections
Route all power and data cables through the cutouts in the motherboard tray for a clean build. Connect the front panel I/O cables (USB, HD Audio, Power, Reset, LED) to their corresponding headers on your motherboard. The case features a Type-C port, two USB 2.0 ports, HD Audio, and Reset button on the top panel.

Immagine: Parte superiore anteriore view of the GAMDIAS Aura GC11 ARGB PC case, displaying the front I/O panel with Type-C, USB 2.0 ports, and audio jacks, along with the top magnetic dust filter.
8. Chiusura del caso
Once all components are installed and cables are managed, reattach the side panels, starting with the solid panel, then the tempered glass panel. Secure them with the thumbscrews.
Istruzioni per l'uso
1. Prima accensione
After ensuring all connections are secure, connect your PC to a power outlet and press the power button on the top panel of the case. The pre-installed ARGB fans will illuminate, and your system should begin to boot.

Immagine: Frontale view of the GAMDIAS Aura GC11 ARGB PC case, with the four pre-installed ARGB fans visible and illuminated behind the bar-patterned mesh front panel.
2. Controllo della ventola ARGB
The pre-installed ARGB fans are typically connected to a controller or directly to an ARGB header on your motherboard. Refer to your motherboard's manual or the fan controller's instructions for details on how to customize the lighting effects.
Manutenzione
1. Pulizia del filtro antipolvere
The GAMDIAS Aura GC11 ARGB case includes a magnetic dust filter on the top panel and a removable filter for the PSU intake. Regularly clean these filters to maintain optimal airflow and prevent dust buildup inside your system.
- Gently remove the magnetic dust filter from the top of the case.
- Slide out the PSU dust filter from the bottom rear of the case.
- Pulire i filtri con aria compressa o sciacquandoli con acqua. Assicurarsi che siano completamente asciutti prima di rimontarli.
2. Pulizia generale
Utilizzare un morbido, damp cloth to wipe down the exterior surfaces of the case. Avoid using harsh chemicals or abrasive materials that could damage the finish or tempered glass.
Risoluzione dei problemi
No Power After Assembly
- Assicurarsi che l'alimentatore sia acceso e correttamente collegato alla presa a muro.
- Verify that the 24-pin ATX and 8-pin CPU power cables are securely connected to the motherboard.
- Verificare che il cavo dell'interruttore di alimentazione del pannello frontale sia collegato correttamente al connettore del pannello frontale della scheda madre.
Fans Not Spinning or ARGB Not Working
- Confirm that the fan power cables are connected to the motherboard or fan controller.
- Ensure ARGB cables are properly connected to the motherboard's ARGB header or the fan controller.
- Check your motherboard's BIOS/UEFI settings or ARGB software for fan and lighting control.
Problemi di surriscaldamento
- Ensure all case fans are spinning correctly and oriented for optimal airflow (intake at front, exhaust at rear/top).
- Clean all dust filters and internal components to remove dust buildup.
- Verify that CPU cooler and GPU fans are functioning properly.
Specifiche
| Caratteristica | Dettaglio |
|---|---|
| Marca | GAMDIA |
| Nome del modello | Aura GC11 ARGB |
| Tipo di caso | Mid Tower |
| Compatibilità della scheda madre | Mini ITX, Micro ATX, ATX |
| Ventole preinstallate | 4 ventole ARGB da 120 mm |
| Metodo di raffreddamento | Aria |
| Materiale di recinzione | Metallo, vetro temperato |
| Porte I/O | 1 x Type-C, 2 x USB 2.0, 1 x HD Audio, 1 x Reset |
| Limitazione dell'altezza del dispositivo di raffreddamento della CPU | 160mm |
| Limitazione della lunghezza VGA | 300mm |
| Limitazione della lunghezza dell'alimentatore | 150mm |
| Internal Bays Quantity | 3 (for 2.5"/3.5" drives) |
| Caratteristiche speciali | Bar Patterned Mesh Front Panel, Magnetic Dust Filter |
| Peso dell'articolo | 4000 grammi |
| Dimensioni dell'articolo (P x L x A) | 46D x 20W x 40H centimetri |
| Paese di origine | Cina |
Informazioni sulla garanzia
Questo prodotto viene fornito con un 1 YEAR MANUFACTURER warranty. Please retain your proof of purchase for warranty claims. For detailed terms and conditions, refer to the official GAMDIAS websito o contattare l'assistenza clienti.
Supporto
If you encounter any issues or have questions regarding your GAMDIAS Aura GC11 ARGB PC Case that are not covered in this manual, please contact GAMDIAS customer support. You can find contact information on the official GAMDIAS websito o tramite il tuo rivenditore.
Manufacturer Contact Information: GAMDIAS TAIWAN, No. 113, Jian 2nd Rd., Zhonghe, Dist., New Taipei City 235, Taiwan
Importer Contact Information: Allway Distributions Pvt Ltd, No-49, H.B. Samajha Road, Baswangudi, Bengaluru- 560004, Contact -8904307700