
1. Introduzione
Thank you for choosing the Keenso Front Rear Dash Cam. This device is designed to provide reliable video recording of your journeys, offering enhanced safety and security for your vehicle. This manual will guide you through the installation, operation, and maintenance of your dash cam to ensure optimal performance.
2. Informazioni sulla sicurezza
- Non utilizzare la dash cam durante la guida. Regolare le impostazioni solo quando il veicolo è parcheggiato in sicurezza.
- Assicurarsi che la dash cam sia montata saldamente e non ostruisca la visuale view della strada o interferire con i comandi del veicolo.
- Evitare di esporre il dispositivo a temperature estreme, alla luce solare diretta per periodi prolungati o a umidità eccessiva.
- Use only the provided car charger and data cable to prevent damage to the device.
- Do not attempt to disassemble or repair the dash cam yourself. Contact customer support for assistance.
- Eseguire regolarmente il backup dei video importanti fileper prevenire la perdita.
3. Contenuto della confezione
Verifica che tutti gli articoli siano presenti nel tuo pacco:
- 1 x Keenso Car DVR Unit
- 1 x Caricabatteria da auto
- 1 x Manuale utente (questo documento)
- 1 cavo dati (USB)
- 2 x Mounts (for installation)
- 1 nastri biadesivi
- 1 x Base magica
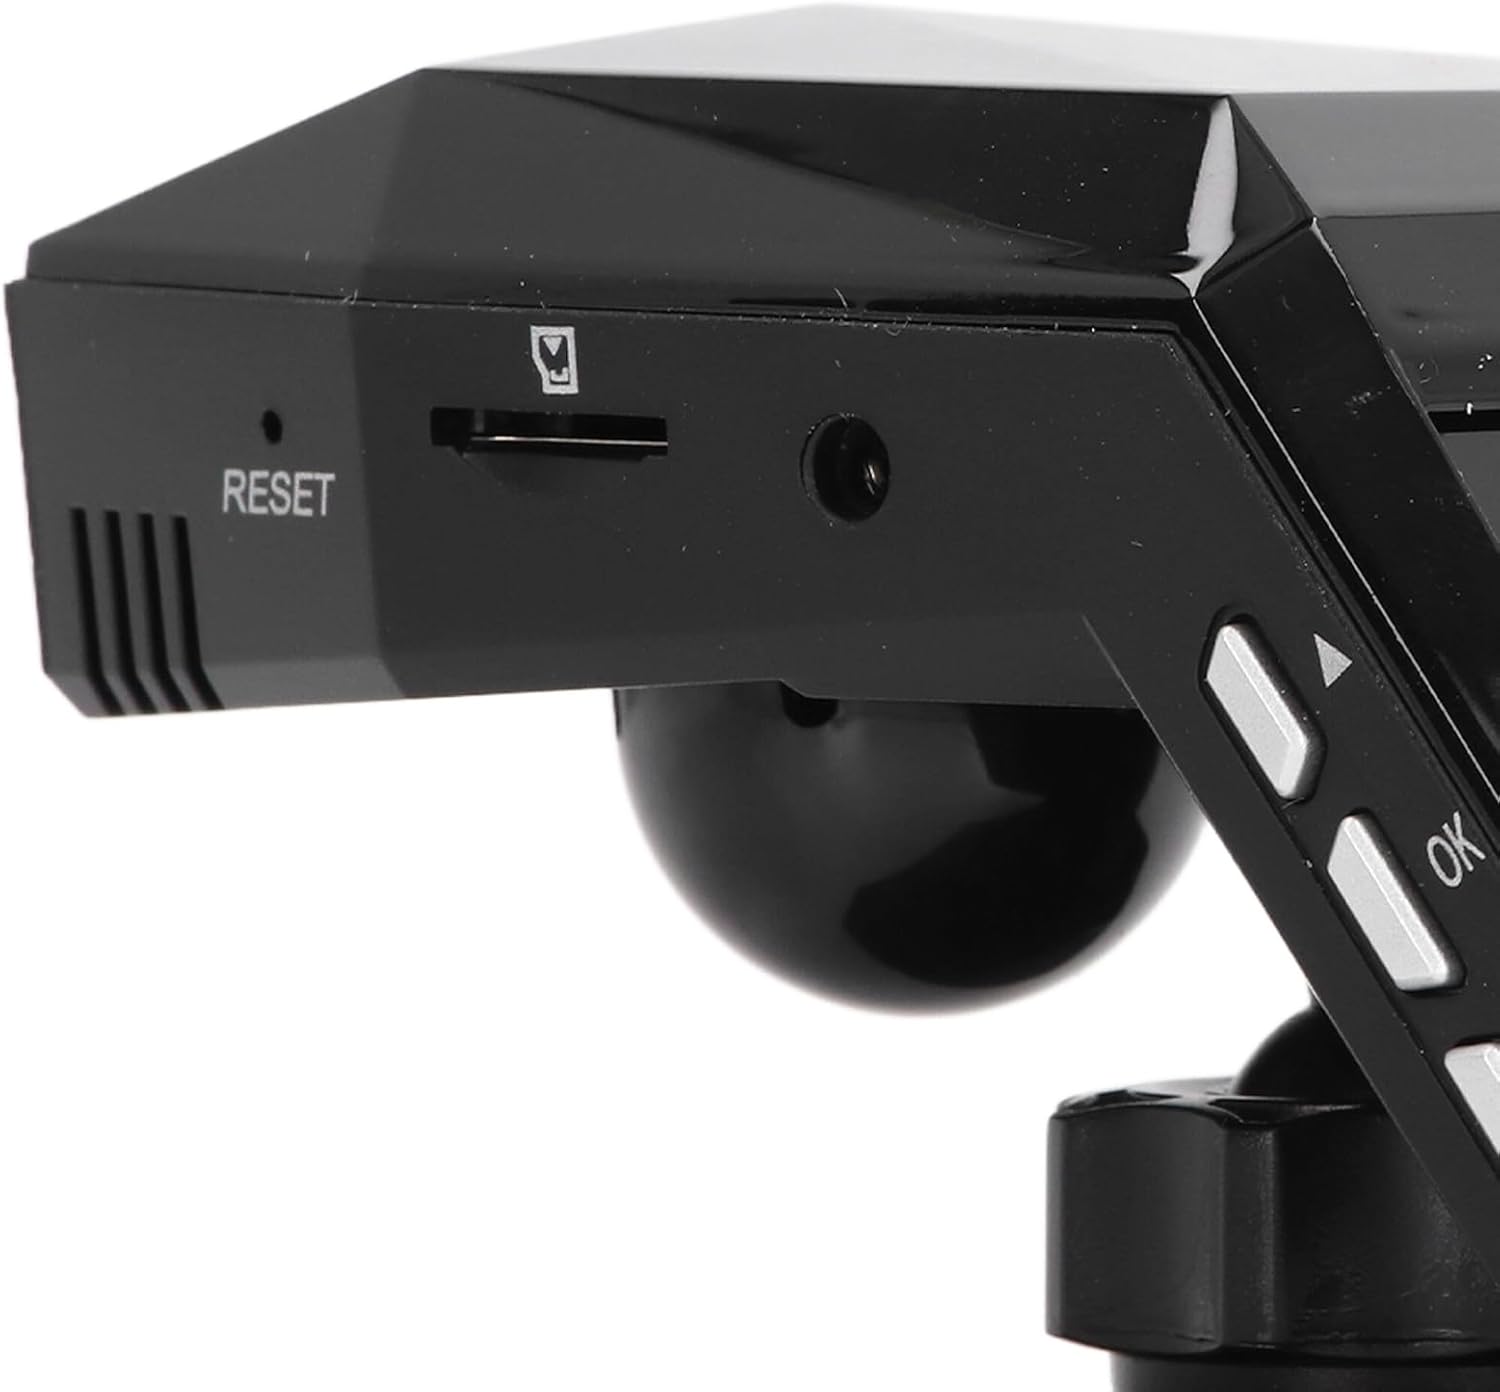
Figura 3.1: All components included in the Keenso Dash Cam package.
4. Caratteristiche del prodotto
The Keenso Front Rear Dash Cam offers a range of features for reliable vehicle monitoring:
- Materiale di alta qualità: Constructed from durable ABS material for long-lasting performance.
- Batteria al litio integrata: Features a 180mAh lithium-ion battery for continuous recording even when external power is interrupted.
- Display intuitivo: Equipped with a 2.0-inch screen (960x240 resolution) for easy viewgestione e registrazione delle registrazioni.
- Enhanced Parking Safety: Motion detection feature automatically records movement around your parked vehicle.
- Registrazione in loop: Sovrascrive automaticamente i file più vecchi e non protetti files when the memory card is full, ensuring continuous recording without manual deletion.
- Visione notturna a infrarossi: Professional configuration of 4 infrared night lights combined with WDR technology enhances night recording clarity.
- Supercapacitors: Designed to operate reliably in temperatures ranging from -10℃ to 70℃.
- Fotocamera ad alta risoluzione: 10MP image sensor with a 170-degree wide-angle lens, covering multiple lanes.

Figura 4.1: Fronte view of the dash cam, highlighting the display screen and control buttons.
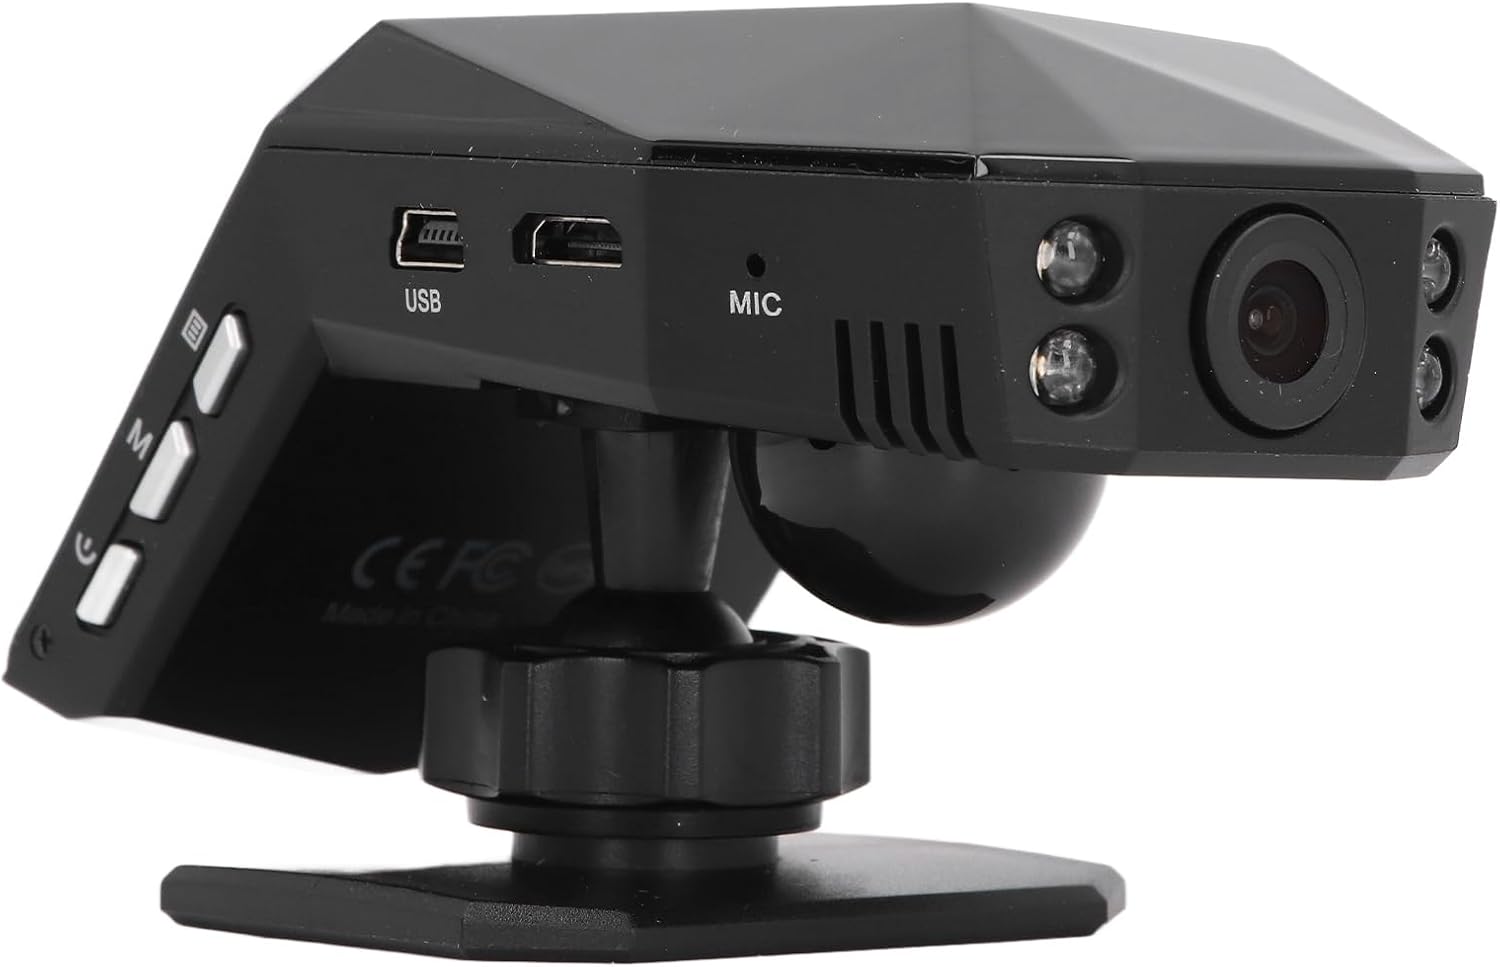
Figura 4.2: Posteriore view of the dash cam, showing the camera lens and four infrared night vision lights.
5. Impostazione
5.1 Inserting the Micro Memory Card
- Assicurarsi che la dash cam sia spenta.
- Locate the Micro Memory Card slot on the side of the device.
- Gently insert a Micro Memory Card (up to 32GB, not included) into the slot until it clicks into place.
- Per rimuoverla, spingere delicatamente la scheda finché non scatta, quindi rilasciarla per espellerla.

Figura 5.1: Lato view showing the Micro Memory Card slot and Reset button.
5.2 Montaggio della Dash Cam
- Scegli una posizione sul parabrezza che non ostruisca il tuo view, in genere dietro la parte posterioreview specchio.
- Pulire accuratamente la superficie del parabrezza.
- Attach the magic base to the chosen location using the double-sided tape. Ensure it is firmly secured.
- Connect the dash cam to one of the provided mounts.
- Attach the mount with the dash cam to the magic base. Adjust the camera angle for optimal road coverage.
5.3 Collegamento dell'alimentazione
- Inserire il caricabatteria per auto nella presa accendisigari del veicolo.
- Collegare l'altra estremità del cavo del caricabatteria per auto alla porta USB della dash cam.
- Route the cable neatly along the windshield trim to avoid interference with driving.
- In genere la dash cam si accende automaticamente all'avvio del veicolo e si spegne quando il motore viene spento.
6. Istruzioni per l'uso
6.1 Funzionamento di base
- Accensione/spegnimento: The device powers on automatically when connected to vehicle power and off when power is cut. You can also manually power on/off using the power button.
- Registrazione: Once powered on, the dash cam will automatically begin continuous loop recording. A recording indicator will be visible on the screen.
- Navigazione nel menu: Use the 'M' button to access the menu and the up/down arrow buttons to navigate. The 'OK' button confirms selections.
6.2 Registrazione in loop
The dash cam features intelligent loop recording. When the Micro Memory Card reaches its capacity, the system will automatically delete the oldest unprotected video fileper fare spazio a nuove registrazioni. Ciò garantisce una registrazione continua senza intervento manuale.
6.3 Monitoraggio del parcheggio 24 ore su 24
To activate 24-hour parking monitoring, ensure the feature is enabled in the settings. When the car encounters a collision while parked, the dash cam will automatically start recording for approximately one minute. For continuous monitoring when the car is off, a voltage reducing cable (purchased separately) is required.
6.4 Rilevamento del movimento
If enabled in the settings, the motion detection feature will automatically activate and begin recording if a significant object enters the camera's monitoring range while the vehicle is parked. It is recommended to turn off motion detection when driving to avoid unnecessary recordings.
6.5 Viewing registrazioni
Puoi view recorded videos directly on the 2.0-inch display screen. Navigate to the playback mode in the menu to browse and play files. Alternatively, remove the Micro Memory Card and insert it into a computer to view files.
7. Manutenzione
- Pulizia: Utilizzare un panno morbido e asciutto per pulire l'obiettivo e lo schermo della dash cam. Non utilizzare detergenti abrasivi o solventi.
- Scheda di memoria: Format the Micro Memory Card regularly (e.g., once a month) within the dash cam's settings to maintain optimal performance and prevent data corruption.
- Aggiornamenti software: Controllare il produttore webperiodicamente il sito per verificare la disponibilità di aggiornamenti del firmware. Seguire attentamente le istruzioni fornite con l'aggiornamento.
- Magazzinaggio: Quando non viene utilizzata per lunghi periodi, conservare la dash cam in un luogo fresco e asciutto, lontano dalla luce solare diretta.
8. Risoluzione Dei Problemi
| Problema | Possibile causa | Soluzione |
|---|---|---|
| La dash cam non si accende. | No power supply; faulty car charger; depleted internal battery. | Check car charger connection and vehicle's power outlet. Ensure the car charger is functional. Charge the internal battery. |
| La registrazione si interrompe inaspettatamente. | Scheda di memoria piena; errore della scheda di memoria; interruzione di corrente. | Format the memory card. Replace the memory card if errors persist. Check power connection. |
| La qualità video è scarsa. | Lente sporca; pellicola protettiva sulla lente; impostazioni di risoluzione errate. | Clean the lens. Remove any protective film. Adjust video resolution settings to 1080P. |
| La dash cam si blocca o si blocca. | Software error; memory card issue. | Press the RESET button (refer to Figure 5.1). Format or replace the memory card. |
| Il monitoraggio del parcheggio non funziona. | Feature not enabled; no voltage reducing cable for continuous power. | Enable parking monitoring in settings. Consider installing a voltage reducing cable for 24/7 monitoring. |
9. Specifiche
| Caratteristica | Specificazione |
|---|---|
| Materiale del prodotto | addominali |
| Risoluzione video | 1920x1080P/30 fps |
| Risoluzione dell'immagine | 10MP |
| Tipo di batteria | Batteria agli ioni di litio |
| Capacità della batteria | 180mAh |
| Dimensioni dello schermo di visualizzazione | 2.0 pollici |
| Risoluzione dello schermo | 960x240 |
| Supported Micro Memory Card | Fino a 32 GB (non inclusi) |
| Temperatura di esercizio | -10℃ a 70℃ |
| Dimensioni del prodotto (P x L x A) | 5.91" x 4.72" x 3.54" |
10. Garanzia e supporto
This Keenso product is covered by a manufacturer warranty for 90 days from the date of purchase. This warranty covers defects in materials and workmanship under normal use.
For technical support, warranty claims, or any questions regarding your Keenso Front Rear Dash Cam, please contact your retailer or visit the official Keenso websito per informazioni sul servizio clienti.