Introduzione
Thank you for choosing the Klinsmann KRV306 Robotic Vacuum and Mop. This 2-in-1 intelligent cleaning robot is designed to provide efficient and convenient floor cleaning for your home. Please read this manual carefully before use to ensure proper operation, maintenance, and to maximize the lifespan of your device.
Istruzioni di sicurezza
To reduce the risk of injury or damage, read and follow all safety precautions when setting up, using, and maintaining your robot. Keep this manual in a safe place for future reference.
- Questo apparecchio può essere utilizzato da bambini di età pari o superiore a 8 anni e da persone con capacità fisiche, sensoriali o mentali ridotte o prive di esperienza e conoscenza, solo se sorvegliati o istruiti sull'uso sicuro dell'apparecchio e se comprendono i pericoli connessi.
- I bambini devono essere sorvegliati per assicurarsi che non giochino con l'apparecchio.
- La pulizia e la manutenzione da parte dell'utente non devono essere eseguite da bambini senza supervisione.
- Utilizzare solo l'adattatore di alimentazione originale fornito dal produttore.
- Non utilizzare il robot in aree con fiamme libere o oggetti fragili.
- Prima dell'uso, assicurarsi che tutti i cavi e i piccoli oggetti siano rimossi dal pavimento per evitare che rimangano impigliati.
- Non immergere il robot o la sua base di ricarica in acqua.
- Non utilizzare il robot per raccogliere detriti di grandi dimensioni, liquidi o oggetti in fiamme.
Contenuto della confezione
Verificare che tutti i componenti siano presenti nella confezione:
- Klinsmann KRV306 Robotic Vacuum and Mop
- Adattatore di ricarica
- Spazzole laterali (2 paia)
- Pattumiera
- Panno per straccio
- Manuale d'uso
Impostare
- Disimballare il robot: Estrarre con cautela il robot e tutti gli accessori dalla confezione.
- Installare le spazzole laterali: Fissare le spazzole laterali alle apposite fessure nella parte inferiore del robot finché non scattano in posizione.
- Carica il robot:
- Connect the charging adapter to a power outlet and to the charging port on the robot.
- Ensure the robot is fully charged before its first use. A full charge takes approximately 3-4 hours. The indicator light will change to signal a full charge.
- Preparare l'area di pulizia: Remove any obstacles, loose cables, or small items from the floor to prevent the robot from getting stuck or damaging items.
Istruzioni per l'uso
Accensione/spegnimento
- Per accendere: Premere e tenere premuto il pulsante di accensione sul robot finché la spia non si accende.
- Per spegnere: Premere e tenere premuto il pulsante di accensione finché la spia non si spegne.
Modalità di pulizia
The KRV306 offers three cleaning modes:
- Automatic (Zigzag) Mode: Press the power button once to start cleaning in an automatic zigzag pattern. This mode is suitable for general cleaning of open areas.
- Modalità di pulizia spot: Place the robot in a specific dirty area and press the spot cleaning button (if available, or cycle through modes). The robot will clean in a spiral pattern to concentrate on that area.
- Modalità di pulizia dei bordi: Activate this mode to have the robot clean along walls and furniture edges.
Funzione Mopping
Per utilizzare la funzione di lavaggio:
- Fill the water tank (if separate) or attach the damp mopping cloth to the designated area on the robot.
- Avvia un ciclo di pulizia. Il robot aspirerà e laverà contemporaneamente.
- Remove the mopping cloth and empty the water tank after each use.
Navigazione e sensori
The KRV306 is equipped with intelligent navigation features:
- Anti-drop Infrared Sensors: These sensors detect stairs and elevated surfaces, preventing the robot from falling.
- Mechanical Bumper: The bumper allows the robot to gently detect and navigate around obstacles like furniture without causing damage.
- Arrampicata sulla soglia: The robot can easily slide over thresholds up to 10mm high, ensuring continuous cleaning across different rooms.
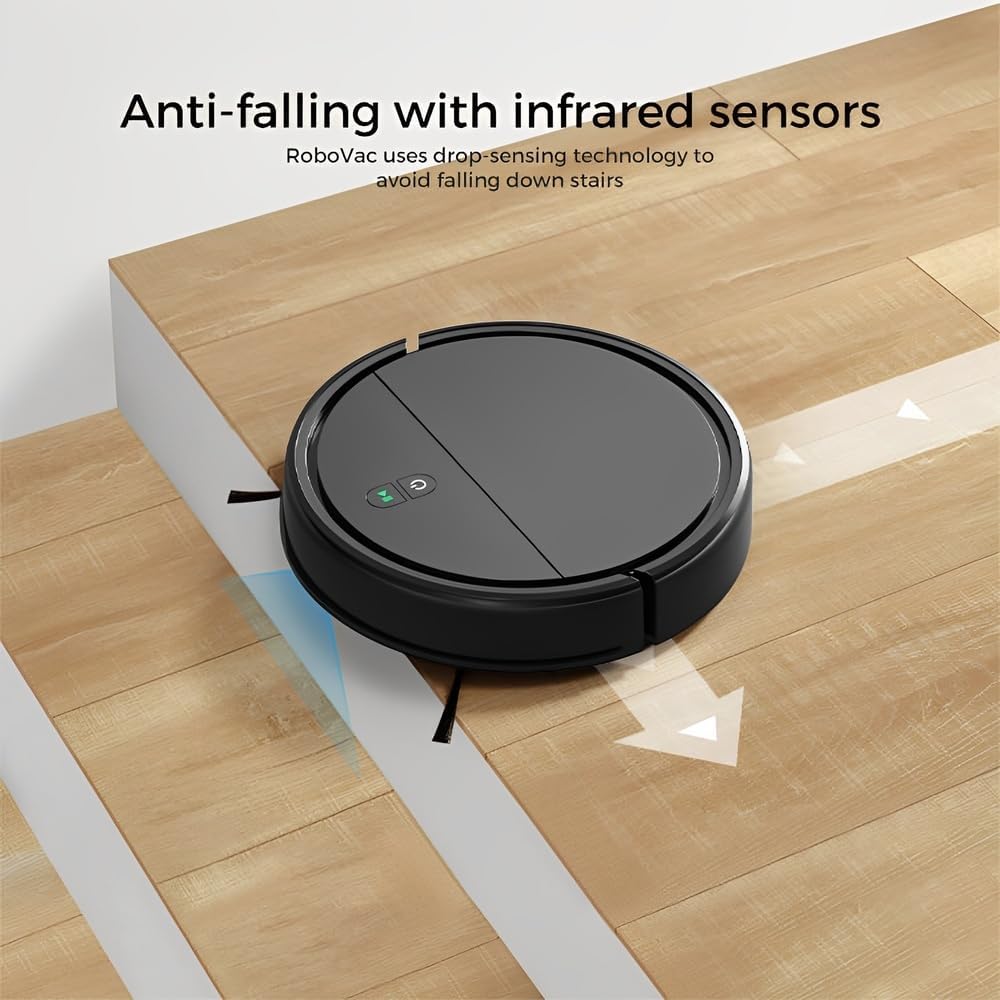
Image: Anti-falling infrared sensors prevent the robot from falling down stairs.

Image: The mechanical bumper allows the robot to navigate around furniture without damage.
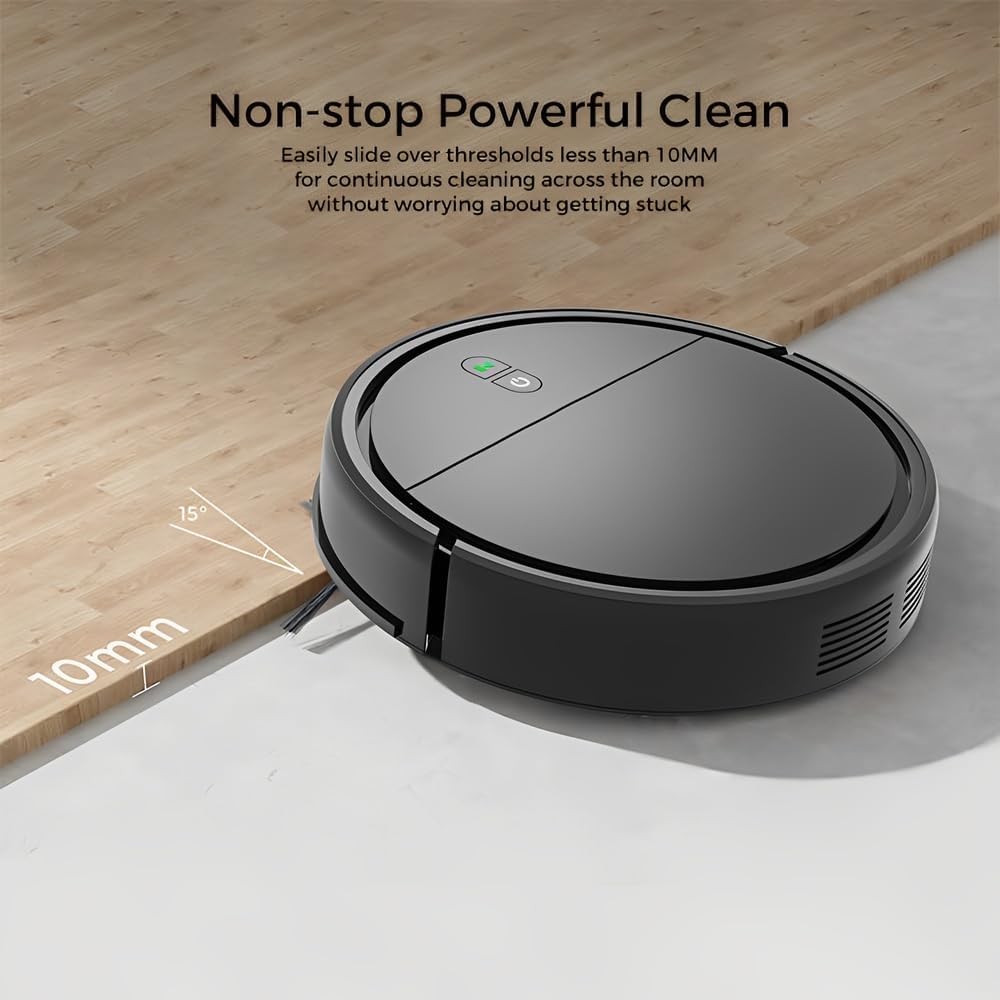
Image: The robot can easily overcome thresholds up to 10mm for continuous cleaning.
Manutenzione
Regular maintenance ensures optimal performance and extends the life of your robot.
Svuotare il cestino

Image: The large dustbin collects various types of debris, reducing the frequency of emptying.
- Premere il pulsante di sgancio del contenitore della polvere ed estrarlo.
- Aprire il coperchio del cestino e svuotarne il contenuto nel cestino della spazzatura.
- Clean the filter inside the dustbin with the provided cleaning tool or a soft brush. Replace the filter if necessary.
- Rinse the dustbin with water if needed, ensuring it is completely dry before reinserting.
Pulizia delle spazzole laterali
- Controllare regolarmente le spazzole laterali per verificare che non vi siano capelli o detriti aggrovigliati.
- Carefully remove any tangled material. If brushes are worn, replace them with new ones.
Sensori di pulizia
- Wipe the anti-drop sensors and charging contacts on the bottom of the robot with a clean, dry cloth.
- Ensure the bumper area is free of debris.
Cleaning Mopping Cloth
- Remove the mopping cloth after each use.
- Wash the cloth by hand or machine. Allow it to air dry completely before reattaching.
Risoluzione dei problemi
| Problema | Possibile causa | Soluzione |
|---|---|---|
| Il robot non si accende. | Batteria scarica; il pulsante di accensione non è premuto correttamente. | Caricare il robot; tenere premuto il pulsante di accensione per alcuni secondi. |
| Il robot si blocca spesso. | Obstacles (cables, rugs, small items); Dirty sensors. | Clear the cleaning area; Clean the anti-drop and bumper sensors. |
| Scarsa efficienza di pulizia. | Contenitore della polvere pieno; Filtro intasato; Spazzole laterali usurate. | Svuotare il contenitore della polvere; pulire/sostituire il filtro; pulire/sostituire le spazzole laterali. |
| Il robot cade dalle scale. | Dirty anti-drop sensors; Sensors obstructed. | Clean the anti-drop sensors thoroughly. |
| La funzione di lavaggio non è efficace. | Mopping cloth is dry or dirty. | Dampen the mopping cloth; Clean or replace the mopping cloth. |
Specifiche
| Modello | KRV306 |
| Marca | Vita |
| Funzioni | Aspirazione, lavaggio |
| Tipo di batteria | Ioni di litio da 1500 mAh |
| Durata | Fino a 80 minuti |
| Tempo di ricarica | 3-4 ore |
| Potenza di aspirazione | 400PA |
| Livello di rumore | Massimo 68 dB |
| Capacità del bidone della spazzatura | Optimized (ample capacity) |
| Dimensioni (diametro x altezza) | Dimensioni: 29 cm x 7.2 cm |
| Peso | 2.1 kg |
| Capacità di arrampicata sulla soglia | Fino a 10 mm |
| Caratteristiche speciali | Anti-drop Infrared Sensor, Mechanical Bumper, Low Noise, Compact, Rechargeable |
Informazioni sulla garanzia
The Klinsmann KRV306 Robotic Vacuum and Mop comes with a Garanzia di 90 giorni from the date of purchase, covering manufacturing defects. This warranty does not cover damage caused by misuse, accidents, unauthorized modifications, or normal wear and tear. Please retain your proof of purchase for warranty claims.
Assistenza clienti
If you encounter any issues or have questions regarding your Klinsmann KRV306, please refer to the troubleshooting section of this manual. For further assistance, contact the retailer or manufacturer's customer service department with your product model and purchase details.