
1. Introduzione
Grazie per l'acquistoasing the AODK Farmhouse Nightstand Set of 2. This manual provides detailed instructions for assembly, operation, and maintenance to ensure safe and optimal use of your new nightstands. Please read this manual thoroughly before beginning assembly or use.
2. Caratteristiche del prodotto
The AODK Farmhouse Nightstand is designed to offer both style and functionality to your bedroom or living space. Key features include:
- Progetto di fattoria rustica: Features a white wood finish and rustic dark walnut top, adding a warm and elegant touch.
- RGB LED Light Strip: Equipped with a LED light strip offering 10 colors, 10 lighting modes, and adjustable brightness levels for personalized ambiance.
- Comoda stazione di ricarica: Includes 1 AC outlet and 2 USB ports for easy device charging, with cable management to keep your space organized.
- AmpSpazio di archiviazione: Two smooth-gliding drawers and an open shelf provide generous storage for essentials.
- Costruzione durevole: Made from engineered wood for stability and long-lasting use.

Image: AODK Farmhouse Nightstand, showcasing its rustic design, LED lighting, and charging station.
3. Istruzioni di montaggio
For ease and safety, we recommend two people for assembly. Please ensure all parts are included and in good condition before starting. The entire assembly process takes approximately 1 hour per nightstand.
3.1. Guida video all'assemblaggio
Video: Detailed installation guide for the AODK Nightstand, demonstrating each step of the assembly process.
3.2. Assemblaggio passo dopo passo
Follow the numbered steps below, referring to the provided diagrams for visual guidance.
- Prepare Hardware: Pre-assemble hardware onto Panel A (top board) and Panels I (drawer front panels). Insert each piece vertically into the marked holes and ensure the hardware is fully seated.
- Montare i lati del cassetto: Insert hardware into the edge holes of Panels B, C, J, and K. Ensure each piece is pushed in straight and fully seated. Panels J and K each require two pieces on both sides.
- Fissare le guide dei cassetti: Attach drawer slide CL to Panel B and drawer slide CR to Panel C. Align the correct screw holes and fasten the slides securely using screws. Tighten firmly to avoid noise during use.
- Form Drawer Frame: Connect Panels J and K using screws to form the drawer frame. Insert Board M into the side grooves. Attach Panel I and align the pre-installed Cam Locks with the Cam Bolts. Rotate Cam Locks clockwise using the provided tool until about 60% tightness, then fully secure.
- Attach Drawer Slides to Drawer: Attach drawer slide DL to Panel J, and drawer slide DR to Panel K using screws. Make sure each slide is installed in the correct screw holes. Please tighten the screws fully to avoid noise during use.
- Attach Drawer Handle: Attach the handle to the front panel I using screws from the inside.
- Collegare il cablaggio: Connect the wiring end of the socket to the connector on the light board. Align the connector with the correct direction. Do not force it if the direction is wrong.
- Fix Power Socket: Place the power socket at the desired position on the back of board A. The installation can be on the left, right, or center according to your preference. Fix the socket using screws. Ensure the clip is facing upwards.
- Cavo di alimentazione sicuro: Use the cable clips and screws to fix the power cable onto the back of board A.
- Secure Boards D, E, F: Secure boards D, E, and F to board B using screws. Ensure all boards sit firmly and edges stay flush.
- Secure Board C: Secure Board C to the structure using screws.
- Slide Board H: Slowly slide Board H down along the groove tracks on Boards B and C until it reaches the bottom and fits securely in place.
- Insert Part N: Insert Part N into the groove on Board B and press it down until it fits firmly in place.
- Insert Board G: Insert Board G into the grooves of Boards B and C, ensuring the large round hole on Board G is positioned at the top. Slide it down gently until fully seated on Part N.
- Install Board A: Insert the cam bolts into the holes on Board A. Align the arrow on Cam Lock with the bolt, press down, and tighten clockwise until fully secured.
- Install Panel Fasteners: Use bracket and screw to secure boards G and H to the steel frame B/C. Place bracket at the top corners of board G, then tighten with screw using screwdriver. Ensure all panel fasteners are fully tightened and the back panels are firmly secured.
- Installa cassetto: Align the drawer slide DL/R with the cabinet slide CL/R. Push the drawer straight inward following the direction of the arrows until the slide rails fully click and lock into place. If resistance is felt, slightly lift or adjust the drawer to ensure the rails align correctly.
- Apply Cover Stickers: Press the cover stickers firmly over all exposed screw holes on the cabinet and drawers.

Image: Product dimensions and key features like cable grommet and power outlet.

Image: Details of the sturdy drawer handle, ample storage space, and smooth metal drawer slides.
4. Istruzioni per l'uso
4.1. Using the LED Light Strip
The nightstand features an RGB LED light strip with multiple colors and modes:
- Accensione/spegnimento: Press the touch button located on the charging station to turn the LED light on or off.
- Cambia colore/modalità: Short press the touch button to cycle through 10 different colors and 10 lighting modes.
- Regola luminosità: Long press the touch button to adjust the brightness level. Release when the desired brightness is reached.
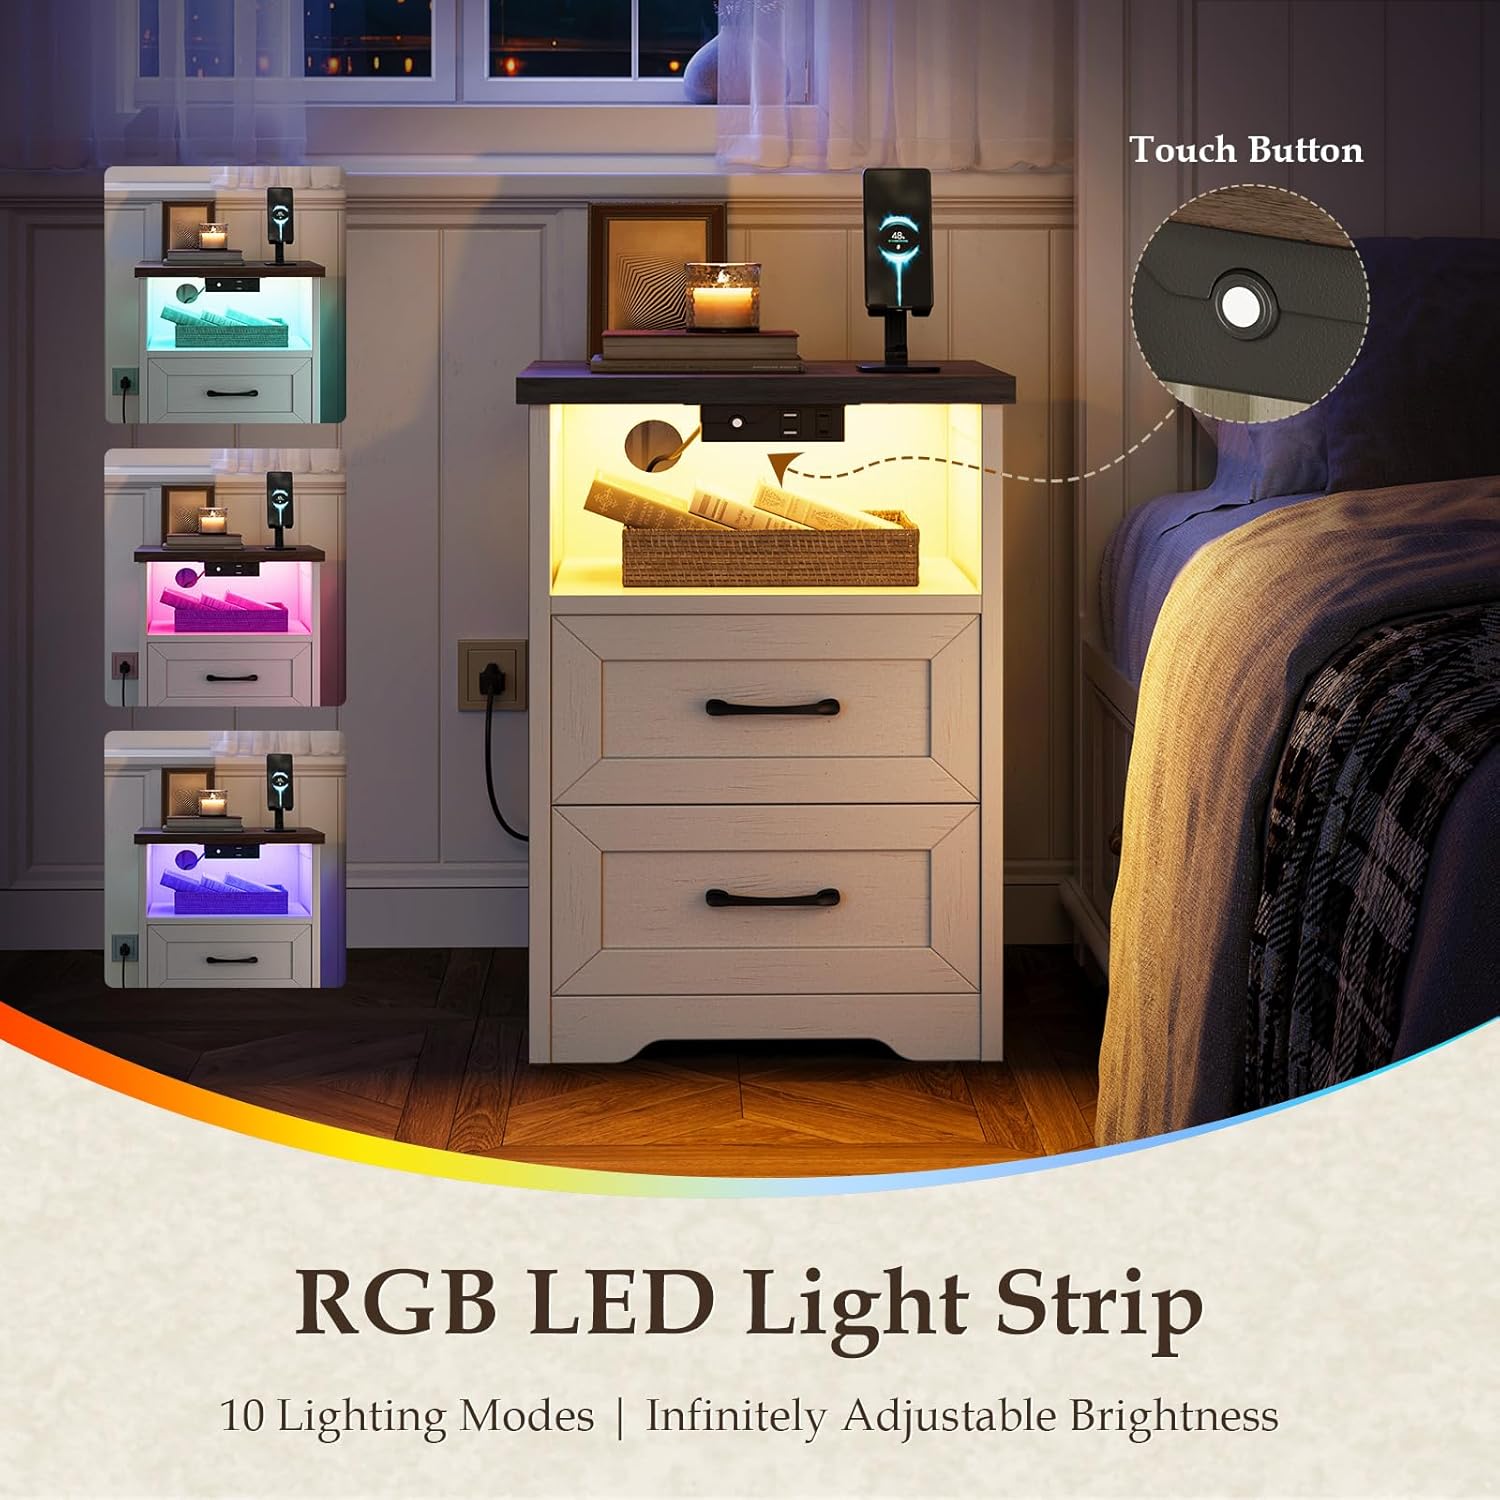
Image: The RGB LED light strip displaying different color options and a touch button for control.
4.2. Utilizzo della stazione di ricarica
La stazione di ricarica integrata garantisce un comodo accesso all'energia:
- Presa CA: Plug your devices into the 125V/8A AC outlet for standard power.
- Porte USB: Use the 5V/2A USB ports to charge compatible electronic devices.
- Gestione dei cavi: Utilize the cable grommet to route charging cables neatly, reducing clutter.

Immagine: dettagliata view of the charging station, highlighting the 2 USB ports, 1 AC outlet, and power cord.
5. Manutenzione
Proper care will extend the life and appearance of your AODK nightstand:
- Pulizia: Pulisci le superfici con adamp panno. Evitare prodotti chimici aggressivi o detergenti abrasivi che potrebbero danneggiare la finitura.
- Fuoriuscite: Asciugare immediatamente eventuali fuoriuscite per evitare macchie o danni al legno ingegnerizzato.
- Hardware: Controllare e serrare periodicamente tutte le viti e gli elementi di fissaggio per garantirne la stabilità.
- Componenti elettrici: Ensure the charging station and LED light strip are kept dry. Do not attempt to repair electrical components yourself.
6. Specifiche
| Caratteristica | Dettaglio |
|---|---|
| Marca | AODK |
| Dimensioni del prodotto | 13.78"P x 15.75"L x 23.62"A |
| Colore | Rustic White & Dark Walnut |
| Materiale | Legno ingegnerizzato |
| Numero di cassetti | 2 |
| Caratteristiche speciali | Charging Station, Easy Assembly, LED Lighted, Storage, Two Drawers |
| Presa elettrica | 1 AC Outlet (125V / 8A) |
| Porte USB | 2 USB Ports (5V / 2A) |
| Peso dell'articolo | 45.8 libbre |
| Tipologia di camera | Bedroom, Guest Room, Kid's Room, Living Room |
7. Risoluzione Dei Problemi
If you encounter any issues with your AODK nightstand, please refer to the following common solutions:
- La luce LED non funziona: Ensure the power cord is securely plugged into a functional wall outlet and the light strip's connector is properly attached. Check if the touch button is responsive.
- Stazione di ricarica non funzionante: Verify the power cord is plugged in. Test the AC outlet and USB ports with different devices to confirm functionality. Ensure the power socket is correctly installed on the back panel.
- I cassetti non scorrono fluidamente: Check that the drawer slides are correctly aligned and securely fastened. Ensure no objects are obstructing the drawer's path. Re-tighten any loose screws on the slides.
- Comodino traballante: Confirm that all assembly screws are fully tightened. Ensure the nightstand is placed on a flat, even surface.
If problems persist, please contact AODK customer support for further assistance.
8. Garanzia e supporto
For information regarding warranty coverage, product returns, or technical support, please refer to your purchase documentation or contact AODK customer service directly. Keep your proof of purchase for any warranty claims.