IIWEY Q7
IIWEY Q7 Dual 4K Dash Cam with CPL Filter User Manual
Modello: Q7
1. Prodotto finitoview
IIWEY Q7 è un sistema di telecamera per cruscotto a doppio canale progettato per registrare sia la parte anteriore che quella posteriore views of your vehicle in 4K resolution. It features advanced STARVIS sensors and High Dynamic Range (HDR) for enhanced low-light performance. The system includes a 40mm Circular Polarizing Lens (CPL) filter to reduce glare and improve video clarity, along with a 128GB microSD card for immediate use.
Caratteristiche principali:
- Dual 4K Recording: Captures front and rear video at 3840x2160p resolution simultaneously.
- Dual STARVIS + HDR Night Vision: Utilizes 2nd-generation STARVIS sensors and f/1.6 lenses with dual-channel HDR for clear recordings in various lighting conditions.
- Integrated CPL Filter: A 40mm polarizing lens reduces glare from reflections and enhances color saturation for clearer video.
- Scheda MicroSD da 128 GB inclusa: Ready for immediate use with amplo stoccaggio.
- Registrazione in loop e sensore G: Sovrascrive automaticamente il vecchio footage and locks important incident videos to a protected folder.
- Largo View & IPS Screen: 170 ° grandangolare view for comprehensive coverage and a 3.18" IPS screen for live view e riproduzione.

Immagine: Oltreview of the IIWEY Q7 Dual 4K Dash Cam system, illustrating front and rear camera views and STARVIS technology.
2. Configurazione e installazione
2.1 Inserimento della scheda MicroSD
- Assicurarsi che la dash cam sia spenta.
- Locate the microSD card slot on the dash cam.
- Insert the provided 128GB microSD card with the contacts facing the correct direction until it clicks into place.
- It is recommended to format the microSD card within the dash cam settings before first use.
2.2 Montaggio della telecamera
- Fotocamera frontale: Scegli una posizione sul parabrezza che non ostruisca il tuo view, in genere dietro la parte posterioreview mirror. Clean the area thoroughly. Attach the suction cup mount or adhesive mount firmly.
- Telecamera posteriore: Montare la telecamera posteriore sul lunotto posteriore, assicurandosi che la visuale sia chiara view of the road behind. Route the cable discreetly to the front camera.
- Adjust the lens angles of both cameras to cover the desired field of view (170° for each).
2.3 Collegamento di alimentazione
- Connect the power cable to the dash cam and plug the other end into your vehicle's 12V power outlet (cigarette lighter socket).
- Route the power cable along the edges of the windshield and dashboard to keep it tidy and out of the way.
2.4 CPL Filter Attachment
The CPL filter is designed to be easily attached and removed from the front camera lens.
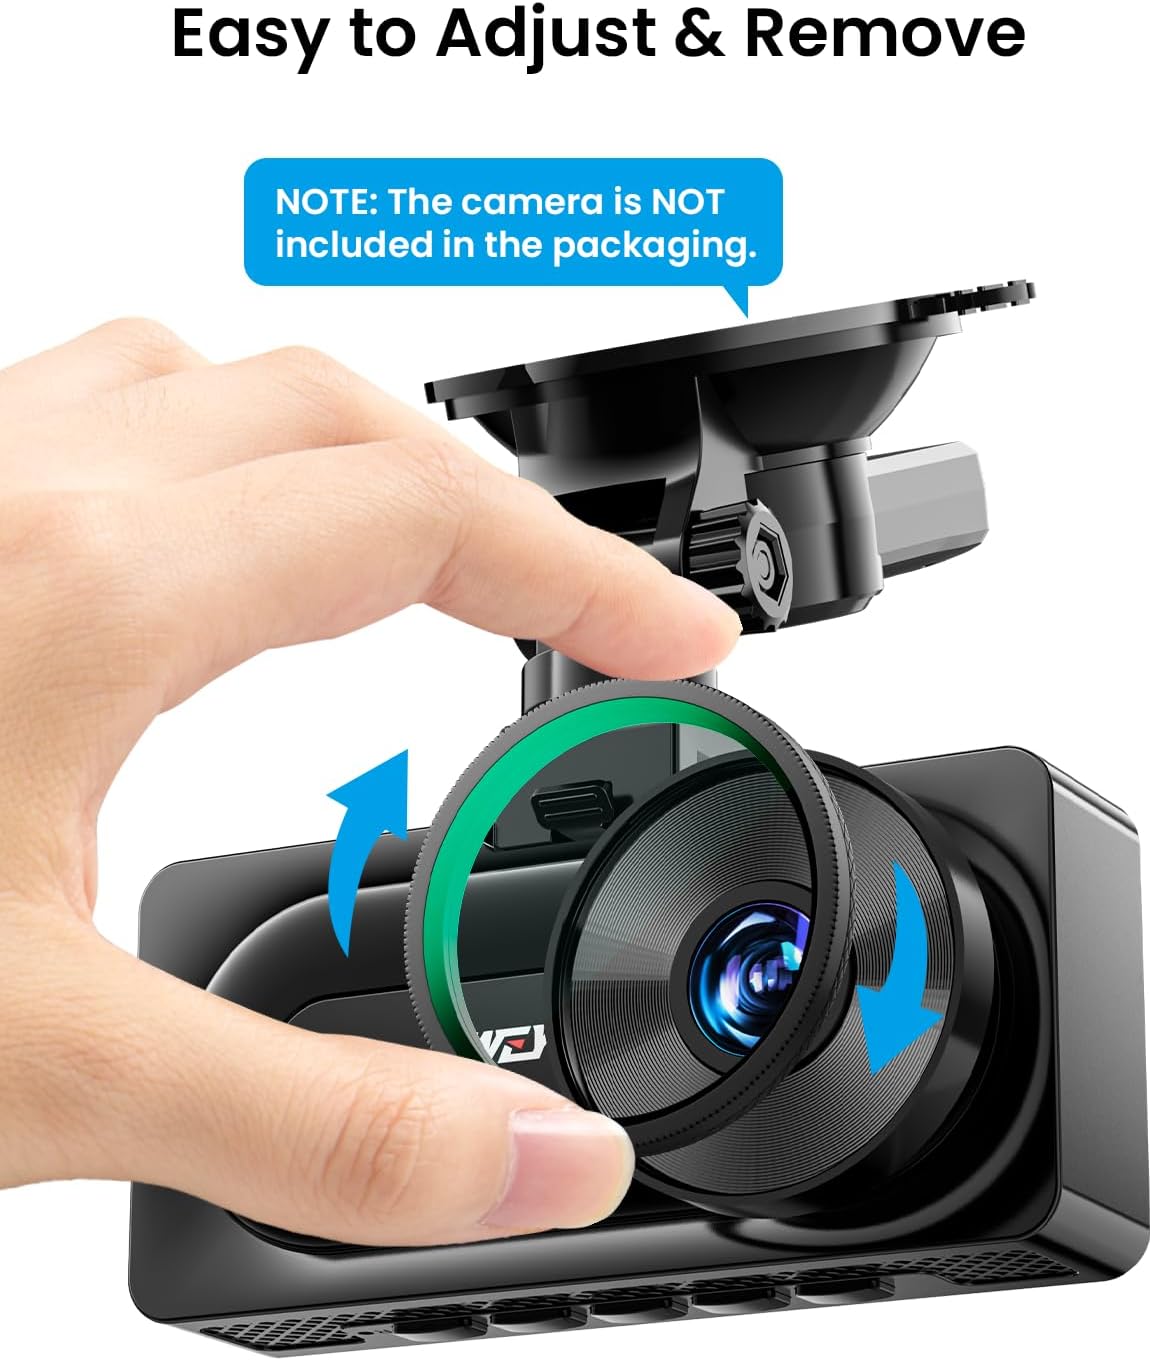
Image: Illustration of how to easily attach and remove the CPL filter from the dash cam lens.
- Ensure your IIWEY Q7 dash cam has pre-threaded lens for CPL filter attachment.
- Gently screw the 40mm CPL filter onto the front camera lens until secure.
- Rotate the CPL filter while observing the screen to achieve the desired glare reduction and color enhancement.

Image: Compatibility check for the CPL filter, confirming it fits the IIWEY Q7 model with pre-threaded lenses.
3. Istruzioni per l'uso
3.1 Accensione/spegnimento
- La dash cam si accenderà automaticamente e inizierà a registrare quando il motore del veicolo verrà acceso.
- Si spegnerà automaticamente poco dopo lo spegnimento del motore.
- Per accendere/spegnere manualmente, tenere premuto il pulsante di accensione.
3.2 Modalità di registrazione
- Registrazione in loop: The dash cam continuously records video in short segments (e.g., 1, 3, or 5 minutes). When the microSD card is full, the oldest unprotected filevengono sovrascritti.
- Sensore G (registrazione di emergenza): In the event of a sudden impact or collision, the built-in G-sensor will detect the event and automatically lock the current video segment, preventing it from being overwritten by loop recording. These filevengono archiviati in una cartella separata e protetta.
- Monitor di parcheggio (opzionale): If supported and properly wired (requires a hardwire kit, sold separately), the dash cam can record when motion or impact is detected while the vehicle is parked.
3.3 CPL Filter Adjustment
The CPL filter can be rotated to optimize its effect. Rotate the filter until reflections on the windshield or dashboard are minimized, and colors appear more vibrant on the dash cam's screen.

Image: Visual comparison demonstrating how the CPL filter reduces reflections and glare on the road.

Image: Explanation of CPL filter benefits, including enhanced color tone, improved details, and reduced light reflection.
4. Manutenzione
4.1 Cura della scheda MicroSD
- Format the microSD card regularly (e.g., once a month) within the dash cam's settings to ensure optimal performance and prevent data corruption.
- Use only high-quality, high-endurance microSD cards recommended for dash cam use.
4.2 Pulizia delle lenti
- Gently wipe the camera lenses (front, rear, and CPL filter) with a soft, lint-free cloth.
- Avoid using abrasive cleaners or solvents that could damage the lens coating.
4.3 Cura generale
- Evitare di esporre la dash cam a temperature estreme per periodi prolungati.
- Do not attempt to disassemble or modify the dash cam, as this will void the warranty.
5. Risoluzione Dei Problemi
5.1 La Dash Cam non si accende
- Check the power connection to ensure it is securely plugged into both the dash cam and the vehicle's 12V outlet.
- Verify that the vehicle's 12V outlet is functioning correctly.
- Se disponibile, provare un cavo di alimentazione o una presa di corrente diversi.
5.2 Problemi di registrazione
- Il video non registra: Ensure a microSD card is inserted and properly formatted. Check if the card is full (if loop recording is off or protected files occupy too much space).
- Scarsa qualità video: Clean the camera lenses. Ensure the CPL filter is correctly adjusted. Check dash cam settings for resolution and exposure.
- Sensore G troppo sensibile/non abbastanza sensibile: Regolare l'impostazione della sensibilità del sensore G nel menu della dash cam.
5.3 Problemi di visualizzazione dello schermo
- If the screen is black, check if the screen saver function is enabled in the settings.
- Riavviare la dash cam.
5.4 General Reset
If issues persist, try performing a factory reset through the dash cam's menu settings. This will revert all settings to their default values.
6. Specifiche
| Modello | IIWEY Q7 |
| Risoluzione video | Front: 4K (3840x2160p), Rear: 4K (3840x2160p) |
| Sensore di immagine | 2nd-gen STARVIS |
| Apertura lente | apertura f/1.6 |
| Campo di View | 170° (anteriore e posteriore) |
| Schermo di visualizzazione | 3.18" IPS |
| Magazzinaggio | Supporta schede microSD fino a 128 GB (incluse 128 GB) |
| Caratteristiche speciali | CPL Filter (40mm), HDR, G-Sensor, Loop Recording |
7. Garanzia e supporto
For warranty information and technical support, please refer to the documentation included with your product packaging or visit the official IIWEY websito. Puoi anche contattare direttamente il venditore per assistenza.
Documenti correlati - Q7
 |
Manuale utente della Dash Cam IIWEY S2 Manuale utente completo per la Dash Cam IIWEY S2, che copre installazione, funzionamento, funzionalità come GPS e Wi-Fi, risoluzione dei problemi e aggiornamenti di sistema. |
 |
Rapporto di prova FCC per la Dash Cam iiwey S2 Rapporto ufficiale sui test FCC per la iiwey S2 Dash Cam (ID FCC: 2A5RL-S2), che descrive in dettaglio la conformità alle normative FCC Parte 15 Sottoparte C, inclusi test su larghezza di banda, potenza, emissioni e requisiti dell'antenna, condotti dal Flux Compliance Service Laboratory. |
 |
Manuale utente della dash cam WiFi anteriore e posteriore Odrey Q7 2.5K Manuale utente completo per la dash cam Odrey Q7, che descrive in dettaglio l'installazione, la connessione WiFi, l'utilizzo dell'app, le impostazioni della telecamera e la risoluzione dei problemi per la dash cam WiFi anteriore e posteriore da 2.5K. |
 |
Manuale utente della dash cam Navycrest Q7 2.5K anteriore e posteriore 5G WiFi Manuale utente per la dash cam Navycrest Q7, che illustra installazione, funzionalità, risoluzione dei problemi e supporto. Scopri come configurare e utilizzare la tua dash cam anteriore e posteriore da 2.5K con Wi-Fi 5G. |
 |
Programma di manutenzione Audi 2016 - Tutti i modelli Comprehensive maintenance schedule for all 2016 Audi models, detailing service intervals by mileage and time, specific maintenance tasks, and engine oil specifications. An essential guide for Audi owners. |