1. Introduzione
Thank you for choosing the VOCOO 15.7" Digital Wall Timer and Clock. This device is designed to provide clear time display, versatile countdown and count-up timer functions, and customizable alarm settings for various environments such as offices, homes, kitchens, gyms, and classrooms. Please read this manual carefully to ensure proper setup and operation.
2. Cosa è incluso
Verificare che tutti i componenti siano presenti nella confezione:
- VOCOO 15.7" Digital Wall Timer and Clock
- Telecomando
- Cavo di alimentazione da 16.4 piedi
- Adattatore di alimentazione 5V/2A
- 3 batterie AAA (per il backup della memoria)
- 2 batterie AAA (per il telecomando)
- Manuale dell'utente (questo documento)
3. Impostazione
3.1 Collegamento di alimentazione
- Connect the 16.4ft power cord to the DC 5V input port on the back of the timer.
- Plug the 5V/2A power adapter into a standard electrical outlet. The timer will power on automatically.
3.2 Memory Backup Battery Installation
The timer uses 3 AAA batteries (included) to retain settings during power outages. This ensures that time, colors, and alarms are preserved without reprogramming.
- Individuare il vano batterie sul retro del timer.
- Aprire il coperchio del vano.
- Inserire 3 batterie AAA, rispettando la polarità corretta (+/-).
- Chiudere saldamente il coperchio del vano batterie.

Image: Illustration of memory backup battery installation. The diagram shows the timer connected to power and the location for AAA batteries to preserve settings during power loss.
3.3 Installazione della batteria del telecomando
Il telecomando richiede 2 batterie AAA (incluse).
- Aprire il vano batterie sul retro del telecomando.
- Inserire 2 batterie AAA, assicurandosi della corretta polarità.
- Chiudere il coperchio del vano.
3.4 Montaggio e posizionamento
The timer can be wall-mounted or placed on a desk.
- Montaggio a parete: Use the keyhole slots on the back of the timer to hang it securely on screws (not included) in your desired wall location.
- Posizionamento sulla scrivania: Place the timer on a flat, stable surface.
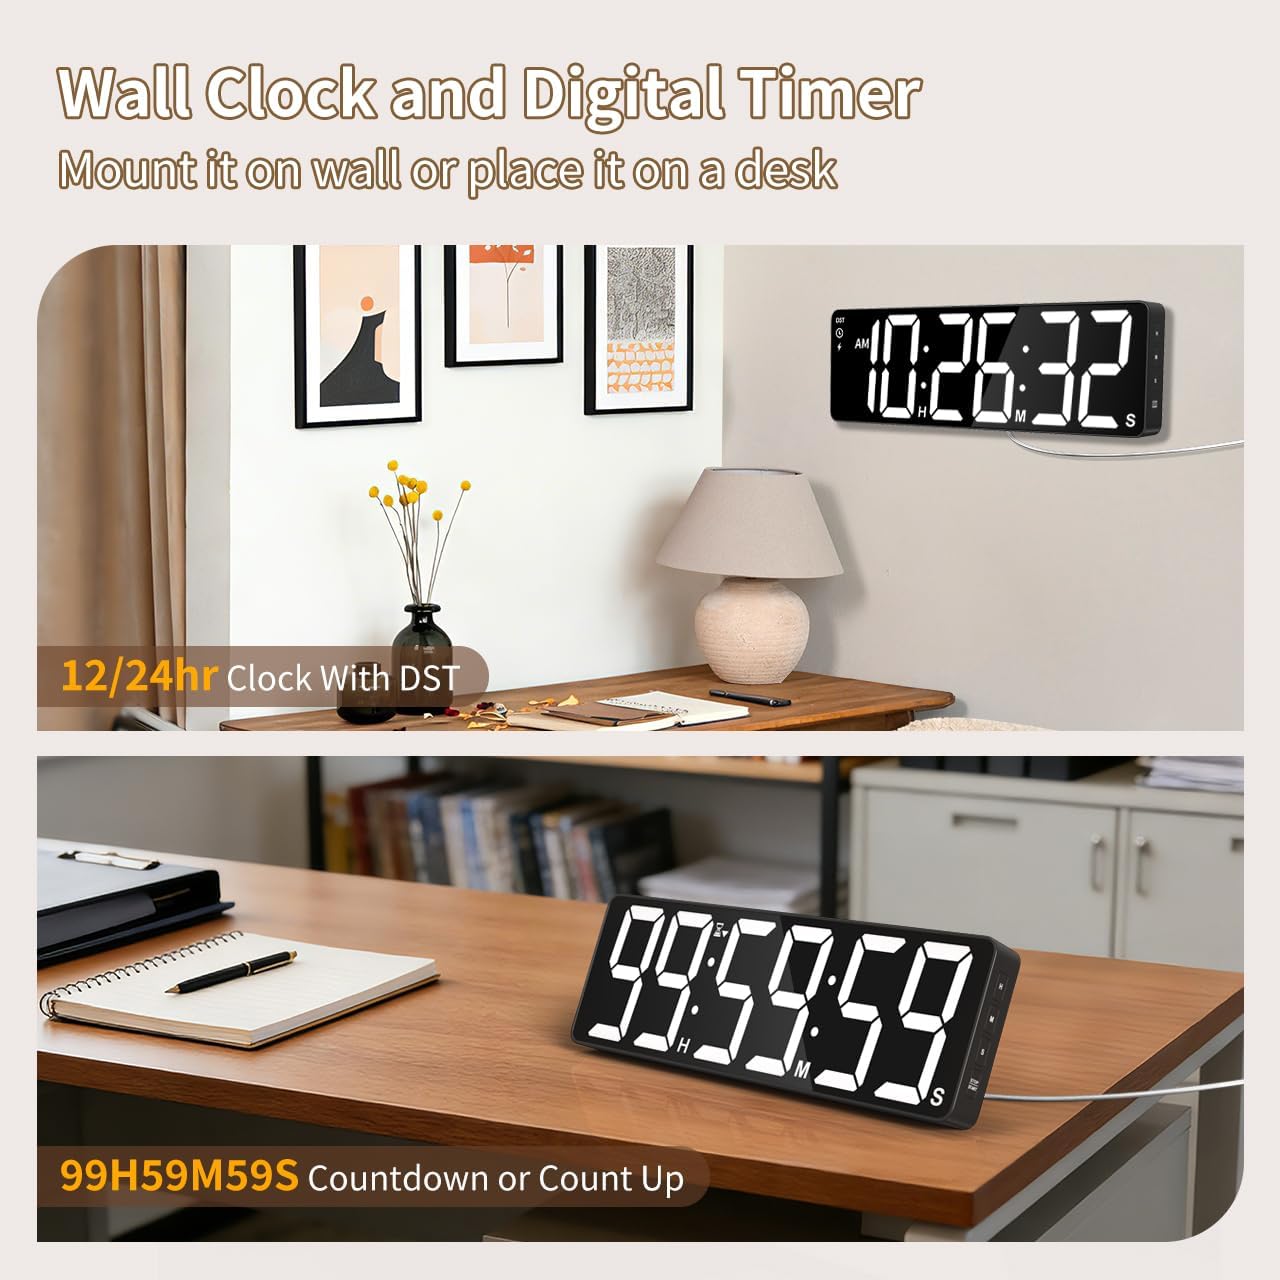
Immagine: Examples of the digital timer's placement, showing it mounted on a wall and resting on a desk, illustrating its versatility.
4. Istruzioni per l'uso
The timer can be operated using the buttons on the device or the included remote control.

Immagine: Oltreview of the timer's physical buttons and the remote control, highlighting their functions for easy operation.
4.1 Basic Clock Settings
Upon initial power-on or after a full power loss without backup batteries, the clock may need to be set.
- Imposta ora: Premere il tasto IMPOSTATO button on the remote or device. Use the number buttons (0-9) on the remote or the SU/GIÙ buttons on the device to adjust hours and minutes. Press IMPOSTATO di nuovo per confermare.
- Formato 12/24 ore: Premere il tasto 12/24H button on the remote to switch between 12-hour (with AM/PM indicator) and 24-hour formats.
- Ora legale (DST): The timer features automatic DST adjustment. Ensure the DST setting is enabled if your region observes it. Refer to the remote control for a dedicated Ora legale button or a combination key press.
4.2 Regolazione della luminosità
The display has 3 brightness levels.
- Premere il tasto LUMINOSITÀ button on the remote or device to cycle through the available brightness levels (Dim, Medium, Bright).
4.3 Selezione del colore
Choose from 18 color options for the display digits.
- Premere il tasto COLORE CHIARO button on the remote or device to cycle through 8 solid colors, 3 RGB fixed colors, and 7 RGB gradient colors.

Image: Visual representation of the 18 color options and 3 brightness levels (Dim, Medium, Bright) available for the timer's display.
4.4 Timer Functions (Countdown/Count Up)
The timer supports both countdown and count-up modes, up to 99 hours, 59 minutes, and 59 seconds.
- Set Countdown: Premere TIMER on the remote. Use the number buttons (0-9) to input the desired time (HH:MM:SS). Press AVVIO/PAUSA per iniziare.
- Count Up (Stopwatch): Premere TIMER poi CHIARO to set the timer to 00:00:00. Press AVVIO/PAUSA per iniziare a contare.
- Pausa/Riprendi: Premere AVVIO/PAUSA during an active timer to pause or resume.
- Reset: Premere RESET to clear the current timer setting.
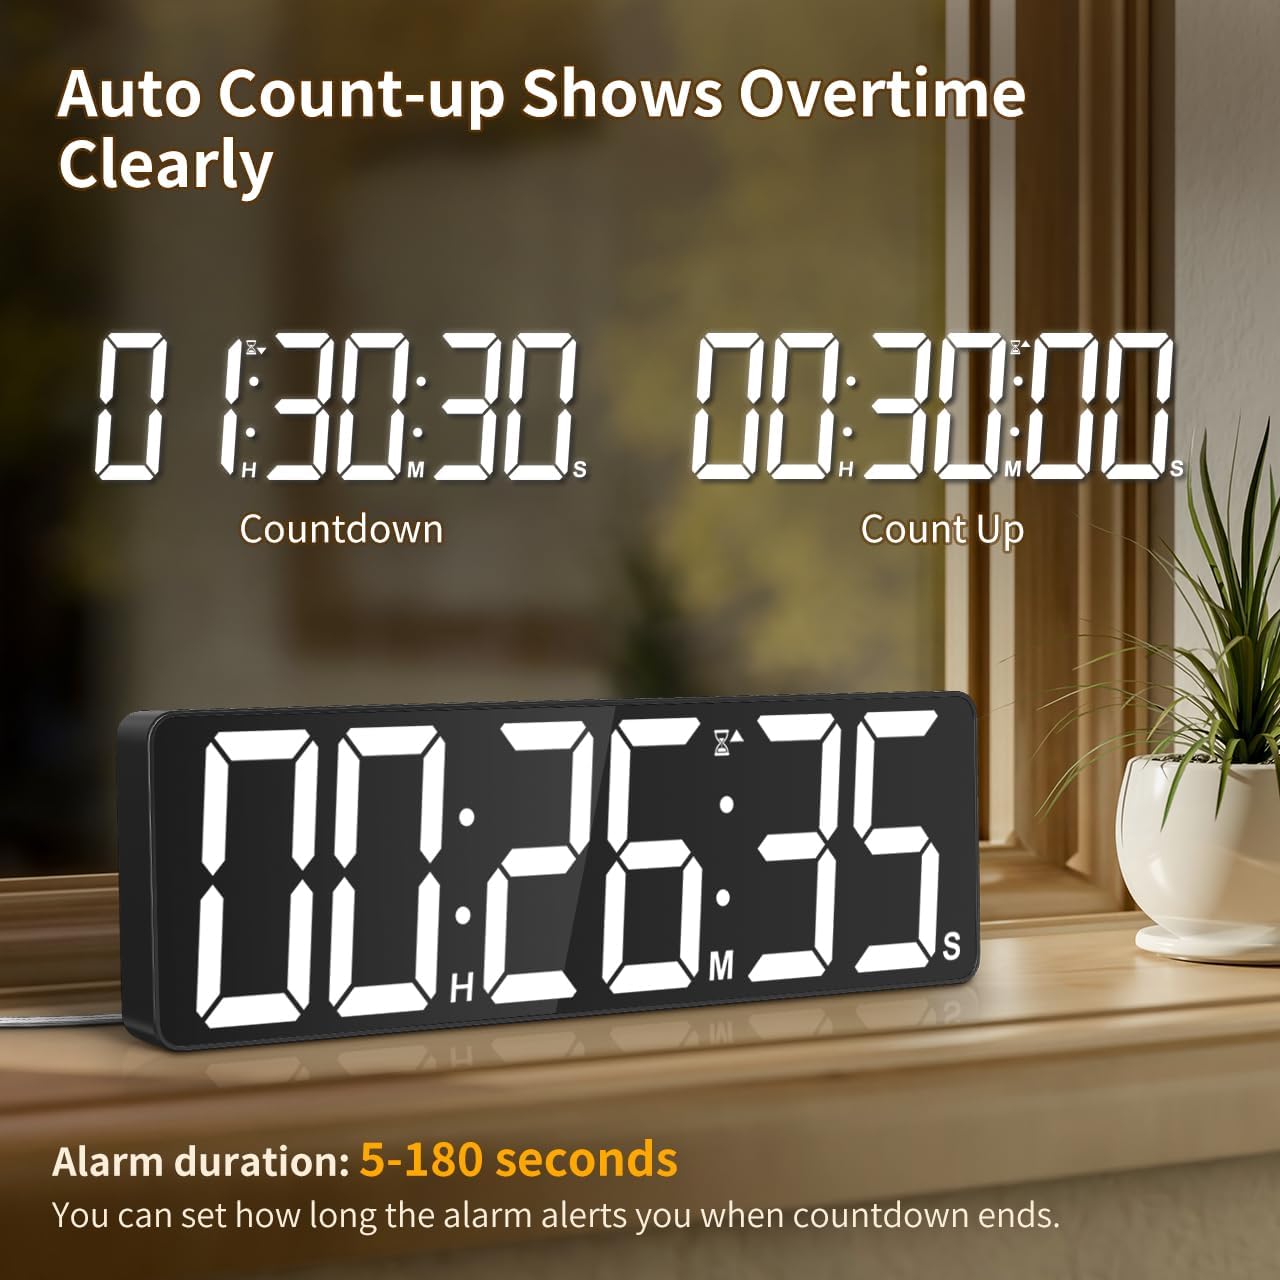
Image: The timer showing a countdown from 01:30:30 and an automatic count-up to 00:30:00 after a countdown finishes, indicating overtime tracking.
4.5 Quick-Set Shortcuts
The remote control includes 6 one-touch shortcut buttons for common timer durations:
- 3 minuti
- 5 minuti
- 15 minuti
- 25 minuti
- 30 minuti
- 5 ore
Press the desired shortcut button to instantly set and start a countdown.
4.6 Impostazioni di allarme
The timer offers 6 distinct ringtones and 4 adjustable volume levels.
- Imposta sveglia: Premere ALLARME on the remote. Use number buttons to set the alarm time. Press ALLARME di nuovo per confermare.
- Select Ringtones: Premere il tasto SUONERIE button on the remote to cycle through the 6 available tones (Buzzer, Melody 1-5).
- Regola volume: Premere il tasto VOLUME button on the remote to cycle through 4 volume levels (L01-L04) or L00 for silent mode (digits flash).
- Durata dell'allarme: The alarm duration can be set from 5 to 180 seconds. Refer to the remote control for specific buttons or combination presses to adjust this setting.
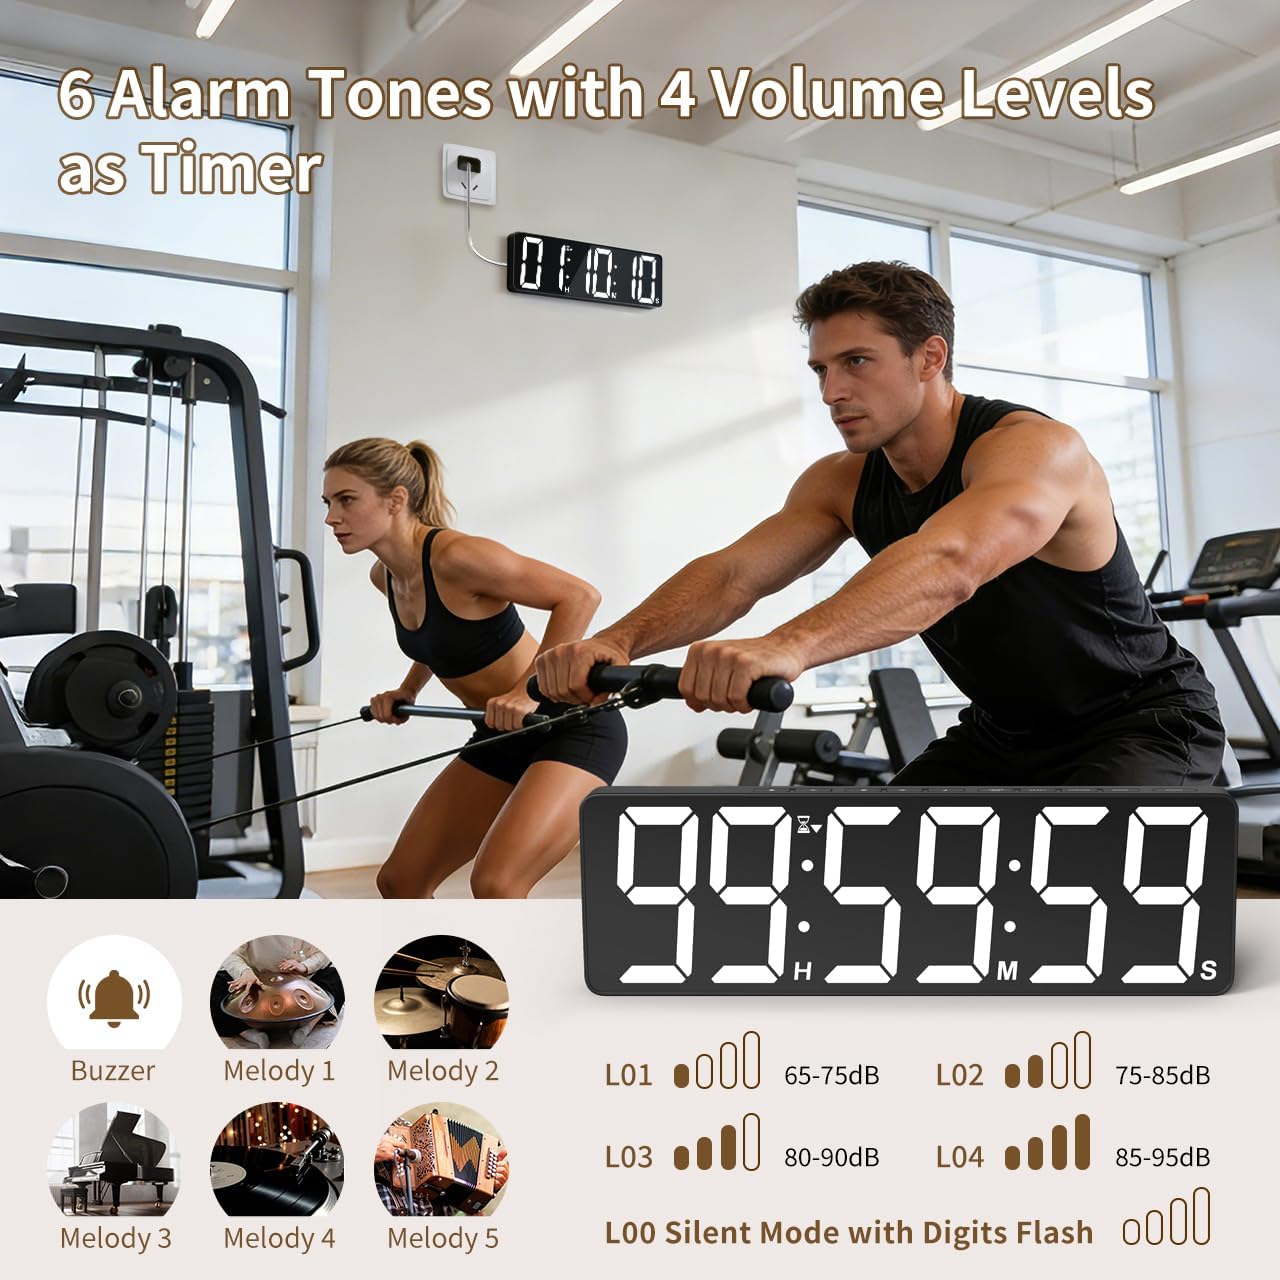
Image: Visual guide to the 6 alarm tones (Buzzer, Melody 1-5) and 4 volume levels (L01-L04), including a silent mode (L00) with flashing digits.
5. Manutenzione
5.1 Pulizia
To clean the timer, gently wipe the display and casincon un panno morbido e asciutto. Non utilizzare detergenti abrasivi, solventi o spray direttamente sul dispositivo.
5.2 Sostituzione della batteria
- Memory Backup Batteries: Replace the 3 AAA batteries in the main unit annually or if you notice settings are not retained during power outages.
- Batterie del telecomando: Replace the 2 AAA batteries in the remote control when its range or responsiveness decreases.
Smaltire sempre le batterie usate secondo le normative locali.
6. Risoluzione Dei Problemi
- Timer not powering on: Ensure the power adapter is securely connected to both the timer and a working electrical outlet. Check if the outlet is functional.
- Telecomando non funzionante: Check if the remote control batteries are correctly installed and not depleted. Ensure there are no obstructions between the remote and the timer. The remote has a range of 30ft+.
- Impostazioni perse dopo lo spegnimentotage: Verify that the 3 AAA memory backup batteries are installed correctly and are not depleted. Replace them if necessary.
- Display is dim or colors are incorrect: Adjust the brightness level using the LUMINOSITÀ button. Cycle through color options using the COLORE CHIARO pulsante.
- Alarm not audible: Check the alarm volume setting using the VOLUME button on the remote. Ensure it is not set to L00 (silent mode).
7. Specifiche
| Numero di modello | 6247 |
| Tipo di visualizzazione | GUIDATO |
| Dimensioni dello schermo | 15.7 pollici |
| Altezza delle cifre | 4.1 pollici |
| Opzioni colore | 18 (8 solid, 3 RGB fixed, 7 RGB gradients) |
| Livelli di luminosità | 3 |
| Intervallo del timer | Fino a 99 ore, 59 minuti, 59 secondi |
| Suonerie di allarme | 6 |
| Livelli del volume dell'allarme | 4 + Silent Mode |
| Durata dell'allarme | 5-180 secondi |
| Potenza in ingresso | 5V/2A CC |
| Lunghezza del cavo di alimentazione | 16.4 ft (5 metri) |
| Backup della memoria | Batterie 3 x AAA (incluse) |
| Batterie per telecomando | Batterie 2 x AAA (incluse) |
| Gamma di controllo remoto | 30ft+ |
| Dimensioni del prodotto (P x L x A) | 3.7D x 38W x 12H centimetri |
| Peso dell'articolo | 820 grammi |
| Materiale | Acrilonitrile-butadiene-stirene |
8. Garanzia e supporto
For warranty information or technical support, please refer to the contact details provided with your purchase or visit the official VOCOO webluogo. Conserva la ricevuta di acquisto per eventuali richieste di garanzia.