
1. Introduzione
Thank you for choosing the ZACHVO Puri Hot and Cold Water Dispenser. This appliance is designed to provide instant hot water and refreshingly cool water for your daily needs. Please read this manual carefully before operating the device to ensure safe and efficient use. Keep this manual for future reference.
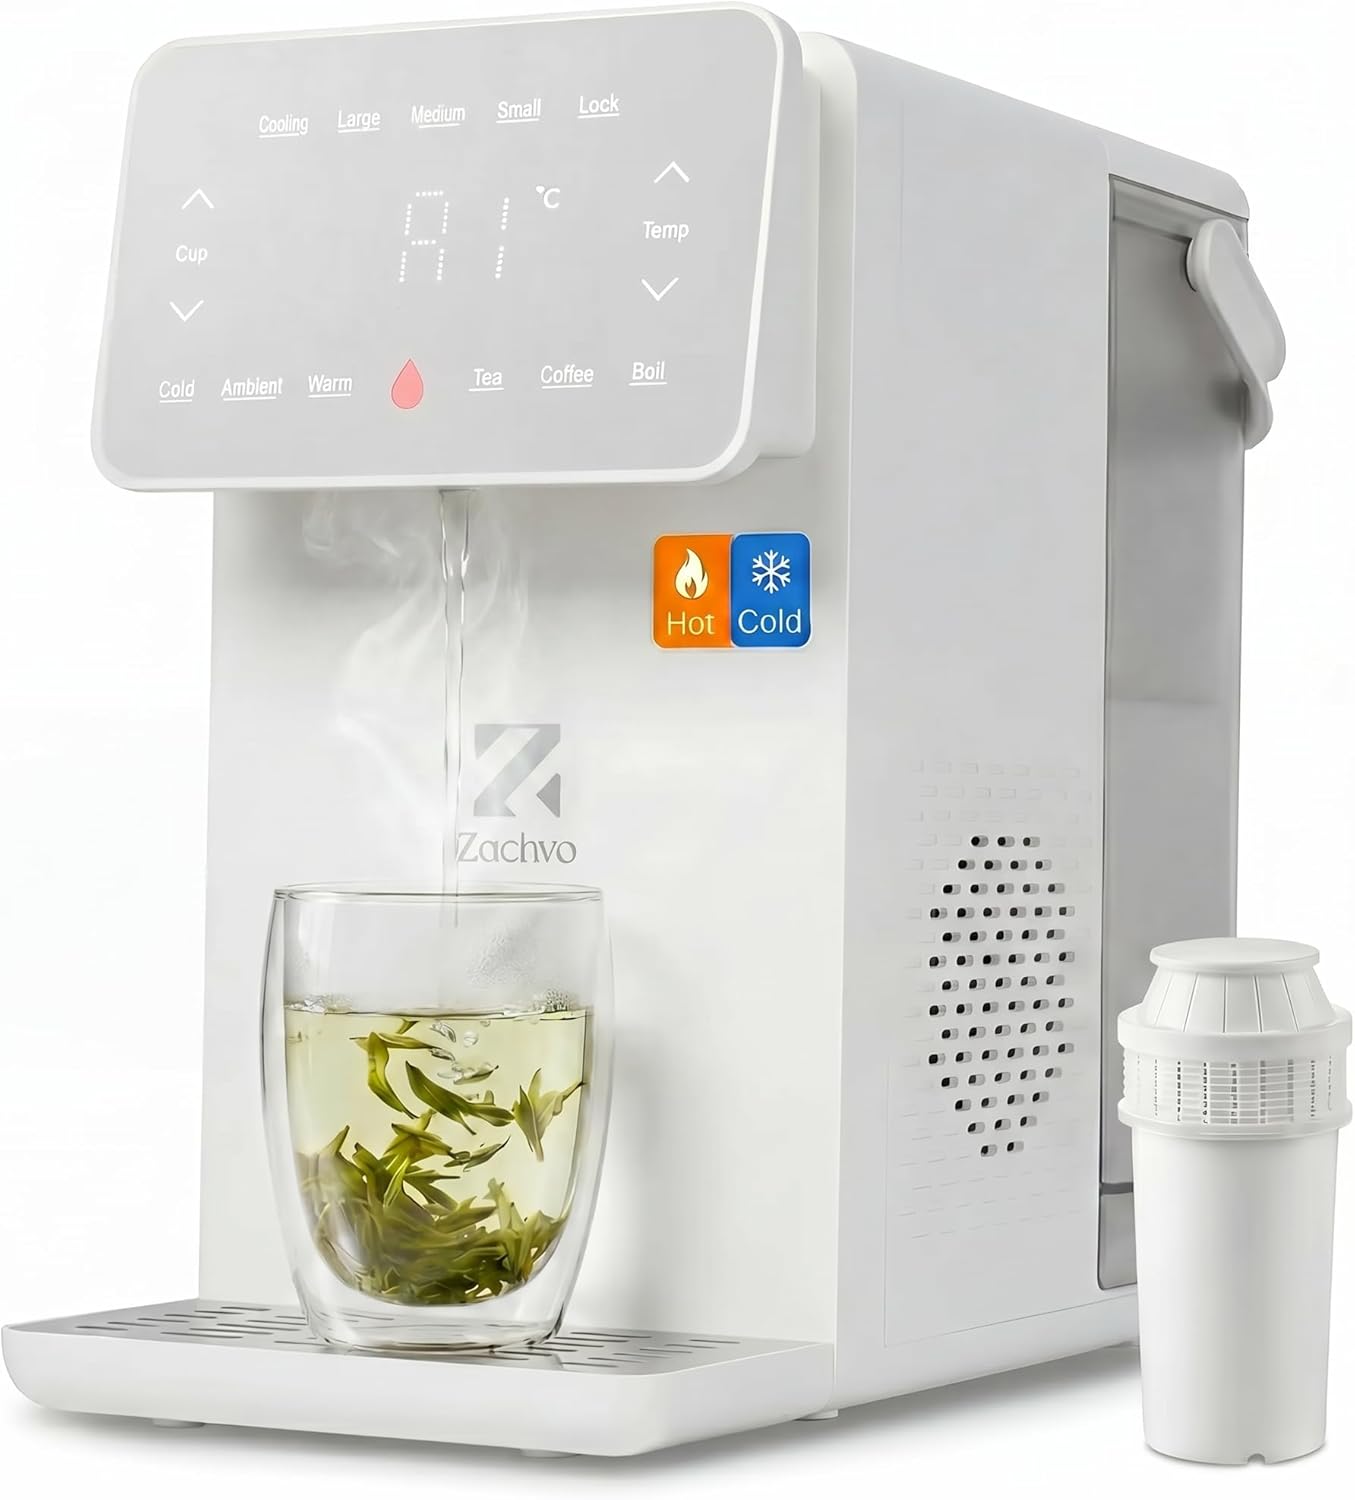
Image 1.1: ZACHVO Puri Hot and Cold Water Dispenser. This image shows the overall design of the dispenser, highlighting its compact form factor and the digital display panel.
2. Istruzioni di sicurezza
Per evitare lesioni a se stessi e ad altri, oppure danni all'apparecchio, osservare le seguenti precauzioni di sicurezza:
- Always connect the dispenser to a grounded power outlet with the correct voltage (220 Volt).
- Non immergere l'apparecchio, il cavo di alimentazione o la spina in acqua o altri liquidi.
- Keep children away from the hot water dispenser. The appliance features a Blocco di sicurezza per bambini to prevent accidental hot water dispensing.
- Ensure the appliance is placed on a stable, level surface, away from direct sunlight and heat sources.
- Do not operate the dispenser if it has a damaged cord or plug, or if it malfunctions or has been damaged in any manner.
- The dispenser is equipped with Protezione da surriscaldamento E Protezione contro il funzionamento a secco per garantire un funzionamento sicuro.
- Avoid touching the hot water outlet directly after dispensing hot water.
- IL Splash-Free Water Outlet design minimizes splashing during use.

Image 2.1: Child Lock Feature. This image illustrates the child lock activated on the dispenser's control panel, emphasizing family safety.
3. Componenti del prodotto
Familiarize yourself with the main parts of your ZACHVO Puri water dispenser:
- Main Water Tank (4.5 L): Holds the primary water supply.
- Cold Water Tank (0.5 L): Separate tank for chilled water.
- Pannello di controllo: Display digitale e pulsanti touch per il funzionamento.
- Uscita acqua: Dispenses hot or cold water.
- vassoio antigoccia: Raccoglie eventuali fuoriuscite o gocce.
- Filtro per l'acqua: Filters incoming water for improved taste and quality.
- Cavo di alimentazione: Per il collegamento elettrico.

Image 3.1: Internal Components. This transparent view highlights the dual heating and cooling modules, demonstrating the advanced technology within the dispenser.
4. Impostazione
4.1 Disimballaggio
- Estrarre con cautela il dispenser dalla confezione.
- Rimuovere tutti i materiali di imballaggio, comprese eventuali pellicole o nastri protettivi.
- Verificare eventuali danni durante il trasporto. In caso di danni, non utilizzare il prodotto e contattare l'assistenza clienti.
4.2 Posizionamento
Place the dispenser on a flat, stable, and heat-resistant surface. Ensure there is adequate space around the unit for ventilation.

Image 4.1: Product Dimensions. This image shows the compact size of the dispenser, with approximate dimensions of 28 cm (width) x 43 cm (height) x 40 cm (depth), making it suitable for various countertop spaces.
4.3 Preparazione e installazione del filtro
Before first use, the water filter needs to be prepared:
- Remove Carbon Dust: Rinse the filter under running tap water for a few minutes to remove any loose carbon dust.
- Bagnare: Submerge the filter in a bowl of water for a few minutes. This helps to activate the filter and improve performance.
- Install & Fill: Insert the prepared filter into the designated slot within the water tank. Fill the main water tank with clean tap water.
- Place Tank Back: Ensure the water tank is correctly positioned and securely seated in the dispenser.

Image 4.2: Filter Preparation Steps. This visual guide demonstrates the four essential steps for preparing and installing the water filter before initial use.
4.4 Accensione iniziale
Plug the power cord into a suitable electrical outlet. The dispenser will power on, and the display will illuminate. It may perform an initial self-check or priming cycle.
5. Funzionamento
5.1 Pannello di controllo Sopraview
The digital control panel allows you to select desired water temperatures and volumes.

Image 5.1: Control Panel. This close-up shows the touch-sensitive control panel, indicating options for temperature adjustment (in 5°C steps) and volume adjustment (in 50ml steps).
5.2 Erogazione di acqua fredda
To dispense cold water (12-15°C):
- Posizionare una tazza sotto l'uscita dell'acqua.
- Press the 'Cold' button on the control panel.
- The dispenser will provide chilled water from the separate 0.5L cold water tank.
5.3 Erogazione Acqua Calda
The dispenser uses direct heating technology to provide hot water in approximately 3 seconds.
- Place a heat-resistant cup under the water outlet.
- Select your desired temperature (from 45°C to 95°C) using the 'Temp' up/down arrows. Common presets like 'Tea', 'Coffee', 'Boil' may also be available.
- Select your desired volume using the 'Cup' up/down arrows or preset volume buttons (e.g., 'Small', 'Medium', 'Large').
- Press the 'Dispense' or 'Start' button (often indicated by a water droplet icon).
- To stop dispensing before the selected volume is reached, press the dispense button again.

Image 5.2: Hot and Cold Dispensing. This image displays the dispenser providing both hot water (95°C) and cold water (12°C), illustrating its dual functionality for various beverages.
5.4 Blocco bambini
To activate or deactivate the child lock, press and hold the 'Lock' button for a few seconds until the indicator changes. When activated, hot water dispensing is prevented.
5.5 Luce notturna
The dispenser features a soft night light for convenient use in low-light conditions. This function activates automatically or can be toggled via the control panel (refer to specific button on your model).

Image 5.3: Quiet Operation and Night Light. This image shows the dispenser in a bedroom setting, highlighting its quiet operation (below 46 dB) and the soft night light feature for nighttime use.
6. Manutenzione
Una pulizia e una manutenzione regolari garantiranno la longevità e le prestazioni ottimali del tuo dispenser.
6.1 Pulizia dell'esterno
Pulire l'esterno del dispenser con un panno morbido eamp panno. Non usare detergenti abrasivi o solventi.
6.2 Pulizia della vaschetta raccogli gocce
The drip tray should be emptied and cleaned regularly to prevent overflow and bacterial growth. Simply slide it out, empty the water, wash with mild soap, rinse, and dry before reinserting.
6.3 Sostituzione del filtro
The water filter should be replaced regularly, typically after filtering 150 liters of water or every 4-6 weeks, depending on water quality and usage. Refer to the filter preparation steps (Section 4.3) for installation of a new filter.
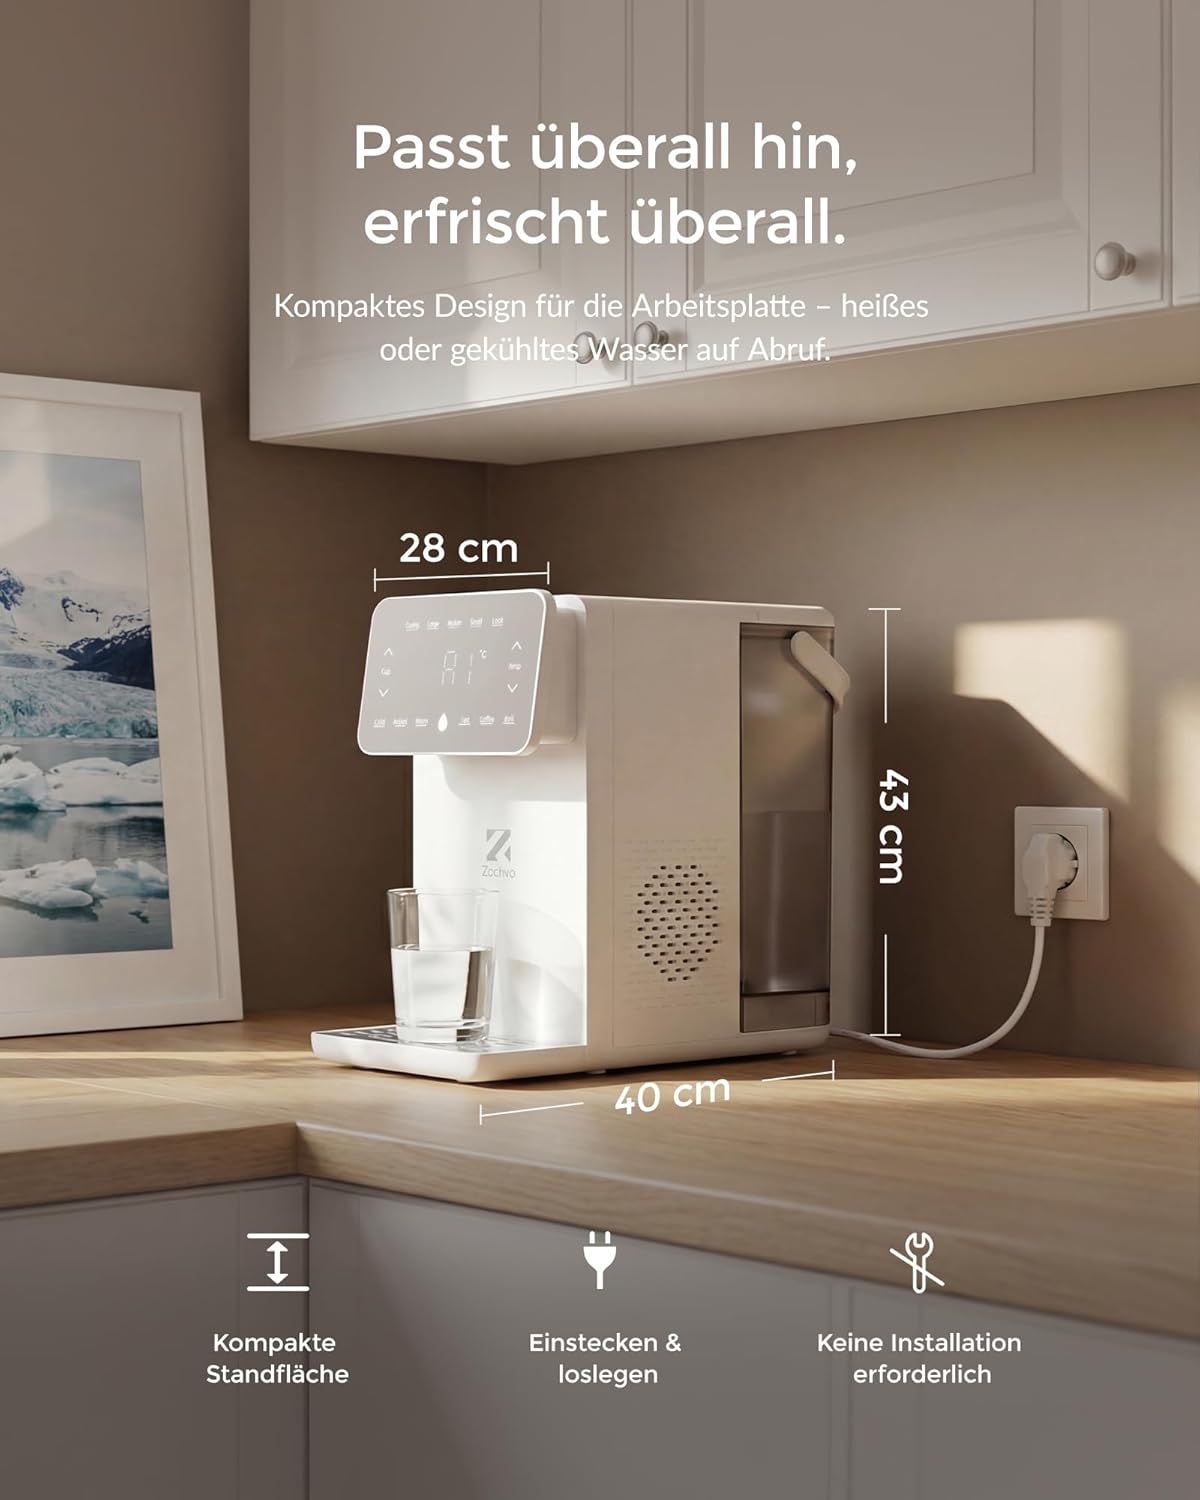
Image 6.1: Water Filter Layers. This diagram illustrates the multi-stage filtration process, including nylon mesh for large particles, PP cotton for finer particles, activated carbon for taste and odor, and ion exchange resin for limescale reduction.

Image 6.2: Filter Effectiveness. This comparison shows the difference between unfiltered tap water and water filtered by the ZACHVO system, demonstrating its ability to reduce limescale buildup and improve taste.
6.4 Decalcificazione
Over time, mineral deposits (limescale) can build up, especially in the hot water system. Descale the appliance every 1-3 months, depending on your water hardness. Use a food-grade descaling solution specifically designed for water dispensers or kettles. Follow the descaling product's instructions carefully.
7. Risoluzione Dei Problemi
If you encounter any issues with your dispenser, please refer to the following common problems and solutions:
| Problema | Possibile causa | Soluzione |
|---|---|---|
| Nessuna acqua erogata | Water tank empty; Tank not properly seated; Power issue | Refill water tank; Re-seat tank correctly; Check power connection |
| L'acqua calda non si riscalda | Overheat protection activated; Heating element malfunction; Child lock engaged | Unplug and wait 15 mins, then restart; Deactivate child lock; Contact support if issue persists |
| Cold water not cooling | Cooling system malfunction; Ambient temperature too high | Ensure proper ventilation; Contact support if issue persists |
| L'acqua ha un sapore insolito | New filter not primed; Filter needs replacement; Appliance needs cleaning | Prime new filter (Section 4.3); Replace filter (Section 6.3); Clean appliance (Section 6.1-6.2) |
If the problem persists after trying these solutions, please contact ZACHVO customer support.
8. Specifiche
| Caratteristica | Specificazione |
|---|---|
| Marca | ZACHVO |
| Nome / numero modello | C4-WH-DE |
| Capacity (Main Tank) | 4.5 litri |
| Capacity (Cold Water Tank) | 0.5 litri |
| Materiale | Plastica |
| Colore | Bianco |
| Voltage | 220 Volt |
| Energia | 2100 Watt |
| Peso dell'articolo | 3.74 chilogrammi |
| Intervallo di temperatura dell'acqua calda | da 45°C a 95°C |
| Intervallo di temperatura dell'acqua fredda | da 12°C a 15°C |
| Noise Level (Cooling) | < 46 dB |
9. Garanzia e supporto
Your ZACHVO Puri Hot and Cold Water Dispenser comes with a standard manufacturer's warranty. Please refer to the warranty card included in your product packaging for specific terms and conditions.
For technical support, warranty claims, or any questions regarding your product, please contact ZACHVO customer service through the retailer where you purchased the product or visit the official ZACHVO websito per le informazioni di contatto.