
1. Informazioni importanti sulla sicurezza
Please read all instructions carefully before operating the appliance. Retain this manual for future reference. Always follow basic safety precautions to reduce the risk of fire, electric shock, and injury.
- Assicurarsi che l'apparecchio sia collegato a una presa di corrente correttamente messa a terra.
- Non immergere il cavo di alimentazione, la spina o l'apparecchio in acqua o altri liquidi.
- Scollegare l'apparecchio prima della pulizia o quando non viene utilizzato.
- Non utilizzare l'apparecchio con un cavo o una spina danneggiati.
- Tenere l'apparecchio lontano da fonti di calore e luce solare diretta.
- Questo apparecchio è destinato esclusivamente all'uso domestico.
2. Prodotto finitoview
The EUHOMY IM046-S is a countertop ice ball maker designed to produce crystal-clear, slow-melting 2-inch ice spheres. It features a self-cleaning function and offers both manual and automatic water refill options.

Immagine 2.1: anteriore view of the EUHOMY IM046-S Ice Ball Maker, showcasing its compact design and the ice spheres inside.
3. Impostazione
3.1 Disimballaggio
- Estrarre con cautela la macchina per il ghiaccio dalla confezione.
- Check that all included components are present: Ice Maker Machine, Inlet Pipe, Instruction Manual, Ice Clamp.
- Remove any protective film or tape from the appliance.
3.2 Posizionamento
Place the ice maker on a stable, level surface away from direct sunlight and heat sources. Ensure there is adequate ventilation around the unit. The product dimensions are 17.6"D x 12.6"W x 17.9"H.

Image 3.1: Product dimensions (Length: 12.6 in, Width: 17.6 in, Height: 17.9 in) and key specifications.
3.3 Riempimento dell'acqua
La macchina del ghiaccio offre due metodi per aggiungere acqua:
- Riempimento manuale: Open the water inlet cover and pour clean drinking water directly into the reservoir.
- Auto Refill: Connect the provided inlet pipe to a water line for continuous water supply.

Image 3.2: Illustration of the two water filling methods: manual pour and automatic water line connection.
3.4 Pulizia iniziale
Before first use, perform a self-cleaning cycle. Refer to the 'Maintenance' section for detailed instructions on using the self-cleaning function.
4. Istruzioni per l'uso
4.1 Pannello di controllo
The ice maker features an intuitive touch control panel. Familiarize yourself with the buttons and indicators:
- Pulsante di accensione: Accende o spegne l'apparecchio.
- Pulsante Pulisci: Avvia il ciclo di autopulizia.
- acquatage Avviso: Indicates when the water reservoir needs refilling.
- Door Alert: Indicates if the door is not properly closed.
- Ice Making Progress Bar: Visualizza la s correntetage of the ice production cycle.
- Spia luminosa di respirazione: Provides visual feedback on the machine's status.

Immagine 4.1: Dettagliata view of the easy touch controls and indicators on the ice maker's display panel.
4.2 Produzione di ghiaccio
- Assicurarsi che il serbatoio dell'acqua sia pieno.
- Premere il tasto Pulsante di accensione (right side) to turn on the machine.
- The ice maker will automatically begin the ice production cycle. Four 2-inch ice balls are typically ready in approximately 40 minutes.
- The machine will continue to produce ice until the ice storage capacity is reached or the water level is low.
Video 4.1: This video demonstrates the ice making process, showing the machine producing four ice balls in approximately 40 minutes.
4.3 Conservazione del ghiaccio
The ice maker has a storage capacity of approximately 30-40 ice balls. The machine is designed to keep ice cold longer through adaptive cooling and high-density PU foam insulation, but it is not a freezer. For long-term storage, transfer ice balls to a freezer.
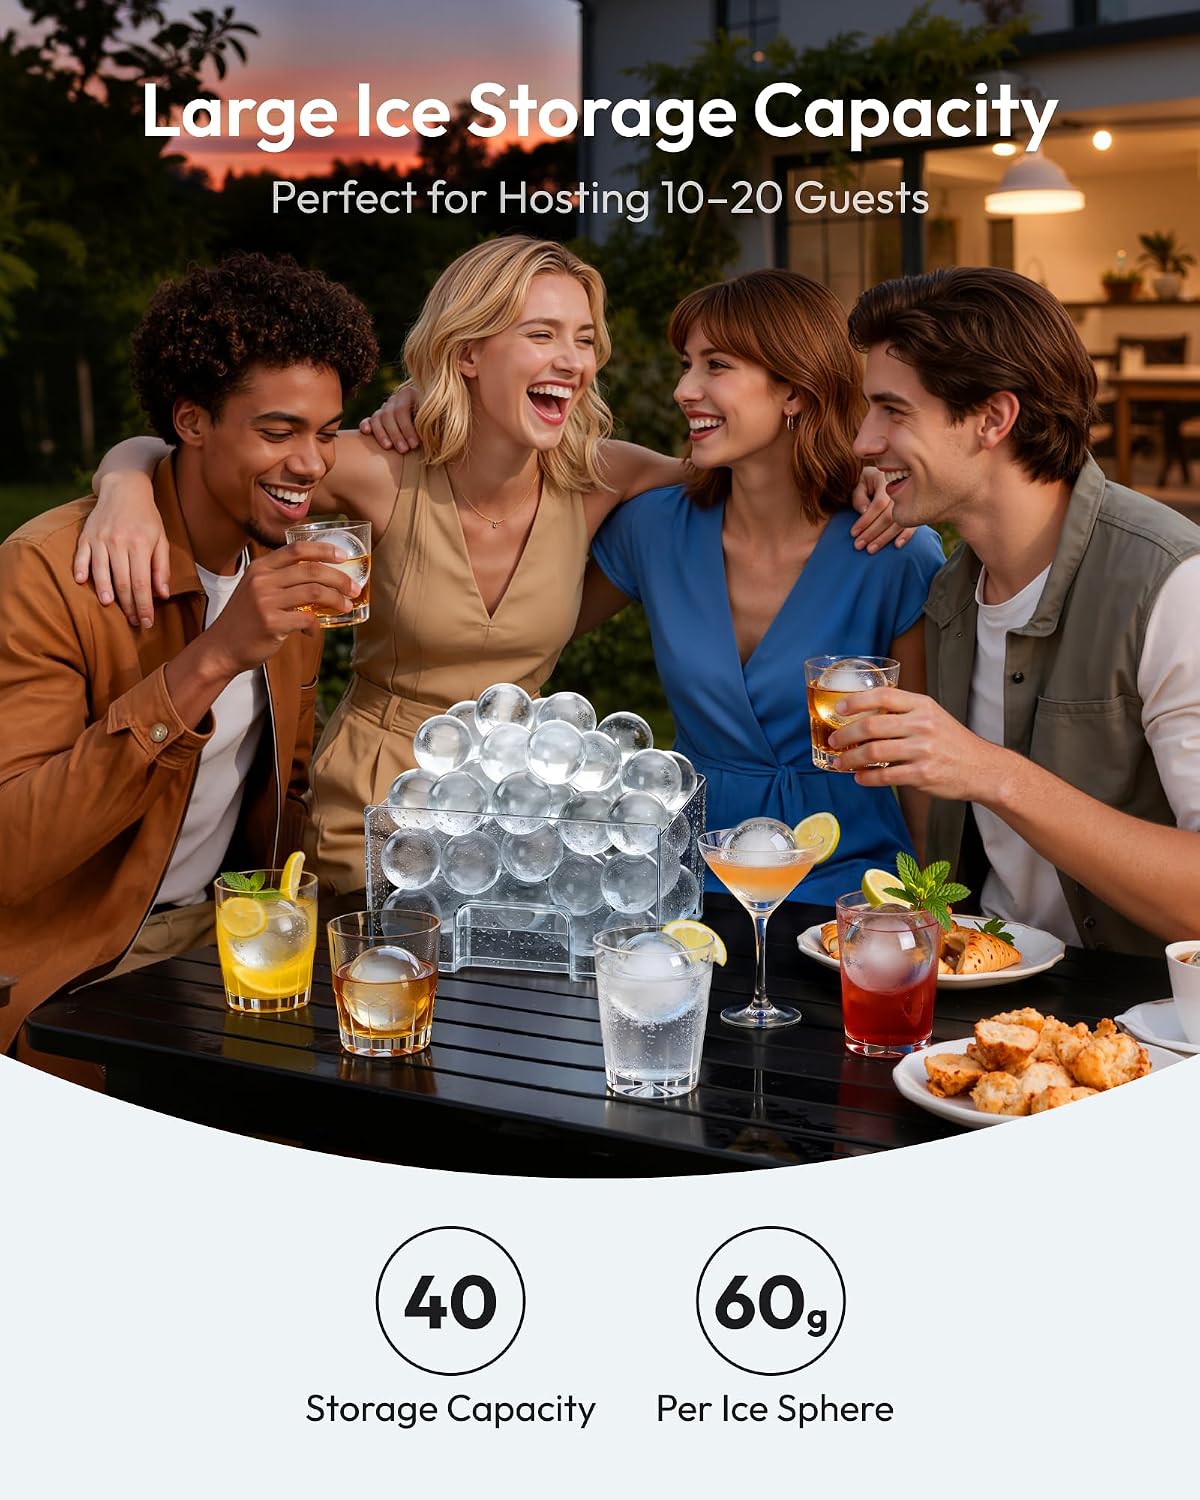
Image 4.2: The ice maker's large storage capacity, ideal for continuous ice supply.
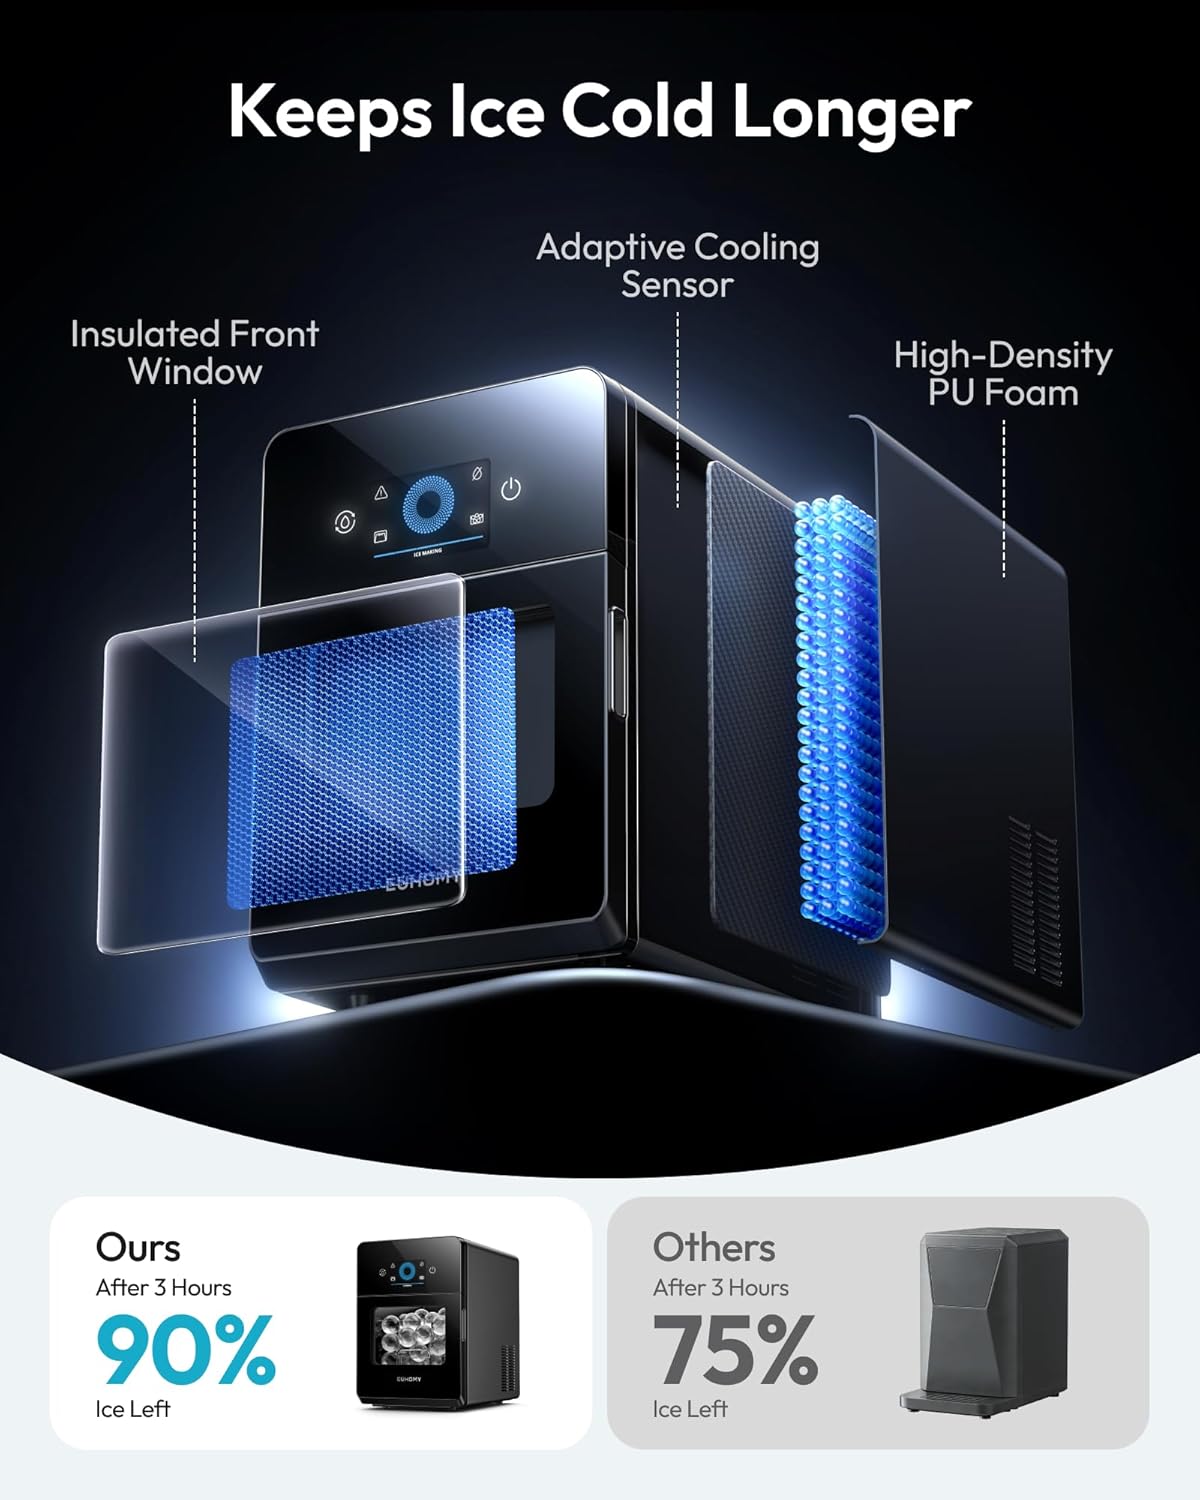
Image 4.3: Internal components demonstrating how the ice maker keeps ice cold longer, including insulation and cooling sensor.
4.4 Water Quality for Clear Ice
The clarity of the ice balls can be influenced by the quality of the water used. For best results and crystal-clear ice, distilled water is recommended. Filtered water also produces good results, while tap water may result in cloudier ice with more bubbles.

Image 4.4: Visual guide to ice clarity based on the Total Dissolved Solids (TDS) level in water, recommending distilled water for optimal results.

Image 4.5: Illustration demonstrating how the 2-inch clear ice spheres melt slower than standard ice cubes, preserving drink flavor.
5. Manutenzione
5.1 Funzione autopulente
The ice maker is equipped with an automatic deep cleaning system:
- Assicurarsi che il serbatoio dell'acqua sia riempito con acqua pulita.
- Premere e tenere premuto il tasto Pulsante Pulisci (left side) for 5 seconds to initiate the thorough cleaning cycle.
- The machine will perform a cleaning process, circulating water to remove impurities.
- Once the cleaning cycle is complete, drain the water as described in section 5.2.

Image 5.1: The self-cleaning feature in action, ensuring hygienic ice production without manual scrubbing.
5.2 Scarico dell'acqua
To drain water from the appliance:
- Locate the front-edge drain port at the bottom of the unit.
- Place a container under the drain port.
- Rimuovere il tappo di scarico per far defluire l'acqua.
- Una volta svuotato, riposizionare saldamente il tappo di scarico.

Image 5.2: The convenient front-edge drain port for easy water removal without lifting the machine.
5.3 Pulizia generale
Regularly wipe the exterior of the appliance with a soft, damp cloth. For the interior, in addition to the self-cleaning function, periodically wipe down surfaces with a mild detergent solution and rinse thoroughly. Ensure the appliance is unplugged before any manual cleaning.
6. Risoluzione Dei Problemi
If you encounter issues with your EUHOMY IM046-S ice ball maker, refer to the following common problems and solutions:
| Problema | Possibile causa | Soluzione |
|---|---|---|
| La macchina non si accende | Nessuna alimentazione | Controllare il collegamento del cavo di alimentazione e la presa a muro. |
| Nessuna produzione di ghiaccio | Low water level; Door not closed; Ambient temperature too high | Refill water reservoir; Ensure door is securely closed; Operate in a cooler environment. |
| Ice balls are cloudy | Scarsa qualità dell'acqua | Use filtered or distilled water for clearer ice. |
| acquatage Alert is on | Il serbatoio dell'acqua è vuoto | Refill the water reservoir manually or check auto-refill connection. |
| Door Alert is on | La porta non è chiusa correttamente | Close the door firmly until the alert disappears. |
Se il problema persiste dopo aver provato queste soluzioni, contattare l'assistenza clienti.
7. Specifiche
| Caratteristica | Dettaglio |
|---|---|
| Marca | EUHOMY |
| Nome del modello | IM046-S |
| Dimensioni del prodotto | 17.6"P x 12.6"L x 17.9"A |
| Capacità | 22 Pounds (Ice Production per Day) |
| Cosatage | 150 watt |
| Voltage | 120 Volt |
| Ice Ball Size | 2 pollici (50 mm) |
| Ice Making Speed | 4 balls per 40 minutes |
| Produzione giornaliera di ghiaccio | Up to 144 balls per day |
| Capacità di conservazione del ghiaccio | 30-40 balls |
| Peso netto | 40.23 libbre / 18.25 kg |
| Refrigerante | R290a |
| Componenti inclusi | Ice Maker Machine, Inlet Pipe, Instruction Manual, Ice Clamp |
8. Garanzia e supporto
This EUHOMY ice ball maker comes with a Garanzia del produttore di 1 anni. For warranty claims, technical support, or any questions regarding the operation or maintenance of your appliance, please contact EUHOMY customer service. Refer to the contact information provided in the packaging or on the official EUHOMY websito.