
FLEX FC3401-Z 120V Corded Brushless Gear-Driven Orbital Polisher
Manuale di istruzioni
1. Importanti istruzioni di sicurezza
Leggere tutte le avvertenze di sicurezza, le istruzioni, le illustrazioni e le specifiche fornite con questo elettroutensile. La mancata osservanza di tutte le istruzioni elencate di seguito può causare scosse elettriche, incendi e/o lesioni gravi.
- Sicurezza dell'area di lavoro: Mantenere l'area di lavoro pulita e ben illuminata. Le aree disordinate o buie favoriscono gli incidenti.
- Sicurezza elettrica: Le spine degli elettroutensili devono essere adatte alla presa. Non modificare mai la spina in alcun modo. Non esporre gli elettroutensili alla pioggia o all'umidità.
- Sicurezza personale: Stay alert, watch what you are doing, and use common sense when operating a power tool. Always wear eye protection.
- Uso e cura dell'utensile elettrico: Non forzare l'utensile elettrico. Utilizzare l'utensile elettrico corretto per l'applicazione desiderata. Scollegare la spina dalla presa di corrente prima di effettuare qualsiasi regolazione, sostituire accessori o riporre l'utensile elettrico.
- Servizio: Fate riparare il vostro elettroutensile solo da personale qualificato e utilizzando solo pezzi di ricambio identici.
2. Prodotto finitoview
The FLEX FC3401-Z is a 120V corded brushless gear-driven orbital polisher designed for car detailing. It features constant speed technology, an 11-speed control dial, and an ergonomic grip for precise control.
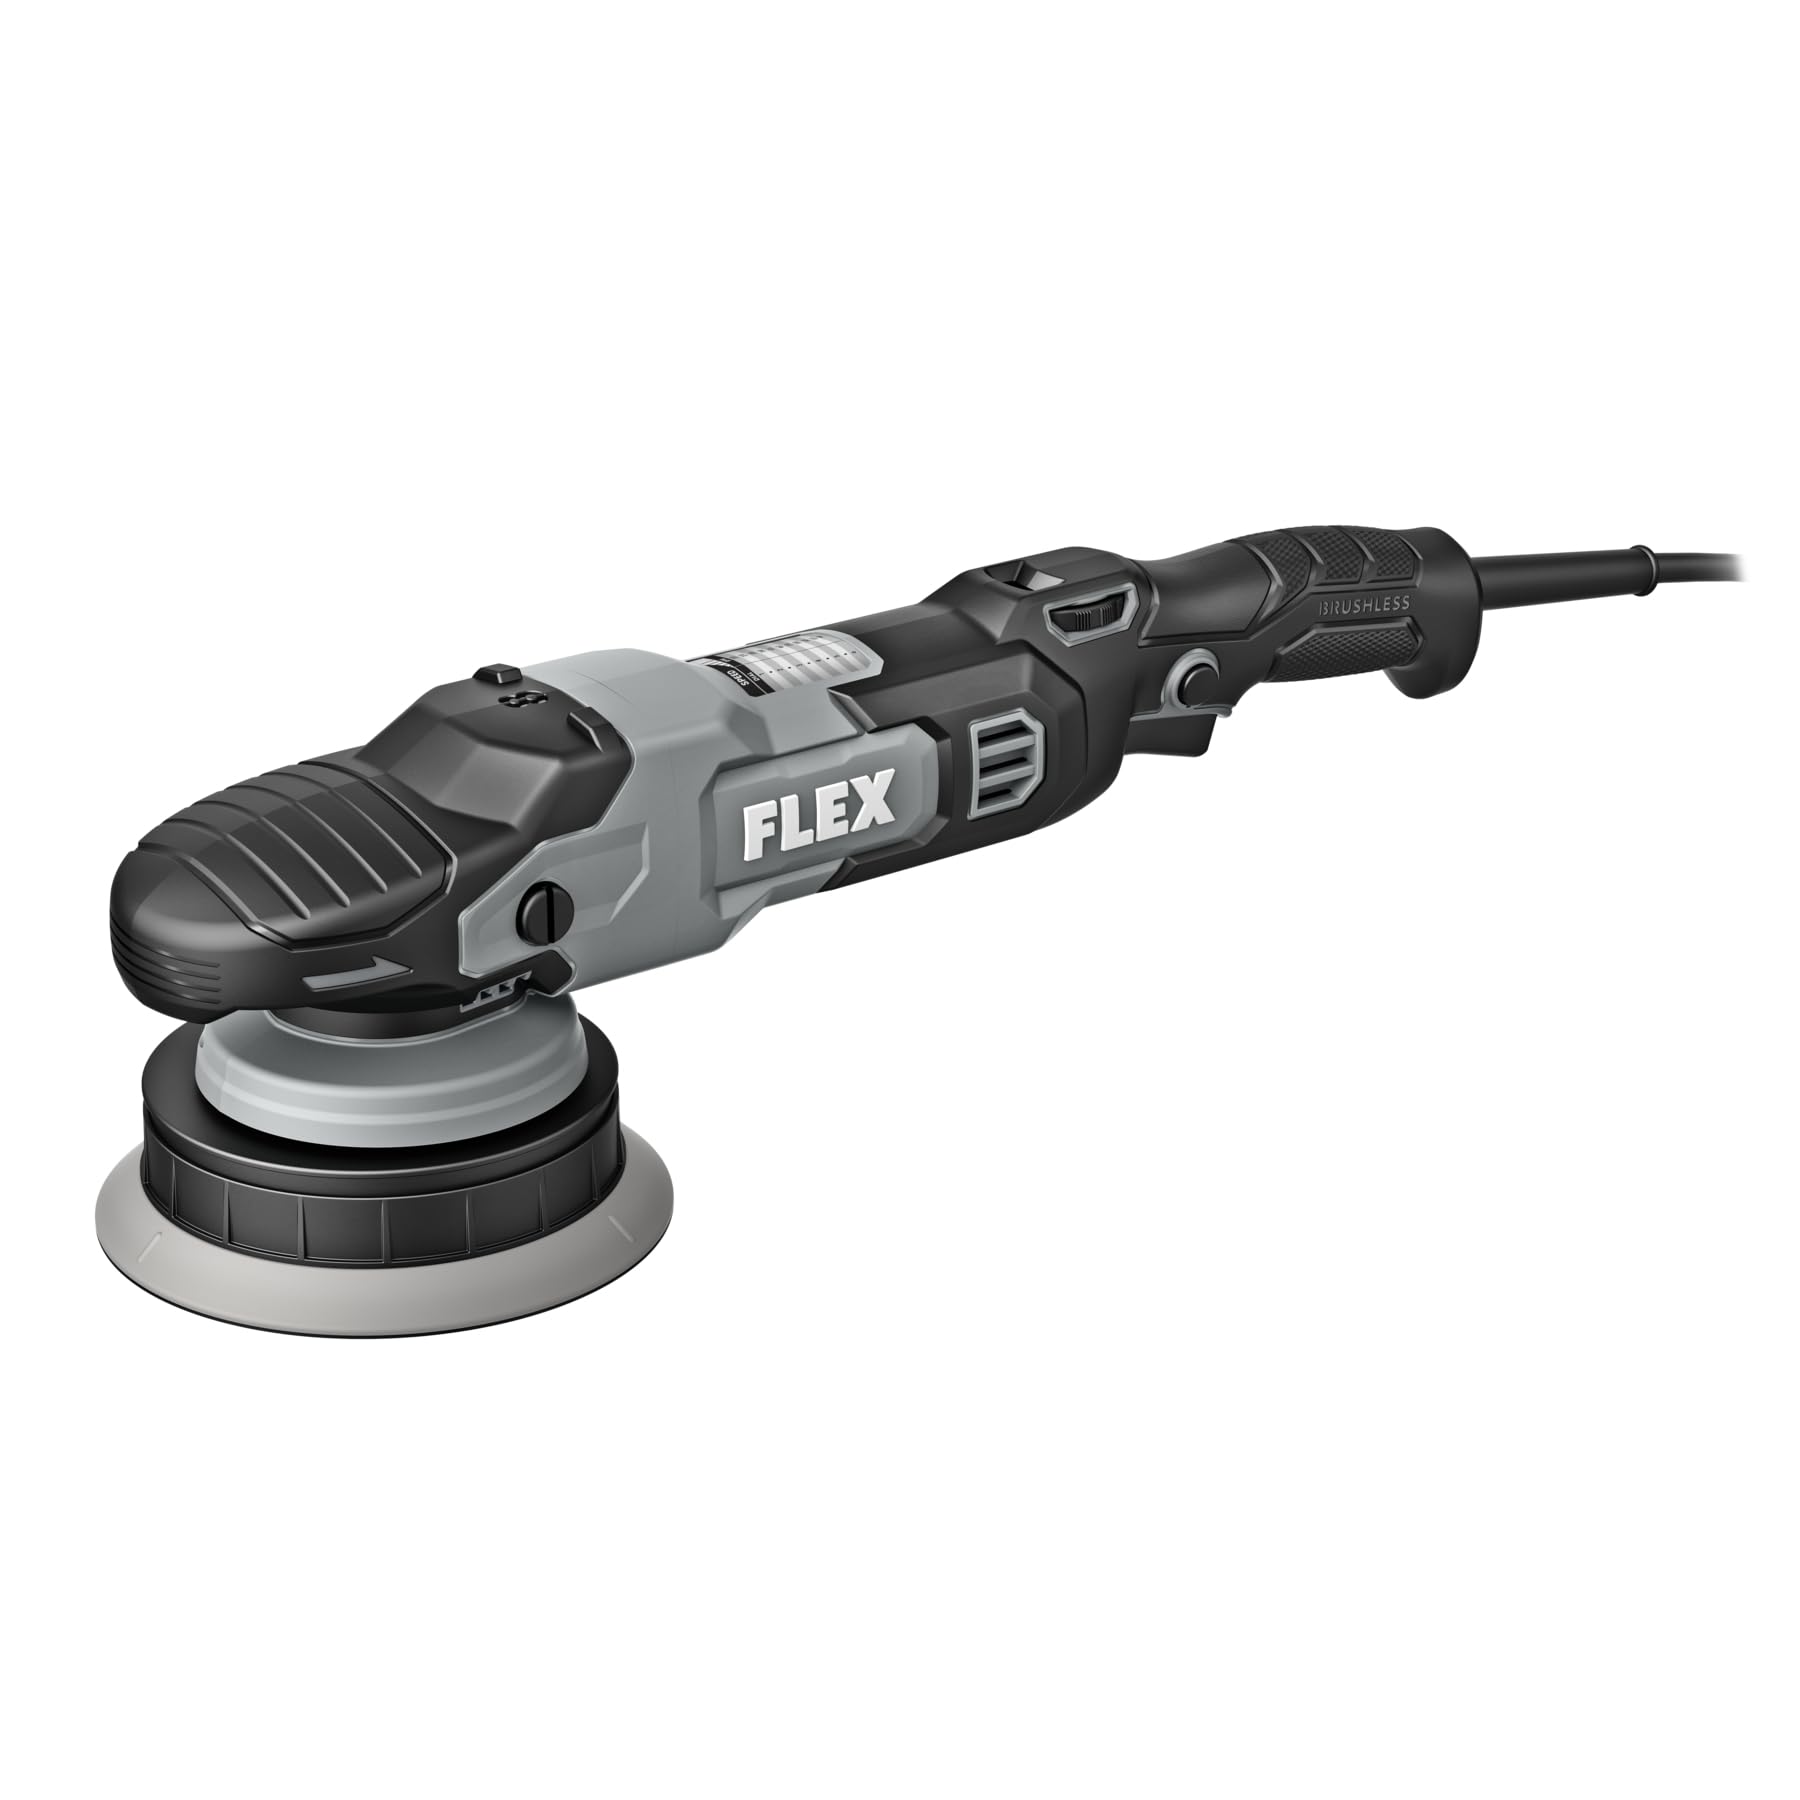
Figure 1: FLEX FC3401-Z Orbital Polisher. This image shows the complete polisher unit with its ergonomic handle and speed control dial.
Componenti inclusi:
- FLEX FC3401-Z Polisher Unit
- 5-inch Backing Plate
- 6-inch Backing Plate
3. Impostazione
Before operating the polisher, ensure it is properly assembled and all safety precautions are observed.
- Select Backing Plate: Choose either the 5-inch or 6-inch backing plate based on the pad size and the area you intend to polish.
- Fissare la piastra di supporto: Align the backing plate with the polisher's spindle. Securely screw the backing plate onto the spindle until it is hand-tight. Do not overtighten.
- Applicare il tampone di lucidatura: Press the desired polishing pad firmly onto the hook-and-loop surface of the backing plate. Ensure the pad is centered.
- Collegamento elettrico: Plug the polisher's cord into a standard 120V electrical outlet. Ensure the power switch is in the "OFF" position before plugging in.
Figure 2: Backing Plate Attachment. This image illustrates how to securely attach a backing plate to the polisher's spindle.
4. Istruzioni per l'uso
Follow these steps for effective and safe operation of your FLEX orbital polisher.
- Prepara la superficie: Ensure the vehicle surface is clean, dry, and free of contaminants before polishing.
- Applicare il composto/lucidante: Applicare una piccola quantità di composto lucidante o cera direttamente sul tampone lucidante o sulla superficie di lavoro.
- Start Polisher: Place the pad flat on the work surface before turning the tool on. Use the 11-speed control dial to select the desired speed. Start at a lower speed and gradually increase as needed. The variable speed trigger allows for fine-tuning.
- Tecnica di lucidatura: Move the polisher in a consistent, overlapping pattern. Apply light, even pressure. Avoid tilting the polisher, which can cause uneven results or damage.
- Monitorare la temperatura: Periodically check the temperature of the work surface and the polisher. If either becomes excessively hot, stop and allow them to cool.
- Fine: Once the desired result is achieved, turn off the polisher before lifting it from the surface.
Quadrante di controllo della velocità:
The polisher features an 11-speed control dial. Refer to the table below for general speed recommendations:
| Impostazione quadrante | Applicazione |
|---|---|
| 1-3 | Waxing, Glazing, Finishing |
| 4-7 | Light Polishing, Swirl Removal |
| 8-11 | Heavy Compounding, Scratch Removal |
Note: These are general guidelines. Always test on an inconspicuous area first.
5. Manutenzione
Regular maintenance ensures optimal performance and extends the life of your polisher.
- Pulizia: After each use, disconnect the polisher from power. Remove the polishing pad and clean it according to its manufacturer's instructions. Wipe down the polisher body with a clean, damp stoffa. Non utilizzare prodotti chimici aggressivi o detergenti abrasivi.
- Ispezione delle pastiglie: Regularly inspect backing plates and polishing pads for wear or damage. Replace worn pads to maintain effective polishing.
- Ispezione del cavo: Controllare che il cavo di alimentazione non presenti tagli, sfilacciamenti o danni. Non utilizzare l'utensile se il cavo è danneggiato.
- Magazzinaggio: Store the polisher in a clean, dry place, out of reach of children. Avoid storing in direct sunlight or extreme temperatures.
6. Risoluzione Dei Problemi
Fare riferimento a questa sezione per trovare soluzioni ai problemi più comuni.
| Problema | Possibile causa | Soluzione |
|---|---|---|
| La lucidatrice non si accende. | No power supply; faulty cord/plug; internal fault. | Check power outlet and cord. Ensure plug is fully inserted. If problem persists, contact customer support. |
| Vibrazioni o rumori eccessivi. | Loose backing plate; unbalanced pad; internal issue. | Ensure backing plate is securely tightened. Check pad for even attachment and wear. If issue continues, discontinue use and seek service. |
| Poor polishing results. | Incorrect pad/compound; worn pad; improper technique. | Verify pad and compound are suitable for the task. Replace worn pads. Review istruzioni operative per la tecnica corretta. |
7. Specifiche
| Caratteristica | Dettaglio |
|---|---|
| Numero di modello | FC3401-Z |
| Voltage | 120 Volt |
| Tipo di motore | Senza spazzole |
| Giri al minuto massimi | 700 giri al minuto |
| Max OPM | 8,700 OPM |
| Controllo della velocità | 11-speed dial with variable speed trigger |
| Included Backing Plates | 5 pollici e 6 pollici |
| Dimensioni del prodotto (P x L x A) | 16.5" x 3.9" x 5" |
| Fonte di alimentazione | Elettrico con cavo |
8. Garanzia e supporto
This FLEX polisher is protected by a one-year limited warranty when registered.
- Registrazione della garanzia: To activate your one-year limited warranty, register your product at registermyflex.com.
- Assistenza clienti: For technical assistance, service, or warranty claims, please refer to the contact information provided on the FLEX official websito o la documentazione di acquisto.