
1. Introduzione
1.1 Prodotto finitoview
The Hikvision DS-7108HGHI-M1/T is an 8-channel Turbo HD DVR designed for reliable surveillance recording in various environments. This digital video recorder supports 1080p Lite recording, providing clear video footage. It incorporates H.265 Pro+ compression technology for efficient storage and video quality. Features include Motion Detection 2.0 for intelligent event identification, 2-way audio support for communication, and HDMI/VGA output options for display connectivity. Remote viewing is available via the Hik-Connect application.
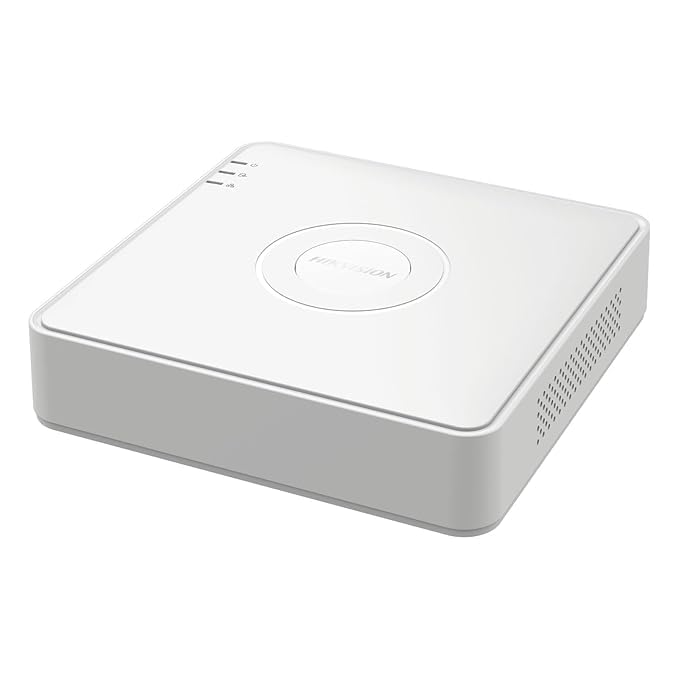
Figura 1: in alto view of the Hikvision DS-7108HGHI-M1/T DVR. This image displays the device's compact white casing with the Hikvision brand logo centrally located. Indicator lights for power, hard drive activity, and network status are visible on the left side of the top panel.
1.2 Caratteristiche principali
- 8-Channel Turbo HD DVR: Supports up to 8 analog cameras with 1080p Lite recording resolution.
- Compressione avanzata: Utilizes H.265 Pro+ video compression for reduced bandwidth and storage while maintaining video quality.
- Two-Way Audio Support: Enables real-time communication through connected cameras via built-in audio input and output.
- Rilevamento del movimento 2.0: Intelligent motion detection technology for improved accuracy and reduced false alarms.
- Connettività flessibile: Equipped with HDMI and VGA outputs, a network port for remote viewing via Hik-Connect, and USB ports for data backup.
1.3 Contenuto della confezione
Verificare che tutti gli articoli siano presenti nel pacco:
- 1 x 4 Channel DVR Recorder (Note: Product title indicates 8-channel, but package content lists 4-channel. Please verify actual product received.)
- 2 x 2MP ColorVu Dome Cameras
- 2 x 2MP ColorVu Bullet Cameras
- 1 x 1TB Surveillance Hard Disk Drive
- 1 x 4 Channel SMPS Power Supply
- 8 connettori BNC
- 4 x DC Power Connectors
- 1 cavo HDMI
- Mouse 1 x USB
- 1 x adattatore di alimentazione per DVR
- 1 x Cable Roll (90 Metres)
- 6 viti di montaggio
- Accessori per l'installazione
2. Impostazione
2.1 Installazione fisica
Before connecting, ensure the DVR is placed on a stable, flat surface with adequate ventilation. Avoid direct sunlight, heat sources, and areas with high humidity or dust.
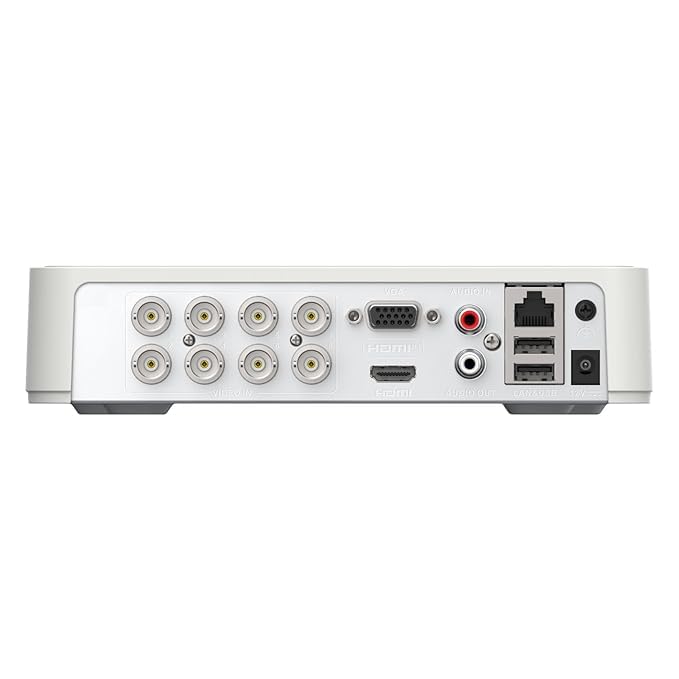
Figure 2: Rear panel of the Hikvision DS-7108HGHI-M1/T DVR. This image illustrates the various connectivity ports available on the back of the device, including multiple BNC connectors for camera inputs, VGA and HDMI outputs for display, audio input and output jacks, an Ethernet port for network connection, USB ports for peripherals, and the DC power input.
2.2 Collegamento del DVR
- Collega le telecamere: Attach your analog cameras to the BNC video input ports on the rear panel (refer to Figure 2).
- Connetti il monitor: Collegare un monitor al DVR tramite la porta di uscita HDMI o VGA.
- Connetti rete: Per telecomando viewing and network access, connect an Ethernet cable from the DVR's LAN port to your router or network switch.
- Connetti dispositivi USB: Plug the included USB mouse into one of the USB ports for navigation. Additional USB ports can be used for external storage for backup.
- Connetti l'audio (opzionale): If using cameras with audio or an external microphone, connect to the Audio In port. Connect speakers to the Audio Out port for two-way audio communication.
- Connetti alimentazione: Collegare l'adattatore di alimentazione in dotazione all'ingresso di alimentazione del DVR e quindi a una presa di corrente.
2.3 Accensione iniziale e configurazione
After connecting all necessary cables, power on the DVR. The system will boot up, and you will be guided through an initial setup wizard on the connected monitor. Follow the on-screen prompts to set up basic parameters such as language, date/time, network settings, and administrator password. It is crucial to set a strong password for security.
3. Istruzioni per l'uso
3.1 Vivere View
Once the DVR is powered on and cameras are connected, the live view of all connected cameras will be displayed on the monitor. You can switch between single-camera view, griglia multi-camera view, and sequence display using the on-screen controls or the USB mouse.
3.2 Registrazione
Il DVR supporta diverse modalità di registrazione:
- Registrazione continua: Registrazioni 24 ore su 24, 7 giorni su 7.
- Registrazione programmata: Registrazioni effettuate durante periodi di tempo specificati.
- Registrazione attivata dal movimento: Registra solo quando viene rilevato un movimento.
- Registrazione dell'evento: Records based on other events like alarm input.
Configure recording schedules and parameters through the DVR's menu system. The H.265 Pro+ compression technology optimizes storage space while maintaining video quality.
3.3 Riproduzione
per riview registrato footage:
- Accedi al menu "Riproduzione" dall'interfaccia principale.
- Selezionare la/le telecamera/e desiderata/e e l'intervallo di data/ora.
- Use the timeline to navigate through recordings. Playback controls (play, pause, fast forward, rewind) are available.
3.4 telecomando Viewing via Hik-Connect
The Hik-Connect application allows remote access to your DVR from a smartphone or computer. To set up:
- Assicurarsi che il DVR sia connesso a Internet.
- Download and install the Hik-Connect app on your mobile device.
- Create a Hik-Connect account and add your DVR by scanning the QR code or manually entering the serial number.
- Follow the app's instructions to view live feeds, play back recordings, and receive notifications remotely.
3.5 Rilevamento del movimento 2.0
Motion Detection 2.0 is an advanced feature that intelligently identifies movement, reducing false alarms caused by environmental factors. Configure motion detection zones and sensitivity settings in the DVR's menu. When motion is detected, the DVR can trigger recording, send notifications, or activate alarms.
3.6 Audio bidirezionale
If your cameras support audio and are connected to the DVR's audio input/output, you can use the two-way audio feature. This allows you to listen to audio from the camera's location and speak through a connected speaker, enabling interactive communication.
4. Manutenzione
4.1 Manutenzione generale
- Pulizia: Regularly clean the DVR's exterior with a soft, dry cloth. Do not use liquid or aerosol cleaners.
- Ventilazione: Ensure the DVR's ventilation openings are clear and not obstructed to prevent overheating.
- Aggiornamenti del firmware: Controllare periodicamente le istruzioni del produttore websito per gli aggiornamenti del firmware per garantire prestazioni e sicurezza ottimali.
4.2 Gestione dell'archiviazione
- Stato del disco rigido: Monitor the health status of the internal hard drive through the DVR's system information menu.
- Backup dei dati: Eseguire regolarmente il backup delle registrazioni importanti su un'unità USB esterna o su un archivio di rete per evitare la perdita di dati.
- Modalità di sovrascrittura: Configure the DVR to overwrite older recordings when the hard drive is full, or set it to stop recording.
5. Risoluzione Dei Problemi
5.1 Problemi comuni e soluzioni
- Nessuna visualizzazione video:
- Check power connections to the DVR and monitor.
- Verificare i collegamenti dei cavi HDMI/VGA.
- Ensure the correct input source is selected on the monitor.
- Nessuna immagine della telecamera:
- Controllare l'alimentazione della telecamera.
- Verify BNC cable connections between camera and DVR.
- Ensure camera is compatible with the DVR's technology (e.g., TVI, CVI, AHD, CVBS).
- Remoto Viewing non funziona:
- Confirm the DVR is connected to the internet (check network cable and router status).
- Verify network settings on the DVR.
- Ensure the Hik-Connect app is correctly configured and the DVR is added.
- Nessuna registrazione:
- Verificare che il disco rigido sia installato e inizializzato.
- Verificare le pianificazioni e le impostazioni di registrazione.
- Check hard drive health status.
6. Specifiche
6.1 Specifiche tecniche
| Caratteristica | Dettaglio |
|---|---|
| Numero di modello | DS-7108HGHI-M1/T |
| Marca | HIKONECT (Manufacturer: Hikvision) |
| Numero di canali | 8 |
| Tecnologia di connettività | Ethernet, HDMI, USB, VGA |
| Dispositivi compatibili | Telecamera |
| Dimensioni del prodotto (L x P x A) | 12L x 14W x 5H centimetri |
| Peso dell'articolo | 750 grammi |
| Nome del tipo di articolo | Registratore digitale |
7. Garanzia e supporto
7.1 Informazioni sulla garanzia
Questo prodotto viene fornito con un Garanzia del produttore di 2 anniSi prega di conservare la prova d'acquisto per eventuali reclami in garanzia. La garanzia copre difetti di materiali e fabbricazione in condizioni di normale utilizzo. Non copre danni causati da uso improprio, incidenti, modifiche non autorizzate o installazione non corretta.
7.2 Assistenza clienti
For technical assistance, troubleshooting, or warranty inquiries, please contact your retailer or the manufacturer's customer support. Refer to the contact information provided with your purchase or visit the official Hikvision websito per le risorse di supporto.


