
1. Introduzione
This manual provides essential information for the safe and efficient operation of your PowMr 4000W Hybrid Solar Inverter. This device is designed to convert 24VDC battery power into 110/120VAC pure sine wave electricity, integrating a 140A MPPT charge controller for optimal solar energy utilization. It supports various battery types and off-grid system configurations. Please read this manual thoroughly before installation and use, and retain it for future reference.
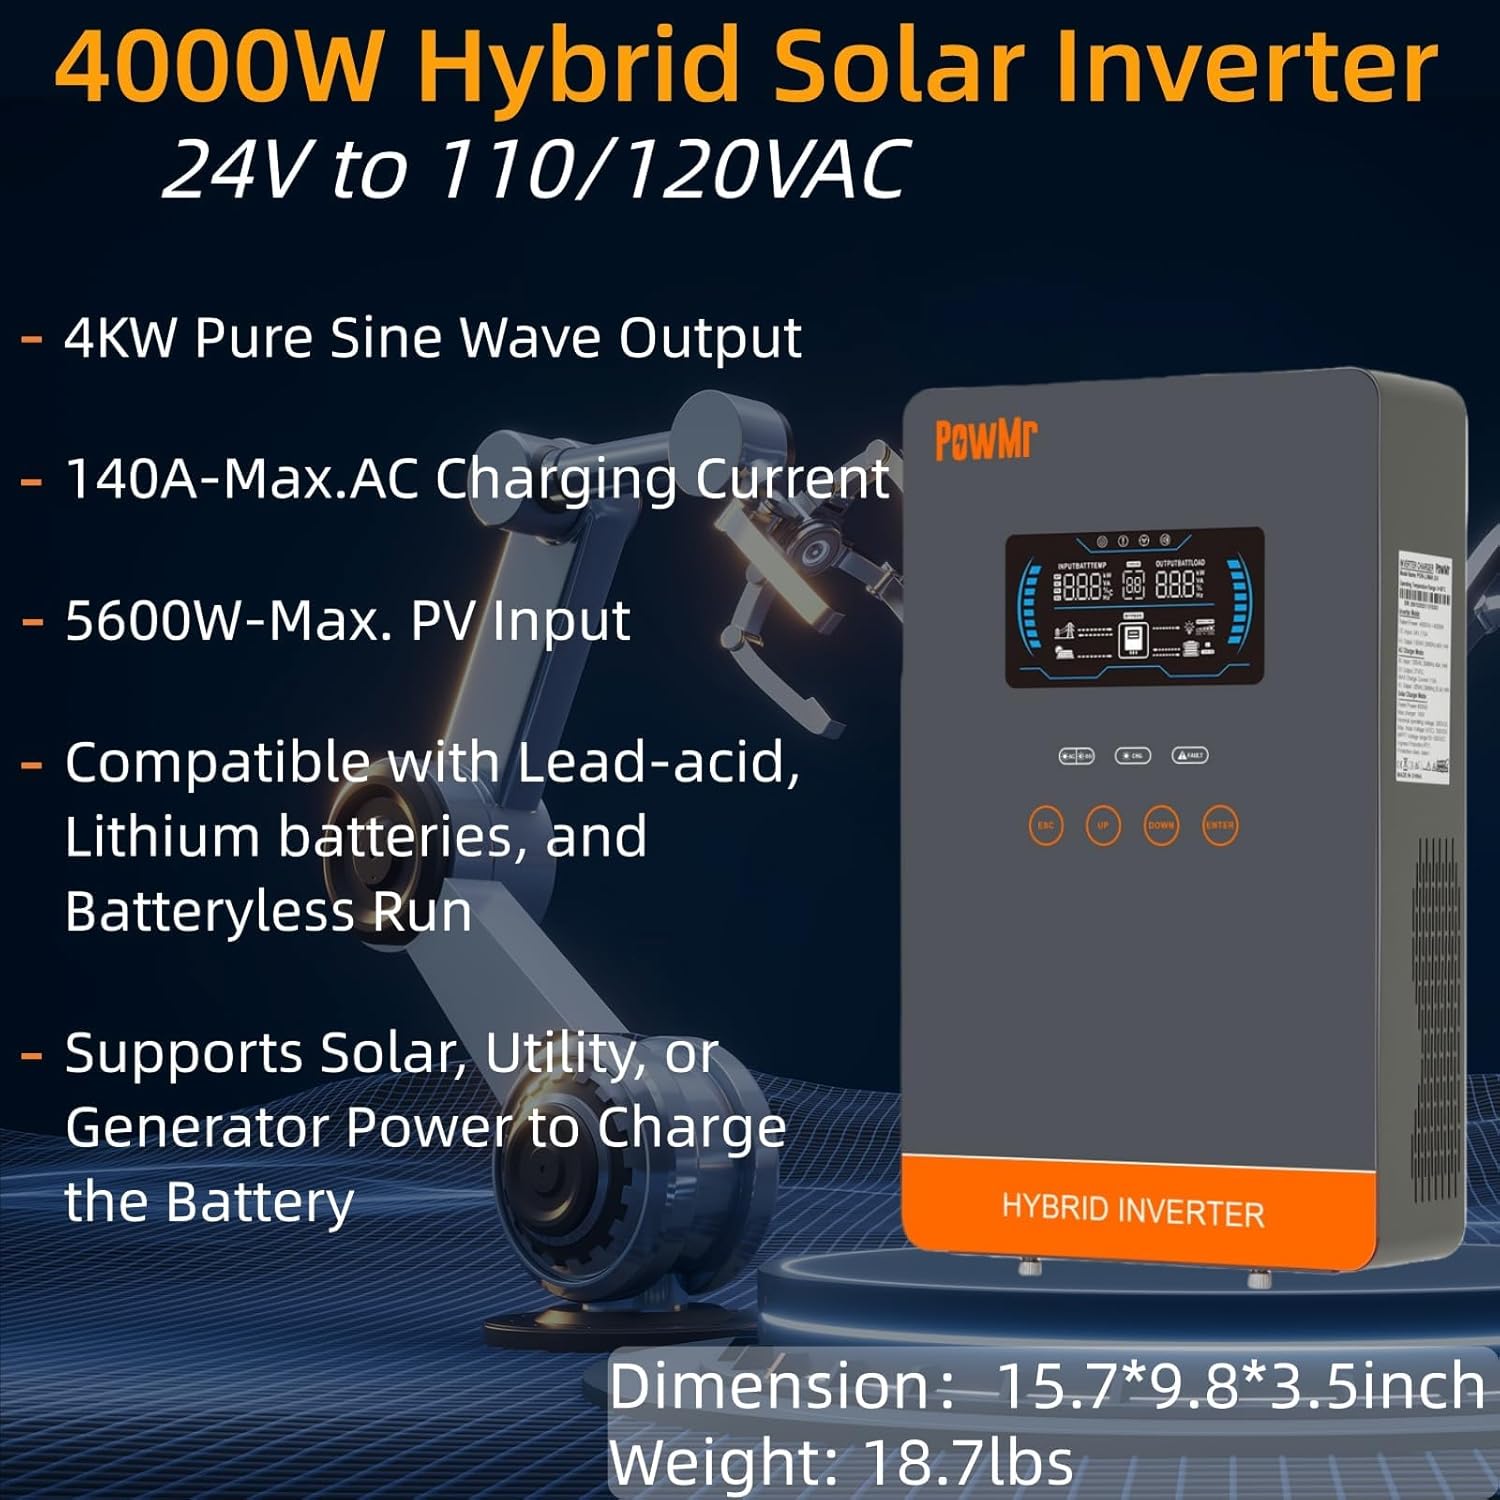
Image: The PowMr 4000W Hybrid Solar Inverter, highlighting its 4KW pure sine wave output, 140A max AC charging current, 5600W max PV input, compatibility with various batteries, and support for solar, utility, or generator power to charge the battery. Dimensions are 15.7"L x 9.8"W x 3.5"H and weight is 18.7lbs.
2. Istruzioni di sicurezza
Per ridurre il rischio di scosse elettriche, incendi o lesioni, osservare sempre le seguenti precauzioni di sicurezza:
- L'installazione deve essere eseguita da personale qualificato.
- Assicurarsi che tutti i cavi siano correttamente dimensionati e isolati.
- Non smontare l'inverter. All'interno non ci sono parti riparabili dall'utente.
- Tenere l'inverter lontano da materiali infiammabili, umidità e luce solare diretta.
- Assicurare un'adeguata ventilazione attorno all'inverter per evitare il surriscaldamento.
- Scollegare sempre tutte le fonti di alimentazione (fotovoltaico, batteria, ingresso CA) prima di eseguire qualsiasi operazione di manutenzione o cablaggio.
- Indossare adeguati dispositivi di protezione individuale (DPI) durante l'installazione e la manutenzione.
3. Prodotto finitoview
3.1 Caratteristiche
- Uscita onda sinusoidale pura: Fornisce un'alimentazione stabile e pulita, adatta ai dispositivi elettronici sensibili.
- Regolatore di carica MPPT integrato: 140A MPPT for efficient solar charging.
- Ampia compatibilità della batteria: Supports AGM, Gel, Lead-acid, Lithium-ion, and LiFePO4 batteries.
- Modalità senza batteria: Can power loads directly from PV/AC grid without a connected battery.
- Molteplici modalità di ricarica: Solar Only, Mains Only, Mains & Solar Hybrid.
- Modalità di uscita del carico multiple: Utility Priority, Solar Priority, Solar and SBU Priority.
- Protezione avanzata: Cortocircuito, oltre voltage, sotto volumetage, overload, reverse polarity, over-temperature, and backfill protection.
- Interfaccia intuitiva: 6.25-inch LCD screen with touch controls for real-time data display.
- Porte di comunicazione: RS485 and RS232 for monitoring and control.
3.2. Identificazione dei componenti

Image: A detailed diagram of the PowMr Hybrid Solar Inverter, showing its front panel and connection ports. Key components labeled include: 1. LCD display, 2. Status indicator, 3. Charging indicator, 4. Fault indicator, 5. Function touch buttons, 6. On/off switch, 7. AC input, 8. AC output, 9. PV input, 10. Battery input, 11. RS485/RS232 communication port.
3.3. Funzionalità di protezione

Image: An illustration detailing the comprehensive protection features of the inverter, including Short Circuit Protection, Over-Load Protection, Over Current Protection, Backfill Protection, Over Voltage Protection, Over-Temperature Protection, Under Voltage Protection, and Over Charge Protection.
4. Contenuto della confezione
Dopo aver disimballato, verificare che tutti gli articoli siano presenti e integri:
- PowMr 4000W Hybrid Solar Inverter
- Manuale di istruzioni (questo documento)
- Communication Cables (if applicable, check packaging)
- Hardware di montaggio (se applicabile, controllare la confezione)
5. Installazione e configurazione
5.1. Montaggio dell'inverter
Select a suitable location for mounting the inverter. It should be:
- Al chiuso, al riparo dalla luce solare diretta, dalla pioggia e dalla polvere.
- Ben ventilato per consentire la dissipazione del calore.
- Vicino alla batteria per ridurre al minimo la lunghezza e il volume del cavotage goccia.
- Su una superficie solida e non infiammabile.
5.2. Schema elettrico
Follow the wiring diagram carefully. Incorrect wiring can cause damage to the inverter, batteries, or connected loads, and may pose a safety hazard.

Image: A comprehensive wiring diagram illustrating connections for PV input, Mains/Generator input, AC output, and Battery input. It specifies voltage ranges, current ratings, and recommended wire gauges for each connection point.
5.3. Collegamento della batteria
The inverter is compatible with various 24V battery types. Ensure your battery bank matches the inverter's voltage requisiti.

Image: An illustration showing the inverter's compatibility with various battery types including AGM, GEL, FLD (Flooded), LI (Lithium-ion), SLD (Sealed Lead-Acid), and USER-defined settings. It also indicates a maximum battery charging current of 140A (utility charging + solar charging).
- Connect the battery cables to the inverter's battery terminals, ensuring correct polarity (positive to positive, negative to negative).
- Stringere bene tutti i collegamenti.
5.4. PV Array Connection
- Connect the solar panel array to the PV input terminals, observing correct polarity.
- Assicurare la tensione a circuito aperto del pannello fotovoltaicotage la potenza rientrano nelle specifiche dell'inverter.
5.5. Collegamento ingresso/uscita CA
- Collegare la rete elettrica CA o il generatore ai terminali di ingresso CA.
- Collegare i carichi CA ai terminali di uscita CA.
- Ensure all AC connections are properly grounded.
6. Istruzioni per l'uso
6.1. Accensione/Spegnimento
- Per accendere: Ensure all connections are secure. First, connect the battery, then the PV array, and finally the AC input. Press the On/Off switch.
- Per spegnere: Disconnect the AC input, then the PV array, and finally the battery. Press the On/Off switch.
6.2. Display LCD e controlli
The LCD screen displays real-time system data. Use the touch buttons to navigate menus and adjust settings.
6.3. Setting Charging and Output Modes
L'inverter offre modalità di carica e di uscita flessibili per soddisfare diverse esigenze di gestione energetica.

Image: An illustration detailing the three charging modes (1. Only Solar, 2. Only Utility, 3. Solar+Utility) and three output modes (1. Utility First, 2. Solar First (default), 3. SBU priority). Steps to set programs are also provided: 1. Long press and hold ENTER button for 3s, 2. Press UP and DOWN to select setting programs, 3. Press ENTER to confirm or ESC to exit.
6.3.1. Modalità di ricarica
- Solo solare: Carica le batterie esclusivamente tramite pannelli solari.
- Solo rete elettrica: Charges batteries exclusively from the AC utility grid or generator.
- Rete elettrica e solare ibrida: Prioritizes solar charging, supplementing with AC utility/generator if solar power is insufficient.
6.3.2. Modalità di uscita del carico
- Priorità di utilità: Loads are primarily powered by the AC utility grid. Inverter switches to battery/solar if utility fails.
- Priorità solare: Loads are primarily powered by solar and battery. Inverter switches to utility if solar/battery power is insufficient.
- Priorità SBU (Solare-Batterie-Utilità): Loads are primarily powered by solar, then battery, and finally by utility as a last resort.
7. Manutenzione
Una manutenzione regolare garantisce prestazioni ottimali e longevità del vostro inverter.
- Pulizia: Periodically clean the inverter's exterior with a dry cloth. Do not use liquid cleaners.
- Ventilazione: Ensure cooling fan vents are clear of dust and obstructions. The triple cooling fan design helps dissipate heat efficiently.
- Connessioni: Controllare annualmente tutti i collegamenti elettrici per verificarne la tenuta e l'assenza di segni di corrosione.
- Ambiente: Maintain a clean, dry, and well-ventilated environment around the inverter. The dust-proof design helps prevent dust ingress.
8. Risoluzione Dei Problemi
If you encounter issues, refer to the following common problems and solutions. For persistent issues, contact customer support.
| Problema | Possibile causa | Soluzione |
|---|---|---|
| L'inverter non si accende | Nessuna connessione alla batteria; basso livello della batteriatage; On/Off switch off | Check battery connections; Charge battery; Turn on switch |
| Nessuna uscita CA | Sovraccarico; Cortocircuito; Guasto dell'inverter | Reduce load; Check for short circuits; Restart inverter |
| La ricarica fotovoltaica non funziona | PV array disconnected; Insufficient sunlight; PV voltage troppo basso/alto | Check PV connections; Ensure adequate sunlight; Verify PV array specifications |
| Avviso di sovraccarico | I carichi collegati superano la capacità dell'inverter | Disconnect some loads; Ensure total load is within 4000W |
| Avviso di temperatura elevata | Scarsa ventilazione; Temperatura ambiente troppo alta | Clear vents; Improve airflow; Relocate inverter if necessary |
9. Specifiche
Technical specifications for the PowMr 4000W Hybrid Solar Inverter:
| Parametro | Valore |
|---|---|
| Numero di modello | POW-LVM4K-24V-FBA2 |
| Potenza di uscita nominale | 4000W |
| Ingresso volumetage (CC) | 24 V CC |
| Volume di uscitatage (CA) | 110/120 V CA |
| Forma d'onda di uscita | Onda sinusoidale pura |
| Massimo Circuito aperto fotovoltaico voltage | 350 V CC |
| MPPT array fotovoltaico voltage Gamma | 55-350 V CC |
| Potenza massima in ingresso FV | 5600W |
| Vol. nominale di ingresso della retetage | 110/120 V CA |
| Max. Hybrid Charging Current (AC+PV) | 140A |
| Comunicazione | RS485, RS232 |
| Tipo di visualizzazione | LCD |
| Dimensioni (L x P x A) | 15.7 cm L x 9.8 cm P x 3.5 cm A |
| Peso | 18.7 lbs (approximate, derived from image) |
10. Garanzia e supporto
10.1. Informazioni sulla garanzia
The PowMr 4000W Hybrid Solar Inverter comes with an Garanzia di 18 mesi from the date of purchase. This warranty covers defects in materials and workmanship under normal use. It does not cover damage caused by improper installation, misuse, accidents, unauthorized modifications, or natural disasters.
10.2. Assistenza clienti
For technical assistance, warranty claims, or any questions regarding your PowMr inverter, please contact PowMr customer support through the retailer's platform or the official PowMr website. Please have your model number (POW-LVM4K-24V-FBA2) and purchase date available when contacting support.