JUMMICO 3x4m Gazebo with Solar Lighting User Manual
Model: 3x4BGL
1. Informazioni sulla sicurezza
Please read these instructions carefully before installation and use. Failure to follow these guidelines may result in injury or damage to the product.
Leggere attentamente le istruzioni prima dell'installazione.
Do not use if the ground is unstable or slippery. Ensure the gazebo is anchored securely to a flat, stable surface.
Do not exceed the maximum load capacity of 8 people under the gazebo at any given time.
Exercise caution when assembling and disassembling heavy components. It is recommended that two people perform the assembly.
In strong winds or heavy rain, it is advisable to remove the canopy and side walls to prevent damage to the structure.
2. Prodotto finitoview
The JUMMICO 3x4m Gazebo is designed to provide a reliable outdoor shelter with integrated solar lighting. It features a robust metal structure and a double-layer roof for enhanced durability and weather resistance.
Caratteristiche principali:
Costruzione robusta: Designed with reinforced ground anchors and a solid frame to resist wind and adverse weather conditions.
Integrated Solar Lighting: Equipped with practical solar lighting that provides soft illumination from dusk, extending your outdoor enjoyment.
Double-Layer Roof: Features a 180G polyester roof with PU coating and UV50 rating, ensuring reliable waterproofing and effective UV ray blocking. The double-layer design also aids in efficient rainwater drainage.
Design versatile: Includes 4 removable side walls, allowing easy transformation from an open pavilion to a protected party tent.
Anti-Rust Frame: The steel frame is treated for anti-rust protection, ensuring longevity.
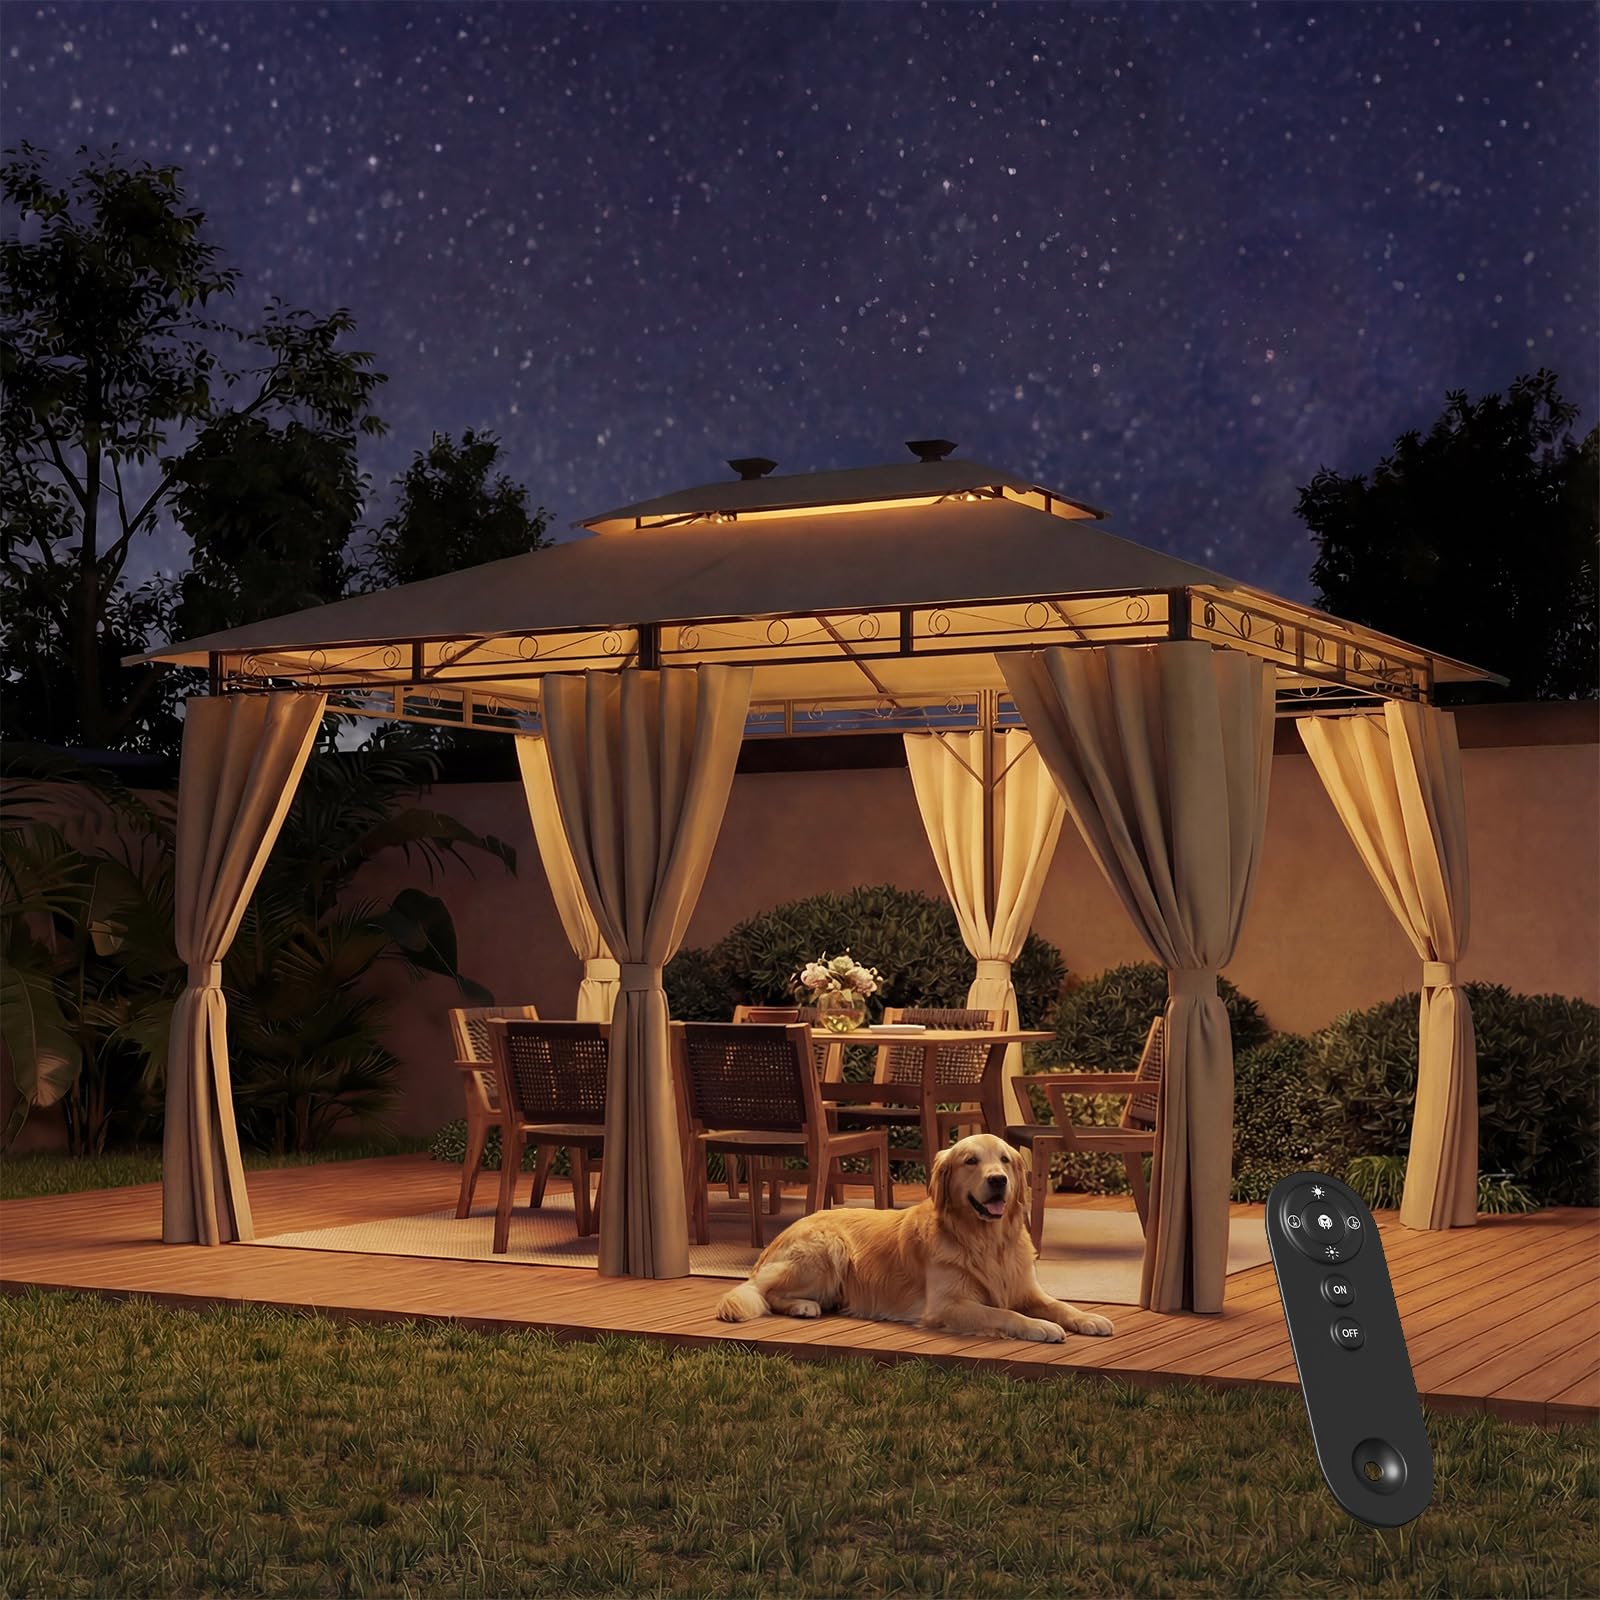
Image 2.1: The JUMMICO 3x4m Gazebo in an outdoor setting, showcasing its design and solar lighting.
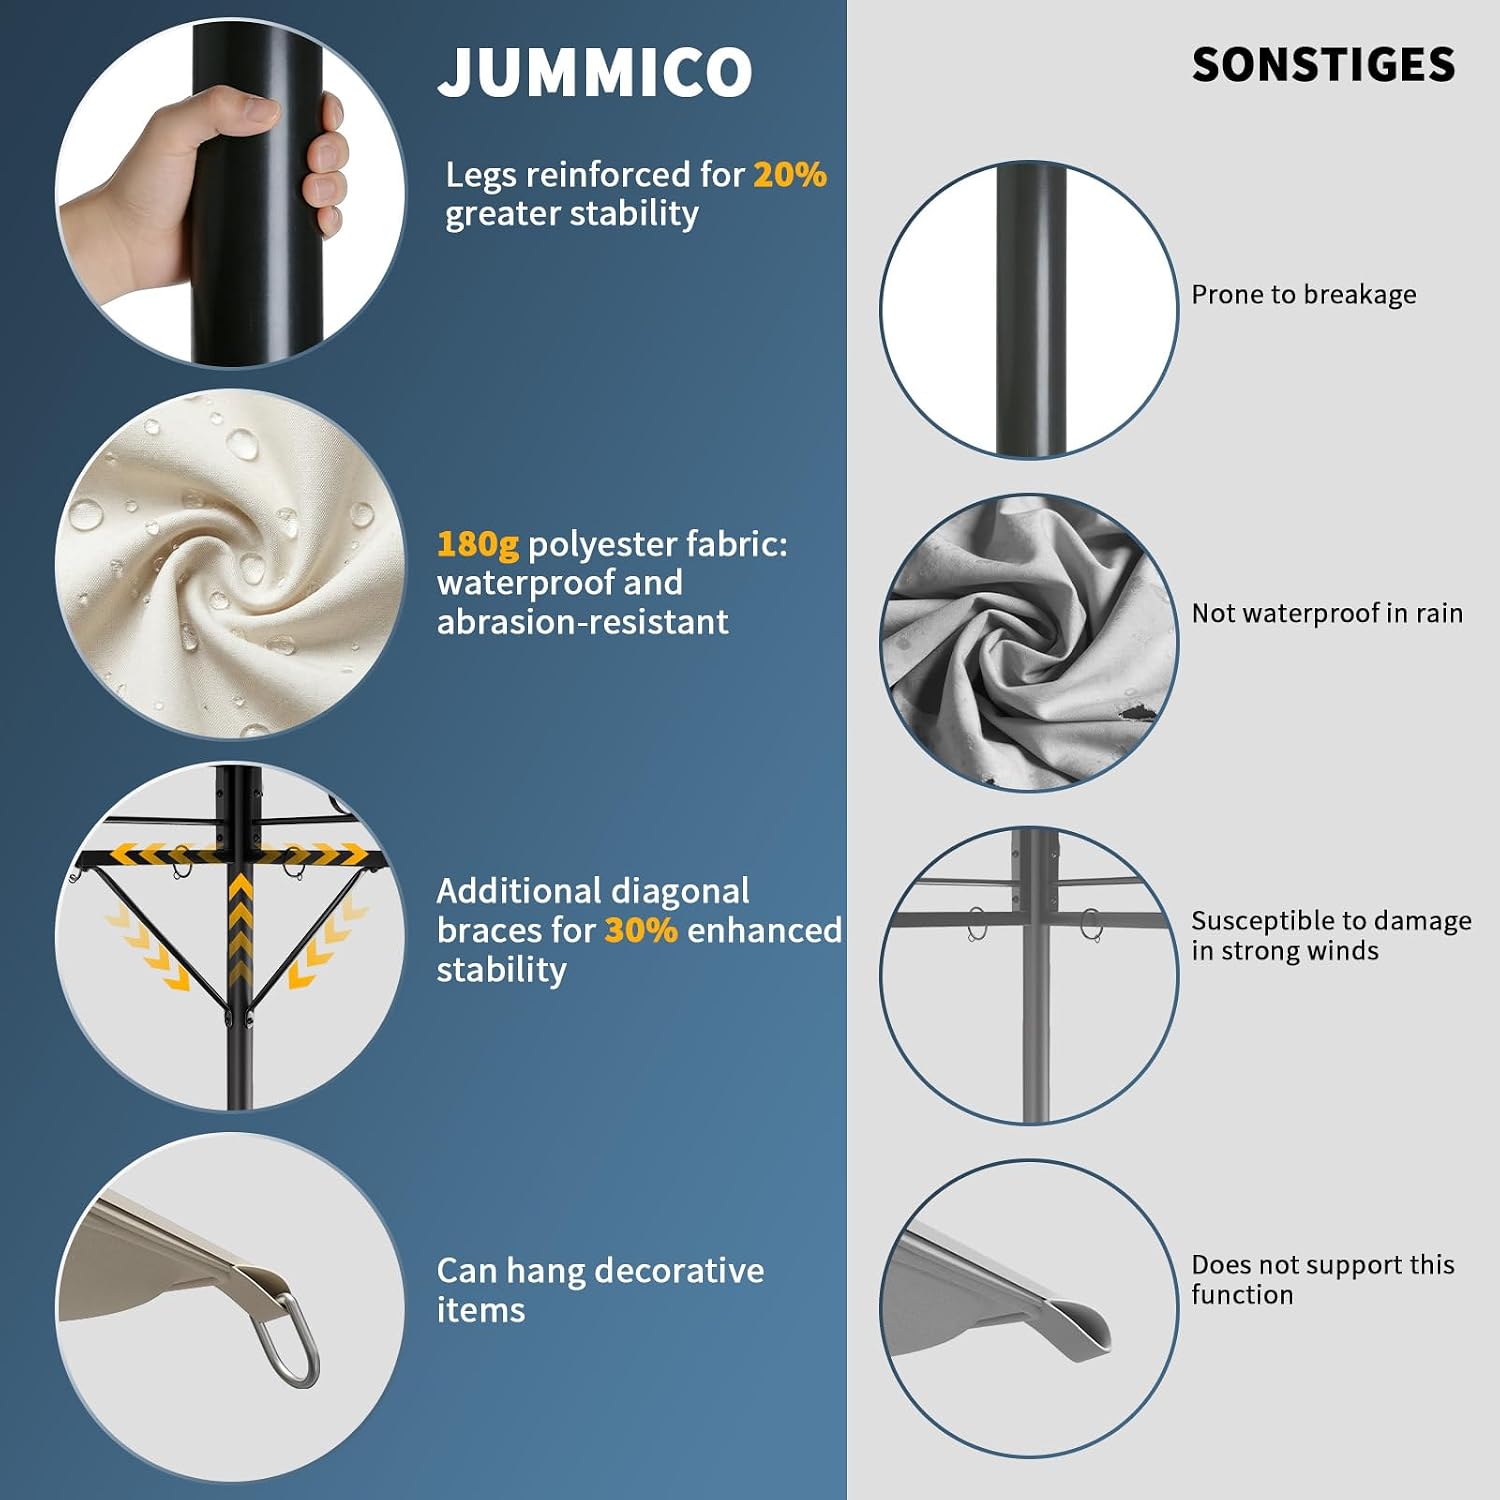
Image 2.2: Comparison of JUMMICO gazebo features, highlighting reinforced legs for stability, 180g polyester fabric for waterproofing and abrasion resistance, additional diagonal braces for enhanced stability, and hooks for decorative items.
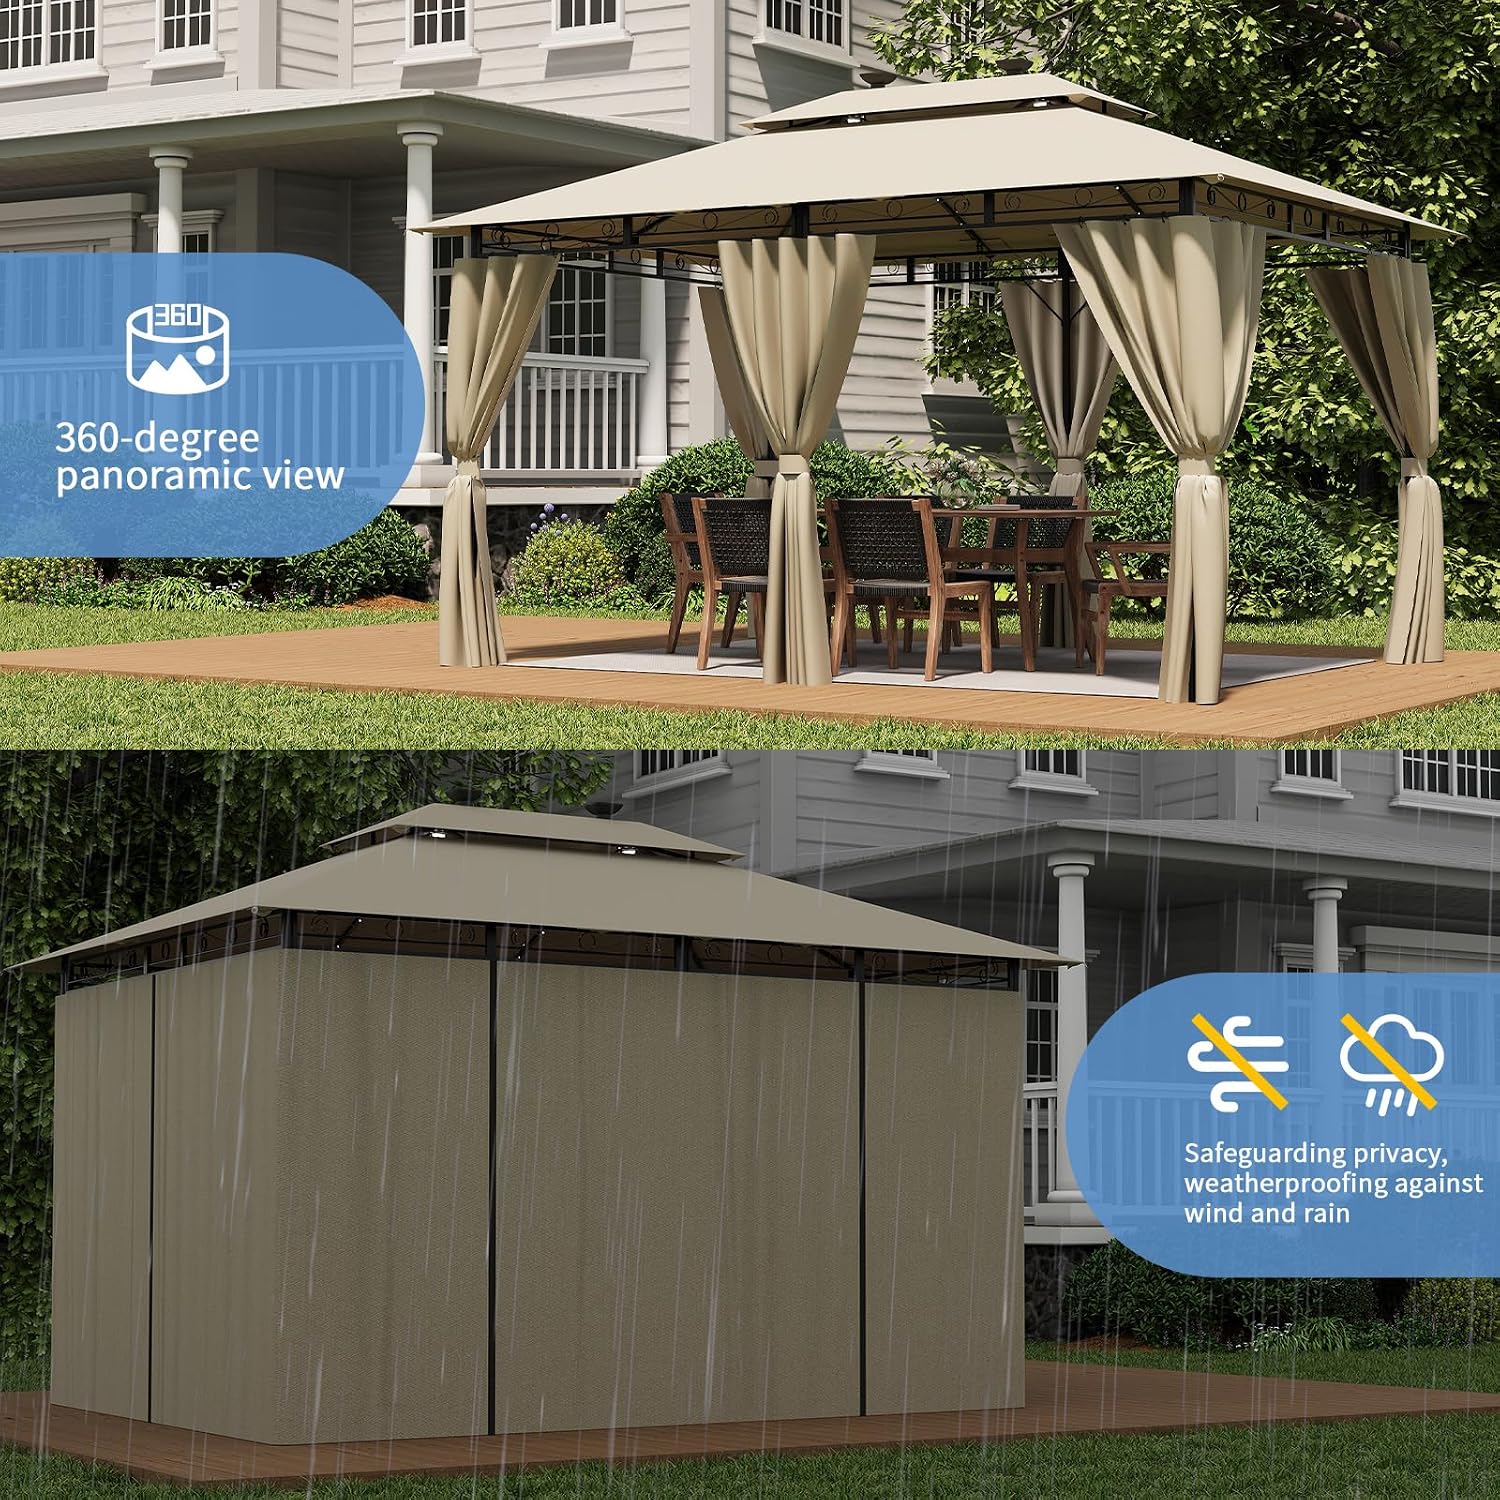
Image 2.3: A 360-degree panoramic view of the gazebo and its weatherproofing capabilities against wind and rain.
3. Contenuto della confezione
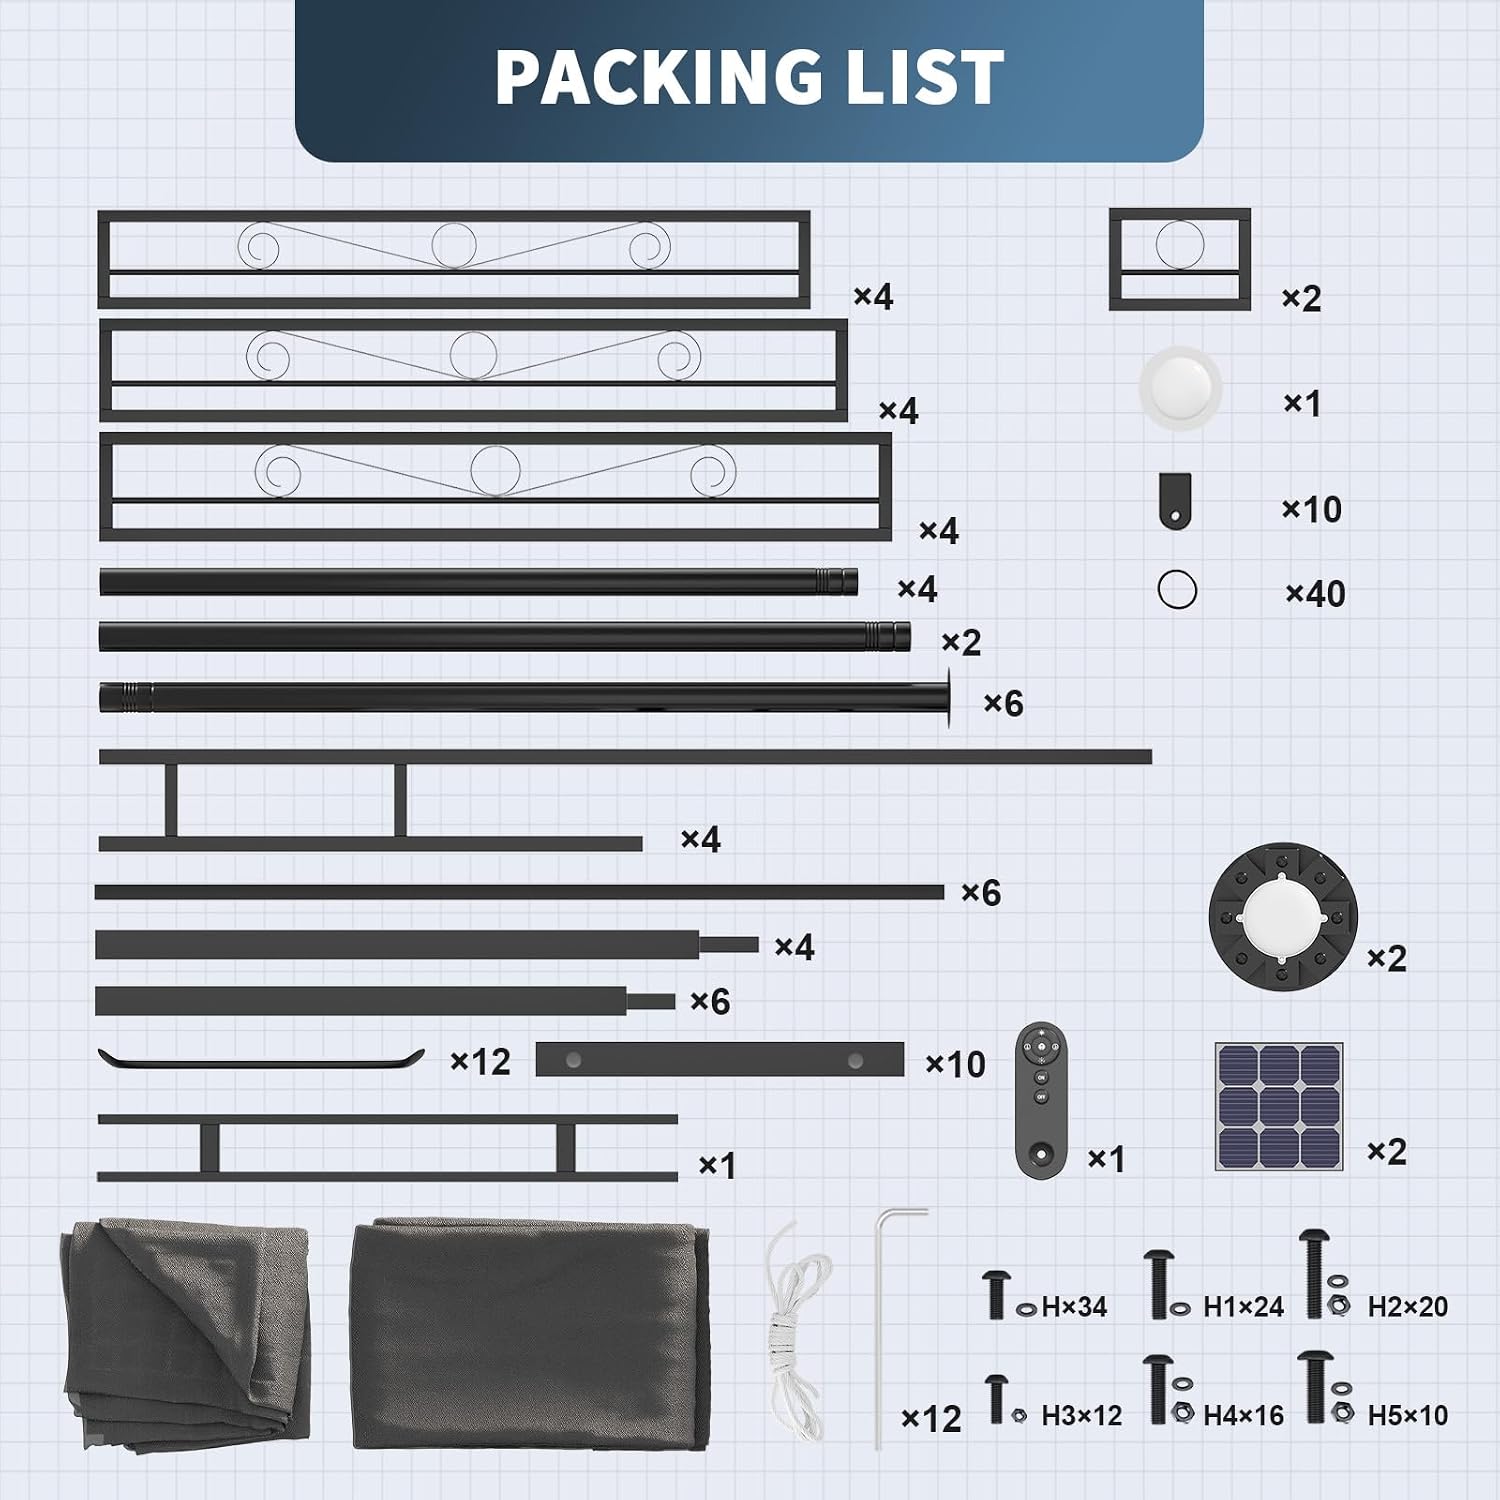
Prima di iniziare il montaggio, assicurarsi che tutti i componenti elencati di seguito siano presenti e integri. Se alcuni componenti risultano mancanti o danneggiati, contattare l'assistenza clienti.
Image 3.1: Detailed diagram of all components included in the package. Refer to this list to verify all parts are present before assembly.
Il pacchetto tipicamente include:
Main frame components (legs, beams, connectors)
Double-layer canopy fabric
Side walls (4 units)
Unità pannello solare
Ground anchors and ropes
Assembly tools (e.g., wrench, hex key)
Spare hooks for side walls
Manuale di istruzioni
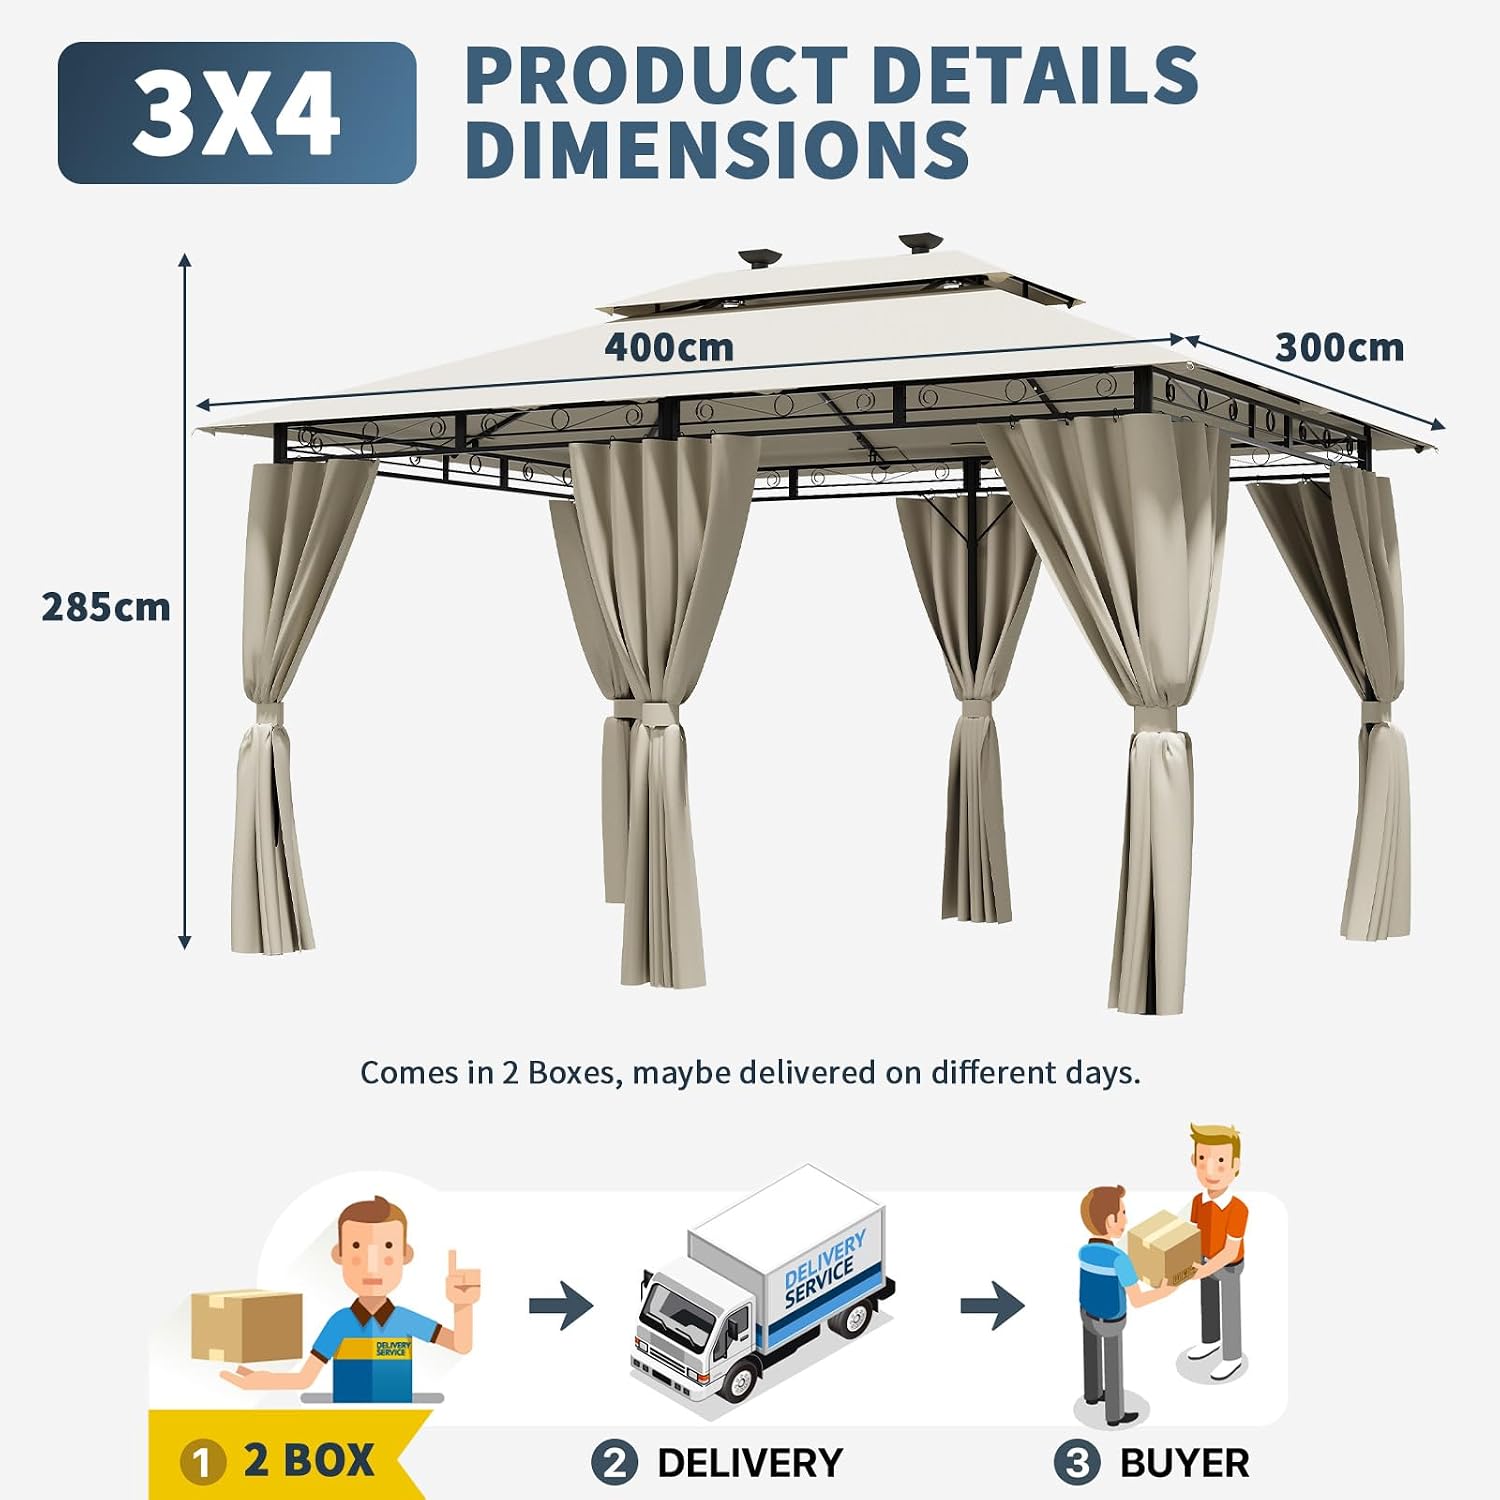
Note: The gazebo is delivered in 2 boxes, which may arrive on different days.
4. Istruzioni per l'installazione
Assembly of the JUMMICO Gazebo is designed to be straightforward, but it requires two people for quick and safe installation. Follow the steps below and refer to the included assembly key and diagrams.
4.1 Preparazione
Choose a flat, stable, and level area for the gazebo installation. Ensure there is sufficient clearance around the chosen spot.
Unpack all components and verify against the packing list (Image 3.1).
Disporre tutti i componenti su una superficie pulita e morbida per evitare graffi.
4.2 Assemblaggio del telaio
Begin by assembling the base frame using the designated leg and beam components. Ensure all connections are secure.
Attach the two-part legs to the base frame.
Connect the upper frame components, including the diagonal braces, to form the roof structure.
Tighten all bolts and screws using the provided tools, but do not overtighten until the entire frame is assembled.
4.3 Canopy and Side Wall Installation
Carefully unfold the double-layer canopy fabric.
Position the canopy over the assembled roof frame, ensuring proper alignment. Secure the canopy to the frame as per the instructions, paying attention to the rainwater drainage design.
Attach the solar panel unit to the designated spot on the roof.
Hang the side walls using the integrated hooks. The side walls are removable and can be tied back when not in use.
4.4 Fissaggio finale
Once the entire structure is assembled, re-check all connections and tighten all bolts and screws firmly.
Use the provided ground anchors and ropes to secure the gazebo to the ground, especially in areas prone to wind.
Image 4.1: Illustration of the gazebo dimensions (400cm L x 300cm W x 285cm H) and the delivery process, indicating it comes in two boxes.
5. Istruzioni per l'uso
This section details the operation of the integrated solar lighting system.
5.1 Solar Lighting System
The gazebo is equipped with a solar panel that charges an internal battery during the day to power the lights at night.
Funzionamento automatico: The solar lights are designed to turn on automatically at dusk and turn off at dawn, provided the solar panel receives sufficient sunlight during the day.
Controllo manuale: A switch or remote control (if included) may be available to manually turn the lights on or off, or to adjust brightness settings. Refer to the specific instructions for your solar lighting unit.
5.2 Informazioni sulla ricarica
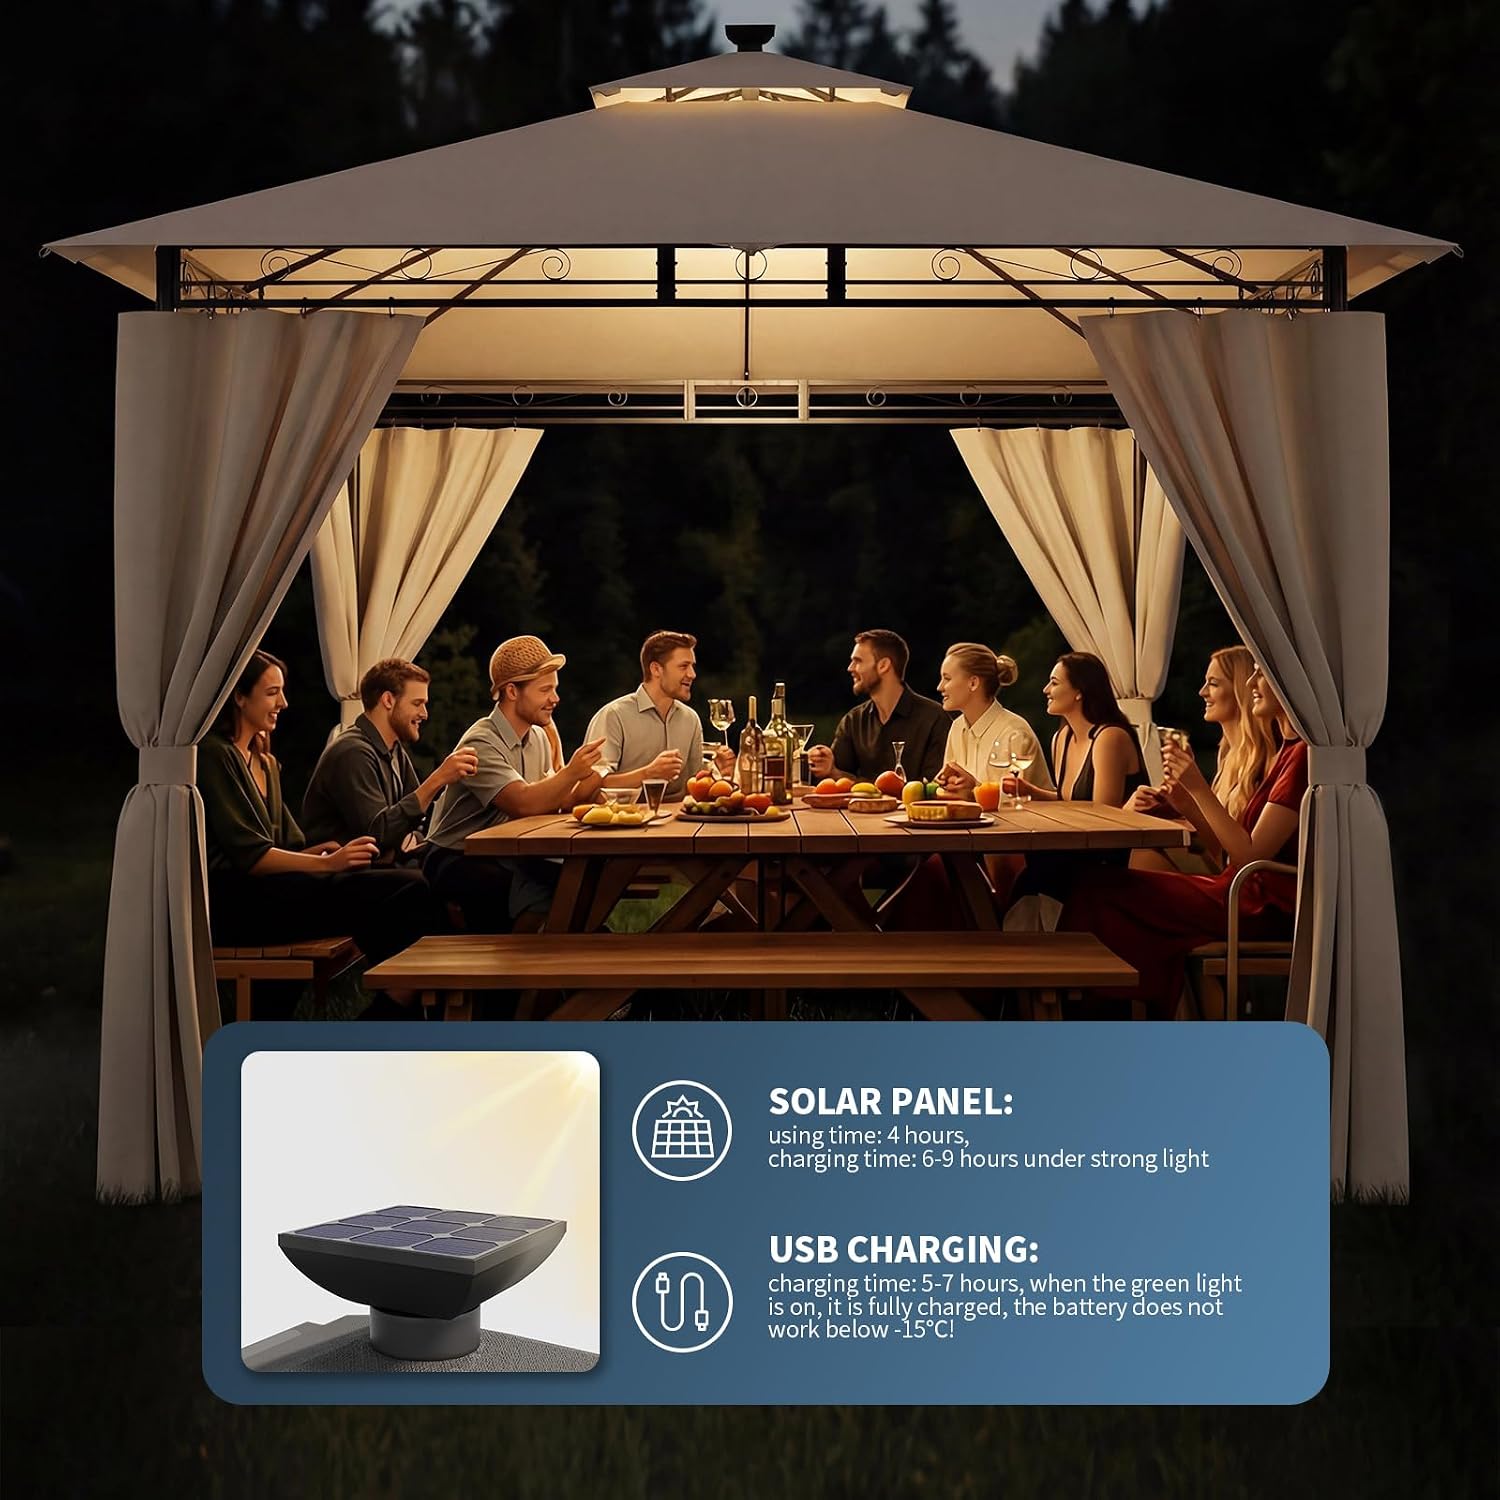
Image 5.1: Details on the solar panel and USB charging capabilities for the gazebo's lighting system.
Ricarica del pannello solare: Under strong sunlight, the solar panel typically requires 6-9 hours to fully charge the battery. A full charge provides approximately 4 hours of illumination.
Ricarica USB: For faster charging or during periods of low sunlight, the battery can be charged via USB. USB charging takes approximately 5-7 hours. A green light indicates when the battery is fully charged.
Considerazioni sulla temperatura: The battery may not operate effectively below -15°C.
6. Manutenzione
Regular maintenance will extend the lifespan and appearance of your JUMMICO Gazebo.
Pulizia della capottina: Clean the polyester canopy fabric periodically with mild soap and water. Rinse thoroughly and allow to air dry completely before storage or prolonged non-use. Do not use harsh chemicals or abrasive cleaners.
Ispezione del telaio: Regularly inspect the steel frame for any signs of rust, loose connections, or damage. Tighten any loose bolts and apply rust-preventative paint to any scratched areas on the frame.
Pulizia del pannello solare: Keep the solar panel clean from dust, dirt, and debris to ensure optimal charging efficiency. Wipe it gently with a damp stoffa.
Rimessaggio invernale: During winter months or prolonged periods of non-use, it is recommended to disassemble the gazebo and store the components in a dry, protected area to prevent weather damage.
Pareti laterali: Clean side walls as needed with mild soap and water. Ensure they are dry before folding and storing.
7. Risoluzione Dei Problemi
Questa sezione affronta i problemi più comuni che potresti riscontrare con il tuo gazebo.
7.1 Gazebo Stability Issues
Problema: Gazebo feels unstable or sways in light wind. Soluzione: Ensure all frame connections are securely tightened. Verify that the ground anchors are properly installed and firmly secured into the ground. If on a hard surface, consider using sandbags or weights on the legs.
Problema: L'acqua si accumula sulla volta. Soluzione: Check that the canopy is stretched taut and correctly aligned on the frame to allow for proper water runoff. The double-layer roof is designed for efficient drainage; ensure no obstructions are present.
7.2 Solar Lighting Problems
Problema: Solar lights are not turning on at night. Soluzione:
Ensure the solar panel is clean and free from obstructions (leaves, dirt) that might block sunlight.
Verify the solar panel is positioned in an area that receives direct sunlight for at least 6-9 hours during the day.
Check the battery connection within the solar unit.
If applicable, ensure the manual switch for the lights is in the 'ON' or 'AUTO' position.
Try charging the battery via USB to rule out a solar charging issue.
Problema: Le luci sono fioche o restano accese solo per un breve periodo. Soluzione: This usually indicates insufficient charging. Ensure the solar panel gets maximum sun exposure. Consider USB charging if solar conditions are consistently poor.
8. Specifiche
Caratteristica
Specificazione
Marca
JUMMICO
Numero di modello
3x4BGL
Dimensioni del prodotto (L x P x A)
4L x 3W x 2.85H metri
Peso dell'articolo
13 chilogrammi
Materiale del telaio
Acciaio legato
Livello di resistenza all'acqua
Impermeabile
Forma
Rettangolare
Protezione UV
UV protection, level 50+
Assemblaggio richiesto
SÌ
Numero di articoli
1
Colore
Beige
Occupazione
Da 4 a 8 persone
Superficie del pavimento
120000 centimetri quadrati
Paese di origine
Cina
Codice UPC
788418916938
Codice GTIN
788418916938
9. Garanzia e supporto
JUMMICO is committed to providing high-quality products and customer satisfaction. While specific warranty details are not provided in this manual, please retain your proof of purchase for any warranty claims.
For any questions regarding your JUMMICO Gazebo, assembly assistance, missing parts, or technical support, please contact JUMMICO customer service through the retailer where you purchased the product or visit the official JUMMICO websito per le informazioni di contatto.
Your satisfaction is our absolute priority. We will offer expert technical support and the best solutions adapted to your needs.
Ask a question about this manual
Ask about setup, troubleshooting, compatibility, parts, safety, or missing instructions. Manuals+ will review the question and use this page’s manual context to help answer it.