
1. Importanti istruzioni di sicurezza
Leggere attentamente tutte le istruzioni prima di utilizzare questo apparecchio e conservarle per riferimento futuro. Seguire sempre le precauzioni di sicurezza di base per ridurre il rischio di incendi, scosse elettriche e lesioni personali.
- Questo apparecchio è destinato esclusivamente all'uso in ambienti interni.
- Assicurarsi che l'alimentazione corrisponda al voltage specificato sulla targhetta dei dati tecnici.
- Non utilizzare l'unità con un cavo o una spina danneggiati.
- Per garantire un corretto flusso d'aria, tenere l'unità ad almeno 50 cm di distanza dalle pareti o da altri oggetti.
- Non bloccare le prese d'aria o le prese d'aria.
- Scollegare sempre l'unità prima di pulirla o sottoporla a manutenzione.
- Non utilizzare in ambienti umidi come bagni o lavanderie.
- I bambini devono essere sorvegliati per assicurarsi che non giochino con l'apparecchio.
- Before use, ensure the rubber plugs on the rear, middle, and bottom drainage holes (two in total) are properly inserted.
2. Prodotto finitoview
The AirOrig 10,000 BTU Portable Air Conditioner is a versatile 4-in-1 unit designed to provide comfort in various environments. It offers cooling, dehumidification, fan, and sleep modes, suitable for rooms up to 450 sq. ft. The unit features 360° swivel wheels for easy portability and a self-evaporating system for continuous operation without frequent draining.

Figure 2.1: Unit displaying 10,000 BTU cooling capacity and coverage for up to 450 sq. ft.
2.1 Componenti inclusi
Check that all accessories are present before installation.
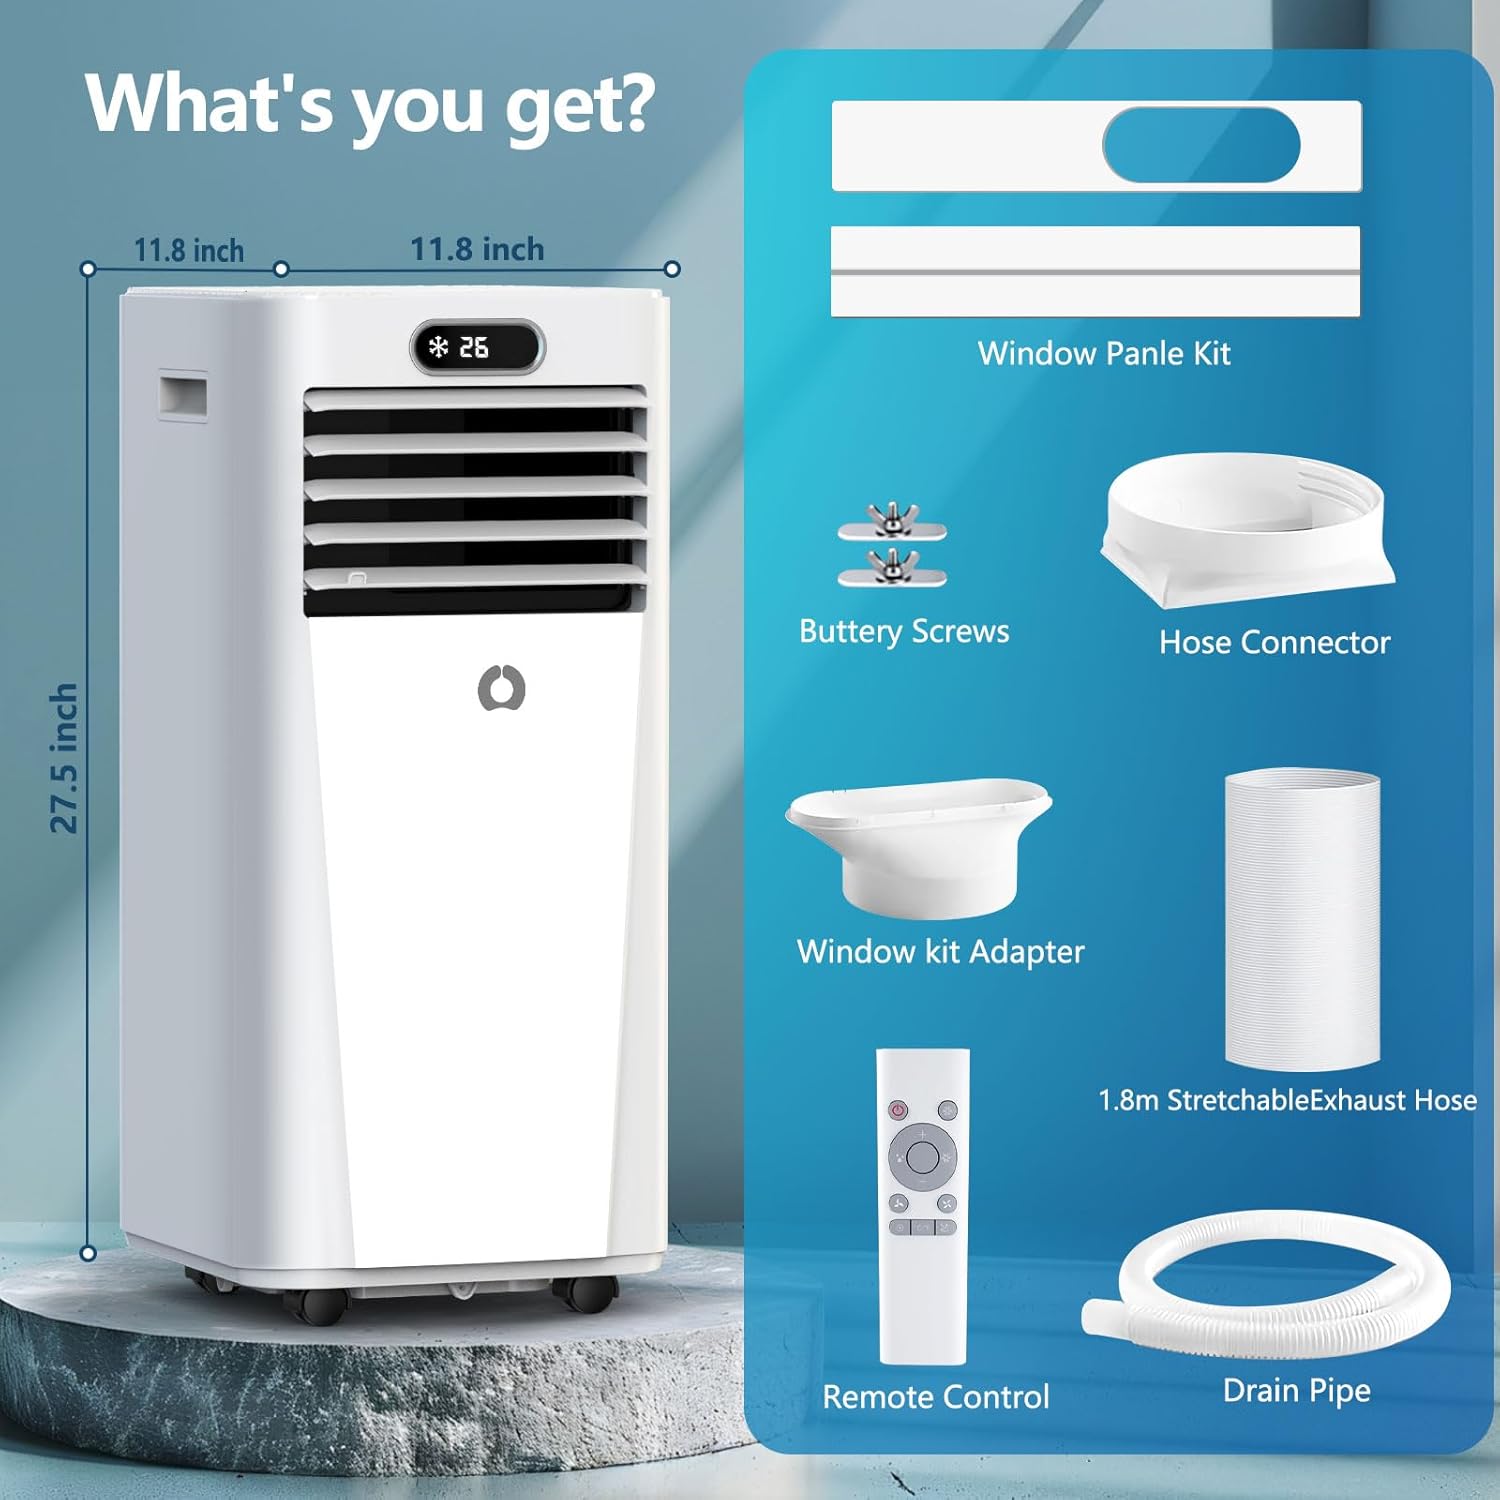
Figure 2.2: All components included with the AirOrig Portable Air Conditioner.
- Unità di condizionamento dell'aria portatile
- Window Panel Kit (Adjustable)
- Exhaust Hose (1.8m stretchable)
- Connettore per tubo flessibile
- Adattatore per kit finestra
- Telecomando
- Tubo di scarico
- Butterfly Screws
3. Installazione
The portable air conditioner is designed for easy installation in various window types. Follow these steps for proper setup.
3.1 Assemblaggio del kit finestra
The window kit is adjustable to fit most vertical or horizontal sliding windows.

Figure 3.1: Window panel kit components and compatible window types.
- Prepare the Window Panels: Insert the butterfly screws into the holes on the window plates.
- Collegare i pannelli: Install the washer and screw, but do not tighten completely yet.
- Pannelli protetti: Place an additional inner plate into the outer plate and secure the screws to achieve the desired length for your window.
- Install in Window: Adjust the length of the assembled window plates to fit your window opening. Fix the window plates and close your window to secure them.
3.2 Collegamento del tubo di scarico

Figure 3.2: Step-by-step guide for window kit and exhaust hose installation.
- Collegare il tubo all'unità AC: Attach one end of the exhaust hose to the AC unit's adapter.
- Collegare il tubo al kit finestra: Align the connector on the other end of the hose with the opening in the window bracket and push it in until it locks into place.
Nota importante: Before operating, ensure the rubber plugs on the rear, middle, and bottom drainage holes (two in total) are properly inserted. Do not connect a drain hose for normal cooling operation as the unit's self-evaporating system handles condensation.
4. Funzionamento
Your AirOrig portable air conditioner can be controlled via the top panel or the included remote control.
4.1 Pannello di controllo e telecomando

Figure 4.1: Control panel and remote control for the AirOrig AC unit.
The control panel on top of the unit and the remote control offer identical functions for convenience.
- Pulsante di accensione: Accende o spegne l'unità.
- Pulsante Modalità: Passa attraverso le modalità Raffreddamento, Deumidificatore, Ventilatore e Sospensione.
- Pulsante di velocità: Regola la velocità della ventola (bassa, media, alta).
- Pulsanti su/giù: Regola le impostazioni della temperatura o la durata del timer.
- Pulsante Timer: Imposta il timer di accensione o spegnimento automatico.
Modalità operative 4.2

Figure 4.2: The four versatile operating modes of the portable AC.
- Modalità di raffreddamento: Provides powerful cooling for your space. Set your desired temperature using the Up/Down buttons.
- Modalità deumidificatore: Reduces humidity in the air. The unit will automatically manage condensation through its self-evaporating system.
- Modalità ventola: Fa circolare l'aria senza raffreddare. Regola la velocità della ventola come desiderato.
- Modalità risparmio: Operates quietly with reduced fan speed and gradually increases the set temperature over time for comfortable sleep.
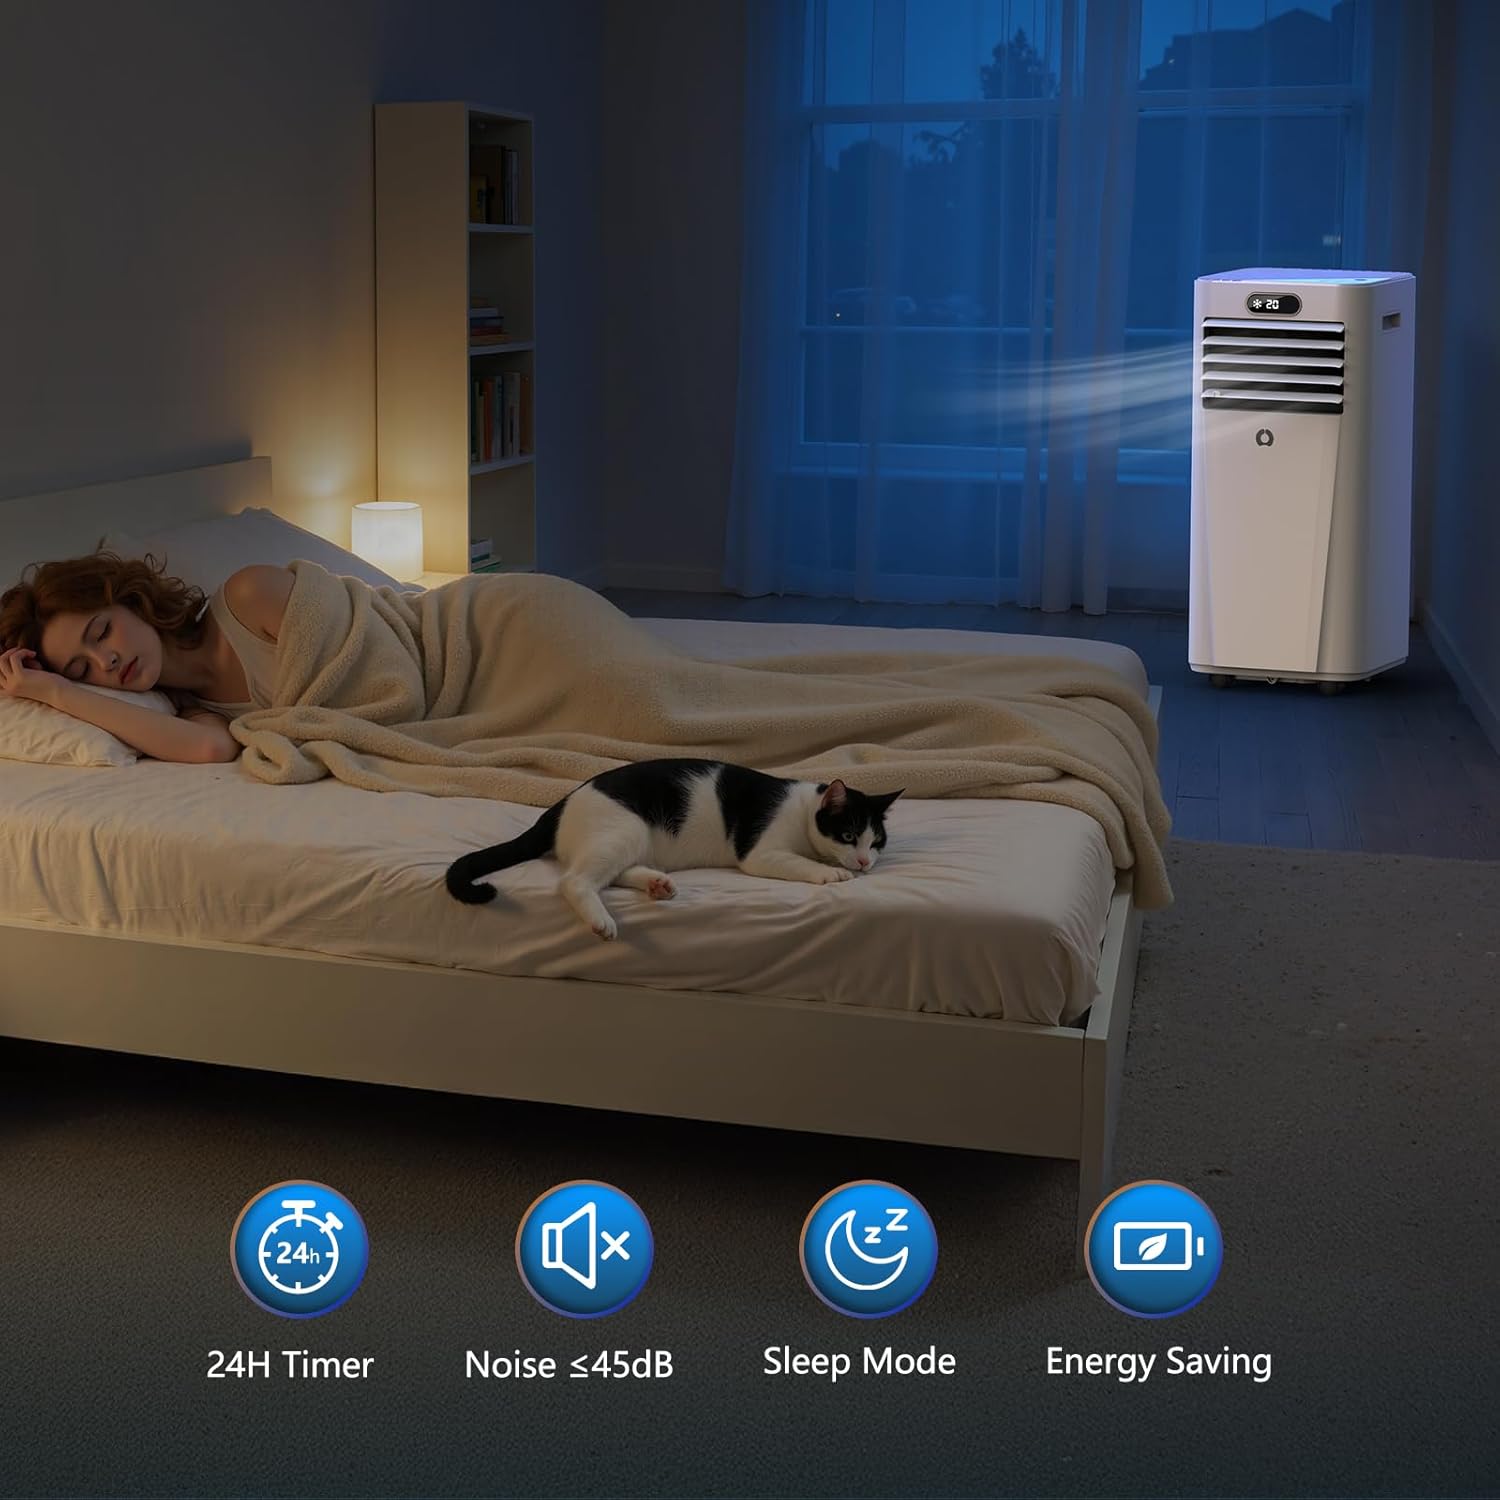
Figure 4.3: Features for enhanced comfort, including Sleep Mode and 24-hour timer.
4.3 4-Way Air Swing
The unit features a 4-way air swing function to distribute cool air evenly throughout the room. This can be activated or deactivated via the control panel or remote control.
4.4 Portabilità
Equipped with 360° swivel wheels and built-in handles, the unit can be easily moved between rooms. Ensure the unit is unplugged before moving.

Figure 4.4: The unit's 360° swivel wheels for effortless movement.
5. Manutenzione
Una manutenzione regolare garantisce prestazioni ottimali e longevità del tuo condizionatore portatile.
5.1 Pulizia del filtro dell'aria
The unit features a washable air filter. Clean the filter regularly (every two weeks or more often depending on usage) to maintain air quality and cooling efficiency.

Figure 5.1: Illustration of the washable air filter.
- Scollegare l'unità dalla presa di corrente.
- Individuare e rimuovere il filtro dell'aria dal retro dell'unità.
- Lavare il filtro sotto l'acqua corrente o utilizzare un aspirapolvere per rimuovere la polvere.
- Attendere che il filtro si asciughi completamente prima di reinstallarlo.
- Reinsert the clean, dry filter into the unit.
5.2 Drenaggio
This unit features a self-evaporating system, which converts most condensation into vapor and expels it through the exhaust hose. This means manual draining is rarely needed under normal operating conditions.
However, in very high humidity environments, some water may accumulate. If the unit stops operating and displays a 'FL' (Full Water) error, you will need to drain the water manually:
- Scollegare l'unità.
- Place a shallow pan or tray under the lower drain port at the back of the unit.
- Rimuovere il tappo di scarico in gomma.
- Lasciare defluire tutta l'acqua accumulata.
- Replace the rubber drain plug firmly.
6. Risoluzione Dei Problemi
Fare riferimento a questa sezione per i problemi più comuni e le relative soluzioni.
| Problema | Possibile causa | Soluzione |
|---|---|---|
| L'unità non si accende | No power supply; Power cord not plugged in; Fuse blown/Circuit breaker tripped; Water tank full. | Check power outlet; Plug in power cord; Reset circuit breaker/Replace fuse; Drain water tank. |
| L'unità non raffredda a sufficienza | Air filter dirty; Air inlet/outlet blocked; Room too large; Doors/windows open; Temperature setting too high. | Clean air filter; Remove obstructions; Ensure room size is within 450 sq. ft.; Close doors/windows; Lower temperature setting. |
| L'unità è rumorosa | Unit not on a flat surface; Air filter dirty. | Posizionare l'unità su una superficie piana e stabile; pulire il filtro dell'aria. |
| Perdita d'acqua | Drain plug not properly inserted; Unit tilted. | Ensure drain plugs are firmly in place; Place unit on a level surface. |
| Il telecomando non funziona | Batterie scariche; ostruzione tra il telecomando e l'unità. | Replace batteries; Remove obstruction. |
7. Specifiche
| Caratteristica | Dettaglio |
|---|---|
| Marca | AriaOrig |
| Numero di modello | A010L-10K |
| Potenza di raffreddamento | Potenza nominale: 10,000 BTU |
| Area di copertura | Fino a 450 mq. |
| Funzioni | Cooling, Dehumidifier, Fan, Sleep Mode |
| Livello di rumore | 45 dB |
| Voltage | 110 volt AC |
| Cosatage | 1514.99 watt |
| Dimensioni del prodotto (P x L x A) | 20" x 30" x 30" |
| Peso dell'articolo | 50 libbre |
| Caratteristica speciale | Altalena a 4 vie |
| Tipo di controllore | Controllo touch, telecomando |
8. Garanzia e supporto
This AirOrig product comes with a full one-year warranty as standard, covering manufacturing defects and malfunctions under normal use.
For technical assistance, troubleshooting, replacement parts, or any questions regarding your AirOrig Portable Air Conditioner, please contact our customer support team. Our expert support is available to provide reliable after-sales service.
Informazioni sui contatti: Refer to the contact details provided in your product packaging or on the official AirOrig websito.
9. Video del prodotto finitoview
Watch this official product video for a visual guide to the AirOrig 10,000 BTU Portable Air Conditioner.
Video 9.1: Un overview of the AirOrig 10,000 BTU Portable Air Conditioner, demonstrating its features and functionality.