1. Introduzione
This manual provides detailed instructions for the proper installation, operation, and maintenance of your Lanzar RBHTG414 Heritage 600 Watt 4-Channel MOSFET Amplifier. To ensure optimal performance and safety, please read this manual thoroughly before attempting to install or operate the amplifier. Conservare questo manuale per future consultazioni.
2. Istruzioni di sicurezza
Durante l'installazione e il funzionamento, osservare sempre le seguenti precauzioni di sicurezza:
- Prima di iniziare qualsiasi lavoro di installazione, scollegare il terminale negativo della batteria del veicolo per evitare cortocircuiti.
- Assicurarsi che tutti i cavi siano correttamente instradati e fissati per evitare danni causati da bordi taglienti o parti mobili.
- Utilizzare cavi di calibro appropriato per i collegamenti di alimentazione e di terra, come specificato nella sezione di installazione.
- Installare il amplificatore in un luogo che consenta un'adeguata ventilazione per evitare il surriscaldamento.
- Evitare di montare il amplificatore in aree esposte a umidità o vibrazioni eccessive.
- Non tentare di riparare o modificare il amplificatore da solo. Affidare tutti gli interventi di manutenzione a personale qualificato.
3. Prodotto finitoview
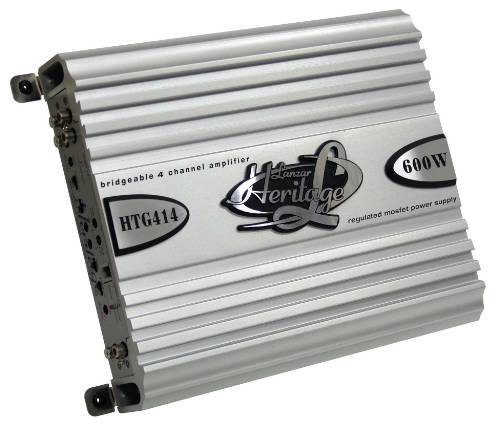
The Lanzar RBHTG414 Heritage amplifier is a 600 Watt, 4-channel MOSFET amplifier designed to deliver powerful and clear audio performance for your car audio system. It features a regulated MOSFET power supply and is bridgeable, offering flexible configuration options for various speaker setups.
4. Configurazione e installazione
Una corretta installazione è fondamentale per le prestazioni e la longevità del tuo amplifier. The Lanzar RBHTG414 is designed for surface mounting.
4.1 Lista di controllo pre-installazione
- Ensure you have all necessary tools and wiring kits (power wire, ground wire, remote turn-on wire, RCA cables, speaker wire, fuses, terminals).
- Choose a mounting location that is dry, well-ventilated, and secure.
- Plan your wiring routes to avoid interference and potential damage.
4.2 Collegamenti di cablaggio
The following outlines general wiring procedures. Consult a professional installer if you are unsure about any steps.
- Power Connection (BATT+): Connect a heavy-gauge power cable (e.g., 8-gauge or 4-gauge depending on total system power) directly from the vehicle's positive battery terminal to the amplifier's BATT+ terminal. Install an in-line fuse holder within 18 inches (45 cm) of the battery.
- Collegamento a terra (GND): Connect a heavy-gauge ground cable of the same length as the power cable from the ampCollegare il terminale GND del generatore a una superficie metallica pulita e non verniciata del telaio del veicolo. Assicurarsi che il collegamento sia solido e a bassa resistenza.
- Accensione remota (REM): Connect a smaller gauge wire (e.g., 18-gauge) from the ampterminale REM del lifier all'uscita di accensione remota dell'unità principale. Questo filo segnala il amplifier per accendere e spegnere l'impianto audio della tua auto.
- Connessioni di ingresso RCA: Connect RCA audio cables from your head unit's pre-amp uscite al amplifier's RCA input jacks. For 4-channel operation, use two pairs of RCA cables (Front L/R, Rear L/R).
- Collegamenti degli altoparlanti: Connect your speakers to the ampterminali di uscita degli altoparlanti dell'amplificatore.
- 4-Channel Stereo Mode: Connect each speaker to its corresponding channel output (e.g., Front Left speaker to CH1+, CH1-, Front Right to CH2+, CH2-, etc.).
- Bridged Mode (2-Channel): For higher power output to subwoofers or a pair of speakers, the RBHTG414 can be bridged. Refer to the amplifier's terminal markings for specific bridged connection points (typically CH1+ and CH2- for one bridged channel, and CH3+ and CH4- for the second). Ensure your speakers are rated for the increased power output in bridged mode.
4.3 Montaggio
Montare saldamente il amplifier to a solid surface using appropriate screws. Ensure there is sufficient space around the amplifier for air circulation, especially around the heat sink fins, to prevent thermal shutdown.
5. Istruzioni per l'uso
Una volta installato, il amplifier will turn on automatically with your head unit. Adjustments should be made carefully to achieve optimal sound quality.
- Ottieni il controllo: The gain control matches the amplifier's input sensitivity to the output level of your head unit. Start with the gain set to minimum, then slowly increase it until you hear distortion, then back off slightly. This is not a volume control.
- Impostazioni crossover: Se il tuo amplifier includes crossover controls (e.g., High-Pass Filter (HPF), Low-Pass Filter (LPF)), adjust them according to your speaker type. HPF is used for full-range speakers to block low frequencies, while LPF is used for subwoofers to block high frequencies.
- Aumento dei bassi: Use the bass boost feature sparingly, if available, as excessive boosting can lead to distortion and potential speaker damage.
6. Manutenzione
Una manutenzione regolare aiuta a garantire la longevità e le prestazioni del tuo amppiù vivace.
- Pulizia: Pulire periodicamente il amplifier's exterior with a soft, dry cloth. Ensure the heat sink fins are free of dust and debris to maintain proper cooling.
- Connessioni: Occasionally check all wiring connections for tightness and corrosion. Loose connections can cause poor performance or damage.
- Ventilazione: Assicurarsi che il amplifier's mounting location remains clear of obstructions that could impede airflow.
7. Risoluzione Dei Problemi
Se riscontri problemi con il tuo amplifier, refer to the following common problems and solutions before seeking professional service.
| Problema | Possibile causa | Soluzione |
|---|---|---|
| Amplifier non si accende | Blown fuse; loose power/ground/remote wire; no power from head unit remote output. | Controllare il fusibile in linea e amplifier fuses; verify all power, ground, and remote connections are secure; test remote wire for 12V when head unit is on. |
| Nessuna uscita audio | Loose RCA cables; incorrect gain setting; speaker wires disconnected; amplifier in modalità protetta. | Controllare le connessioni RCA su entrambi amplifier and head unit; ensure gain is set correctly; verify speaker wire connections; check for protect light indicator. |
| Suono distorto | Gain set too high; improper crossover settings; damaged speaker; poor ground connection. | Reduce gain setting; adjust crossover filters; inspect speakers for damage; ensure ground connection is solid. |
| Ampil lificatore si surriscalda | Insufficient ventilation; impedance mismatch; prolonged high-power operation. | Assicurare un adeguato flusso d'aria attorno al amplifier; verify speaker impedance matches amplifier's rating; reduce volume or operating time. |
8. Specifiche
The following are key specifications for the Lanzar RBHTG414 Heritage Amplificatore:
- Marca: Lanzar
- Numero di modello: RBHTG414
- Numero di canali: 4
- Potenza in uscita: 600 Watts (Peak)
- Ampclasse lifier: MOSFET
- Tipo di montaggio: Montaggio in superficie
- Dimensioni del prodotto (L x P x A): 2 x 2 x 2 pollici
- Peso dell'articolo: 10.89 libbre
- Codice UPC: 068888725088
- Colore: BLACK (Unit shown in image is silver, but product data indicates BLACK)
9. Garanzia e supporto
Lanzar products are designed for reliability and performance. For information regarding warranty coverage, technical support, or service, please refer to the warranty card included with your product or visit the official Lanzar website. Please have your model number (RBHTG414) and purchase information ready when contacting support.