1. Introduzione
The Phoenix DEI 508D Proximity Radar Motion Sensor is designed to enhance the security of your vehicle by detecting motion both inside and outside the vehicle. This dual-zone sensor provides an early warning system, triggering your car alarm upon detecting unauthorized proximity or intrusion. This manual provides detailed instructions for installation, operation, and maintenance to ensure optimal performance and longevity of your sensor.
2. Informazioni sulla sicurezza
- Prima di iniziare qualsiasi installazione elettrica, scollegare sempre la batteria del veicolo per evitare cortocircuiti o scosse elettriche.
- Ensure all wiring connections are secure and properly insulated to prevent fire hazards or system malfunctions.
- Do not attempt to modify the sensor's internal components. Unauthorized modifications can void the warranty and pose safety risks.
- Consult a professional automotive technician if you are unsure about any installation steps.
- Keep the sensor away from excessive moisture, heat, and direct sunlight to prevent damage.
3. Contenuto della confezione
Dopo aver aperto la confezione, verificare che tutti i componenti siano presenti e integri:
- DEI 508D Proximity Radar Motion Sensor Unit
- Cablaggio elettrico
- Guida all'installazione (questo manuale)
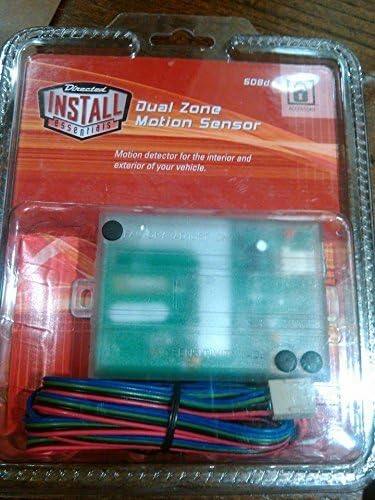
Figure 3.1: The Phoenix DEI 508D Proximity Radar Motion Sensor shown in its clear retail packaging, displaying the main sensor unit with its green circuit board visible, and a bundled wiring harness with multiple colored wires (red, black, blue, green, purple) connected to a white connector. The packaging also features the 'Directed INSTALL essentials' logo and text indicating 'Dual Zone Motion Sensor' and 'Motion detector for the interior and exterior of your vehicle.'
4. Configurazione e installazione
4.1 Lista di controllo pre-installazione
- Assicurarsi che la batteria del veicolo sia scollegata.
- Gather necessary tools: wire strippers, crimpers, electrical tape, zip ties, multimeter.
- Identify a suitable mounting location for the sensor.
4.2 Schema elettrico e collegamenti
The DEI 508D sensor typically connects to your existing car alarm system. Refer to your car alarm's manual for specific input requirements. Common connections are:
- Filo rosso: +12V Constant Power. Connect to a fused constant 12V source.
- Filo nero: Ground. Connect to a solid chassis ground point.
- Filo blu: Zone 1 Output (Warn-Away). Connect to the alarm's warn-away or pre-warn input. This output is typically a negative pulse.
- Filo verde: Zone 2 Output (Full Trigger). Connect to the alarm's full trigger input. This output is typically a negative pulse.
- Filo viola: Ignition Input. Connect to a switched 12V source that is active when the ignition is ON. This wire is used to disable the sensor when the vehicle is running.
4.3 Montaggio del sensore
Choose a central location within the vehicle's cabin, such as under the dashboard, center console, or behind the glove compartment. The sensor should be mounted securely and away from direct metal obstructions that could interfere with its radar field. Ensure the sensor is level and not obstructed by large metal objects or wiring harnesses.
- Use zip ties or double-sided automotive tape to secure the sensor firmly.
- Avoid mounting near large speakers or other devices that emit strong electromagnetic fields.
- Test the sensor's coverage after mounting to ensure optimal detection zones.
5. Istruzioni per l'uso
The DEI 508D sensor operates automatically once properly installed and connected to your car alarm system. It creates two distinct detection zones: an outer
Documenti correlati - DEI-508D
 |
Istruzioni per l'uso della serratura elettronica serie Phoenix DS2500E Istruzioni operative complete per la serratura elettronica Phoenix serie DS2500E, che riguardano la configurazione, la gestione del codice, il doppio controllo, le funzioni di allarme e la sostituzione della batteria. |
 |
Prestazioni Phoenix Solution LGR AmpManuale del proprietario e guida all'installazione del lifier Manuale del proprietario, istruzioni di installazione, funzionamento e assistenza per Therma-Stor Phoenix Solution LGR Performance Amplifier (PN 4026600). Scopri le sue specifiche, la configurazione, la manutenzione e la garanzia. |
 |
Manuale d'uso e istruzioni per l'uso del deumidificatore Phoenix 250 MAX LGR Manuale d'uso completo per il deumidificatore Phoenix 250 MAX LGR di Therma-Stor. Include installazione, funzionamento, manutenzione, risoluzione dei problemi, specifiche e garanzia per questa apparecchiatura di ripristino ad alta capacità. |
 |
Prestazioni Phoenix Solution LGR AmpManuale del proprietario del lifier Manuale del proprietario per Therma-Stor Phoenix Solution LGR Performance Amplifier, che copre l'installazione, il funzionamento, l'assistenza, le specifiche, la risoluzione dei problemi e le informazioni sulla garanzia. |
 |
Manuale del proprietario del deumidificatore Phoenix 200 MAX LGR: istruzioni per l'installazione, il funzionamento e la manutenzione Manuale completo del proprietario per il deumidificatore ad alta capacità Phoenix 200 MAX LGR, che copre l'installazione, il funzionamento, la manutenzione, la risoluzione dei problemi e le informazioni sulla garanzia di Therma-Stor. |
 |
Manuale del proprietario del deumidificatore Phoenix 200 HT LGR | Installazione, funzionamento, assistenza Manuale d'uso completo per il deumidificatore Phoenix 200 HT LGR di Therma-Stor. Include specifiche, funzionamento, manutenzione, risoluzione dei problemi, assistenza, ricambi e garanzia per questa apparecchiatura di restauro ad alte prestazioni. |