Introduzione
This manual provides comprehensive instructions for the installation, operation, and maintenance of your Sunforce 50033 15 Watt Solar Battery Charging Kit. This kit is designed to provide clean, free power for 12-volt battery charging in various applications, including RVs, cabins, homes, boats, and remote power setups. Please read this manual thoroughly before using the product to ensure safe and efficient operation.
Caratteristiche principali
- Designed for RVs, cabins, homes, boats, back-up, and remote power use.
- Completely weatherproof for enhanced durability in various conditions.
- Features a sturdy and durable aluminum frame for extended outdoor use.
- Amorphous solar panel technology ensures functionality in all daylight conditions, including cloudy days.
- Built-in discharge protection to safeguard your battery from over-discharge.
- Kit includes: one 15 Watt amorphous solar panel, a 7 Amp solar charge controller, battery clamps, charge controller wire adapter, and mounting hardware.
Contenuto della confezione
Verifica che tutti i componenti elencati di seguito siano inclusi nel tuo kit:
- 15 Watt Amorphous Solar Panel
- 7 Amp Regolatore di carica solare
- Batteria Clamps
- Charge Controller Wire Adapter
- Hardware di montaggio

Immagine: Oltreview of the Sunforce 15 Watt Solar Battery Charging Kit components, showing the solar panel and the charge controller.
Configurazione e installazione
Follow these steps to properly set up your solar charging kit:
- Scegli una posizione: Select a location that receives optimal, unobstructed sunlight throughout the day. The panel can be mounted on a flat surface such as a roof (home or RV) or any other suitable area.
- Montare il pannello solare:
- Assemble the mounting frame using the provided hardware.
- Securely attach the mounting frame to your chosen surface. Ensure all screws are tightened to prevent movement.
- Carefully place the solar panel onto the mounted frame. Align the brackets under the panel with the mounting frame and secure them firmly.
- Ideally, tilt the panels to a 20-degree angle for optimal sun exposure.
- Wiring the Solar Panel:
- Access the electrical terminals located in the black box on the back of the solar panel. Remove the cover.
- Route the wiring through the allocated holes and secure them.
- Loosen the positive terminal screw with a Phillips screwdriver, then place the positive wire under the loosened screw and tighten. Repeat this process for the negative terminal and wire.
- After connecting the wires, use a voltmeter to test the connections. The panel should output approximately 14.5 volts in direct sunlight.
- If installing multiple panels, connect them in parallel as shown in the installation video.
- Replace the cover over the electrical box.
- Collegamento del regolatore di carica:
- Connect the positive and negative wires from the solar panel to the "Array Terminal" on the charge controller.
- The charge controller can be permanently mounted indoors or in a protected area.
- Collegamento alla batteria:
- Attach the negative wire from the solar charge controller to the negative terminal of your 12-volt battery.
- Attach the positive wire from the solar charge controller to the positive terminal of your 12-volt battery.
- Assicurarsi che tutti i collegamenti siano sicuri.
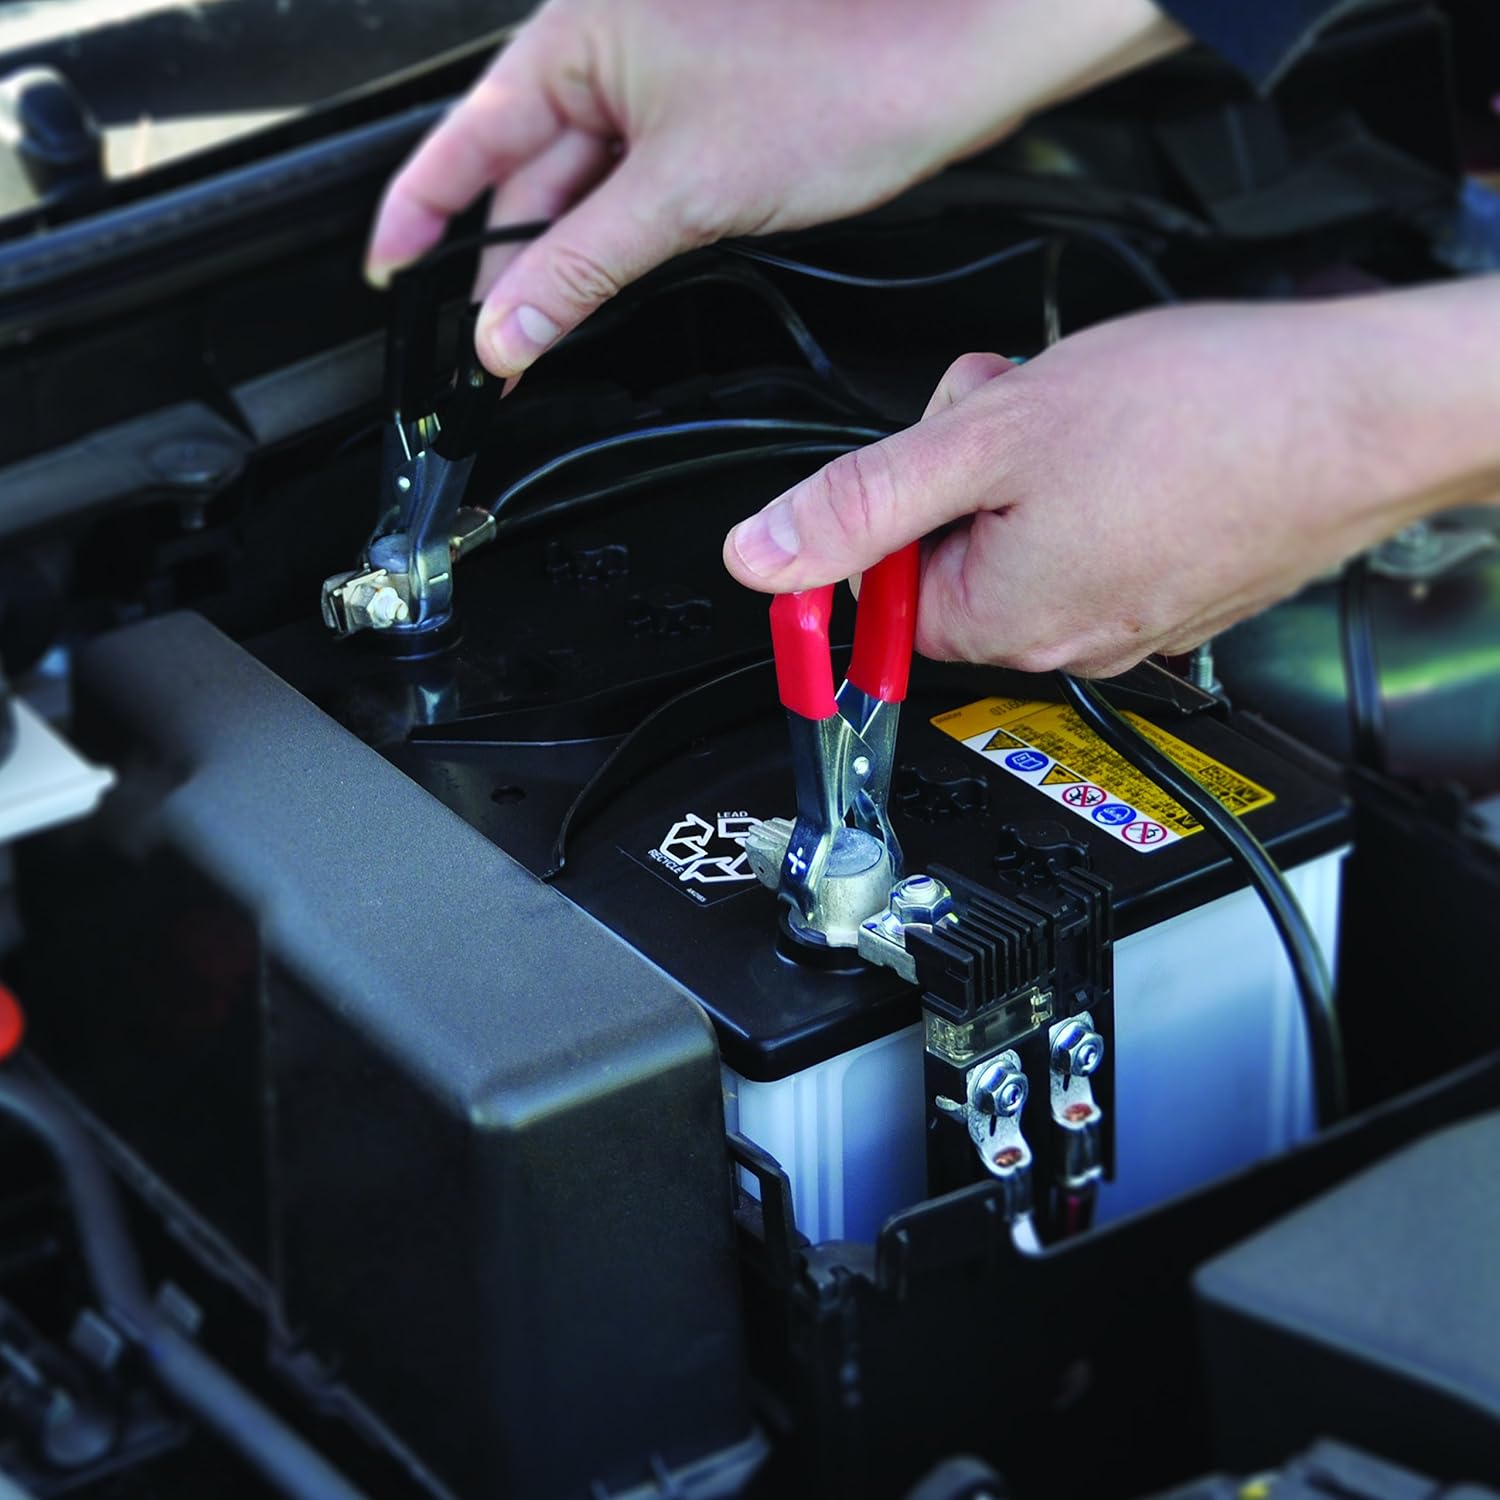
Image: Close-up of hands connecting battery clamps to the terminals of a car battery, illustrating the final connection step.
Videoguida all'installazione
Video: A detailed guide on how to install a solar panel system, covering mounting, wiring, and connecting to a battery. This video demonstrates the entire setup process for the solar charging kit.
Operazione
Once installed, the Sunforce 15 Watt Solar Battery Charging Kit operates automatically. The solar panel converts sunlight into electrical energy, which is then regulated by the 7 Amp charge controller before being supplied to your 12-volt battery. The charge controller prevents overcharging and protects against battery discharge at night.
- Ensure the solar panel is clean and free of obstructions for maximum efficiency.
- Monitor the charge controller's indicators (if available) to confirm proper charging status.
- The system is designed for continuous trickle charging and maintenance of 12-volt batteries.
Manutenzione
Regular maintenance ensures optimal performance and longevity of your solar charging kit:
- Pulizia del pannello: Pulire periodicamente la superficie del pannello solare con un panno morbido eamp panno per rimuovere polvere, sporco e detriti. Evitare detergenti abrasivi o prodotti chimici aggressivi.
- Verifiche della connessione: Annually inspect all electrical connections for tightness and corrosion. Tighten any loose connections and clean any corrosion with a wire brush if necessary.
- Ispezione dei cavi: Controllare tutti i cavi per verificare la presenza di segni di usura, sfilacciamento o danni. Sostituire immediatamente i cavi danneggiati.
- Stato della batteria: Regularly check the water levels in flooded lead-acid batteries and top up with distilled water if needed. For sealed batteries, ensure terminals are clean.
- Rimozione dell'ostruzione: Ensure no new obstructions (e.g., tree branches, leaves, snow) are blocking sunlight from reaching the panel.
Risoluzione dei problemi
| Problema | Possibile causa | Soluzione |
|---|---|---|
| No charge or low charge output |
|
|
| Batteria che non tiene la carica |
|
|
| Charge controller not indicating charge |
|
|
Specifiche
| Attributo | Valore |
|---|---|
| Marca | Sunforce |
| Numero di modello | 50033 |
| Materiale | Alluminio |
| Corrente dell'adattatore CA | 7 Amps |
| Volume massimotage | 12 Volt |
| Potenza massima | 15 Watt |
| Peso dell'articolo | 8.58 libbre |
| Dimensioni del prodotto | 43 x 17 x 5 pollici |
| Codice UPC | 787769500339 |
Garanzia e supporto
Per informazioni sulla garanzia o supporto tecnico, fare riferimento al sito ufficiale del produttore webo contattare direttamente il servizio clienti. Conservare la ricevuta d'acquisto come prova d'acquisto per eventuali reclami in garanzia.


