1. Introduzione
This manual provides comprehensive instructions for the setup, operation, and maintenance of your Geemarc CL100 Amplified Big Button Corded Phone. Please read this manual carefully to ensure proper use and to maximize the benefits of your new telephone.
The Geemarc CL100 is designed for ease of use, featuring large buttons, adjustable amplification, and visual indicators, making it suitable for individuals with hearing or visual impairments. This telephone is line-powered and does not require an external power source.
Nota importante: This telephone does not include a built-in answering machine, speakerphone, caller display, talking caller ID, talking keypad, or voice assist functionality.
2. Prodotto finitoview
2.1 Contenuto della confezione
- Geemarc CL100 Corded Telephone Base
- Cornetta
- Cavo a spirale del microtelefono
- Cavo della linea telefonica
- Manuale dell'utente (questo documento)
2.2 Telephone Layout
Familiarize yourself with the key components and controls of your Geemarc CL100 phone.

Figura 1: Top-down view of the Geemarc CL100 phone, illustrating the large numeric keypad, function buttons, and memory slots.
- portatile: For speaking and listening during calls.
- Tastiera numerica: Large, easy-to-read buttons for dialing numbers.
- P1, P2, P3 Buttons: Priority memory buttons for frequently called numbers.
- Pulsanti M1-M9: One-touch memory buttons for storing additional numbers.
- Pulsante di ricomposizione: Compone l'ultimo numero chiamato.
- Pulsante Flash: Used for network services (e.g., call waiting).
- Pulsante Negozio: Utilizzato per programmare i numeri di memoria.
- Tasto muto: Disattiva temporaneamente il microfono durante una chiamata.
- Interruttore di controllo del tono: Adjusts the audio tone for clearer conversations.
- Interruttore di controllo del volume: Adjusts the receiving volume during a call.
- Indicatore visivo della suoneria: Flashes when an incoming call is received.
- Memory Index Card: Pull-out card for noting stored memory numbers.

Figura 2: Lato view of the phone, illustrating the ringer ON/OFF switch and the telephone line connection port.
3. Impostazione
3.1 Collegamento del telefono
- Collegare il portatile: Plug one end of the coiled handset cord into the handset and the other end into the handset jack on the side of the telephone base.
- Collegare la linea telefonica: Plug one end of the telephone line cord into the jack labeled with a telephone icon on the back or side of the phone base. Plug the other end into your wall telephone jack.
- Fonte di energia: The Geemarc CL100 is powered by the telephone line and does not require an external power adapter.
- Interruttore suoneria: Ensure the ringer switch (located on the side) is set to "Low" or "High" for audible ringing.
3.2 Controlli iniziali
- Sollevare la cornetta e attendere il segnale di linea libera. Se non si sente alcun segnale, controllare tutti i collegamenti.
- Make a test call to ensure proper functionality.
4. Istruzioni per l'uso
4.1 Effettuare una chiamata
- Sollevate il microtelefono.
- Attendere il segnale di linea.
- Dial the required number using the numeric keypad.
- Upon completion of the call, carefully replace the handset in the cradle to disconnect.
4.2 Rispondere a una chiamata
When an incoming call is received, the phone will ring and the visual indicator will flash.
- Sollevare il ricevitore per rispondere alla chiamata.
- Upon completion of the call, carefully replace the handset in the cradle.
4.3 Ricomposizione dell'ultimo numero
- Sollevate il microtelefono.
- Attendere il segnale di linea.
- Premere il tasto Ricomposizione button. The previously dialed number will be automatically redialed.
- Note: This function does not apply to numbers dialed from memory buttons.
4.4 Funzione Mute
The Mute button allows you to speak privately without your caller overhearing.
- Durante una chiamata, premere il tasto Muto button. You will still hear the caller, but they will not hear you.
- Premere il tasto Muto button again to resume normal conversation.
4.5 Storing Telephone Numbers (Memory Dialing)
Your telephone can store 12 direct memory numbers: 3 priority numbers (P1, P2, P3) and 9 standard memory numbers (M1-M9). Priority memories can store up to 24 digits, and M1-M9 can store up to 32 digits.
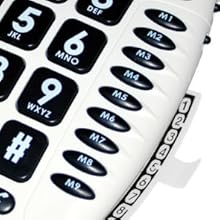
Figura 3: Detail of the memory buttons (M1-M9) and the integrated memory index card.
- Sollevate il microtelefono.
- Premere il tasto Negozio pulsante.
- Comporre il numero di telefono che si desidera memorizzare.
- Premere il tasto Negozio di nuovo il pulsante.
- Press the desired memory button (P1, P2, P3, or M1-M9) where you want to save the number.
- Riagganciare il ricevitore.
- Note: Use the index card located under the base to record your stored numbers for easy reference. Stored memories are protected even if the phone line is unplugged.
4.6 Dialing Stored Numbers
- Sollevate il microtelefono.
- Attendere il segnale di linea.
- Press the appropriate memory button (P1, P2, P3, or M1-M9). The stored number will be dialed automatically.
4.7 Recall (R), * & # Buttons
These buttons are used in conjunction with new services provided on digital exchanges. For specific details on their use, please contact your network operator.
4.8 Compatibilità con gli apparecchi acustici
If you are using this telephone with a hearing aid, set your hearing aid to the "T" (Telecoil) setting for optimal audio quality.
5. Manutenzione
- Pulizia: Pulisci il telefono con un panno morbido eamp panno. Non usare detergenti abrasivi o solventi.
- Magazzinaggio: Conservare il telefono in un luogo fresco e asciutto, lontano dalla luce solare diretta e da temperature estreme.
- Evitare i liquidi: Do not expose the telephone to water or other liquids.
- Cura del cavo: Ensure the handset and line cords are not tangled or pinched to prevent damage.
6. Risoluzione Dei Problemi
| Problema | Possibile causa | Soluzione |
|---|---|---|
| Nessun tono di linea | Il cavo della linea telefonica non è collegato correttamente. | Check that both ends of the telephone line cord are securely plugged in. |
| Non riesco a sentire il chiamante / Il chiamante non riesce a sentirmi | Volume settings are too low or Mute is active. | Adjust the Volume control. Ensure the Mute button is not pressed. |
| Il telefono non squilla | Ringer switch is set to "Off". | Set the ringer switch (on the side) to "Low" or "High". |
| Stored memory numbers are lost | This phone protects stored memories even if the phone line is unplugged. If numbers are lost, they may not have been stored correctly. | Re-store the numbers following the instructions in Section 4.5. |
| Difficulty dialing quickly | Some older phone systems may require a slower dialing pace. | Try dialing at a slightly slower pace. Consider using the memory dial function for frequently called numbers. |
7. Specifiche
- Modello: Geemarc CL100
- Tipo: Telefono con filo
- Amplificazione: Up to 30 dB receiving volume
- Volume della suoneria: Adjustable up to 85 dB
- Memoria: 3 Priority (P1-P3), 9 One-touch (M1-M9)
- Fonte di energia: Alimentato dalla linea (non è richiesto alcun adattatore esterno)
- Compatibile con gli apparecchi acustici: Yes (T-coil setting)
- Dimensioni: Circa 7.5 x 8 x 3 pollici (19 x 20.3 x 7.6 cm)
- Peso: Circa 2.25 libbre (1.02 kg)
- Colore: Bianco
8. Garanzia e supporto
8.1 Informazioni sulla garanzia
For information regarding the warranty period and terms for your Geemarc CL100 telephone, please refer to the warranty card included with your purchase or visit the official Geemarc websito. Conservare la prova d'acquisto per eventuali reclami in garanzia.
8.2 Assistenza clienti
If you encounter any issues not covered in the troubleshooting section or require further assistance, please contact Geemarc customer support. Contact details can typically be found on the Geemarc websito o sulla confezione del prodotto.
Per risorse online, visitare: www.geemarc.com


