1. Introduzione
Thank you for choosing the Ground Zero GZIA 4115HPX 4-Channel Car Audio Amplificatore. Questo amplifier is designed to deliver high-quality audio performance for your vehicle's sound system. This manual provides essential information for the proper installation, operation, and maintenance of your amplificatore. Leggere attentamente questo manuale prima di procedere all'installazione o all'utilizzo per garantire prestazioni e sicurezza ottimali.
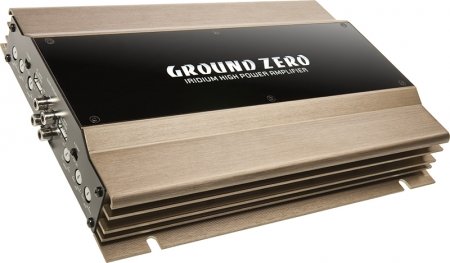
Figure 1: Ground Zero GZIA 4115HPX 4-Channel Car Audio Amplifier. This image displays the external casing del amplifier, highlighting its compact design and heat sink fins.
2. Istruzioni di sicurezza
Informazioni importanti sulla sicurezza: Improper installation or use can lead to serious injury, damage to the amplificatore o danni al veicolo.
- Prima di iniziare qualsiasi lavoro elettrico, scollegare sempre il terminale negativo della batteria del veicolo.
- Ensure all wiring is properly routed and secured to prevent pinching, chafing, or short circuits.
- Use appropriate gauge wiring for power, ground, and speaker connections as recommended by the manufacturer.
- Install a fuse or circuit breaker on the main power wire as close to the battery as possible.
- Evitare di montare il amplificatore in luoghi esposti alla luce solare diretta, a calore eccessivo, umidità o polvere.
- Non azionare il amplificatore se è danneggiato o malfunzionante. Richiedere assistenza professionale.
- Mantieni il amplifier's ventilation areas clear to prevent overheating.
3. Configurazione e installazione
Una corretta installazione è fondamentale per le prestazioni e la longevità del tuo amplifier. If you are unsure about any part of the installation process, consult a professional car audio installer.
3.1 Disimballaggio
Rimuovere con attenzione il file amplifier from its packaging. Inspect the unit for any signs of damage that may have occurred during shipping. Retain the packaging for future transport or service needs.
3.2 Montaggio
The GZIA 4115HPX amplifier is designed for surface mount installation. Choose a mounting location that is:
- Secure and stable, preventing vibration.
- Ben ventilato per consentire una corretta dissipazione del calore.
- Protected from moisture and direct sunlight.
- Accessibile per cablaggio e regolazioni.
Use the provided mounting screws to secure the amplifier to a solid surface in your vehicle. Ensure no existing wiring, fuel lines, or brake lines are damaged during drilling.
3.3 Collegamenti di cablaggio
Refer to the connection diagrams below for proper wiring. All connections should be tight and secure to prevent signal loss or electrical issues.
3.3.1 Cablaggio di alimentazione e di terra
- Potenza (B+): Connect a suitable gauge power cable directly from the positive terminal of the vehicle's battery to the amplifier's B+ terminal. Install an inline fuse (not included) within 18 inches (45 cm) of the battery.
- Terra (GND): Connect a suitable gauge ground cable from the amplifier's GND terminal to a clean, unpainted metal surface of the vehicle's chassis. Ensure a good electrical connection. The ground cable should be as short as possible.
- Remoto (REM): Collegare un cavo di accensione remota dall'uscita remota dell'unità principale al ampterminale REM del lificatore. Questo filo trasforma il amplifier acceso e spento con l'unità principale.
3.3.2 Cablaggio degli altoparlanti
The GZIA 4115HPX is a 4-channel amplifier. Connect your speakers to the corresponding speaker output terminals (CH1, CH2, CH3, CH4). Ensure correct polarity (+ to + and - to -) for each speaker.
- For stereo operation, connect one speaker per channel.
- For bridged operation (e.g., for a subwoofer), refer to the specific bridging instructions on the amplifier or in a detailed wiring diagram.
3.3.3 Collegamenti di ingresso RCA
Collegare i cavi RCA dal pre-amplificatore dell'unità principaleamp uscite al amplifier's RCA input jacks (INPUT CH1/2, INPUT CH3/4).

Figura 2: Interno view of the Ground Zero GZIA 4115HPX amplifier's circuit board. This image shows the internal components, including capacitors, resistors, and the transformer, which are responsible for audio processing and power delivery.

Figura 3: Interno dettagliato view of the Ground Zero GZIA 4115HPX amplifier. This image provides a closer look at the power supply section and output stage components, indicating the amplifier's robust construction.
3.4 Regolazioni iniziali
Before powering on, ensure all connections are correct and secure.
- Controllo di guadagno: Set the gain controls (LEVEL) on the amplifier to their minimum position.
- Impostazioni crossover: Se il tuo amplifier has built-in crossovers (HPF/LPF), set them according to your speaker type. For full-range speakers, you might use the HPF (High Pass Filter) to protect them from low frequencies. For subwoofers, use the LPF (Low Pass Filter).
4. Funzionamento del Amppiù vivace
Una volta installato, il amplifier will turn on automatically with your head unit via the remote wire.
4.1 Setting Gain Levels
The gain control is not a volume knob; it matches the output voltage della tua unità principale alla sensibilità di ingresso del amppiù vivace.
- Turn your head unit volume to about 75-80% of its maximum.
- Aumenta lentamente il ampil controllo del guadagno del filtro finché non senti una leggera distorsione, quindi abbassalo leggermente finché il suono non diventa chiaro.
- Repeat for all channels if independent gain controls are present.
4.2 Adjusting Crossovers and Bass Boost
- Filtro passa alto (HPF): Used for full-range speakers to block low frequencies that they cannot reproduce effectively. Adjust to protect speakers and improve clarity.
- Filtro passa basso (LPF): Used for subwoofers to allow only low frequencies to pass through. Adjust to blend with your main speakers.
- Aumento dei bassi: Use sparingly. Excessive bass boost can lead to distortion and potential damage to speakers or the amplifier. Adjust to enhance low-frequency response as desired, but avoid overdriving the system.
5. Manutenzione
The Ground Zero GZIA 4115HPX amplifier richiede una manutenzione minima.
- Pulizia: Pulire periodicamente l'esterno del amplifier with a soft, dry cloth to remove dust. Do not use harsh chemicals or abrasive cleaners.
- Ventilazione: Assicurarsi che il amplifier's heat sink fins and surrounding area remain free of obstructions to allow for proper airflow and cooling.
- Verifica della connessione: Occasionally check all power, ground, remote, and speaker connections to ensure they remain tight and free of corrosion.
6. Risoluzione Dei Problemi
Se riscontri problemi con il tuo amplifier, consultare la seguente guida alla risoluzione dei problemi prima di contattare l'assistenza.
| Problema | Possibile causa | Soluzione |
|---|---|---|
| Amplifier does not turn on (no power indicator). |
|
|
| Nessun suono dagli altoparlanti. |
|
|
| Qualità del suono distorta o scarsa. |
|
|
| Amplifier overheats (protection light on). |
|
|
7. Specifiche
The following are the technical specifications for the Ground Zero GZIA 4115HPX 4-Channel Car Audio Amplificatore:
| Caratteristica | Dettaglio |
|---|---|
| Numero di modello | GZIA 4115HPX |
| Numero di canali | 4 |
| Output Channel Quantity | 4 |
| Voltage | 14.4 Volt |
| Cosatage (massimo) | 500 Watt |
| Tipo di montaggio | Montaggio in superficie |
| Peso dell'articolo | 2 kg 900 gr |
| Dimensioni del pacco | Dimensioni: 43.4 x 25 x 7.9 cm |
| ASIN | B006VTSQ8C |
8. Informazioni sulla garanzia
Ground Zero products are designed and manufactured to the highest quality standards. For detailed warranty terms and conditions, please refer to the warranty card included with your product or visit the official Ground Zero websito. Conservare la prova d'acquisto per eventuali reclami in garanzia.
9. Assistenza clienti
If you require further assistance or have questions not covered in this manual, please contact Ground Zero customer support or your authorized dealer. Contact information can typically be found on the official Ground Zero websito.


