1. Introduzione
This manual provides comprehensive instructions for the installation, operation, and maintenance of your Yale YSV/200/DB1 Value Electronic Safe. Please read this manual thoroughly before using the safe to ensure proper function and security.

Immagine: Frontale view of the Yale YSV/200/DB1 Value Electronic Safe.
2. Informazioni sulla sicurezza
- Non conservare le chiavi di emergenza all'interno della cassaforte. Conservarle in un luogo sicuro e separato.
- Assicurarsi che la cassaforte sia montata saldamente per impedirne la rimozione non autorizzata.
- Sostituire tempestivamente le batterie quando appare l'indicatore di batteria scarica per evitare di rimanere bloccati.
- Tenere la cassaforte lontana da umidità eccessiva o temperature estreme.
3. Contenuto della confezione
Verificare che tutti gli articoli siano presenti nel pacco:
- Yale YSV/200/DB1 Electronic Safe Unit
- Chiavi di emergenza (2)
- 4 batterie AAA
- Mounting Hardware (bolts/screws)
- Manuale dell'utente (questo documento)
4. Impostazione
4.1 Installazione della batteria
The safe requires 4 AAA batteries for operation. These are included in your package.
- Open the safe door using the emergency override key (see section 5.3 if needed).
- Individuare il vano batterie all'interno dello sportello della cassaforte.
- Inserire le 4 batterie AAA, assicurandosi della corretta polarità (+/-).
- Chiudere il coperchio del vano batterie.

Image: Detail of the electronic keypad and manual override lock.
4.2 Montaggio della cassaforte
For enhanced security, it is recommended to securely mount the safe to a floor or wall using the provided hardware.
- Choose a suitable location for mounting. Ensure the surface is solid and can support the weight of the safe and its contents.
- Segnare i punti di foratura attraverso i fori preforati all'interno della cassaforte.
- Drill pilot holes into the chosen surface.
- Position the safe and secure it using the provided mounting bolts/screws.
- Assicurarsi che la cassaforte sia fissata saldamente e non oscilli.
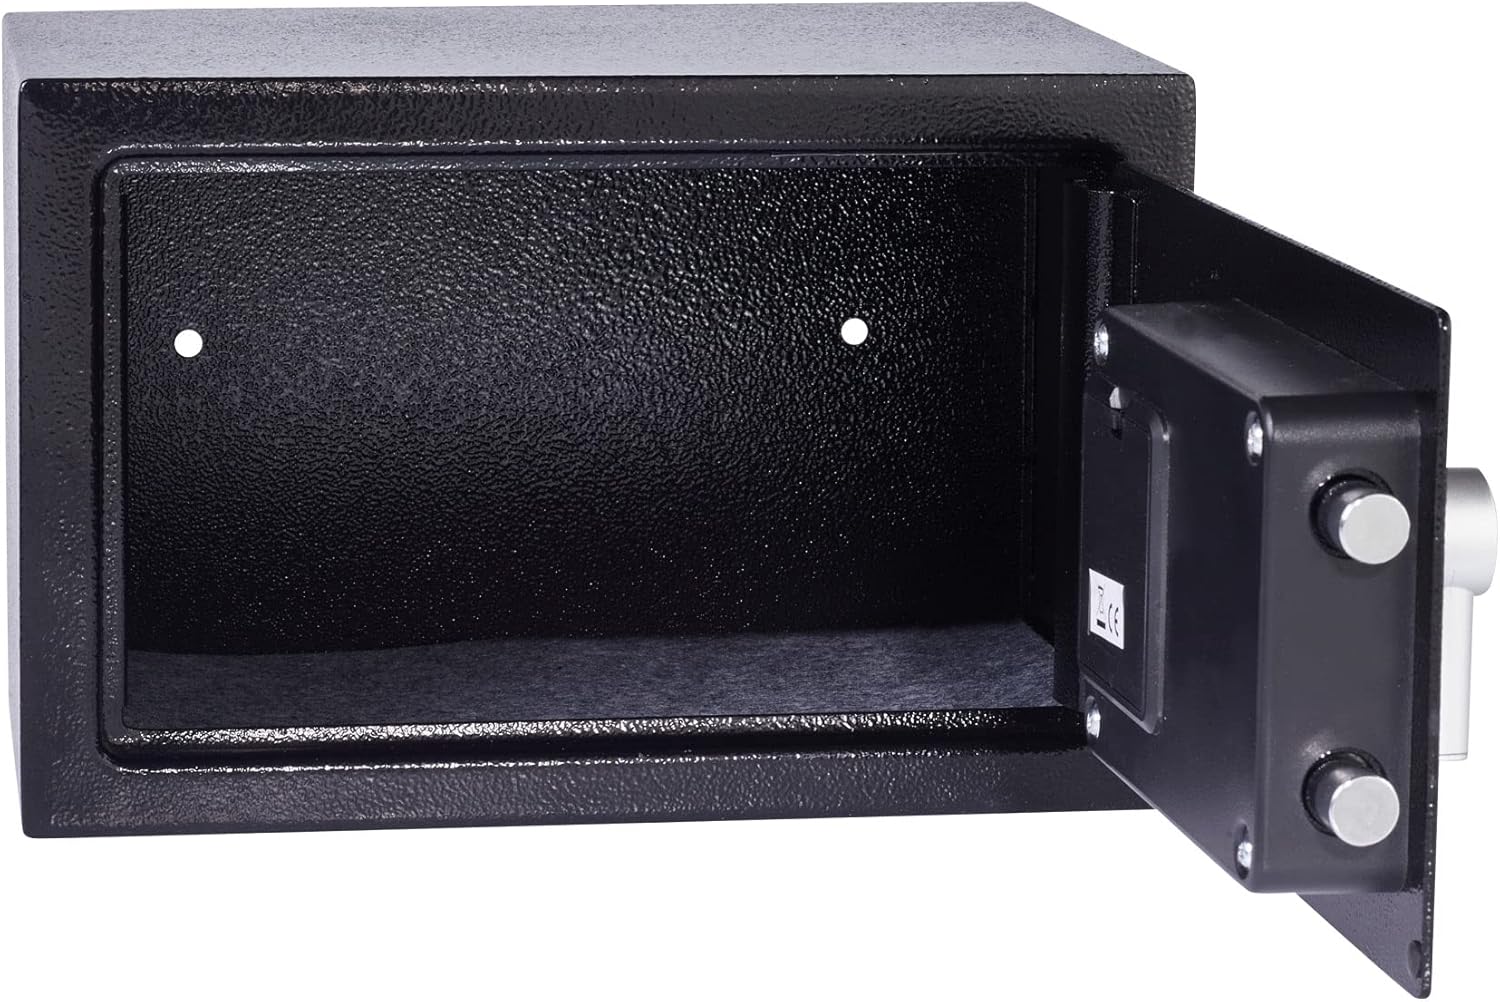
Image: Interior of the safe showing pre-drilled mounting holes.
5. Istruzioni per l'uso
5.1 Setting Your User Code
The safe comes with a factory default code (usually 1-2-3-4 or similar, refer to quick start guide if provided). It is crucial to change this immediately.
- With the safe door open, press the red or green reset button located on the inside of the door (often near the hinge or battery compartment). The safe will beep, and the yellow indicator light will illuminate.
- Enter your new personal code (3-8 digits) on the keypad.
- Press the 'E' or '#' button to confirm. The safe will beep again, and the yellow light will turn off, indicating the new code is set.
- Provare il nuovo codice più volte con la porta aperta prima di chiuderla.

Image: Safe door open, revealing the interior and locking mechanism.
5.2 Apertura della cassaforte con il tuo codice
- Inserisci il tuo codice personale sulla tastiera.
- Press the 'E' or '#' button. The green indicator light will illuminate.
- Entro 5 secondi, ruotare la manopola in senso orario per aprire lo sportello della cassaforte.
5.3 Utilizzo della chiave di emergenza
In case of forgotten code or battery failure, the safe can be opened using the emergency override key.
- Individuare la serratura, solitamente nascosta dietro una piccola copertura sul pannello della tastiera.
- Insert the emergency override key and turn it counter-clockwise.
- Tenendo la chiave girata, ruotare la manopola in senso orario per aprire lo sportello della cassaforte.
- Una volta aperto, rimuovere la chiave.
Video: Demonstrates opening the Yale safe using the electronic keypad and the emergency override key. It shows the keypad entry, turning the knob, and the use of the hidden keyhole.
6. Manutenzione
6.1 Sostituzione della batteria
When the batteries are low, the red indicator light will flash or remain on after entering your code. Replace all 4 AAA batteries promptly to ensure continued operation.
- Apri la porta della cassaforte.
- Individuare il vano batteria sul lato interno dello sportello.
- Rimuovere le vecchie batterie e smaltirle in modo responsabile.
- Inserire 4 batterie AAA nuove, rispettando la polarità corretta.
- Chiudere il coperchio del vano batterie.
6.2 Pulizia
Pulisci l'esterno della cassaforte con un panno morbido eamp panno. Non utilizzare detergenti abrasivi o solventi, poiché potrebbero danneggiare la finitura o i componenti elettronici.
7. Risoluzione Dei Problemi
| Problema | Possibile causa | Soluzione |
|---|---|---|
| La cassaforte non si apre con il codice. | Incorrect code entered, low batteries, or keypad malfunction. |
|
| La tastiera non risponde. | Batterie scariche. | Replace batteries immediately. Use emergency override key to open if necessary. |
| La porta non si chiude correttamente. | Obstruction, or locking bolts are extended. | Ensure nothing is blocking the door. Turn the knob to retract bolts before closing. |
8. Specifiche
- Modello: YSV/200/DB1
- Dimensioni esterne (A x L x P): 200 x 310 x 200 mm (circa 7.87 x 12.2 x 7.87 pollici)
- Dimensioni interne (A x L x P): 197 x 307 x 150 mm (circa 7.75 x 12.08 x 5.9 pollici)
- Peso: 4.49 kg (circa 9.9 libbre)
- Capacità: 8 litri
- Meccanismo di bloccaggio: Electronic keypad with 22mm motorized locking bolts, 6-lever double-bitted manual override lock.
- Materiale: Acciaio legato
- Energia: 4 batterie AAA (incluse)
- Caratteristiche speciali: Laser cut door, reinforced hinge, armored steel anti-drill plates.
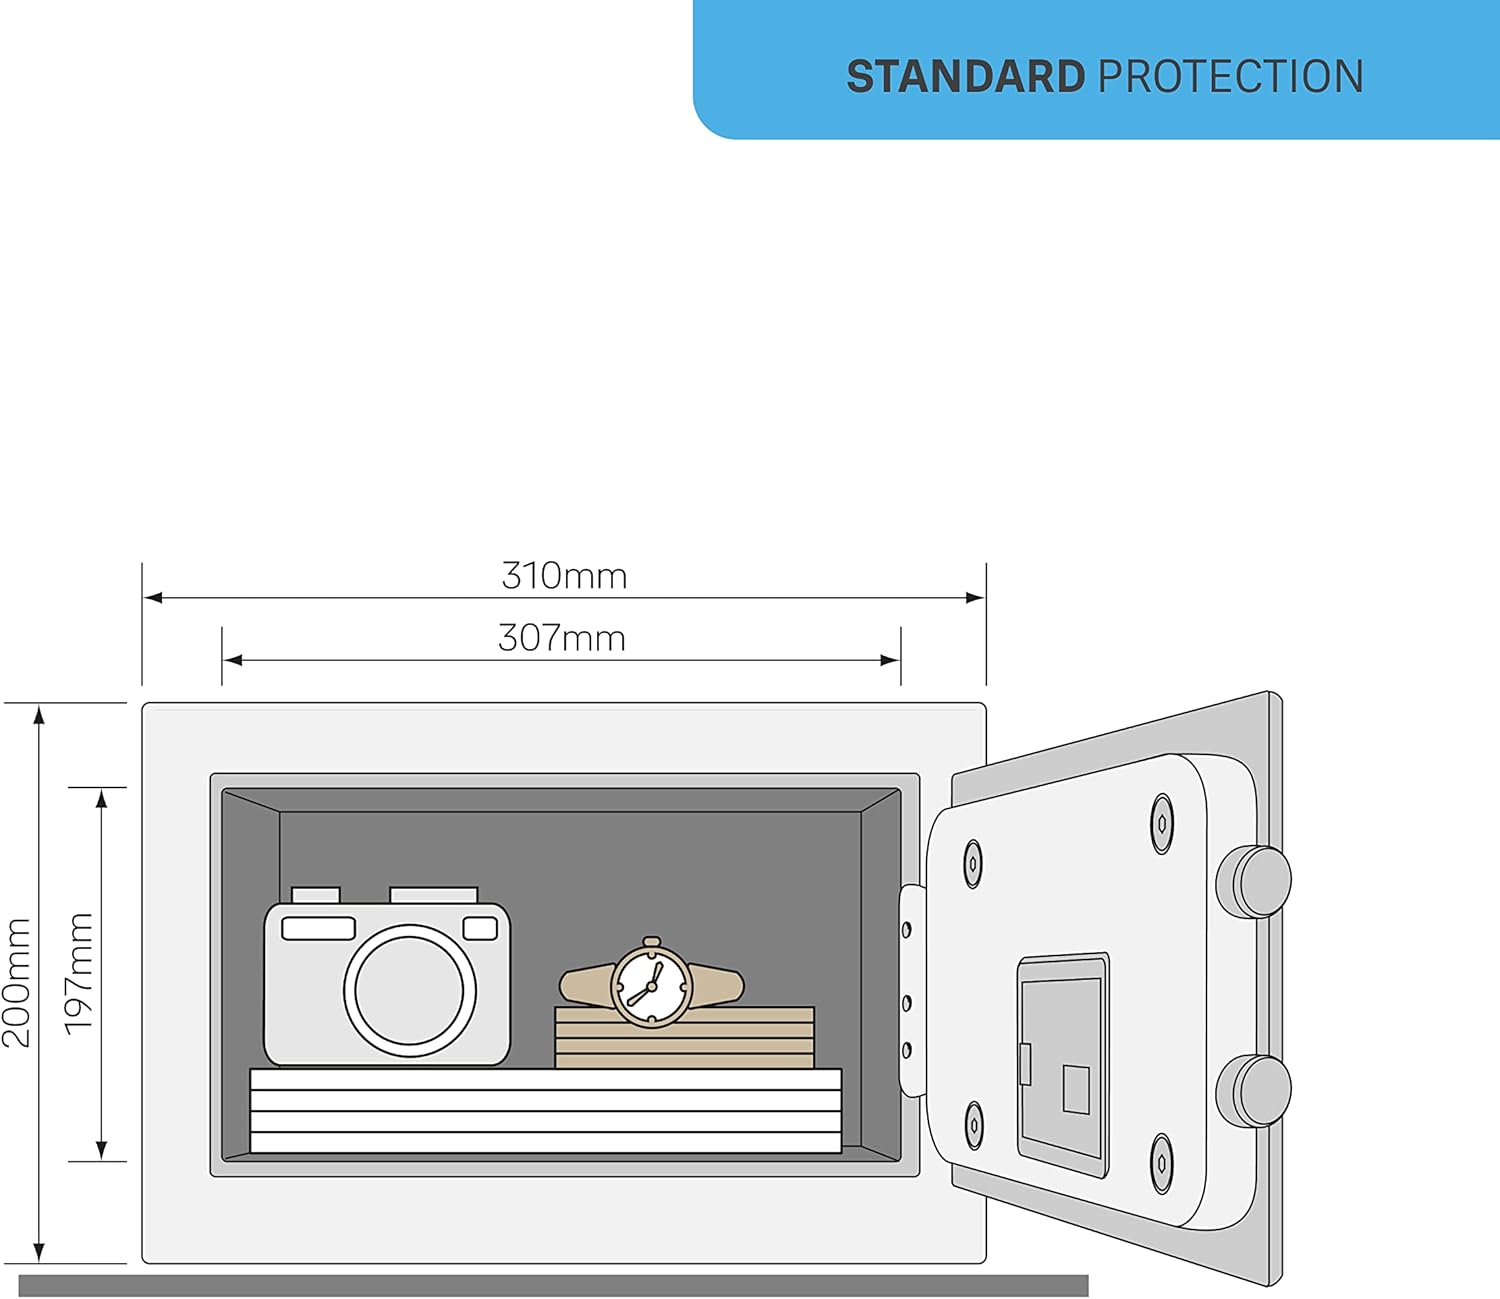
Image: Dimensional diagram of the safe, illustrating height, width, and depth.
9. Garanzia e supporto
Per informazioni sulla garanzia o supporto tecnico, fare riferimento al sito ufficiale Yale webo contattare il distributore Yale locale. Conservare la ricevuta d'acquisto come prova d'acquisto.