1. Introduzione
This manual provides comprehensive instructions for the installation, operation, maintenance, and troubleshooting of the HPE J9783A-ABA Aruba 2530 8 Switch. This device is designed to provide reliable network connectivity for various environments, offering 8 network ports, manageability features, and flexible deployment options.
Please read this manual thoroughly before attempting to install or operate the switch to ensure proper setup and to prevent damage to the unit or connected devices.
2. Configurazione e installazione
2.1 Disimballaggio dello Switch
Estrarre con cautela l'interruttore e tutti gli accessori dalla confezione. Verificare che tutti i componenti siano presenti:
- HPE J9783A-ABA Aruba 2530 8 Switch unit
- Adattatore di alimentazione (12 V 0.5 A)
- Mounting hardware (if included for rack or wall mounting)
- Documentazione (questo manuale)
Inspect the switch for any signs of physical damage. If any damage is found, contact your vendor immediately.
2.2 Posizionamento fisico
The HPE Aruba 2530 8 Switch is versatile and can be deployed in several ways:
- Posizionamento sul desktop: Place the switch on a flat, stable surface. Ensure adequate ventilation around the unit.
- Montaggio a parete: Use appropriate screws and anchors (not included) to secure the switch to a wall. Refer to the mounting holes on the device.
- Montaggio su rack: The switch is 1U high and can be installed in a standard equipment rack using the provided rack-mount kit (if applicable).
Ensure the installation location is dry, well-ventilated, and within the specified operating temperature range (up to 40°C).

Figura 1: Posteriore view of the switch, highlighting the 12V 0.5A power input and product identification label.
2.3 Collegamento di alimentazione
Connect the provided power adapter to the 12V 0.5A DC input port on the rear of the switch. Plug the other end of the power adapter into a suitable electrical outlet. The switch will power on automatically.
2.4 Connessioni di rete
The switch features 8 Fast Ethernet (10/100Base-TX) RJ45 ports for connecting network devices such as computers, printers, and other network switches. It also includes 2 dual-personality 10/100/1000Base-T or SFP ports for uplink connections.
- Connect standard Ethernet cables (Cat5e or higher) from your network devices to any of the RJ45 ports (1-8).
- The switch supports auto-MDI/MDIX, so you can use either straight-through or crossover cables.
- For uplink connections, use the dual-personality ports (9G, 10G) with either RJ45 Gigabit Ethernet or SFP transceivers.

Figure 2: Front panel of the switch, illustrating the network ports, console port, and LED status indicators.
2.5 Connessione alla console
For initial configuration and advanced management, connect a console cable (not included) from your computer's serial port to the RJ45 console port on the front of the switch. Use a terminal emulation program (e.g., PuTTY, Tera Term) with the following settings:
- Velocità in baud: 9600
- Bit di dati: 8
- Parità: Nessuna
- Stop Bits: 1
- Controllo del flusso: nessuno
3. Funzionamento dell'interruttore
3.1 Accensione e autotest
Once connected to power, the switch will automatically power on and perform a Power-On Self-Test (POST). During POST, the system LEDs will cycle. Upon successful completion, the Status LED will indicate normal operation.
3.2 Indicatori LED
The front panel of the switch features several LEDs that provide status information:
- LED di potenza: Indica lo stato di alimentazione dell'unità.
- LED di guasto: Illuminates if a system fault is detected.
- LED di localizzazione: Used to physically locate the switch in a rack or wiring closet.
- LED di stato: Indica lo stato operativo generale dell'interruttore.
- Pulsante di prova: Utilizzato per scopi diagnostici.
- Pulsante Cancella: Used to clear certain diagnostic states.
- LED di collegamento/attività (per porta):
- Verde pieno: È stato stabilito un collegamento di rete valido.
- Verde lampeggiante: Sulla porta si sta verificando un'attività dati.
- Spento: No link detected or port is disabled.
- LED di velocità (per porta):
- Spento: Connessione a 10Mbps.
- Verde pieno: Connessione a 100Mbps.
- Verde lampeggiante: 1000 Mbps connection (for Gigabit ports).
3.3 Funzionamento di base della rete
The HPE Aruba 2530 8 Switch operates as a plug-and-play device for basic network connectivity. Once devices are connected to the ports, they can communicate with each other and with other network segments if the switch is connected to a router or another switch.
3.4 Interfaccia di gestione
The switch is manageable, allowing for advanced configuration and monitoring. Management can be performed via:
- Interfaccia della riga di comando (CLI): Accessible via the console port or Telnet/SSH over the network.
- WebInterfaccia utente grafica (GUI) basata su: Accessibile tramite un web browser by entering the switch's IP address.
Refer to the comprehensive software configuration guide (available from HPE's support website) for detailed instructions on configuring VLANs, QoS, security features, and other advanced settings.
4. Manutenzione
The HPE Aruba 2530 8 Switch is designed for reliable operation with minimal maintenance. However, periodic checks can help ensure optimal performance and longevity.
4.1 Pulizia
Keep the switch clean and free of dust. Use a soft, dry cloth to wipe the exterior. Do not use liquid or aerosol cleaners, as they may damage the unit. Ensure ventilation openings are not obstructed.
4.2 Considerazioni ambientali
Ensure the switch operates within its specified environmental limits:
- Temperatura di esercizio: da 0°C a 40°C (da 32°F a 104°F)
- Umidità di esercizio: dal 15% al 95% senza condensa
Avoid placing the switch near heat sources or in direct sunlight. Maintain proper airflow around the unit.
5. Risoluzione Dei Problemi
This section provides solutions to common issues you may encounter with the HPE Aruba 2530 8 Switch.
| Problema | Possibile causa | Soluzione |
|---|---|---|
| Nessuna alimentazione / LED di alimentazione spento | Adattatore di alimentazione non collegato o difettoso; problema con la presa di corrente. | Verify power adapter connection to switch and outlet. Test outlet with another device. Replace power adapter if faulty. |
| Nessuna spia di collegamento sulla porta | Cable not connected properly; faulty cable; connected device is off or faulty; incorrect port configuration. | Ensure cable is securely connected at both ends. Try a different Ethernet cable. Verify the connected device is powered on and functioning. Check switch port status via management interface. |
| Prestazioni di rete lente | Network congestion; faulty cable; duplex mismatch; outdated firmware. | Check network traffic. Replace suspect cables. Verify duplex settings on both the switch port and connected device. Consider updating switch firmware. |
| Fault LED is On | Internal hardware issue; overheating. | Check ventilation and ensure the switch is not overheating. If the issue persists, contact technical support. |
For more complex issues or if the problem persists, consult the detailed troubleshooting guide available on the HPE support website or contact HPE technical support.
6. Specifiche
The following table outlines the technical specifications of the HPE J9783A-ABA Aruba 2530 8 Switch.
| Caratteristica | Descrizione |
|---|---|
| Numero di modello | Modello J9783A |
| Marca | HP (Hewlett Packard Enterprise) |
| Porte di rete | 8 x 10/100Base-TX RJ45 ports |
| Porte di uplink | 2 x Dual-personality 10/100/1000Base-T or SFP ports |
| Velocità di trasferimento dati | 5.6 Gigabit al secondo (capacità di commutazione) |
| Supporto a strati | Layer 2 Supported |
| Gestibilità | Manageable (CLI, Web GUI) |
| Dimensioni (L x P x A) | 10 x 6.28 x 1.75 pollici (25.4 x 15.95 x 4.45 cm) |
| Peso | 1.81 libbre (820 grammi) |
| Materiale della cassa | Metallo |
| Potenza in ingresso | 12V DC, 0.5A |
| Temperatura di esercizio | da 0°C a 40°C (da 32°F a 104°F) |
| Opzioni di montaggio | Rack-mountable (1U), Wall Mountable, Desktop |
| Dispositivi compatibili | Desktop, Laptop, Stampante |
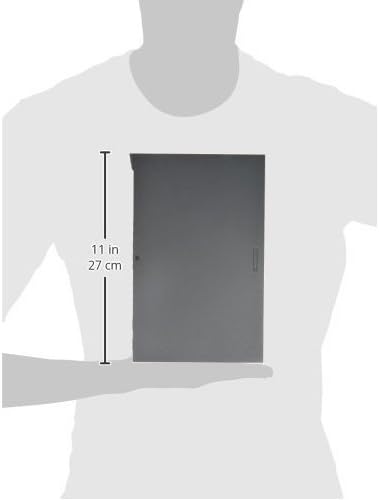
Figure 3: Approximate dimensions of the switch.
7. Garanzia e supporto
This HPE J9783A-ABA Aruba 2530 8 Switch is covered by a manufacturer's warranty. For specific warranty terms and conditions, please refer to the warranty card included with your product or visit the official HPE websito.
For technical assistance, product registration, or to download the latest firmware and documentation, please visit the HPE support portal or contact their customer service. Have your product model number (J9783A) and serial number ready when contacting support.
Supporto HPE Websito: www.hpe.com/support


