1. Introduzione
This manual provides detailed instructions for the proper use and maintenance of your JVC GR-AX720 Compact VHS Camcorder. Please read this manual thoroughly before operating the camcorder to ensure optimal performance and longevity. Keep this manual for future reference.
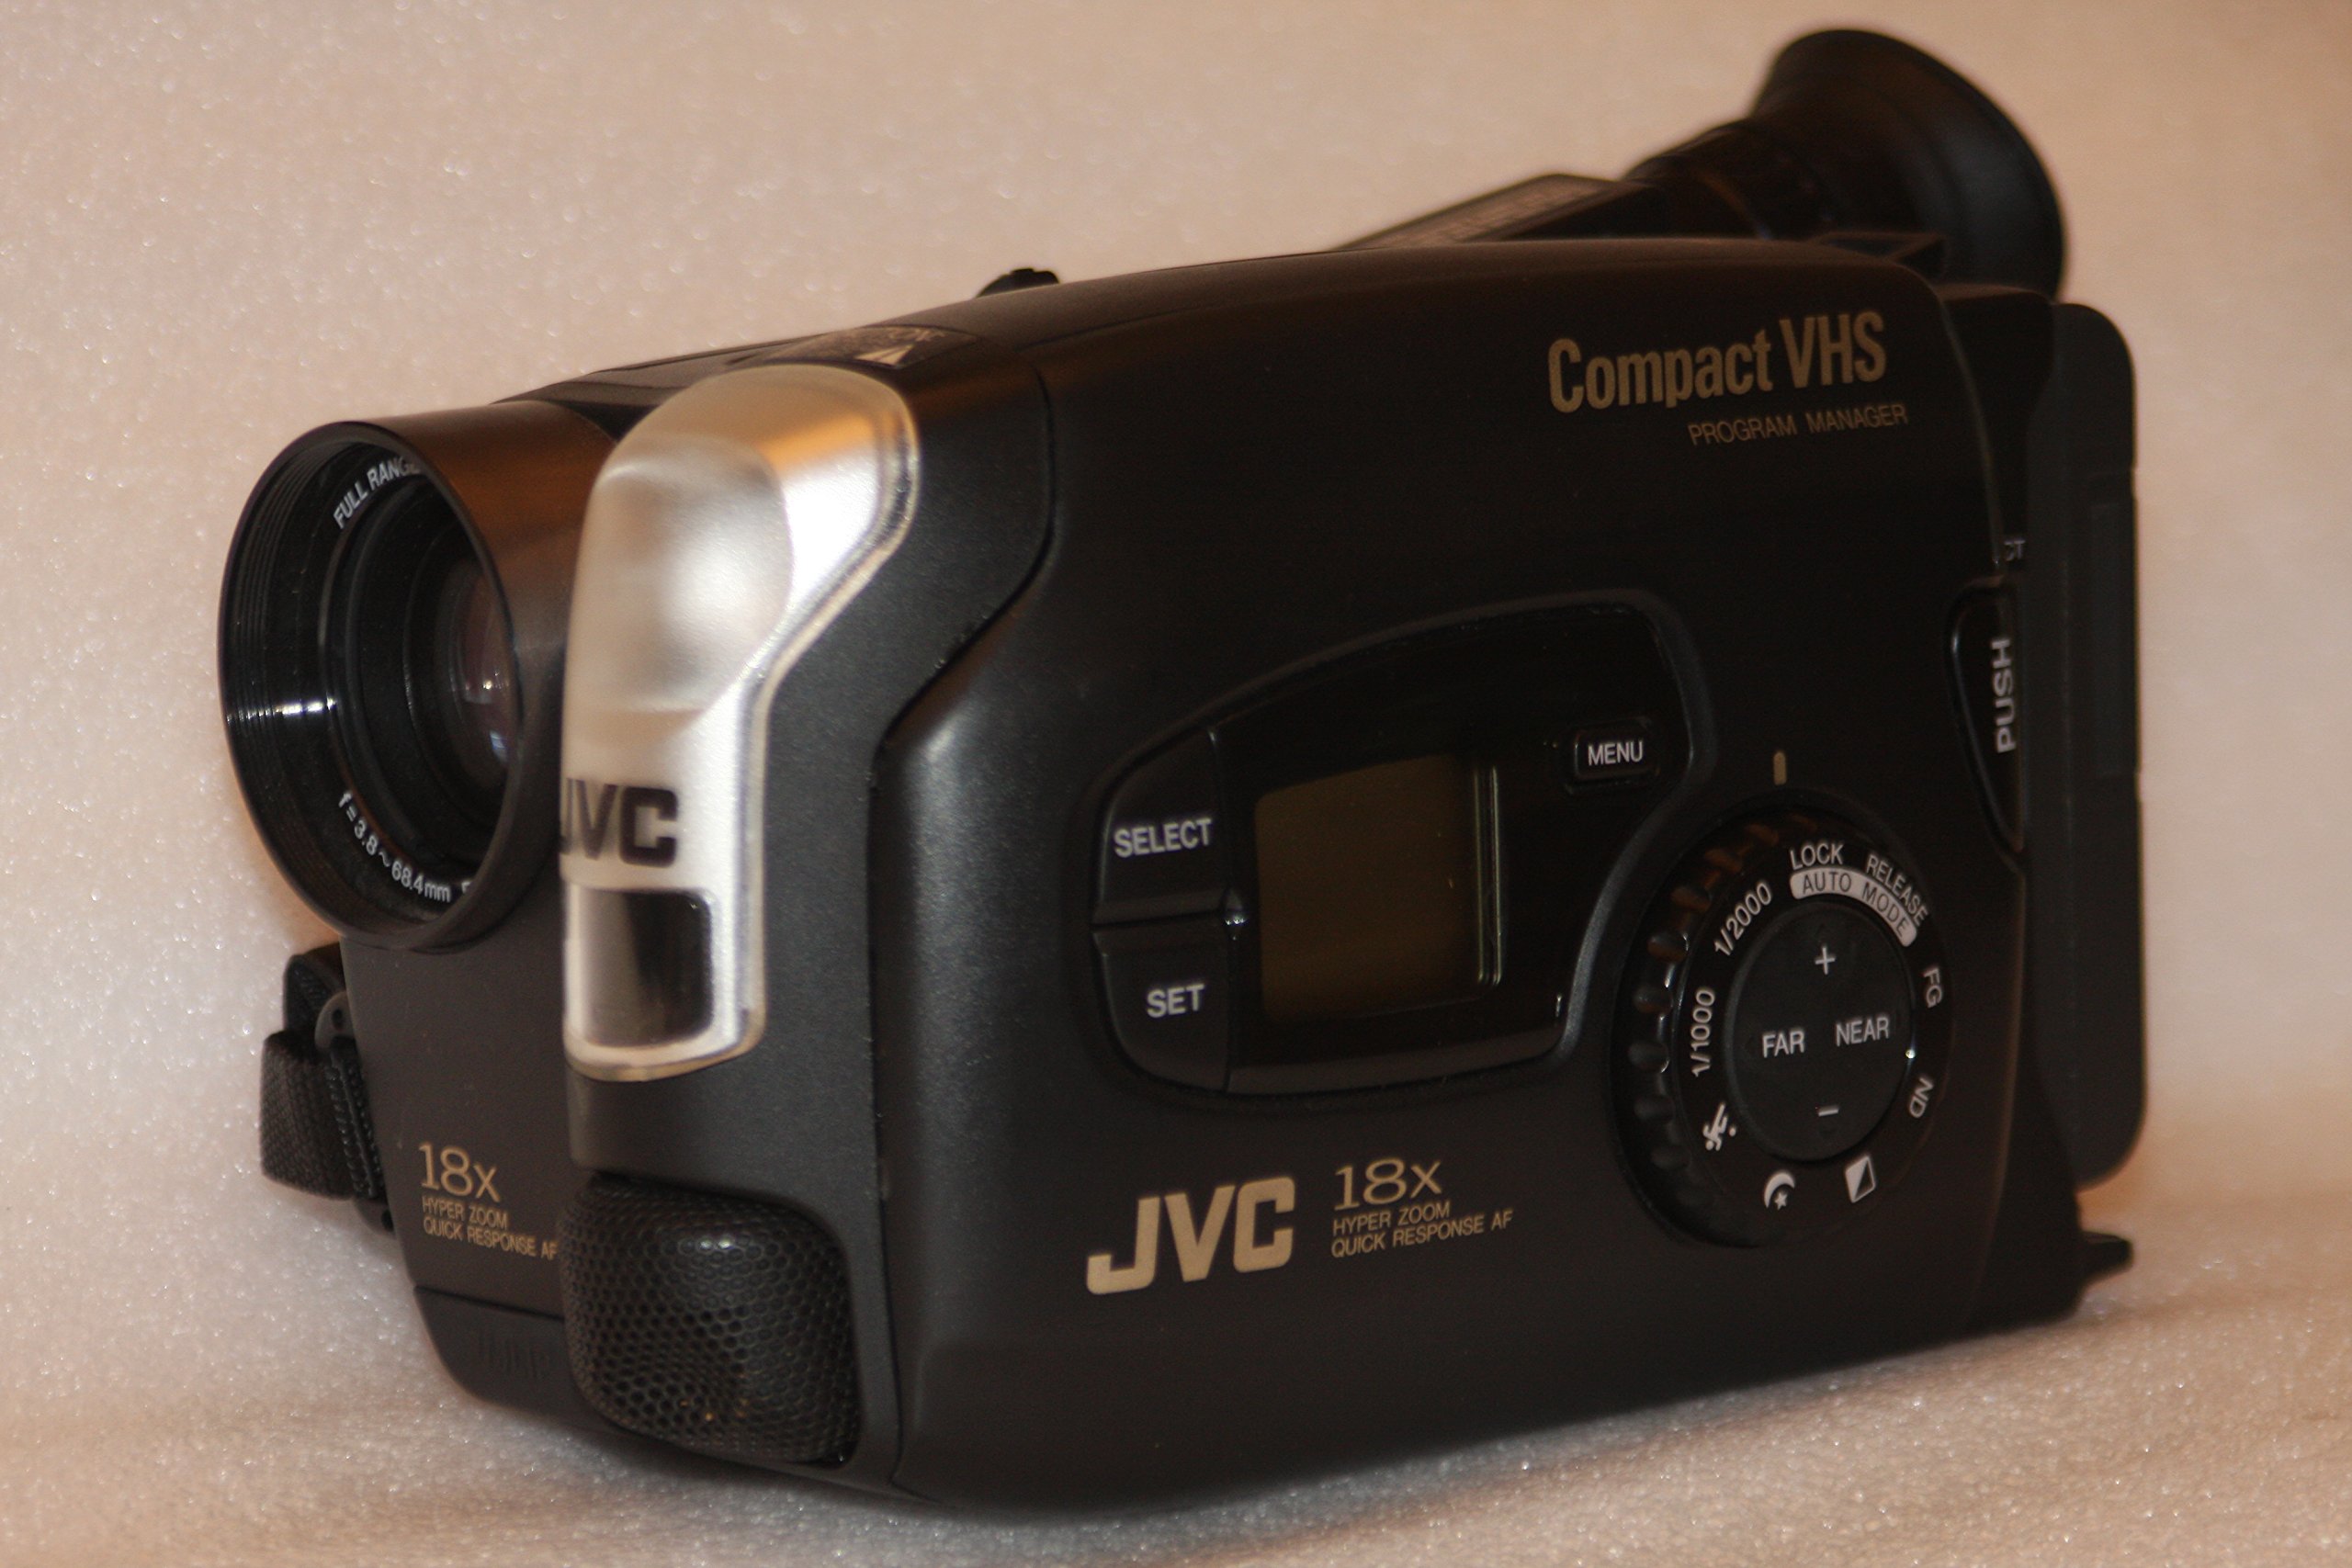
Immagine 1: Fronte e lato view of the JVC GR-AX720 Compact VHS Camcorder, showcasinil suo design compatto e i comandi principali.
2. Prodotto finitoview
The JVC GR-AX720 is a Compact VHS (VHS-C) camcorder designed for recording and playing back video on VHS-C tapes. Key features include an 18x Hyper Zoom lens, Auto Light function, Fast Auto Focus (AF), Program AE with various special effects, and a color viewfinder for monitoring recordings and playback.
Caratteristiche principali:
- VHS-C Format: Records to and plays from Compact VHS tapes. These tapes can be played in a standard VHS VCR using an appropriate adapter (not included).
- 18x Hyper Zoom: Provides extended optical zoom capabilities for capturing distant subjects.
- Colore Viewcercatore: Offers a color display for framing shots and reviewfootage.
- Luce automatica: Automatically adjusts for optimal lighting conditions.
- Fast AF: Ensures quick and accurate focusing.
- Program AE with Special Effects: Allows for creative control over recordings.
3. Impostazione
3.1. Installazione e ricarica della batteria
- Assicurarsi che la videocamera sia spenta.
- Individuare il vano batteria sul retro della videocamera.
- Slide the battery release latch and insert the battery pack, ensuring it clicks into place securely.
- To charge the battery, connect the AC adapter to the camcorder's DC input and then to a power outlet. The charging indicator will illuminate.
3.2. Loading a VHS-C Cassette
- Open the cassette compartment by sliding the ESPELLERE lever. The compartment cover will open.
- Insert a VHS-C cassette with the tape window facing forward and the open side facing down.
- Gently push the cassette down until it locks into position.
- Close the cassette compartment cover until it clicks shut.

Immagine 2: Lato view of the camcorder, illustrating the general area for battery and cassette insertion.
3.3. Collegamento a un televisore
A view your recordings on a television, use the provided Composite A/V cable.
- Connect one end of the Composite A/V cable to the A/V output jacks on the camcorder.
- Connect the other end of the cable to the corresponding A/V input jacks (typically yellow for video, white/red for audio) on your television.
- Select the correct A/V input channel on your television.
4. Istruzioni per l'uso
4.1. Accensione/spegnimento
To power on the camcorder, slide the ENERGIA switch from SPENTO A TELECAMERA for recording or GIOCARE for playback. To power off, slide the switch back to SPENTO.

Immagine 3: Primo piano view of the power switch, light control, and record button on the camcorder.
4.2. registrazione
- Imposta il ENERGIA passare a TELECAMERA.
- Aprire il copriobiettivo.
- Look through the color viewmirino per inquadrare il tuo scatto.
- Utilizzare il ZOOM lever to adjust the focal length (telephoto/wide-angle).
- Premere il tasto DOCUMENTAZIONE per avviare la registrazione. L'indicatore di registrazione si illuminerà.
- Premere il tasto DOCUMENTAZIONE nuovamente il pulsante per interrompere la registrazione.
Regolazione della messa a fuoco:
The camcorder features Fast AF for automatic focusing. For manual focus, switch to manual mode (if available) and use the focus ring or buttons.
Effetti speciali:
Refer to the on-screen menu (accessed via the MENU button) for available Program AE modes and special effects.
4.3. Riproduzione
- Imposta il ENERGIA passare a GIOCARE.
- If connected to a TV, ensure the TV is on the correct A/V input.
- Use the playback controls (Play, Stop, Rewind, Fast Forward) to navigate your recordings.
4.4. Using the Color Viewcercatore
Il colore viewfinder provides a real-time view of your subject during recording and displays recorded footage during playback. Adjust the diopter on the viewfinder for clear vision if needed.

Immagine 4: Lato view of the camcorder, highlighting the adjustable color viewcercatore.
5. Manutenzione
5.1. Pulizia
- Lente: Utilizzare un panno morbido e privo di lanugine, specificamente progettato per lenti ottiche. Non utilizzare detergenti abrasivi.
- Corpo: Pulire il corpo della videocamera con un panno morbido e asciutto. Per lo sporco ostinato, leggermente dampen the cloth with water. Avoid using solvents.
- Testine del nastro: Regular cleaning of tape heads is recommended to maintain optimal video quality. Use a dry-type VHS-C head cleaner cassette (not included) according to its instructions.
5.2. Conservazione
- Conservare la videocamera in un luogo fresco e asciutto, lontano dalla luce solare diretta e da temperature estreme.
- Remove the battery pack if the camcorder will not be used for an extended period.
- Keep the lens cap on to protect the lens from dust and scratches.
6. Risoluzione Dei Problemi
If you encounter issues with your JVC GR-AX720 camcorder, refer to the following common problems and solutions:
| Problema | Possibile causa | Soluzione |
|---|---|---|
| La videocamera non si accende. | La batteria è scarica o non è installata correttamente. | Charge the battery or ensure it is securely installed. |
| No image in viewfinder during recording. | Lens cap is on. Power switch is not in TELECAMERA modalità. | Remove the lens cap. Set the power switch to TELECAMERA. |
| Poor video quality during playback. | Dirty tape heads. Damaged tape. | Clean the tape heads using a head cleaner cassette. Try a different tape. |
| Nessun suono durante la riproduzione. | TV volume is low or muted. A/V cables are not connected correctly. | Adjust TV volume. Check A/V cable connections. |
If the problem persists after attempting these solutions, please contact JVC customer support.
7. Specifiche
The following are technical specifications for the JVC GR-AX720 Compact VHS Camcorder:
| Caratteristica | Specificazione |
|---|---|
| Nome del modello | JVC GR AX720 |
| Formato di acquisizione video | VHS-C |
| Risoluzione di acquisizione video | Formato: 480p |
| Zoom ottico | 18x |
| Tecnologia di connettività | Composite A/V |
| Formato audio supportato | Audio analogico |
| Colore | Nero |
| Componenti inclusi | Battery, Carrying Case, User Manual, VHS-C to RCA Cable |

Immagine 5: In basso view of the camcorder, displaying the model number (GR-AX720U) and other regulatory information.
8. Garanzia e supporto
Per informazioni sulla garanzia e sull'assistenza clienti, fare riferimento alla documentazione inclusa con l'acquisto o visitare il sito ufficiale JVC websito. Conservare la prova d'acquisto per eventuali reclami in garanzia.
Assistenza clienti JVC: For technical assistance or service inquiries, please contact JVC directly through their official support channels.