1. Introduzione
This manual provides essential information for the safe and efficient operation of your COTEC SP2000-224 Pure Sine Wave Inverter. This advanced inverter offers high efficiency and power density, featuring selectable output voltage and frequency, all housed within a robust aluminum casing. Please read this manual thoroughly before installation and use to ensure proper function and longevity of the device.
2. Informazioni sulla sicurezza
Always observe the following safety precautions to prevent injury and damage to the inverter or connected equipment:
- Ventilazione: Assicurare un'adeguata ventilazione attorno all'inverter. Non ostruire le aperture di ventilazione.
- Ambiente: Installare l'inverter in un luogo asciutto, fresco e ben ventilato, lontano dalla luce solare diretta, da fonti di calore e da materiali infiammabili.
- Messa a terra: Properly ground the inverter chassis to prevent electrical shock.
- Ingresso CC: Connect the inverter only to a 24V DC battery bank. Ensure correct polarity (positive to positive, negative to negative). Reverse polarity will damage the unit.
- Uscita CA: Non sovraccaricare l'inverter. Assicurarsi che la potenza totaletage of connected AC devices does not exceed the inverter's rated output.
- Manutenzione: Non tentare di aprire o riparare l'inverter autonomamente. Per qualsiasi intervento di manutenzione, rivolgersi a personale qualificato.
- Esposizione all'acqua: Keep the inverter away from water, rain, or excessive moisture.
3. Caratteristiche del prodotto
The COTEC SP2000-224 Inverter incorporates several advanced features for reliable power conversion:
- Uscita a onda sinusoidale pura per dispositivi elettronici sensibili.
- Power ON / OFF remote control capability via a dedicated green terminal.
- Full input and output isolation for enhanced safety.
- Temperature and load-controlled cooling fan for efficient heat dissipation.
- Interfaccia intuitiva con indicatori di stato LED a 3 colori.
- Output frequency selectable between 50 Hz and 60 Hz via DIP switch.
- Volume di uscitatage selectable via DIP switch.
- Power saving mode adjustable via a variable resistor.
- Comprehensive input protection: Reverse Polarity (via fuse), Under Voltage, oltre il volumetage.
- Comprehensive output protection: Short Circuit, Overload, Over Temperature.
- Certifications: E13, UL, CE, FCC approved.
4. Configurazione e installazione
Un'installazione corretta è fondamentale per le prestazioni e la sicurezza dell'inverter.
4.1 Installazione fisica
Mount the inverter securely in a location that meets the safety requirements mentioned in Section 2. Ensure sufficient space around the unit for airflow.
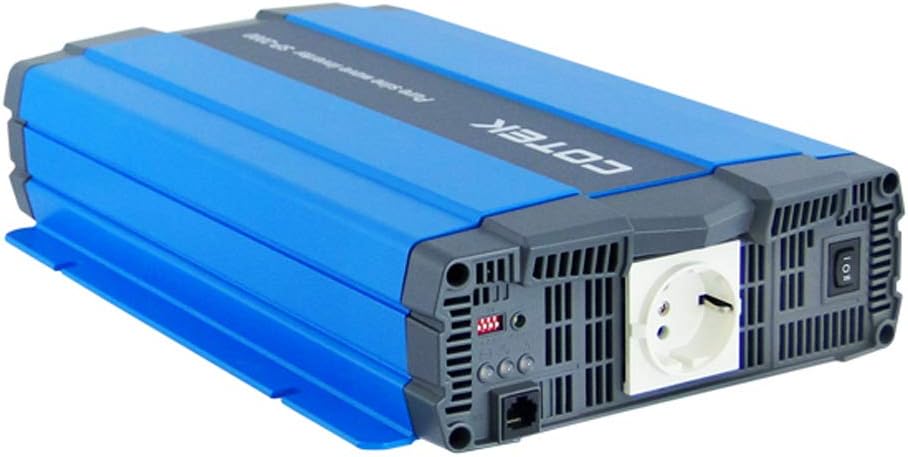
Figura 4.1: Angolato view of the COTEC SP2000-224 Pure Sine Wave Inverter, showcasing its robust blue and gray casing.
4.2 Collegamento ingresso CC
Connect the inverter to a 24V DC battery bank using appropriate gauge cables. Ensure the positive (+) terminal of the inverter connects to the positive terminal of the battery, and the negative (-) terminal of the inverter connects to the negative terminal of the battery. Install an appropriate fuse or circuit breaker in the positive DC line close to the battery.

Figura 4.2: Posteriore view of the inverter, highlighting the DC input terminals (red for positive, black for negative), the chassis ground screw, and the remote control terminal.
4.3 Chassis Ground Connection
Connect the chassis ground terminal (labeled 'CHASSIS GROUND') to a reliable earth ground point. This is a critical safety step.
4.4 AC Output and Controls
The inverter features a standard AC outlet and control switches on its front panel.

Figura 4.3: Davanti view of the inverter, displaying the AC output socket, the main power switch, LED indicators, and DIP switches for configuration.
4.5 Impostazioni dell'interruttore DIP
The inverter features DIP switches for configuring output frequency and voltage. Refer to the specifications table (Section 7) or the product label for specific settings. Ensure the inverter is powered off before adjusting DIP switches.
- Frequenza di uscita: Select 50 Hz or 60 Hz based on your regional requirements.
- Volume di uscitatage: Selezionare il volume di uscita CA desideratotage (e.g., 230VAC for this model).
5. Istruzioni per l'uso
5.1 Accensione/Spegnimento
After all connections are secure and verified, switch the main power button on the inverter to the 'ON' position. The LED indicators will illuminate to show the inverter's status. To power off, switch the button to 'OFF'. A remote control terminal is also available for external ON/OFF control.
5.2 Indicatori LED
The 3-color LED indicators provide visual feedback on the inverter's operational status and any potential faults. Consult the product documentation or the specifications table for a detailed explanation of each LED state.
5.3 Modalità risparmio energetico
The power saving mode can be adjusted via a variable resistor. This feature helps reduce quiescent current draw when no load or a very light load is connected, conserving battery power.
5.4 Collegamento dei carichi CA
Plug your AC appliances into the inverter's AC output socket. Ensure the total power consumption does not exceed the inverter's continuous power rating (2000W for this model). For inductive loads (e.g., motors, refrigerators), consider their surge power requirements, which can be significantly higher than their running power.
6. Manutenzione
Una manutenzione regolare garantisce prestazioni ottimali e prolunga la durata del vostro inverter.
- Pulizia: Mantenere l'inverter pulito e privo di polvere. Utilizzare un panno asciutto per pulire l'esterno. Non utilizzare detergenti liquidi.
- Ventilazione: Periodically check that the cooling fan and ventilation openings are clear of obstructions.
- Connessioni: Inspect all DC and AC connections regularly to ensure they are tight and free from corrosion. Loose connections can cause overheating and poor performance.
- Manutenzione della batteria: Follow the manufacturer's recommendations for your battery bank's maintenance.
7. Risoluzione Dei Problemi
Se l'inverter non funziona correttamente, fare riferimento ai seguenti problemi comuni e alle relative soluzioni:
- Nessuna potenza di uscita:
- Check DC input connections and battery voltage.
- Verify the inverter's power switch is ON.
- Check for blown DC input fuses (if applicable).
- Indicazione di sovraccarico:
- Ridurre il carico totale collegato all'inverter.
- Disconnect and reconnect the load to reset the inverter.
- Over Temperature Indication:
- Assicurare una ventilazione adeguata attorno all'inverter.
- Controllare se la ventola di raffreddamento funziona.
- Reduce the load if operating in a hot environment.
- Batteria scaricatage Alarm/Shutdown:
- Recharge the battery bank.
- Check battery connections for looseness or corrosion.
For persistent issues, contact COTEC customer support.
8. Specifiche
The following table details the technical specifications for the COTEC SP2000 series, with specific values for the SP2000-224 model highlighted where applicable.

Figura 8.1: Detailed technical specifications for the COTEC SP-2000 series, including the SP2000-224 model.
| Caratteristica | Specificazione |
|---|---|
| Marca | COTEK |
| Nome del modello | SP2000 (SP2000-224 variant) |
| Potenza nominale | 2000W |
| Surge Power (1 Sec) | 4000W |
| Ingresso CC Voltage | 24VDC (Operating Range: 21.0-33.0VDC) |
| Volume di uscita CAtage | 230VAC (selectable) |
| Frequenza di uscita | 50/60 Hz (selezionabile) |
| Forma d'onda di uscita | Pure Sine Wave (THD<3% at nominal load) |
| Efficiency (Max) | 93% |
| Raffreddamento | Temperature & load controlled fan |
| Temperatura di esercizio | da -20°C a +40°C |
| Temperatura di conservazione | da -30°C a +70°C |
| Dimensioni (L x A x P) | 17.44 x 9.76 x 3.27 pollici (443 x 248 x 83 mm) |
| Peso dell'articolo | 1 pounds (approximate, actual unit weight may vary) |
| Dimensioni del pacco | 19 x 12 x 6 pollici |
| Certificazioni | E13, UL, CE, FCC approved |
8.1 Disegni meccanici
For detailed physical dimensions and mounting information, refer to the mechanical drawings below.
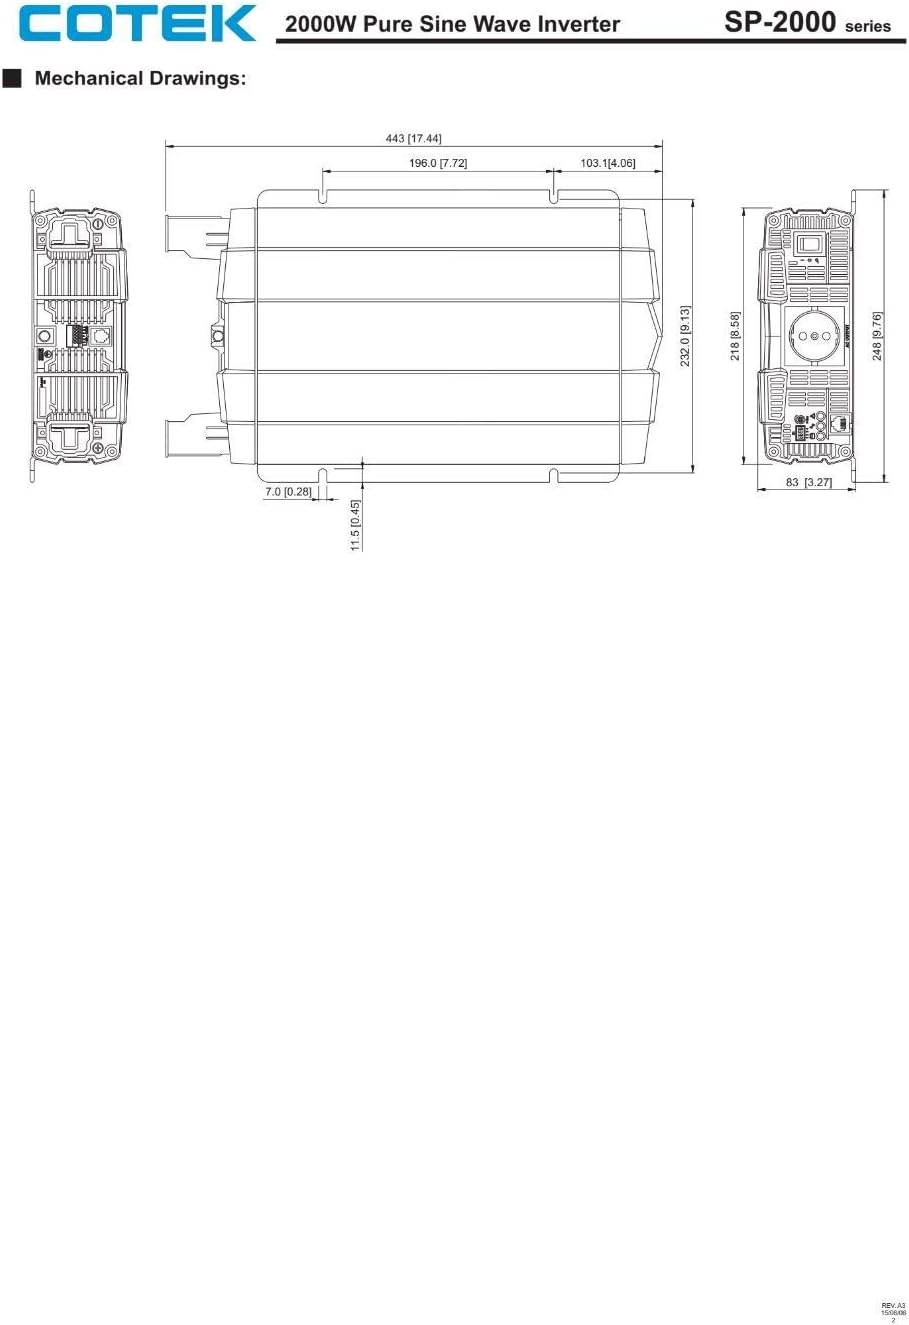
Figura 8.2: Mechanical drawings providing precise dimensions for installation planning.
9. Garanzia e supporto
COTEC products are designed for reliability and performance. For warranty information, technical support, or service inquiries, please refer to the warranty card included with your product or visit the official COTEC websito. Conservare la ricevuta d'acquisto come prova d'acquisto per eventuali reclami in garanzia.


