1. Introduzione
Grazie per l'acquistoasing the Excelvan LK-T091 Digital LED Alarm Clock Radio. This manual provides detailed instructions for the proper setup, operation, and maintenance of your device. Please read this manual thoroughly before use and retain it for future reference.
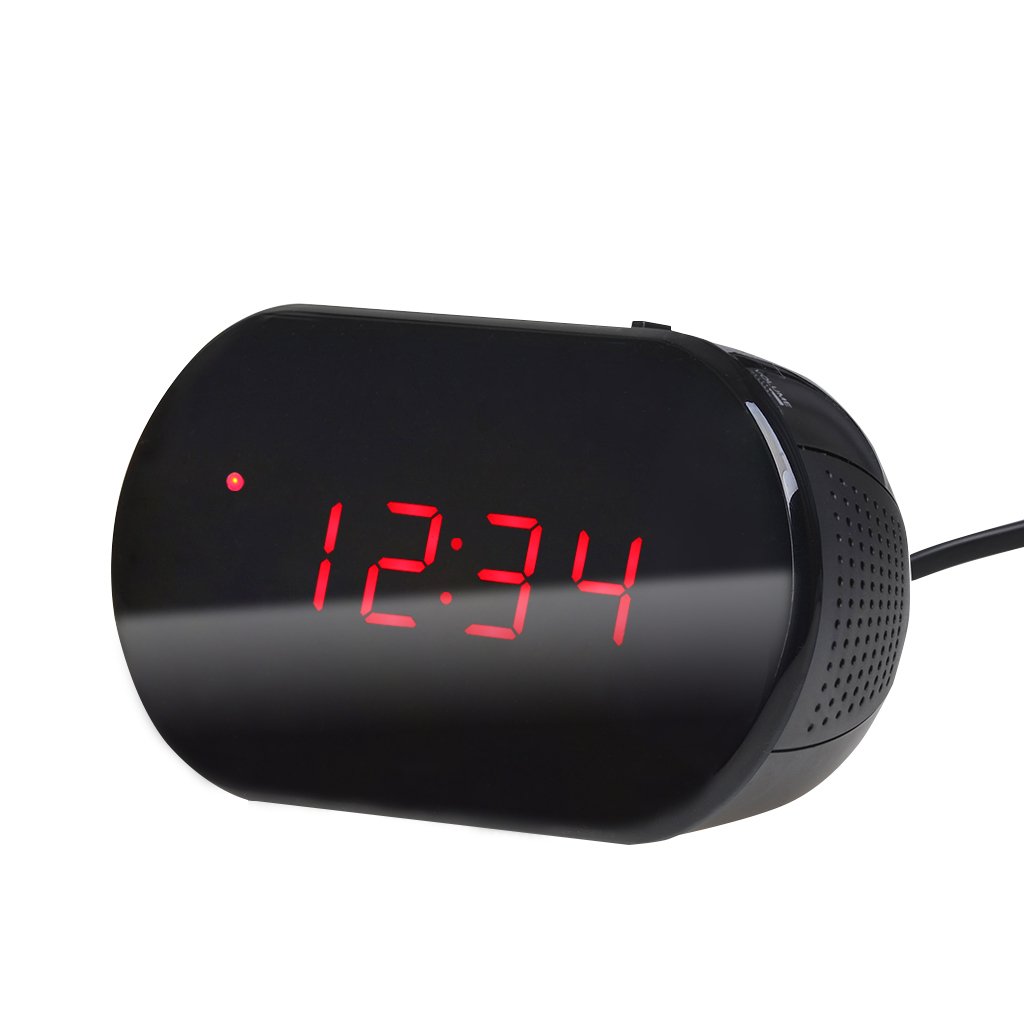
Figura 1: Fronte view of the Excelvan LK-T091 Digital LED Alarm Clock Radio.
Contenuto della confezione:
- 1 x Excelvan Digital LED Alarm Clock Radio (Model LK-T091)
- 1 x Manuale utente
2. Informazioni importanti sulla sicurezza
- Non utilizzare batterie ricaricabili for the backup power. Alkaline or lithium batteries are recommended for optimal performance and longevity.
- Ensure the power adapter is compatible with your local power supply (AC230V ~ 50Hz).
- Non esporre il dispositivo ad acqua, umidità o temperature estreme.
- Evitare di posizionare il dispositivo vicino a fonti di calore o alla luce diretta del sole.
- Non tentare di smontare o riparare l'unità da soli. Per qualsiasi intervento di assistenza, rivolgersi a personale qualificato.
- Tenere fuori dalla portata dei bambini.
3. Prodotto finitoview
Comandi e display:

Figure 2: Top panel controls of the Excelvan LK-T091.
- Display a LED: Mostra l'ora, lo stato della sveglia e la frequenza radio.
- Pulsante SNOOZE: Disattiva temporaneamente l'allarme.
- SET / PRESET Button: Used to set time/alarm and save radio presets.
- ALARM / MEM Button: Activates alarm setting mode and recalls radio presets.
- Pulsante di reset: Reimposta l'unità.
- Tuning Buttons (▲ / ▼): Adjust time, alarm, and radio frequency.
- RADIO / SLEEP Button: Turns radio on/off and activates sleep timer.
- ALARM OFF / BUZZER / RADIO Switch: Selects alarm sound source (off, buzzer, or radio).
- Manopola VOLUME: Adjusts radio volume.

Figura 3: Posteriore view showing the battery compartment for backup power.
4. Impostazione
4.1 Collegamento di alimentazione
- Connect the AC power cord to the power input jack on the back of the clock radio.
- Plug the other end of the power cord into a standard AC230V ~ 50Hz wall outlet.
- The LED display will light up, indicating the unit is powered on.
4.2 Installazione della batteria di backup
The clock radio uses one 9V (6F22 type) battery (not included) for backup power. This battery maintains time settings during a power outage.
- Individuare il vano batterie nella parte inferiore dell'unità.
- Aprire il coperchio del vano batterie.
- Insert one 9V (6F22 type) alkaline or lithium battery, ensuring correct polarity (+ and -).
- Chiudere saldamente il coperchio del vano batterie.
- Note: The battery backup only maintains time settings; the display will not be visible during a power outage. Do not use rechargeable batteries.
4.3 Impostazione dell'ora
- Premere e tenere premuto il tasto IMPOSTATO finché le cifre dell'ora non iniziano a lampeggiare.
- Utilizzare il ▲ or ▼ (Tuning) buttons to adjust the hour.
- Premere il tasto IMPOSTATO nuovamente il pulsante; le cifre dei minuti lampeggeranno.
- Utilizzare il ▲ or ▼ (Tuning) buttons to adjust the minutes.
- Premere il tasto IMPOSTATO button once more to confirm and exit time setting mode. The time is displayed in 24-hour format.
5. Istruzioni per l'uso
5.1 Impostazione dell'allarme
The alarm can be set to wake you with a buzzer or your favorite FM radio station.
- Premere e tenere premuto il tasto ALLARME finché le cifre dell'ora della sveglia non iniziano a lampeggiare.
- Utilizzare il ▲ or ▼ (Tuning) buttons to adjust the alarm hour.
- Premere il tasto ALLARME button again; the alarm minute digits will flash.
- Utilizzare il ▲ or ▼ (Tuning) buttons to adjust the alarm minutes.
- Premere il tasto ALLARME nuovamente il pulsante per confermare e uscire dalla modalità di impostazione della sveglia.
- Per attivare l'allarme, far scorrere il ALARM OFF / BUZZER / RADIO passare a uno dei due BUZZER or RADIO. An alarm indicator will appear on the display.
- To turn off the alarm, slide the switch to SVEGLIA DISATTIVATA.

Figure 4: Choose to wake up to a buzzer sound or your preferred radio station.
5.2 Funzione posticipa
Quando suona la sveglia, premere il tasto grande POSTICIPARE button to temporarily silence the alarm for approximately 9 minutes. The alarm will sound again after this period. To cancel snooze and turn off the alarm, slide the ALARM OFF / BUZZER / RADIO passare a SVEGLIA DISATTIVATA.

Figure 5: The snooze function allows for a short delay before the alarm sounds again.
5.3 Funzionamento della radio FM
5.3.1 Tuning the Radio
- Premere il tasto RADIO pulsante per accendere la radio FM.
- Utilizzare il ▲ or ▼ (Tuning) buttons to manually tune to your desired FM frequency (87.5 – 108 MHz).
- Per cercare automaticamente la stazione successiva disponibile, tenere premuto il tasto ▲ or ▼ (Tuning) buttons for a few seconds until the frequency starts scanning.
- Regolare il volume utilizzando il VOLUME manopola.
- Premere il tasto RADIO nuovamente il pulsante per spegnere la radio.
5.3.2 Salvataggio e richiamo dei preset
The clock radio can store up to 10 FM radio station presets.
- Tune to your desired station using the tuning method described above.
- Premere e tenere premuto il tasto SET / PRESET finché sul display non lampeggia "P01" (o il successivo numero preimpostato disponibile).
- Utilizzare il ▲ or ▼ (Tuning) buttons to select the desired preset number (P01-P10).
- Premere il tasto SET / PRESET nuovamente il pulsante per salvare la stazione nella preimpostazione selezionata.
- To recall a saved preset, press the ALARM / MEM ripetutamente il pulsante per scorrere le stazioni salvate.

Figure 6: Digital FM tuning allows for precise station selection and saving presets.
5.4 Funzione timer di spegnimento
Il timer di spegnimento automatico consente alla radio di funzionare per un periodo di tempo impostato prima di spegnersi automaticamente.
- Mentre la radio è in riproduzione, premere il tasto SONNO button repeatedly to cycle through the available sleep timer durations: 90, 75, 60, 45, 30, 15, 00 minutes.
- La durata selezionata verrà visualizzata brevemente. La radio si spegnerà automaticamente dopo il tempo impostato.
- Per annullare il timer di spegnimento, premere il tasto SONNO button until "00" is displayed, or turn off the radio manually.
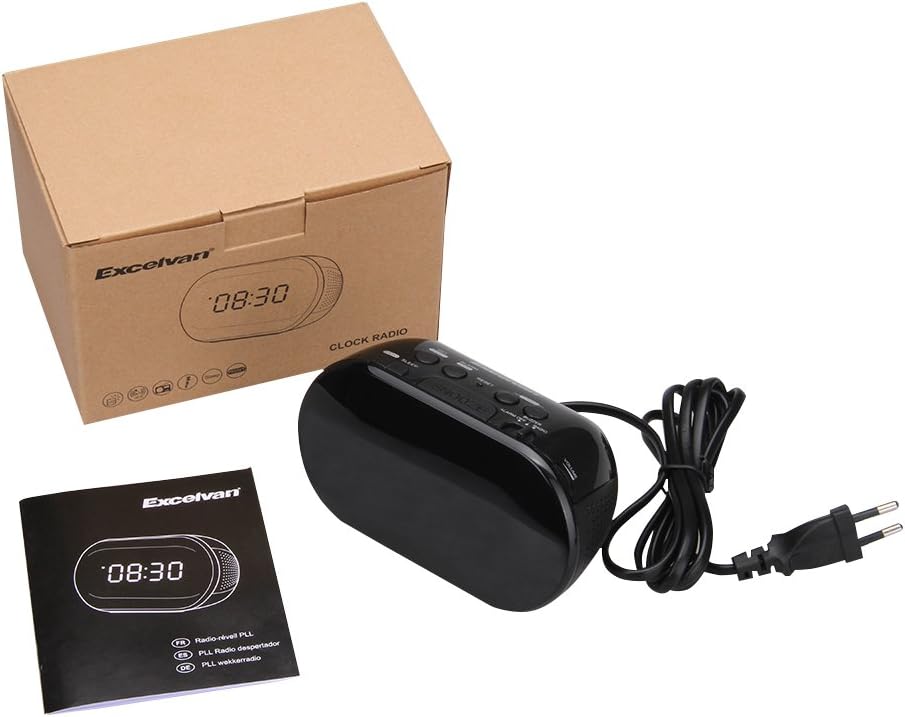
Figure 7: The sleep timer allows you to fall asleep to music, which then automatically turns off.
6. Manutenzione
6.1 Pulizia
- Pulire la parte esterna dell'unità con un panno morbido e asciutto.
- Non utilizzare detergenti abrasivi, cere o solventi poiché potrebbero danneggiare la finitura.
- Ensure the unit is unplugged from the power outlet before cleaning.
6.2 Sostituzione della batteria
If the time settings are lost during a power outage, the 9V backup battery may need to be replaced. Follow the instructions in Section 4.2 for battery installation.
7. Risoluzione Dei Problemi
| Problema | Possibile causa | Soluzione |
|---|---|---|
| Nessun display / L'unità non si accende | Power cord not connected or power outlet not active. | Assicurarsi che il cavo di alimentazione sia collegato saldamente all'unità e a una presa a muro funzionante. |
| Impostazioni di ora/sveglia perse dopo lo spegnimentotage | La batteria di backup è scarica o non è installata. | Install a new 9V alkaline or lithium battery in the battery compartment. |
| Scarsa ricezione della radio FM | Antenna non estesa o area con segnale debole. | Extend the FM wire antenna fully. Try repositioning the unit for better reception. |
| L'allarme non suona | Alarm not set or alarm switch is in "OFF" position. | Verify alarm time is set correctly. Ensure the ALARM OFF / BUZZER / RADIO l'interruttore è impostato su BUZZER or RADIO. |
| Il display è troppo luminoso/scuro | No brightness adjustment feature on this model. | The display brightness is fixed. |
8. Specifiche
- Modello: LK-T091
- Display: LED, 24-hour format
- Tipo di allarme: Single alarm (Buzzer or FM Radio)
- Gamma di frequenza FM: 87.5 – 108 MHz
- Sveglia: 00, 15, 30, 45, 60, 75, 90 minuti
- Potenza in ingresso: CA 230 V ~ 50 Hz
- Batteria di backup: 1 x 9V (6F22 type) battery (not included)
- Dimensioni del prodotto (L x A x P): Circa 14.15 cm x 7.14 cm x 0.89 cm
- Peso: Circa 380 g
- Materiale: AC (Plastic)
- Colore: Nero
9. Garanzia e supporto
Excelvan products are designed to provide reliable performance. For specific warranty information, please refer to the warranty card included with your purchase or contact your retailer. If you encounter any issues or require technical assistance, please contact Excelvan customer support through their official websito o le informazioni di contatto fornite con il prodotto.
Please have your model number (LK-T091) and purchase details ready when contacting support.


