1. Introduzione
This manual provides essential instructions for the safe installation, operation, and maintenance of your KING KB2407-1-B2-ECO ECO2S 7500W Garage Heater. Please read this manual thoroughly before installation and use, and retain it for future reference. Proper installation and adherence to these instructions are crucial for optimal performance and safety.
2. Informazioni importanti sulla sicurezza
WARNING: Risk of Fire, Electric Shock, or Injury to Persons.
- Leggere tutte le istruzioni prima di installare o utilizzare questa stufa.
- Questa stufa è calda quando è in uso. Per evitare ustioni, evitare il contatto della pelle nuda con superfici calde. Tenere materiali combustibili, come mobili, cuscini, biancheria da letto, carta, vestiti e tende, ad almeno 90 cm dalla parte anteriore della stufa e tenerli lontani dai lati e dal retro.
- È necessaria la massima cautela quando un riscaldatore viene utilizzato da bambini o invalidi o nelle loro vicinanze e quando il riscaldatore viene lasciato in funzione e incustodito.
- Non utilizzare il riscaldatore se il cavo o la spina sono danneggiati, se il riscaldatore presenta malfunzionamenti, è caduto o è stato danneggiato in qualsiasi modo. Smaltire il riscaldatore o restituirlo a un centro di assistenza autorizzato per un controllo e/o una riparazione.
- Non utilizzare all'aperto.
- Questo riscaldatore non è destinato all'uso in bagni, aree lavanderia e simili luoghi interni. Non posizionare mai il riscaldatore dove potrebbe cadere in una vasca da bagno o in un altro contenitore d'acqua.
- Non far passare il cavo sotto la moquette. Non coprire il cavo con tappeti, passatoie o rivestimenti simili. Disporre il cavo lontano dall'area di passaggio e dove non ci si possa inciampare.
- Per scollegare il riscaldatore, spegnere i comandi, quindi staccare la spina dalla presa.
- Non inserire o consentire l'ingresso di oggetti estranei nelle aperture di ventilazione o di scarico poiché ciò potrebbe causare scosse elettriche o incendi oppure danneggiare il riscaldatore.
- Per prevenire un possibile incendio, non bloccare in alcun modo le prese d'aria o gli scarichi. Non utilizzare su superfici morbide, come un letto, dove le aperture potrebbero bloccarsi.
- Un riscaldatore ha parti calde e che generano archi elettrici o scintille al suo interno. Non utilizzarlo in aree in cui vengono utilizzati o conservati benzina, vernice o vapori o liquidi infiammabili.
- Utilizzare questo riscaldatore solo come descritto nel presente manuale. Qualsiasi altro utilizzo non raccomandato dal produttore può causare incendi, scosse elettriche o lesioni alle persone.
- Collegare sempre i riscaldatori direttamente a una presa a muro/presa. Non utilizzare mai con una prolunga o una presa di corrente riposizionabile (presa/multipresa).
- This heater is for 240V applications only.
3. Contenuto della confezione
Verify that all components are present and undamaged. If any items are missing or damaged, contact your retailer.
- KING KB2407-1-B2-ECO ECO2S Garage Heater (7500W / 240V)
- Universal Wall/Ceiling Mounting Bracket
- Telecomando
- Manuale dell'utente (questo documento)

Image 3.1: The KING KB2407-1-B2-ECO ECO2S Garage Heater, showing the main unit, the universal mounting bracket, and the remote control.
4. Configurazione e installazione
L'installazione deve essere eseguita da un elettricista qualificato, nel rispetto di tutti i codici elettrici locali e nazionali.
4.1 Posizione di montaggio
- Select a location where the heater is protected from water spray, dripping water, and excessive dust.
- Ensure adequate clearance from combustible materials (minimum 3 feet from front, sides, and rear).
- Mount the heater securely to a structural member (stud, joist) capable of supporting its weight (approximately 33.5 lbs).
- The universal bracket allows for wall or ceiling mounting.
4.2 Montaggio del riscaldatore
- Attach the universal mounting bracket to a sturdy wall stud or ceiling joist using appropriate fasteners (not included). Ensure the bracket is level and securely fastened.
- Lift the heater and align the hanging hooks on top of the heater with the slots on the mounting bracket.
- Slide the heater onto the bracket until it is securely seated.
- Adjust the heater's angle as desired and secure it using the provided hardware to prevent accidental movement.
4.3 Cablaggio elettrico
DANGER: Disconnect power at the main service panel before attempting any wiring to prevent electric shock.
- This heater requires a dedicated 240V circuit.
- The heater is rated for 7500W, drawing approximately 31.25 Amps. A circuit breaker and wiring sized appropriately for this load are required (e.g., 40 Amp breaker with 8-gauge wire, consult local codes).
- Access the internal wiring compartment by removing the appropriate cover plate on the heater.
- Connect the 240V supply wires to the heater's terminals as indicated in the wiring diagram inside the heater's compartment. Ensure proper grounding.
- Secure all wiring connections and replace the cover plate.

Immagine 4.1: posteriore view of the heater, illustrating the fan and location of electrical warning labels. Ensure all wiring is done by a qualified professional.
5. Funzionamento
Once properly installed and powered, the heater can be operated using its integrated control panel or the remote control.
5.1 Pannello di controllo Sopraview

Immagine 5.1: anteriore view of the heater, highlighting the digital display and control buttons for direct operation.
The control panel features a digital display and several buttons:
- Display digitale: Shows current temperature, set temperature, and mode indicators.
- Pulsante di accensione: Accende/spegne il riscaldatore.
- Pulsante MODE: Cycles through heating modes (ECO, HIGH, FAN ONLY).
- Frecce SU/GIÙ: Regola la temperatura impostata.
- Pulsante TIMER: Activates or adjusts the timer function.
5.2 telecomando
Il telecomando in dotazione consente di accedere comodamente a tutte le funzioni del riscaldatore anche a distanza.
- Ensure batteries are correctly installed in the remote control.
- Point the remote control towards the heater's control panel for optimal signal reception.
- Buttons on the remote mirror the functions of the control panel (Power, Mode, Up/Down Temperature, Timer).
Modalità operative 5.3
- Modalità ecologica: The heater automatically selects the lowest wattage needed to maintain the set temperature, optimizing energy consumption.
- HIGH Heat Mode: The heater operates at full wattage (7500W) to quickly reach and maintain the set temperature.
- FAN ONLY Mode: The fan operates without engaging the heating elements, providing air circulation.
5.4 Impostazione della temperatura
- Press the POWER button to turn the heater on.
- Use the UP or DOWN arrow buttons to set your desired temperature. The display will show the set temperature, then revert to the ambient temperature.
- Il riscaldatore si accenderà e spegnerà automaticamente per mantenere la temperatura impostata.
5.5 Funzione timer
The timer allows you to set a duration for the heater to operate before automatically turning off.
- With the heater on, press the TIMER button.
- Use the UP or DOWN arrow buttons to set the desired operating time (e.g., 1-12 hours).
- The heater will operate for the set duration and then power off.
6. Manutenzione
WARNING: Always disconnect power to the heater at the main service panel before performing any maintenance or cleaning.
- Pulizia: Pulire periodicamente l'esterno del riscaldatore con un panno morbido eamp panno. Non usare detergenti abrasivi o solventi.
- Rimozione della polvere: Use a vacuum cleaner with a brush attachment to remove dust from the grilles and internal components. Ensure the fan blades are free of obstructions.
- Ispezione: Regularly inspect the power cord and plug for any signs of damage. If damage is found, discontinue use and contact a qualified electrician for repair.
- No lubrication is required for the motor.
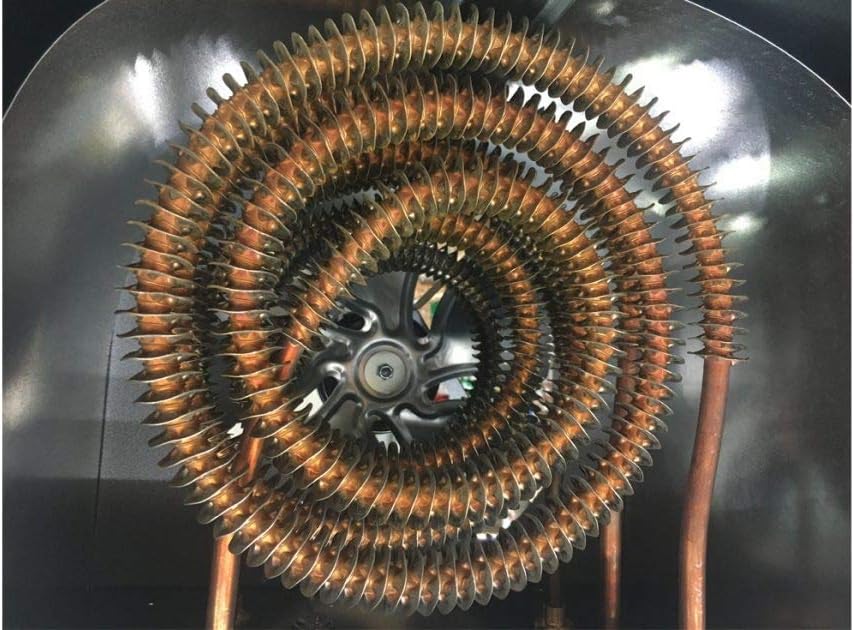
Image 6.1: Close-up of the spiral steel heating elements. Regular cleaning helps maintain efficiency and prolong heater life.
7. Risoluzione Dei Problemi
If your heater is not operating correctly, consult the following table before contacting customer support.
| Problema | Possibile causa | Soluzione |
|---|---|---|
| Il riscaldatore non si accende. | Nessuna alimentazione elettrica. L'interruttore di circuito è scattato. Protezione da surriscaldamento attivata. | Ensure heater is properly wired and connected to 240V supply. Controllare e ripristinare l'interruttore automatico. Turn off heater, allow to cool for 30 minutes, then restart. Clear any obstructions. |
| Il riscaldatore produce calore insufficiente. | È stata selezionata la modalità errata. Temperatura impostata troppo bassa. Le dimensioni della stanza superano la capacità di riscaldamento. | Ensure HIGH or ECO mode is selected, not FAN ONLY. Aumentare la temperatura impostata. Verify the heater's coverage area (700 sq ft for 7500W) is appropriate for your space. |
| Fan runs but no heat. | FAN ONLY mode selected. Heating elements malfunction. | Switch to ECO or HIGH heat mode. If problem persists, contact a qualified technician. |
| Telecomando non funzionante. | Batterie scariche. Ostruzione tra il telecomando e il riscaldatore. | Sostituire le batterie del telecomando. Ensure a clear line of sight to the heater's control panel. |

Image 7.1: Heating coverage chart for various KING garage heater wattages. The 7500W model covers up to 750 sq ft.
8. Specifiche
| Caratteristica | Dettaglio |
|---|---|
| Modello | KB2407-1-B2-ECO |
| Marca | RE |
| Cosatage | 7500 Watt |
| Voltage | 240 Volt |
| Amprabbia | 31.25 Amps |
| Copertura del riscaldamento | Up to 700 ft² (based on 8 ft ceiling height and FHA standard insulation values) |
| Caratteristiche speciali | Remote Control, Built-In Fan Delay, Summer Fan Only & Timer Modes, ECO2S Electronic Thermostat |
| Tipo di montaggio | Universal Wall/Ceiling Bracket |
| Dimensioni del prodotto | 13.5 x 15 x 16.5 pollici |
| Peso dell'articolo | 33.5 libbre |
| Codice UPC | 093319220405 |
9. Garanzia e supporto
Per informazioni sulla garanzia o supporto tecnico, fare riferimento alla scheda di garanzia inclusa con il prodotto o visitare il sito Web ufficiale del produttore. websito. Conservare la ricevuta d'acquisto come prova d'acquisto per eventuali reclami in garanzia.
Manufacturer: King Electric
For further assistance, contact King Electric customer service.


