1. Importanti istruzioni di sicurezza
Read and save these instructions. To reduce the risk of fire, electric shock, or injury to persons, observe the following:
- Install this range hood in accordance with all local and national electrical codes.
- Prima di effettuare interventi di manutenzione o pulizia sull'unità, scollegare sempre l'alimentazione dal pannello di servizio.
- Utilizzare questa unità solo nel modo previsto dal produttore. In caso di domande, contattare il produttore.
- Ensure proper ventilation. Do not vent exhaust air into walls, ceilings, attics, crawl spaces, or garages.
- Quando si tagliano o si forano pareti o soffitti, non danneggiare i cavi elettrici e altre utenze nascoste.
- Always wear safety glasses and gloves during installation and servicing.
- Per ridurre il rischio di incendio causato dal grasso sul piano cottura, non lasciare mai incustodite le unità di superficie impostate su valori elevati.
- Pulire frequentemente le ventole di ventilazione. Non lasciare che il grasso si accumuli sulla ventola o sul filtro.
- Use appropriate size ducting for optimum airflow.
2. Prodotto finitoview
The Broan-NuTone Glacier BCSEK130BL is a 30-inch under-cabinet range hood designed to provide efficient kitchen ventilation. It features a powerful 300 CFM, 2-speed exhaust fan, and integrated LED lighting to illuminate your cooking area. The Captur system enhances smoke and odor removal, while the 4-way convertible design offers flexible installation options. This unit is ENERGY STAR certified, UL-Listed, HVI-2100 Certified, and can be used in ADA-compliant applications.
Caratteristiche principali:
- Ventilazione potente: 300 CFM, 2-speed exhaust fan with Captur system for efficient smoke and odor removal.
- Illuminazione LED integrata: Bright, single-intensity LED module for clear illumination of the cooktop.
- Installazione versatile: 4-way convertible for ducted (vertical, horizontal, round) or non-ducted (recirculating) setups.
- Facile manutenzione: Dishwasher-safe open mesh grease filters.
- Design durevole: Constructed from alloy steel with mitered sides and a hemmed bottom.
- Certificazioni: ENERGY STAR, UL-Listed, HVI-2100 Certified, ADA-compliant.
Contenuto della confezione:
- Broan-NuTone Glacier BCSEK130BL Range Hood
- Filtri antigrasso
- Hardware di montaggio
- Modello di installazione
- Manuale d'uso
- Appliance Parts & Accessories (as included by manufacturer)
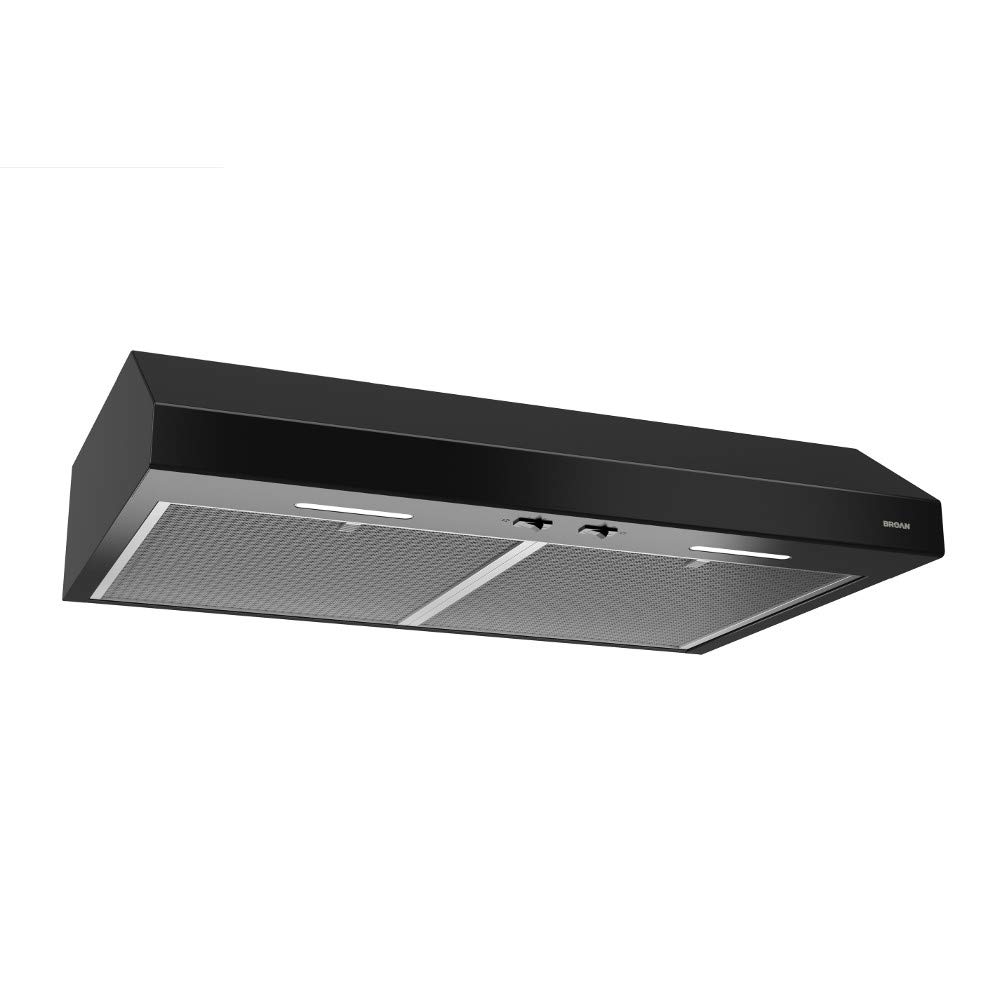
Figure 1: Broan-NuTone Glacier BCSEK130BL 30-inch Under-Cabinet Range Hood, black finish, installed under kitchen cabinets above a stove.
3. Configurazione e installazione
Proper installation is crucial for the optimal performance and safety of your range hood. Follow these steps carefully.
3.1 Strumenti richiesti:
- Nastro di misurazione
- Cacciavite con testa Phillips
- Cacciavite a testa piatta
- Drill with 1/8-inch, 7/64-inch, and 3/8-inch drill bits
- 1 1/2-inch Hole Saw
- Puzzle
- Cesoie per lamiera
- Pinze
- Nastro adesivo in lamina metallica
- Forbici
- Matita
- Spellafili
- Antistrappo
- Occhiali e guanti di sicurezza
3.2 Preparing the Range Hood:
- Rimuovere i filtri antigrasso: Locate and remove the two one-piece open mesh grease filters from the underside of the hood.
- RIMOSSOamper Assembly: Unscrew and remove the damper assembly and the parts bag located inside the hood.
- Remove Wire Cover: Detach the wire cover.
- Remove Duct Plate and Knockout: Remove the round duct plate and the electrical power cable knockout.
- Select Ducting Option: Your range hood supports four ducting options:
- Vertical Ducting (3.25" x 10"): Remove the 3.25" x 10" knockout on top of the hood.
- Horizontal Ducting (3.25" x 10"): Remove the rectangular knockout on the back of the hood.
- Round Vertical Ducting (7"): Remove the round duct knockout on top of the hood. Replace the duct plate and attach the duct pipe to the hood using metal foil duct tape, ensuring an airtight seal.
- Non-Ducted (Recirculating): Remove the three screws holding the recirculation cover plate to the hood. Discard the plate and screws. No other duct knockouts should be removed for non-ducted installation.
3.3 Preparing the Cabinet:
- Mark Center Line: Measure and mark the hood's center line on the bottom of the cabinet.
- Use Template: Line up the included template with the center line on the cabinet. If you have a framed cabinet, fold over the rear edge of the template to match the cabinet frame depth at the wall.
- Drill Pilot Hole for Wiring: Drill a 1/8-inch pilot hole for house wiring at the 'A' location on the template.
- Mark Duct Access Hole: Use a sharp pencil or a 1/8-inch drill bit to mark the points along the duct access hole on the template.
- Remove Template: Remove the template from the cabinet.
- Draw Duct Border: Connect the marked points to draw the border for the exhaust ducting.
- Apertura del condotto tagliato: Drill a 3/8-inch hole at a point along the line to start the jigsaw cut, then carefully cut out the opening with the jigsaw.
3.4 Montaggio della cappa:
- Install Easy One Brackets: The unit includes four Easy One brackets: two for framed cabinets and two for frameless cabinets. The brackets are engraved to indicate left/right sides. Hold each bracket against the cabinet, ensuring the back of the bracket is against the back wall, then mark three screw holes.
- Drill Pilot Holes for Brackets: Use a 7/64-inch drill bit to drill pilot holes at your pencil marks.
- Staffe di sicurezza: Secure the brackets with the included wood screws.
- Fissare il fermacavo: Attach the strain relief to the hood.
- Pull House Power Cable: Pull the house power cable through the strain relief.
- Monte Hood: Simply slide the hood onto the Easy One brackets. The brackets will temporarily hold the hood in place during wiring and duct finishing. For rear ducting or electrical, use the rear Easy One slots.
- Cappuccio di sicurezza: Secure the hood to the brackets through the front recessed holes on top of the hood with the four included screws.
3.5 Collegamento elettrico:
- Collegare il cablaggio: Connect the house power cable to the range hood wiring by connecting black to black, white to white, and the green or bare wire under the green ground screw.
- Replace Wire Cover: Replace the wiring cover and attach it to the hood with the retaining screw.
Video 1: Detailed installation guide for the Broan-NuTone Glacier Range Hood, demonstrating preparation, mounting, and electrical connections.
4. Istruzioni per l'uso
Your Broan-NuTone Glacier range hood is designed for ease of use with simple controls for ventilation and lighting.
4.1 Funzionamento della ventola:
- The range hood features a 2-speed rocker switch for fan control.
- Press the switch to select between low and high fan speeds to adjust ventilation as needed for cooking.
- Premere di nuovo per spegnere la ventola.
4.2 Funzionamento dell'illuminazione:
- The integrated LED module is controlled by a separate interruttore a bilanciere.
- Press the switch to turn the light on to a single intensity.
- Premere di nuovo per spegnere la luce.

Figura 2: Fronte view of the range hood, highlighting the rocker switches for fan speed and LED light control.
5. Manutenzione
Regular maintenance ensures the longevity and efficient performance of your range hood.
5.1 Cleaning Grease Filters:
- The two one-piece open mesh grease filters are lavabile in lavastoviglie.
- To remove, pull down on the tab and slide the filter out.
- Clean filters regularly to maintain optimum grease capture and airflow.
- Lasciare asciugare completamente i filtri prima di reinstallarli.

Figure 3: Underside of the range hood, showing the removable mesh grease filters and integrated LED lights.
5.2 Replacing Non-Ducted Filters (if applicable):
- If your unit is installed in a non-ducted (recirculating) configuration, you will need to purchase non-ducted charcoal filters separately.
- Refer to the instructions provided with the replacement filters for proper installation.
- Replace these filters periodically as recommended by the filter manufacturer to ensure effective odor removal.
5.3 Pulizia generale:
- Clean the exterior surfaces of the range hood with a soft cloth and mild detergent.
- Avoid abrasive cleaners or scouring pads, as these can scratch the finish.
- Ensure the unit is disconnected from power before cleaning.
6. Risoluzione Dei Problemi
If you experience issues with your Broan-NuTone Glacier range hood, consult the following common troubleshooting steps. For more detailed information, refer to the full instruction manual or contact customer service.
| Problema | Possibile causa | Soluzione |
|---|---|---|
| La ventola non funziona. | No power to the unit; fan switch is off; wiring issue. | Check circuit breaker/fuse. Ensure fan switch is in the ON position. Verify electrical connections. |
| La luce non si accende. | Light switch is off; LED module failure; wiring issue. | Ensure light switch is in the ON position. If LED module is faulty, contact customer service for replacement. Verify electrical connections. |
| Poor ventilation/air movement. | Clogged grease filters; obstructed ducting; incorrect ducting size; fan speed too low. | Clean or replace grease filters. Check ducting for obstructions or kinks. Ensure correct duct size is used. Increase fan speed. |
| Rumore eccessivo durante il funzionamento. | Loose components; fan imbalance; foreign object in fan; incorrect installation. | Check for and tighten any loose screws. Inspect fan for debris. Ensure proper installation and secure mounting. |
7. Specifiche
| Caratteristica | Dettaglio |
|---|---|
| Numero di modello | BCSEK130BL |
| Marca | Broan-NuTone |
| Dimensioni (P x L x A) | 19.63 x 30 x 6 pollici |
| Peso dell'articolo | 17.4 libbre |
| Capacità del flusso d'aria | 300 piedi cubi al minuto (CFM) |
| Livello di rumore | 1.5 Sones |
| Numero di velocità | 2 |
| Voltage | 120 Volt |
| Tipo di sorgente luminosa | GUIDATO |
| Tipo di filtro | Mesh (Dishwasher-safe) |
| Materiale | Acciaio legato |
| Tipo di montaggio | Sotto l'armadio |
| Tipo di controllo | Sedia a dondolo |
| Tipo di ventilazione | 4-Way Convertible (Ducted/Non-Ducted) |
| Certificazioni | ENERGY STAR Certified, UL-Listed, HVI-2100 Certified, ADA Compliant |
8. Informazioni sulla garanzia
This Broan-NuTone Glacier range hood is covered by the following limited warranties:
- Garanzia del prodotto: 1-year limited warranty on the entire unit.
- LED Module Warranty: 3-year limited warranty specifically on the LED module.
For full details regarding warranty coverage, terms, and conditions, please refer to the official warranty document included with your product or visit the Broan-NuTone websito.
9. Assistenza clienti
If you require assistance with installation, operation, maintenance, or troubleshooting that is not covered in this manual, please contact Broan-NuTone customer service.
For contact information and additional resources, please visit the official Broan-NuTone websito o fare riferimento ai recapiti forniti sulla confezione del prodotto.


