Introduzione
This manual provides detailed instructions for the installation, operation, and maintenance of your BNT Solar Dummy Fake Camera. This device is designed to simulate a real security camera, providing a visual deterrent against potential intruders without the complexity or cost of a functional surveillance system. It features a realistic appearance, a flashing LED light, and is powered by solar energy with battery backup.
Informazioni sulla sicurezza
- This product is a dummy camera and does not record video or provide actual surveillance.
- Tenere fuori dalla portata dei bambini.
- Do not attempt to open or modify the device, as this may damage the product and void any implied warranty.
- Ensure proper installation to prevent the camera from falling, which could cause injury or damage.
- Smaltire le batterie in modo responsabile, nel rispetto delle normative locali.
Contenuto della confezione
Si prega di controllare il contenuto della confezione per assicurarsi che siano presenti tutti gli articoli:
- 1 x BNT Solar Dummy Fake Camera
- Viti di montaggio e tasselli
- CCTV Sticker (optional, may vary by package)
- Manuale di istruzioni (questo documento)
Prodotto finitoview
The BNT Solar Dummy Fake Camera is designed to mimic the appearance of a functional security camera. Key components include:
- Dome Housing: Realistic camera dome with a simulated lens.
- LED rosso lampeggiante: Indicates simulated operation, enhancing realism.
- Pannello solare: Charges the internal rechargeable batteries during daylight hours.
- Staffa di montaggio regolabile: Consente un posizionamento flessibile e la regolazione dell'angolazione.
- antenne: Further enhance the realistic appearance of a wireless camera.

Immagine: Frontale view of the BNT Solar Dummy Fake Camera, showing the dome, solar panel, and antennas.

Image: Diagram illustrating the dimensions of the dummy camera (approximately 9.06 inches height, 4.92 inches width) and a close-up of the simulated infrared LED lights within the dome.
Impostare
1. Installazione della batteria
The dummy camera requires 2 AA rechargeable batteries (not included) to power the flashing LED light. The solar panel will charge these batteries during daylight hours.
- Gently unscrew the hemisphere (bottom part) of the camera to access the battery compartment.
- Insert 2 AA rechargeable batteries into the battery compartment, ensuring correct polarity (+/-).
- Carefully reattach and screw the hemisphere back onto the camera body.
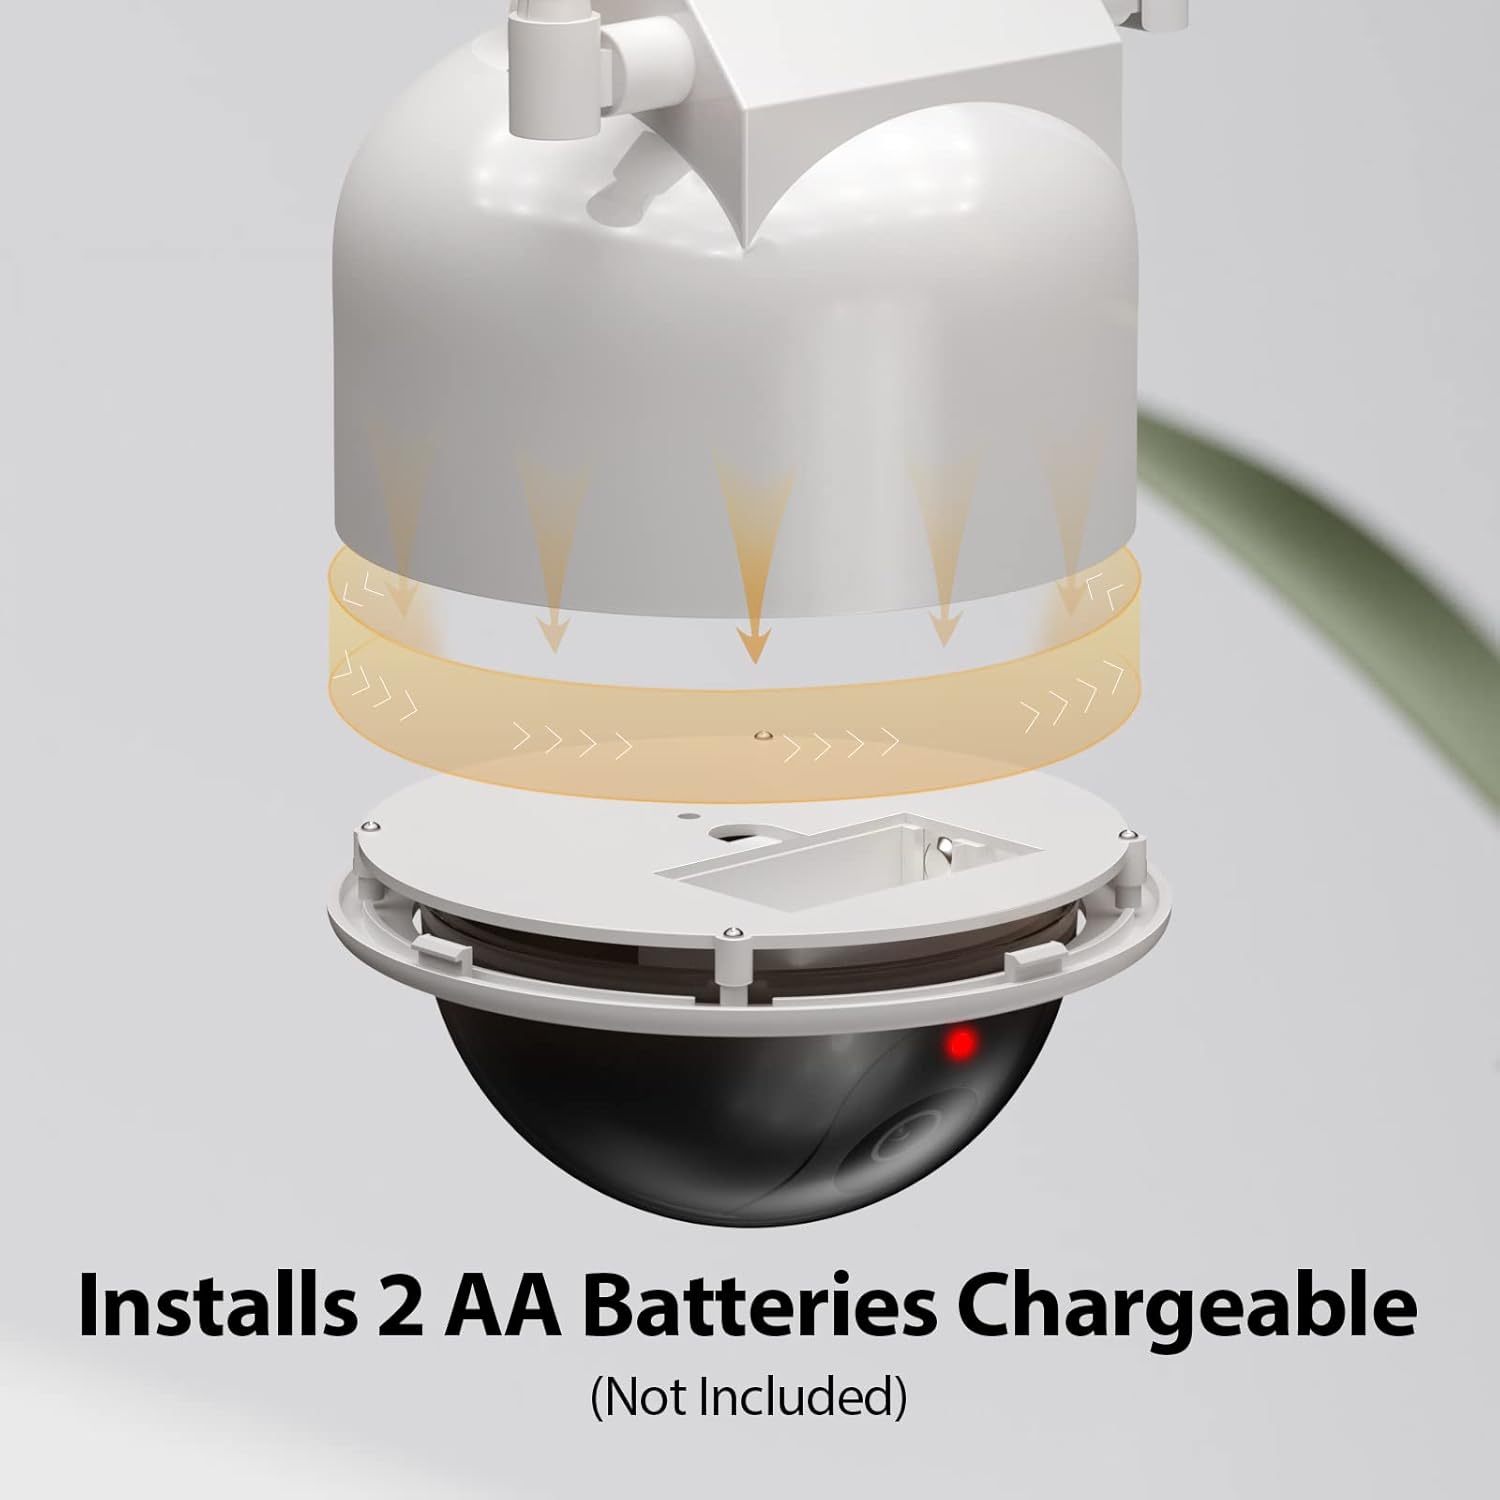
Immagine: Esploso view showing the bottom hemisphere of the camera unscrewed, revealing the compartment for two AA rechargeable batteries.

Image: Illustration of the solar panel and the internal battery compartment, indicating that solar energy charges the rechargeable batteries.
2. Installa le antenne
Screw the two provided antennas into the designated ports on the top of the camera body. These are for aesthetic purposes to enhance realism.
3. Montaggio della fotocamera
The dummy camera can be mounted on walls, ceilings, or other flat surfaces using the included screws and wall plugs. Choose a location that receives ample sunlight for optimal solar charging and is visible for deterrence.
- Selezionare una posizione di montaggio adatta.
- Use the mounting bracket as a template to mark the drill holes on the surface.
- Drill pilot holes and insert wall plugs if mounting into drywall or masonry.
- Fissare la staffa di montaggio alla superficie utilizzando le viti fornite.
- Attach the dummy camera to the mounted bracket.
- Adjust the camera angle as desired. The camera offers 180-degree adjustability.

Image: Diagram showing the dummy camera's mounting bracket allowing for 180-degree angle adjustment.

Image: Four-step visual guide for installation: unscrew hemisphere, put in batteries, install antenna, and mount to wall.
Posizionamento consigliato
The dummy camera is suitable for both indoor and outdoor use. For outdoor placement, ensure the solar panel receives direct sunlight for optimal charging. Consider locations such as:
- Garage entrances
- Porte anteriori
- Backyards
- Edifici per uffici
- Centri commerciali
- Magazzini

Immagine: Examples of suitable installation locations including garage, office, backyard, front doors, shopping mall, and warehouse.

Image: Illustrates that the camera can be battery-powered for indoor use or solar + battery powered for outdoor use.
Operativo
The BNT Solar Dummy Fake Camera operates automatically once batteries are installed and it is exposed to light.
- LED lampeggiante: The red LED light will begin to flash, simulating the activity of a real surveillance camera. This flashing light is designed to be a visual deterrent.
- Ricarica solare: During daylight hours, the integrated solar panel will absorb sunlight and convert it into energy to recharge the installed AA batteries. This ensures continuous operation of the LED light, especially during nighttime.
- Potenza della batteria: When there is insufficient sunlight, the camera will draw power directly from the installed AA batteries to keep the LED flashing.
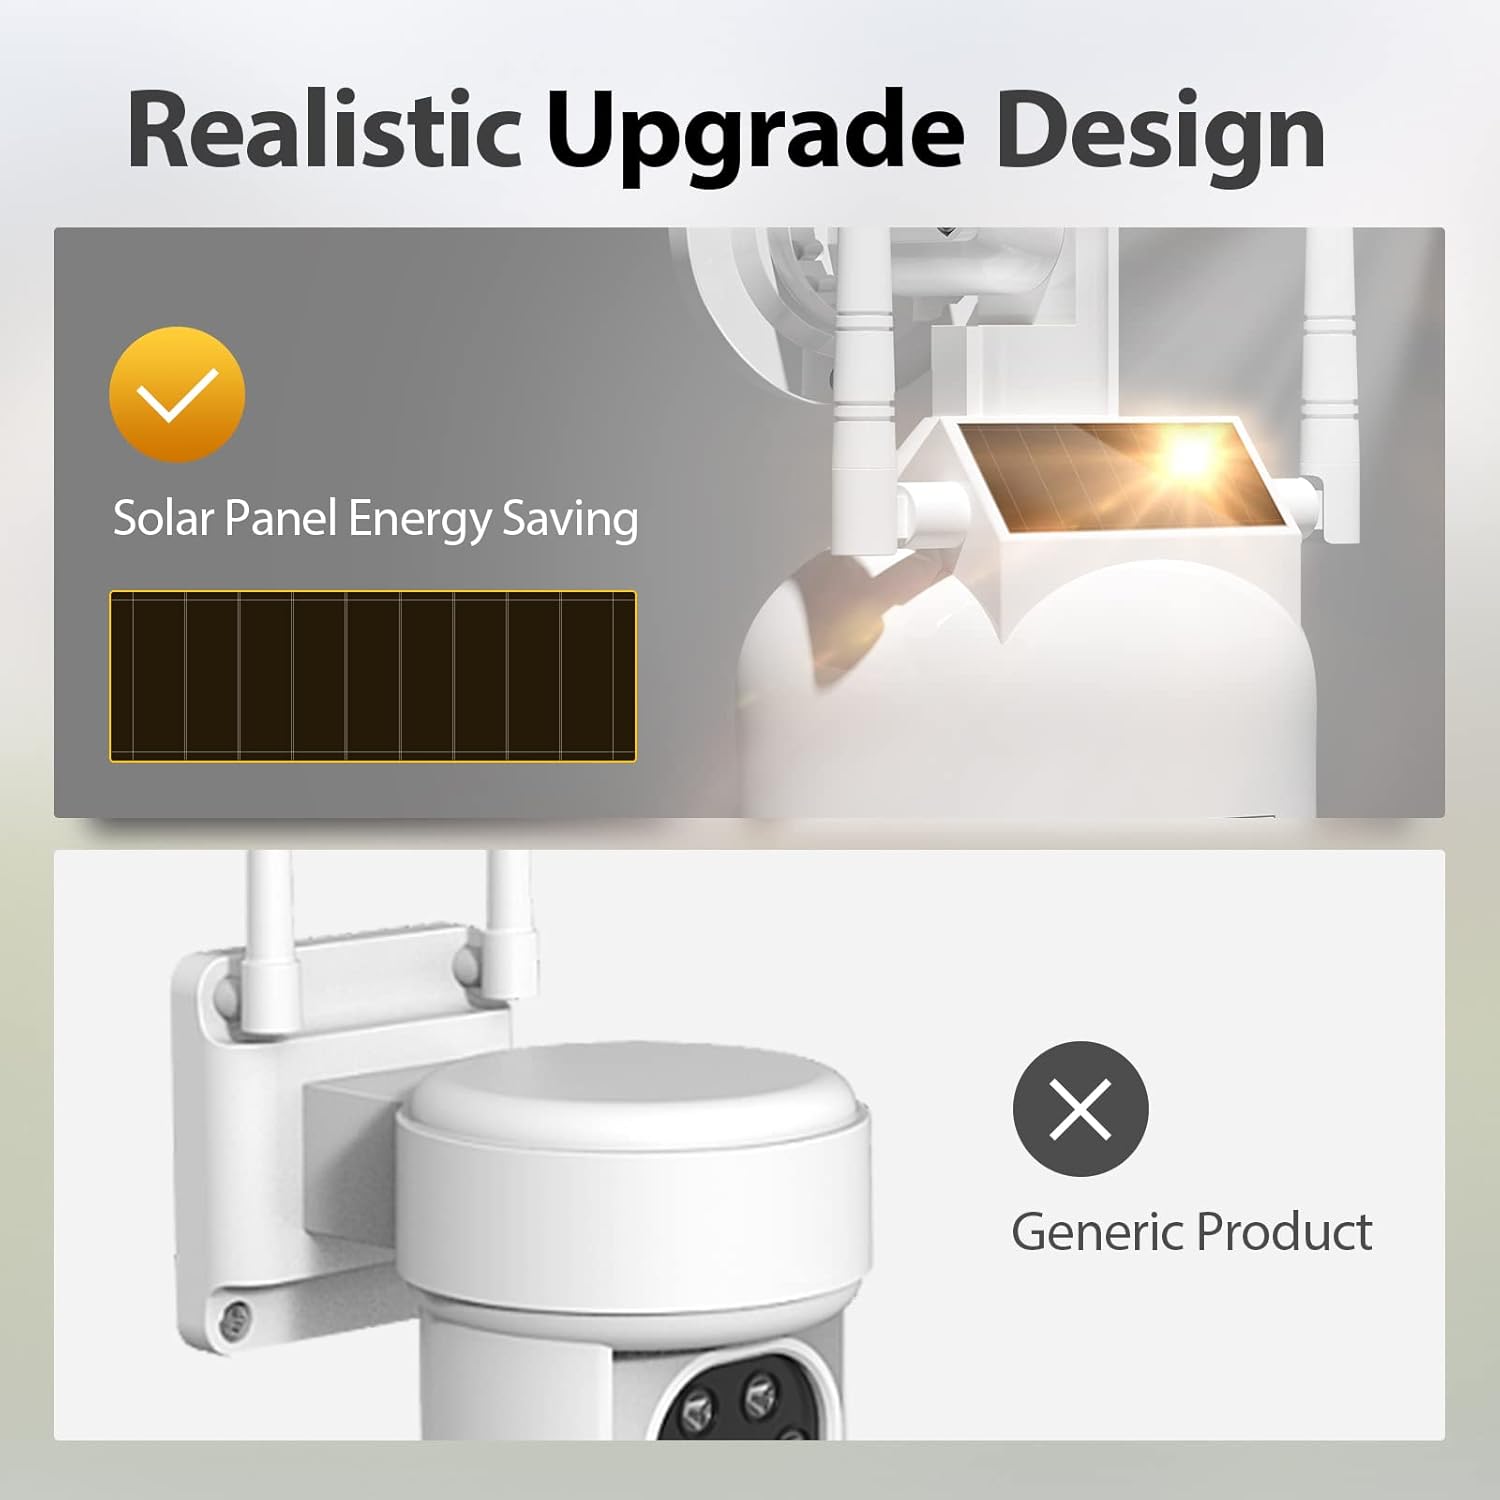
Image: Close-up of the dummy camera highlighting the solar panel and its energy-saving function.
Manutenzione
- Pulizia: Periodically wipe the camera's surface and solar panel with a soft, damp cloth to remove dust and dirt. Ensure the solar panel is clean for efficient charging. Do not use abrasive cleaners.
- Sostituzione della batteria: If the flashing LED light becomes dim or stops flashing, it may be time to replace the rechargeable AA batteries. Follow the battery installation steps in the Setup section.
- Resistenza alle intemperie: The camera is designed with an IP54 international protection rating, indicating resistance to dust and splashing water. While it is suitable for outdoor use, avoid submerging it in water or exposing it to extreme weather conditions beyond its rating.
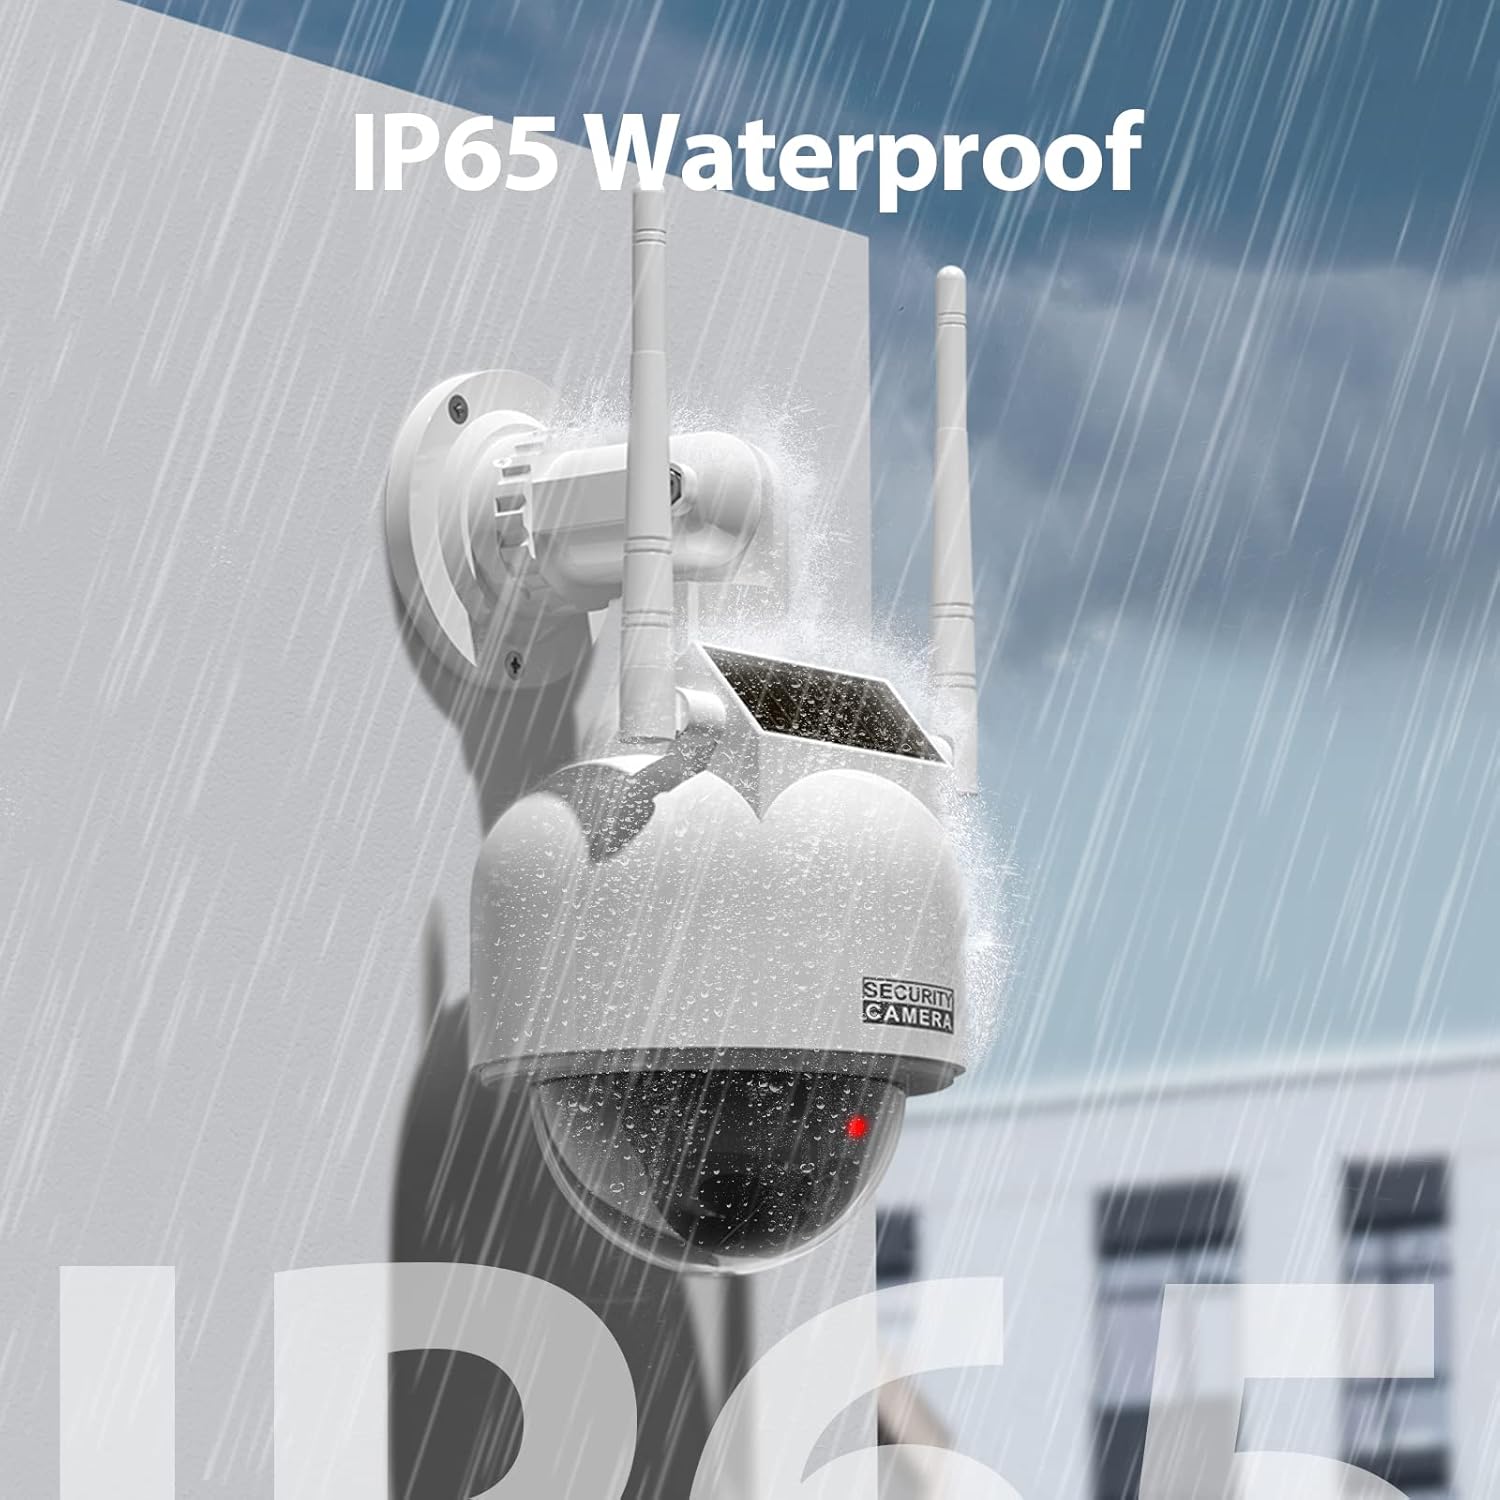
Image: The dummy camera being sprayed with water, illustrating its IP54 (mislabelled as IP65 in image) water resistance for outdoor use.
Risoluzione dei problemi
- LED not flashing:
- Ensure rechargeable AA batteries are installed correctly and are not depleted. Replace if necessary.
- Check if the solar panel is clean and receiving direct sunlight for charging.
- Camera appears unstable after mounting:
- Verify that all mounting screws are tightened securely.
- Ensure the mounting surface is sturdy and can support the camera's weight.
- Product appears damaged:
- If the product arrived damaged, contact the retailer or manufacturer for assistance.
Specifiche
| Caratteristica | Specificazione |
|---|---|
| Modello | B07BNBQZ1K |
| Marca | BNT |
| Colore | White 1pack |
| Materiale | Acrilonitrile Butadiene Stirene (ABS) |
| Fattore di forma | Cupola |
| Fonte di alimentazione | Alimentato a batteria, alimentato a energia solare |
| Batterie richieste | Yes (2 AA Ni-MH, not included) |
| Tipo di sorgente luminosa | LED (Flashing Red) |
| Uso interno/esterno | All'aperto |
| Valutazione internazionale di protezione | Grado di protezione IP54 |
| Dimensioni articolo (L x P x A) | 5.3 x 2.6 x 0.01 pollici (dimensioni del prodotto: 5.3 x 2.6 x 0.01 pollici) |
| Peso dell'articolo | 14.4 once |
| Tipo di montaggio | Montaggio a parete |
Garanzia e supporto
For warranty information or technical support, please refer to the documentation provided with your purchase or contact BNT customer service directly. Contact details can typically be found on the product packaging or the official BNT websito.
Visitare il Negozio BNT su Amazon per ulteriori informazioni.


