1. Introduzione
The Hioki CM3286 Clamp On Power Tester is a versatile instrument designed for precise measurement of electrical parameters. It is capable of measuring voltage, current, power, power factor, phase angle, reactive power, and frequency. Additionally, it can detect phase sequence on live lines within single-phase or three-phase circuits at any desired point. This manual provides essential information for the safe and effective operation, maintenance, and troubleshooting of your CM3286 device.
2. Informazioni sulla sicurezza
AVVERTENZA: Leggere attentamente tutte le avvertenze e le istruzioni di sicurezza prima di utilizzare questo prodotto. La mancata osservanza delle avvertenze e delle istruzioni può causare scosse elettriche, incendi o lesioni gravi.
- Rispettare sempre le norme di sicurezza locali e nazionali.
- Non utilizzare il dispositivo se appare danneggiato o funziona in modo anomalo.
- Assicurarsi che il dispositivo sia classificato per il volumetage i livelli attuali che intendi misurare.
- Wear appropriate personal protective equipment (PPE), such as insulated gloves and eye protection.
- Avoid touching live conductors with bare hands or non-insulated tools.
- Non utilizzare il dispositivo in ambienti umidi o in atmosfere esplosive.
- Keep fingers behind the tactile barrier on the instrument during measurements.
- Disconnect the device from the circuit before opening the battery compartment.
3. Contenuto della confezione
Verificare che tutti gli articoli elencati di seguito siano presenti e integri al momento dell'apertura della confezione:
- Hioki CM3286 Clamp On Power Tester Unit
- Cavi di prova (rosso e nero)
- Custodia per il trasporto
- Batterie AAA (x2)
- Manuale di istruzioni (questo documento)
4. Caratteristiche e componenti del prodotto

Figure 4.1: Hioki CM3286 Clamp On Power Tester (Overall View)
This image displays the complete Hioki CM3286 Clamp On Power Tester, showcasing its ergonomic design, the large clamp jaw for current measurement, and the clear digital display. The function dial and various control buttons are visible on the front panel.
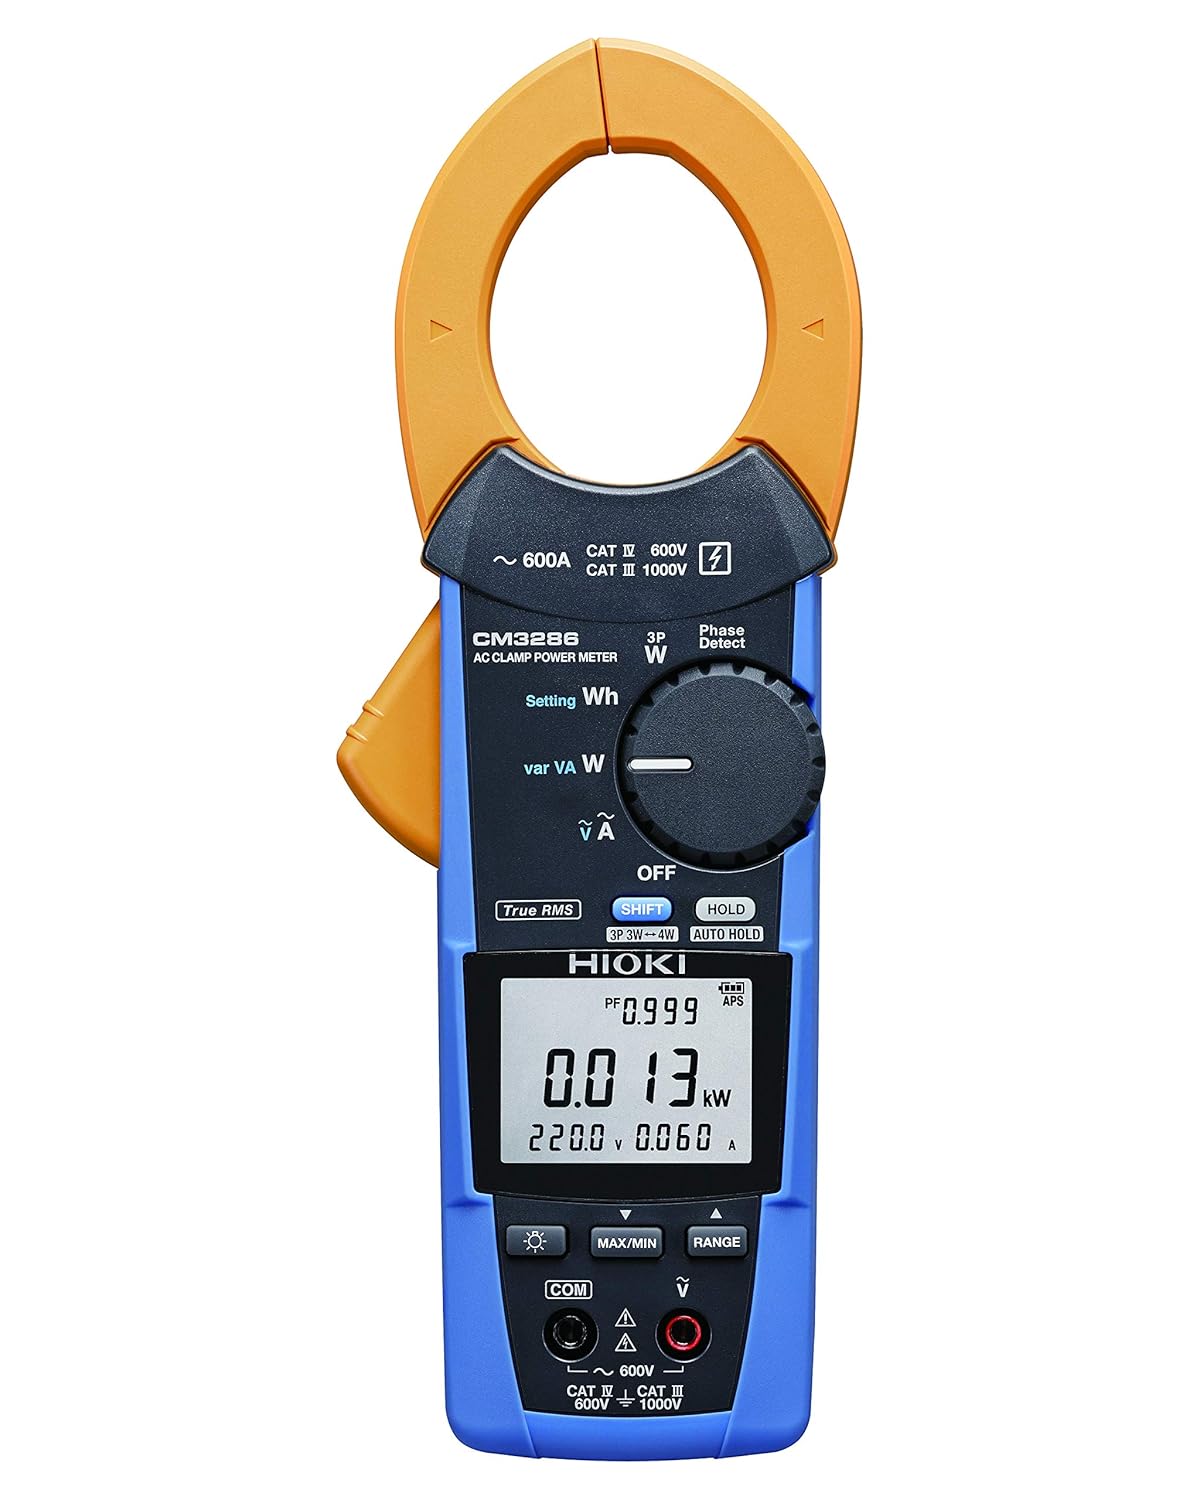
Figure 4.2: Hioki CM3286 Clamp On Power Tester (Front Panel Detail)
This image provides a closer look at the front panel of the Hioki CM3286, highlighting the digital display, the rotary function dial with various measurement settings (e.g., W, Wh, V, A), and the control buttons such as SHIFT, HOLD, MAX/MIN, and RANGE. The input terminals for voltage measurement are also visible at the bottom.
Componenti chiave:
- Clamp Mascella: Utilizzato per la misurazione della corrente alternata senza contatto.
- Funzione Quadrante: Selects the desired measurement mode (e.g., Voltage, Current, Power, Frequency).
- Schermo LCD: Mostra le letture delle misurazioni, le unità e gli indicatori.
- Terminali di ingresso: Per collegare i puntali di prova per voltage and other measurements.
- Pulsante ATTESA: Blocca la lettura corrente del display.
- Pulsante MAX/MIN: Registra le letture massime e minime.
- Pulsante GAMMA: Seleziona manualmente l'intervallo di misurazione.
- Tasto MAIUSC: Accesses secondary functions marked in blue on the dial.
5. Impostazione
5.1. Installazione della batteria
- Assicurarsi che il dispositivo sia spento.
- Individuare il coperchio del vano batterie sul retro dell'unità.
- Utilizzare un cacciavite (se necessario) per aprire il coperchio.
- Inserire due (2) batterie AAA, rispettando la polarità corretta (+/-) come indicato all'interno del vano.
- Riposizionare il coperchio del vano batteria e fissarlo.
5.2. Accensione iniziale
After battery installation, turn the function dial from "OFF" to any measurement setting to power on the device. The display should illuminate, indicating readiness for use.
6. Istruzioni per l'uso
6.1. Accensione/spegnimento
- To power on, rotate the function dial from the "OFF" position to the desired measurement function.
- To power off, rotate the function dial back to the "OFF" position.
6.2. Misurazione della corrente alternata (Clamp)
- Rotate the function dial to the "A" (Current) setting.
- Aprire il clamp mascella premendo la leva.
- Racchiudere solo un conduttore (fase o neutro) all'interno del clamp mascella. Assicurarsi che la mascella sia completamente chiusa.
- Leggere il valore corrente sul display LCD.
6.3. Volumetage Misurazione (V)
- Rotate the function dial to the "V" (Voltage) impostazione.
- Connect the red test lead to the "V" input terminal and the black test lead to the "COM" input terminal.
- Collegare i puntali di prova in parallelo sul circuito o sul componente da misurare.
- Leggi il vol.tage valore sul display LCD.
6.4. Power Measurement (W, Wh, var, VA)
The CM3286 can measure various power parameters. Select the appropriate setting on the function dial (W for active power, Wh for energy, var for reactive power, VA for apparent power). Connect test leads for voltage e clamp the jaw around the current conductor as per the specific measurement method outlined in the full manual (not provided here, but implied by the device's capabilities).
6.5. Misurazione della frequenza (Hz)
Select the "Hz" setting on the function dial. Connect test leads across the circuit where frequency is to be measured, similar to voltage misurazione.
6.6. Phase Sequence Detection
The device features a "Phase Detect" function. Refer to the detailed instructions in the complete manual for proper connection and interpretation of phase sequence on single-phase or three-phase circuits.
6.7. Using Buttons (HOLD, MAX/MIN, RANGE, SHIFT)
- TENERE: Premere per bloccare la lettura corrente sul display. Premere di nuovo per rilasciare.
- MASSIMO/MIN: Press to enter Max/Min recording mode. The display will show the maximum or minimum value recorded since activation. Press again to cycle through Max, Min, and current readings.
- RANGE: Press to switch between auto-ranging and manual ranging. In manual ranging, press repeatedly to cycle through available ranges.
- SPOSTARE: Press to access secondary functions indicated in blue text next to the primary function on the dial.
7. Manutenzione
7.1. Pulizia
Pulire il dispositivo con un panno morbido, damp panno. Non utilizzare detergenti abrasivi o solventi. Assicurarsi che il dispositivo sia completamente asciutto prima di riporlo o di utilizzarlo nuovamente.
7.2. Sostituzione della batteria
When the low battery indicator appears on the display, replace the batteries promptly to ensure accurate measurements. Follow the battery installation steps outlined in Section 5.1.
7.3. Conservazione
Store the device in its carrying case in a cool, dry place, away from direct sunlight and extreme temperatures. If storing for extended periods, remove the batteries to prevent leakage.
8. Risoluzione Dei Problemi
| Problema | Possibile causa | Soluzione |
|---|---|---|
| Il dispositivo non si accende. | Batterie scariche o installate in modo errato. | Controllare la polarità delle batterie; sostituire le batterie. |
| No reading on display. | Incorrect function selected; open circuit; test leads not connected properly. | Select correct function; ensure circuit is complete; check test lead connections. |
| Viene visualizzato "OL" o "OVER". | Measurement exceeds selected range or device maximum. | Select a higher range (if manual ranging) or ensure measurement is within device limits. |
| Letture imprecise. | Low battery; environmental interference; damaged test leads. | Replace batteries; move away from strong electromagnetic fields; inspect and replace test leads if damaged. |
9. Specifiche
| Parametro | Valore |
|---|---|
| Numero di modello | CM3286 |
| Marca | Ciao |
| Dimensioni del pacco | 9.92 x 2.76 x 2.05 pollici |
| Peso dell'articolo | 0.45 chilogrammi (15.87 once) |
| Batterie | 2 batterie AAA (incluse) |
| Fonte di alimentazione | Elettrico con filo (Note: This refers to the type of power it measures, not its own power source. The device is battery-powered.) |
| Produttore | Ciao |
| Data prima disponibilità | 20 agosto 2020 |
10. Garanzia e supporto
For detailed warranty information, please refer to the warranty card included with your product or visit the official Hioki website. Hioki provides comprehensive customer support for its products.
If you encounter any issues not covered in this manual or require technical assistance, please contact Hioki customer support through their official channels. Ensure you have your product model number (CM3286) and purchase details ready when contacting support.
Nota: i termini e le condizioni della garanzia possono variare in base alla regione.


